
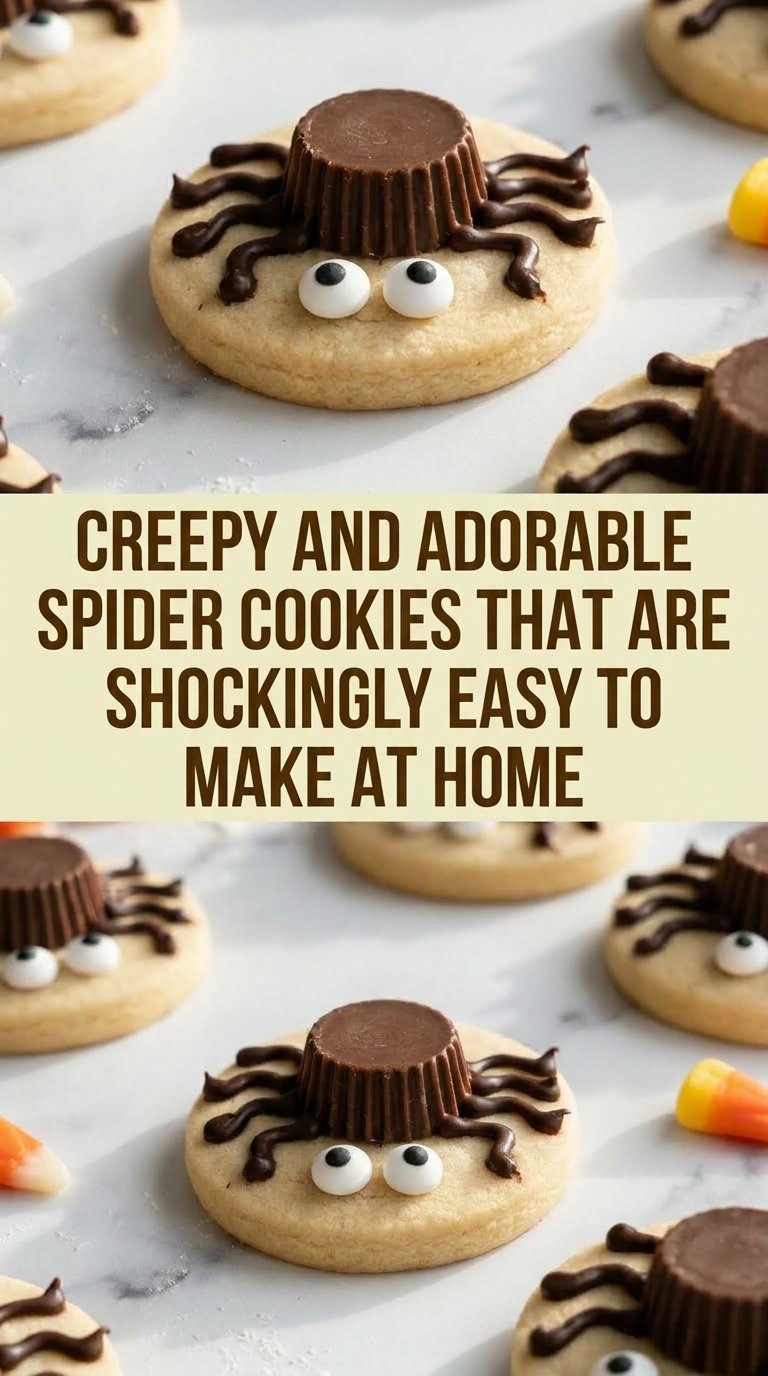
Spider cookies top every Halloween baking list on Pinterest by mid-September, and the trend grows each year. Searches for Halloween spider cookie recipes surge from late September through November 1st, and the most-saved versions consistently share one quality — they look impressively spooky but take under 30 minutes to assemble.
If you have been scrolling past intricate decorated cookies thinking they require professional skills, this guide is your answer. You get the classic peanut butter spider cookie recipe, a no-bake version, a sugar cookie base option, a classroom-party batch formula, and every decoration trick that makes these cookies photograph beautifully for your Halloween table. Seven ingredients and 20 minutes of prep produce two dozen of these irresistible spider treats.
Check out our related guide on easy Halloween party food ideas for kids and adults.
What Are Spider Cookies?
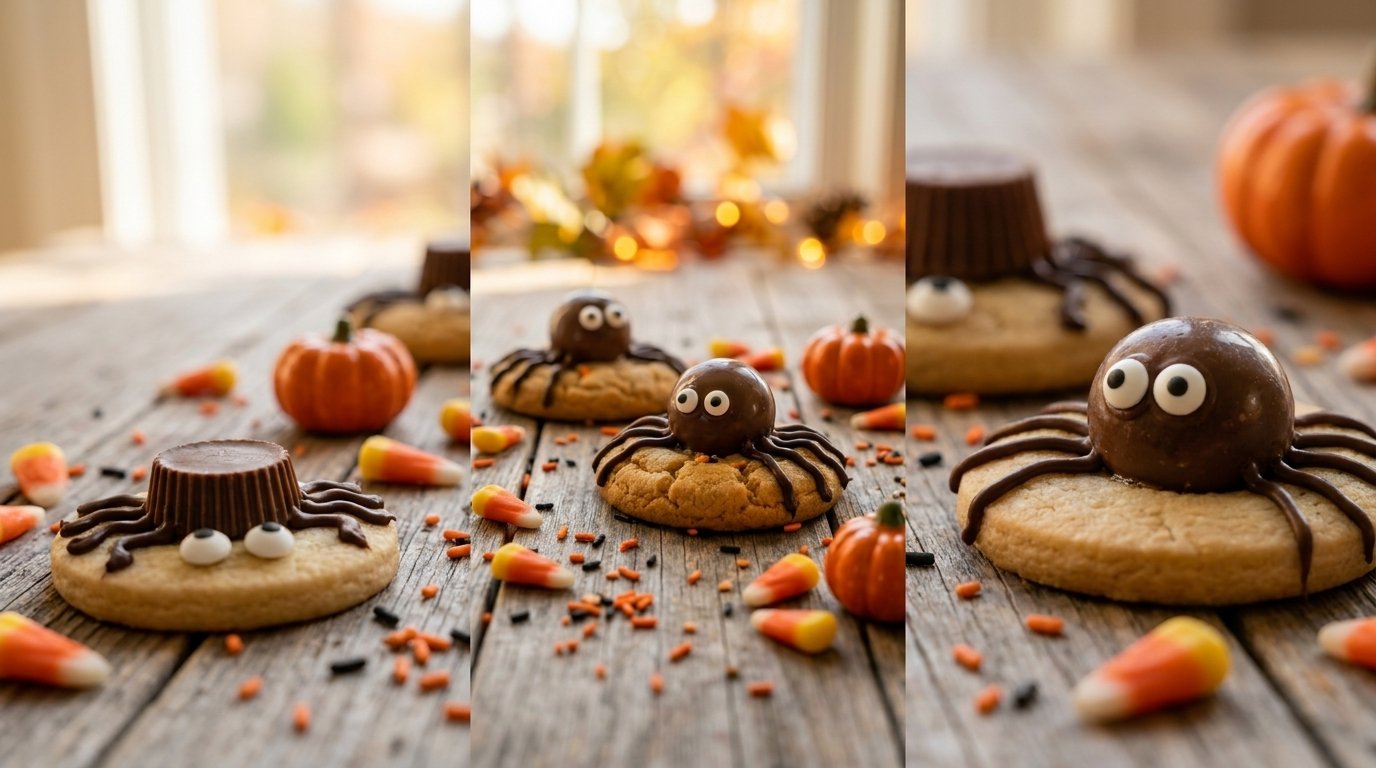
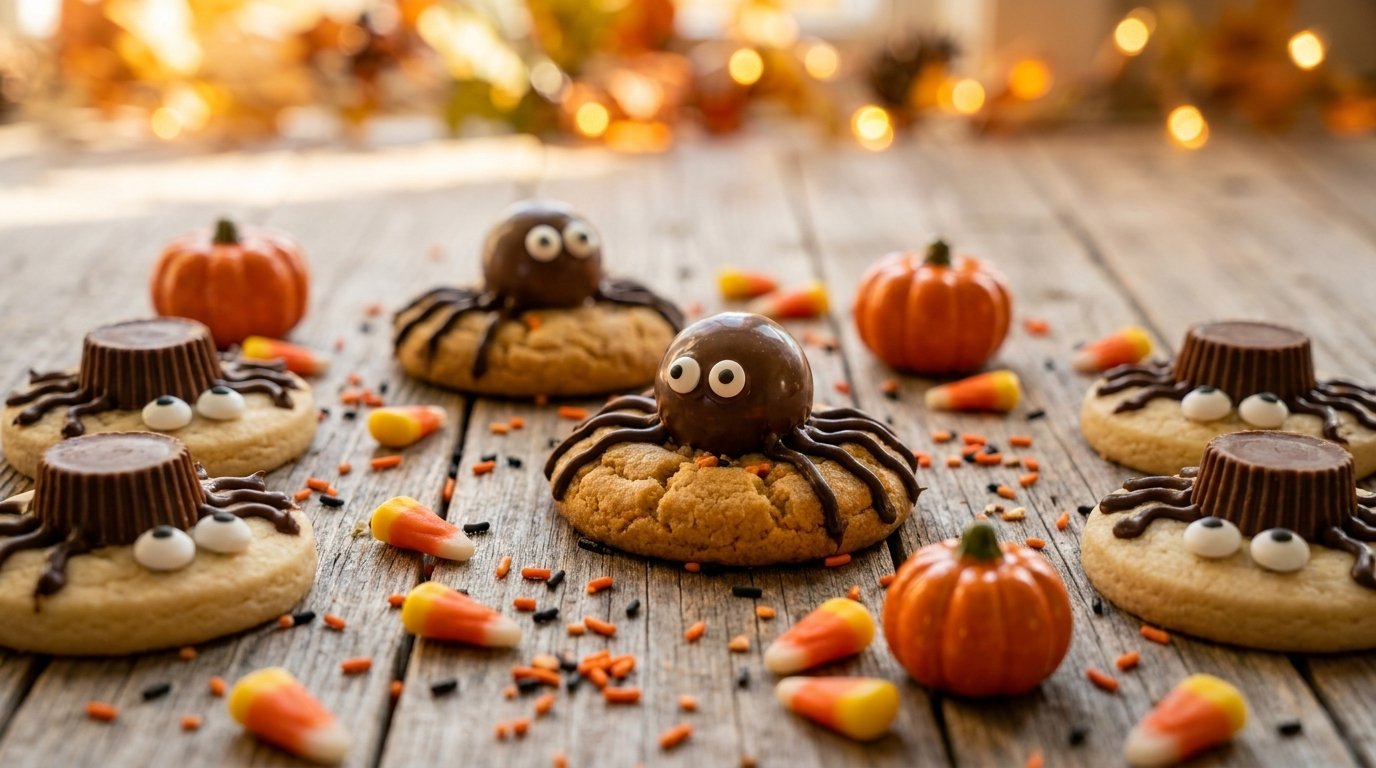
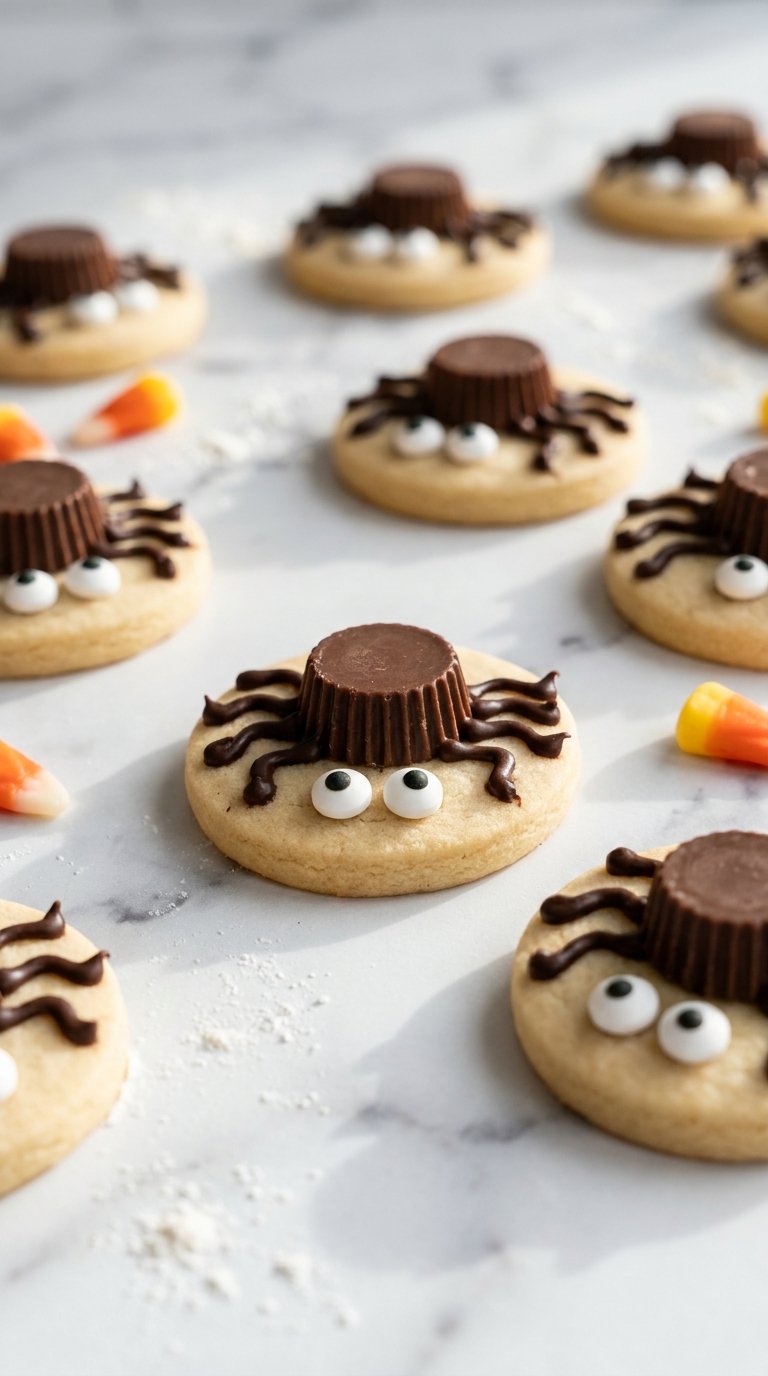
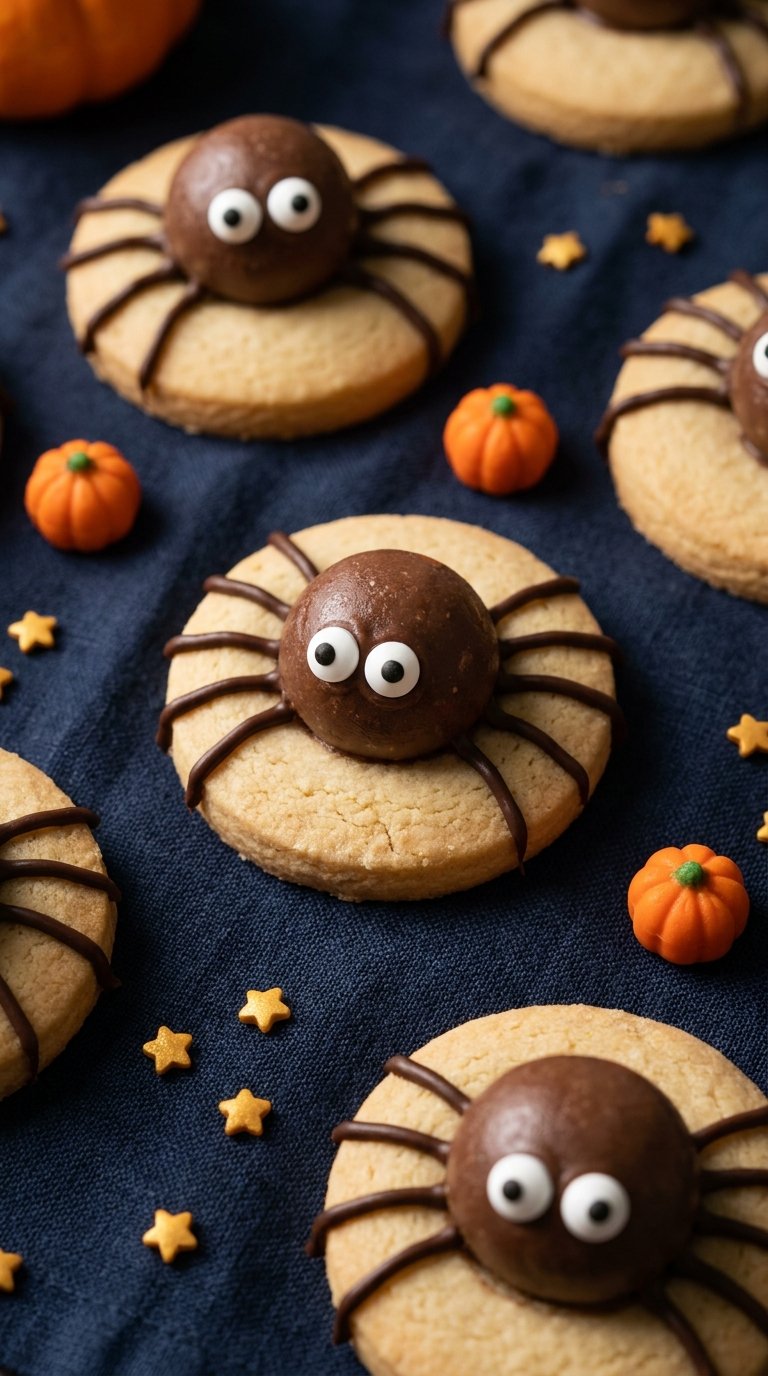
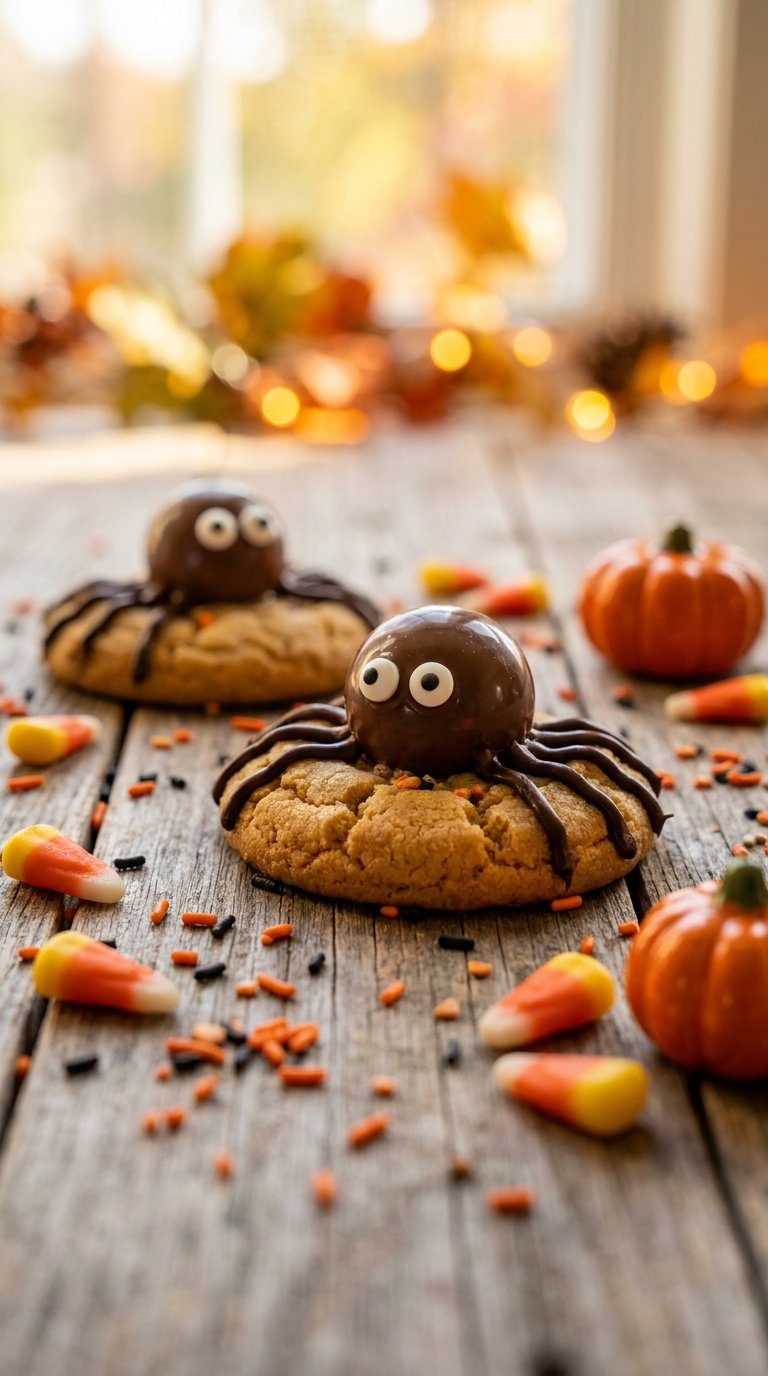
Spider cookies are Halloween-themed cookies decorated to look like spiders, typically with a round cookie as the body base, a candy or chocolate piece as the spider’s abdomen, piped chocolate or candy legs extending outward, and two small candy eyes on the front. The overall silhouette is immediately recognizable and genuinely charming in a spooky-cute way that makes them a perennial Halloween party staple.
The most popular version uses a peanut butter cookie as the base with a mini Reese’s peanut butter cup pressed on top as the spider body. Eight piped chocolate legs extend outward from the candy, and two small candy eyes get attached to the front of the cup with a dot of chocolate. The finished cookie looks like a friendly cartoon spider perched on a warm, golden cookie.
The design works because it plays on contrast — the dark chocolate legs against the pale cookie base, the shiny candy eyes against the matte peanut butter cup. Every element is either a common pantry item or a seasonal candy aisle find. The technique requires no baking skill beyond basic cookie shaping, and the decoration is accessible to children and adults at the same level.
Pro Tip: Search for candy eyes and black writing gel at craft stores like Michaels or Hobby Lobby starting in late August, before grocery stores stock Halloween baking supplies. The selection is wider and the prices are typically lower at craft stores.
Ingredients for the Classic Peanut Butter Spider Cookie
This ingredient list makes approximately 24 spider cookies. Scale up proportionally for larger batches.
For the peanut butter cookie base:
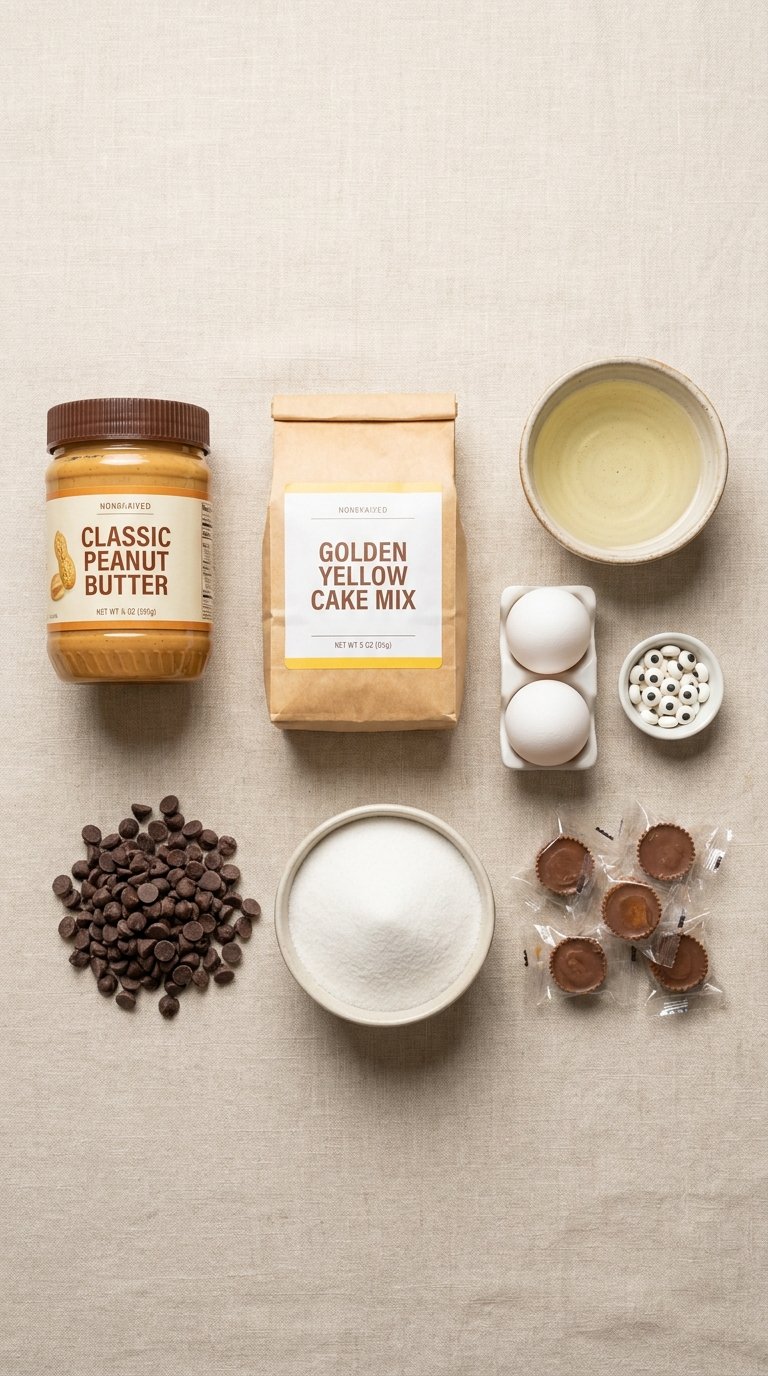
- 1 cup creamy peanut butter (do not use natural peanut butter — the oil separation causes the dough to crumble)
- 1 cup granulated sugar
- 1 large egg (room temperature for even mixing)
- 1 teaspoon vanilla extract
- 1 teaspoon baking soda
- Optional — ¼ teaspoon salt if using unsalted peanut butter
A cup of creamy peanut butter forms the rich and nutty base of the cookie dough. A cup of granulated sugar sweetens the dough and contributes to the crisp exterior. Before baking, consider rolling the peanut butter cookie dough balls in granulated sugar or colored sprinkles — black or orange sprinkles reinforce the Halloween theme and the sugar adds a subtle crunch to the exterior of the cookie.
This particular peanut butter cookie formula is flourless, which keeps it gluten-accessible by default and produces an extraordinarily tender, chewy texture. The simplicity of the dough means the peanut butter flavor comes through cleanly with no wheat-based interference.
Room temperature egg mixes faster and more evenly than a cold egg from the refrigerator. Take the egg out 20 to 30 minutes before you start mixing, or submerge it in a bowl of warm water for five minutes.
Pro Tip: Use Jif or Skippy creamy peanut butter. Both are stabilized with added oils that keep the dough smooth and consistent. Natural peanut butter separates and makes the dough greasy and difficult to roll into balls.
Save this idea to your Pinterest.
Ingredients for the Chocolate Spider Decoration
For the spider decoration:
- 24 Reese’s mini peanut butter cups, unwrapped (the spider bodies)
- ½ cup semi-sweet chocolate chips
- ½ teaspoon coconut oil or shortening (for smooth melting)
- 48 candy eyes (two per spider)
- Optional — black food gel writing pen for additional detail
The mini peanut butter cups serve as the spider body and add an extra layer of peanut butter and chocolate goodness to each cookie. The size of the mini cup is exactly right for a standard spider body proportion — the large cups are too heavy and tip over before the chocolate sets.
Semi-sweet chocolate provides the right balance of bitterness and sweetness for the legs. Dark chocolate works if you prefer a less sweet result. Milk chocolate tends to be too soft at room temperature and can cause the legs to lose their shape before setting.
Coconut oil melted with the chocolate chips creates a thinner, more fluid consistency than straight melted chocolate. This fluidity is what makes the chocolate pipeable through a small bag with a tiny corner snipped off. Without the coconut oil, melted chocolate chips can be too thick to pipe thin, clean legs.
Pro Tip: Set the candy eyes face-down on a piece of parchment paper before the assembly process starts, so they are within arm’s reach and easy to grab with dry fingers during the 60-second window before the chocolate sets on the cookie.
Step-by-Step Instructions
These instructions produce 24 fully decorated peanut butter spider cookies from scratch.
Step 1 — Preheat and prep
Preheat the oven to 375°F (190°C). Line two baking sheets with parchment paper. Unwrap all the mini peanut butter cups and set them in a single layer on a plate near the oven — they go onto the cookies immediately after baking while the cookies are still warm.
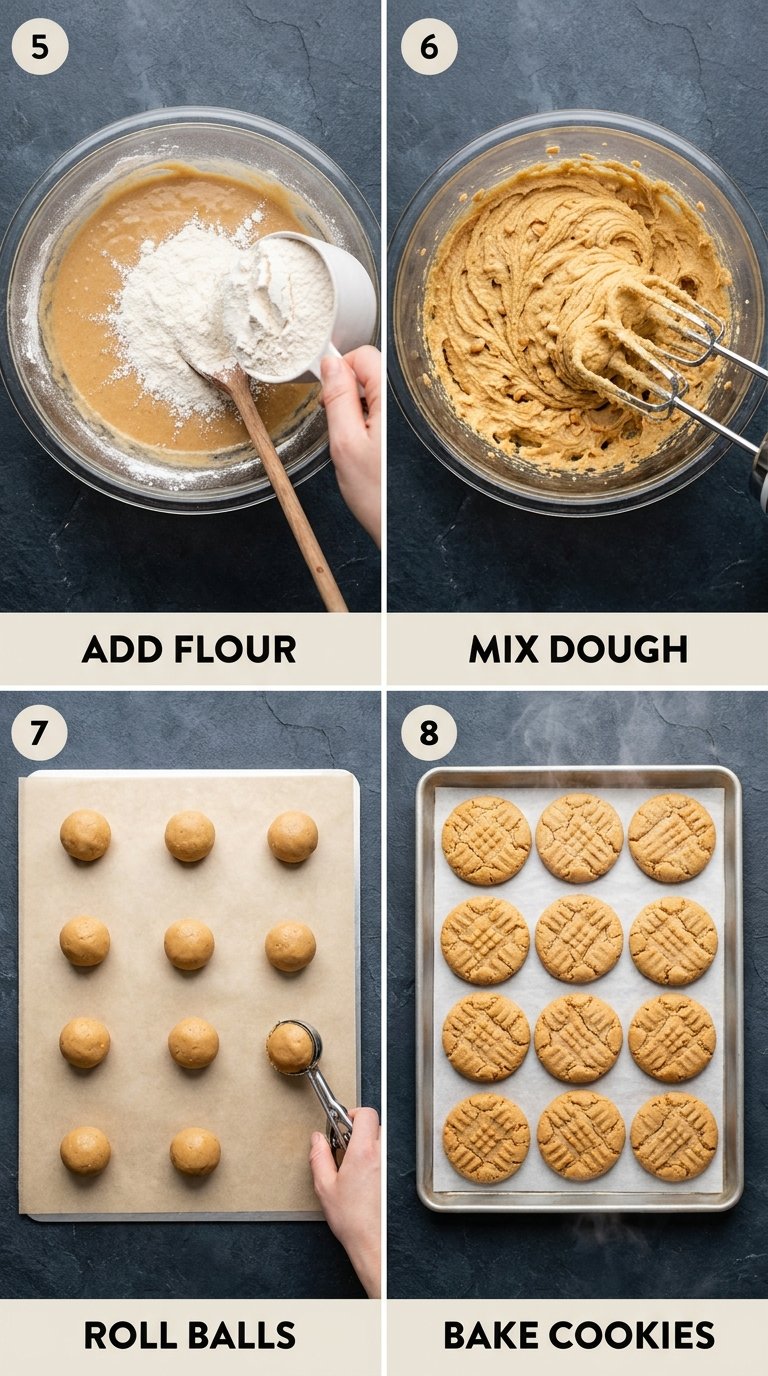
Step 2 — Make the dough
Combine the peanut butter, granulated sugar, egg, vanilla extract, baking soda, and salt in a large bowl. Mix with an electric mixer on medium speed or stir by hand until the dough comes together into a smooth, cohesive ball. The dough will feel slightly sticky but should hold its shape when rolled.
Step 3 — Roll and bake
Roll the dough into 1-inch balls using your palms. Place them on the prepared baking sheets approximately 2 inches apart. If rolling in colored sugar or sprinkles, do so now before the balls go on the sheet. Press each ball very slightly with the flat of your palm to create a disc shape about ½ inch thick. Bake for 8 to 10 minutes until the edges are just set and the surface looks slightly underdone. The cookies continue cooking on the hot pan after they come out of the oven.
Step 4 — Add the spider body
Remove the cookies from the oven immediately and, working fast, press one mini peanut butter cup firmly into the center of each hot cookie. The heat from the cookie slightly softens the bottom of the cup and bonds it to the surface as everything cools. Let the cookies cool completely on the baking sheet for 15 minutes before decorating.
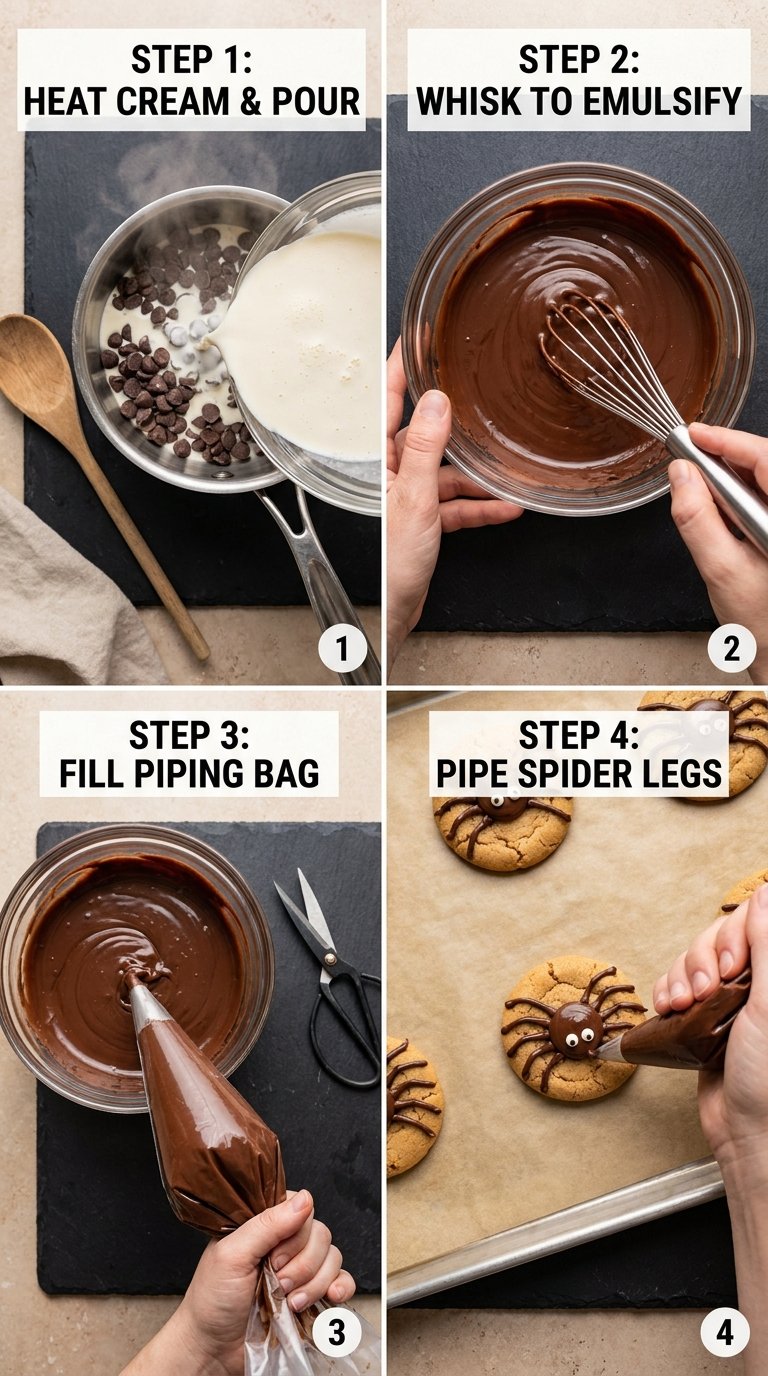
Step 5 — Melt the chocolate
Combine the chocolate chips and coconut oil in a microwave-safe bowl. Microwave at 20-second intervals, stirring between each interval, until the chocolate is fully melted and smooth. Transfer the melted chocolate to a small zip-lock bag. Seal the bag and snip a tiny corner off — the hole should be no larger than 1mm for clean leg lines.
Step 6 — Pipe the legs and add eyes
Pipe four legs on each side of the peanut butter cup, curving them slightly outward and downward for a natural spider shape. Work on four to six cookies at a time so the chocolate does not set before the eyes go on. Dab a tiny dot of chocolate on the back of two candy eyes and press them onto the front face of the peanut butter cup. Let the decorated cookies sit undisturbed for 20 minutes at room temperature until the chocolate legs set completely.
Pro Tip: Chill the fully decorated cookies in the refrigerator for 10 minutes to speed up the leg-setting process if you are short on time. The cold temperature firms the chocolate in minutes rather than the 20-minute room temperature wait.
Popular Asked Questions
What is the best cookie base for spider cookies?
Peanut butter cookies and sugar cookies work best for spider cookies. A peanut butter cookie base provides a rich, nutty flavor that pairs naturally with the chocolate peanut butter cup spider body. Sugar cookies produce a paler, slightly crispier base with more visual contrast against the dark spider decoration. Store-bought cookie dough, boxed cookie mix, or scratch-made dough all work equally well — the key is a flat, even cookie surface that provides a stable base for the spider body and legs.
How do you make spider legs on cookies?
Spider legs on spider cookies can be made four ways. Pipe melted chocolate through a small hole cut in the corner of a zip-lock bag, drawing four curved lines on each side of the spider body. Press short pieces of black licorice string into the warm cookie before it sets. Break pretzel sticks into short segments and press them into the cookie as it comes out of the oven. Use a black food gel writing pen to draw legs directly onto the cooled cookie surface. The piped chocolate method produces the cleanest result. The licorice and pretzel methods are faster and more accessible for children.
Can you make spider cookies without peanut butter?
Yes. The classic peanut butter spider cookie can be made nut-free by switching to a sugar cookie base instead. Replace the Reese’s peanut butter cup spider body with an Oreo cookie, a Whopper malted milk ball, a Rolo caramel candy, or a round chocolate truffle — all are peanut-free. Verify that your chocolate chips carry no nut-related manufacturing cross-contamination warnings if the cookies are for a school setting. The decoration technique stays identical regardless of which body candy you use.
How far in advance can you make spider cookies for a party?
Spider cookies can be baked and decorated up to five days before a Halloween party and stored at room temperature in an airtight container with parchment between layers. For a larger head start, bake and freeze the plain cookie bases up to three months ahead and decorate them one to two days before the event. The chocolate legs and candy eyes set hard and hold well for the full five-day storage window at room temperature. Avoid refrigerating decorated cookies — condensation dulls the chocolate surface.
What can you use instead of candy eyes on spider cookies?
Candy eyes on spider cookies can be replaced with mini M&Ms turned letter-side down, mini chocolate chips pressed point-first into the candy body, white royal icing dots with a smaller black center dot drawn with a food marker, or edible marker circles drawn directly onto the candy surface. White nonpareils or white sprinkle pearls also work as small eyes when attached with a dot of melted chocolate. Candy eyes are the fastest and most readable option when available, but every alternative listed produces a clear, expressive spider face with materials available at any grocery store.
Conclusion
Spider cookies earn their place on Halloween baking lists every year because they deliver on every practical level — they look impressive, taste genuinely good, require no advanced skill, and scale from a single batch to a classroom of 30 without any change in technique.
The flourless peanut butter base takes five minutes to mix. The bake runs 10 minutes. The decoration takes 20 minutes for a full batch. Total time from mixing bowl to finished cookie is under 40 minutes, which makes this one of the most efficient Halloween baking projects available.
Which version are you planning to make first — the classic peanut butter spider, the no-bake licorice version for kids to assemble, or the royal icing web cookies for a more polished result? Leave your choice in the comments below.
Follow us on Pinterest for more spider cookies inspiration, Halloween baking ideas, and easy seasonal recipes.

Leave a Comment