
Short oval shapes dominate the current clean beauty aesthetic. Weak natural nails snap fast when filed into sharp square or almond shapes. The gentle rounded curve of the short oval shape prevents painful tearing and promotes healthy growth.
We compiled ten beautiful design concepts to strengthen your delicate hands. Check out our related guide on simple cuticle care routines on the Wisdom For Home homepage to prepare your hands for these designs.
Key Takeaways
- Short oval shapes eliminate sharp corners that catch and tear on clothing.
- Sheer milky pinks and earthy greens rule the color trends this year.
- A thick layer of builder gel adds massive strength to weak nail beds.
- Daily application of jojoba oil prevents your gel polish from peeling.
Table of Contents
- Target Keyword Strategy
*Short Oval Nails with Pink and Yellow Design for Summer Trends - Glitter and Solid Color Short Oval Nails for Brittle Nails
*Classic Glossy Pink Short Oval Nail Polish Ideas
*Simple Short Oval French Tip Variations with a Twist - Colorful Glitter Tip Short Oval Nail Art for 2026
*Short Oval Acrylic Nails vs Natural Nails Comparison - Get The Look Tool Kit
*Abstract Yellow and White Short Oval Nails for Small Nail Beds - Minimalist Short Oval Nail Art with Delicate Leaf Designs
*Glossy White Short Oval Nails for Budget Friendly Manicures - Playful Polka Dot Short Oval Nails
- Easy DIY Short Oval Nail Designs with Gradient Purple
- Popular Asked Questions
- The Future of Short Oval Nails
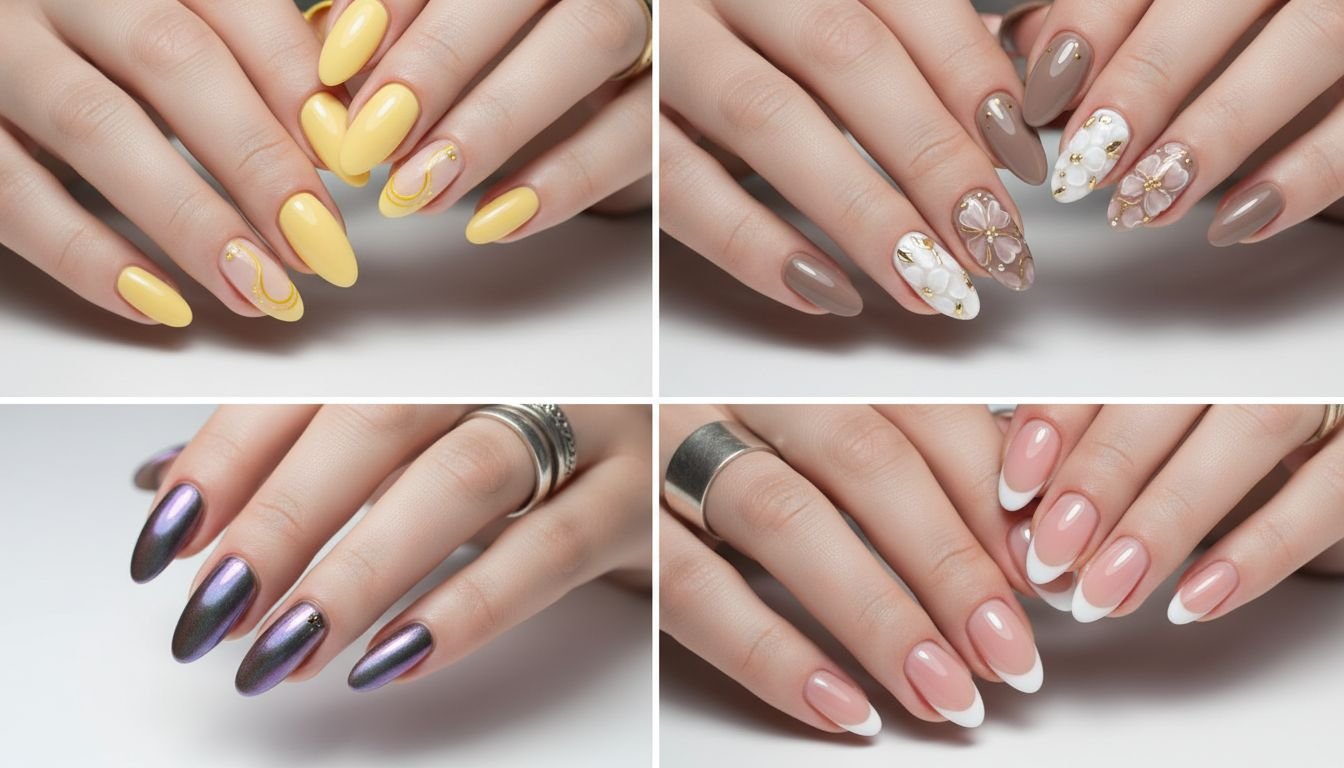
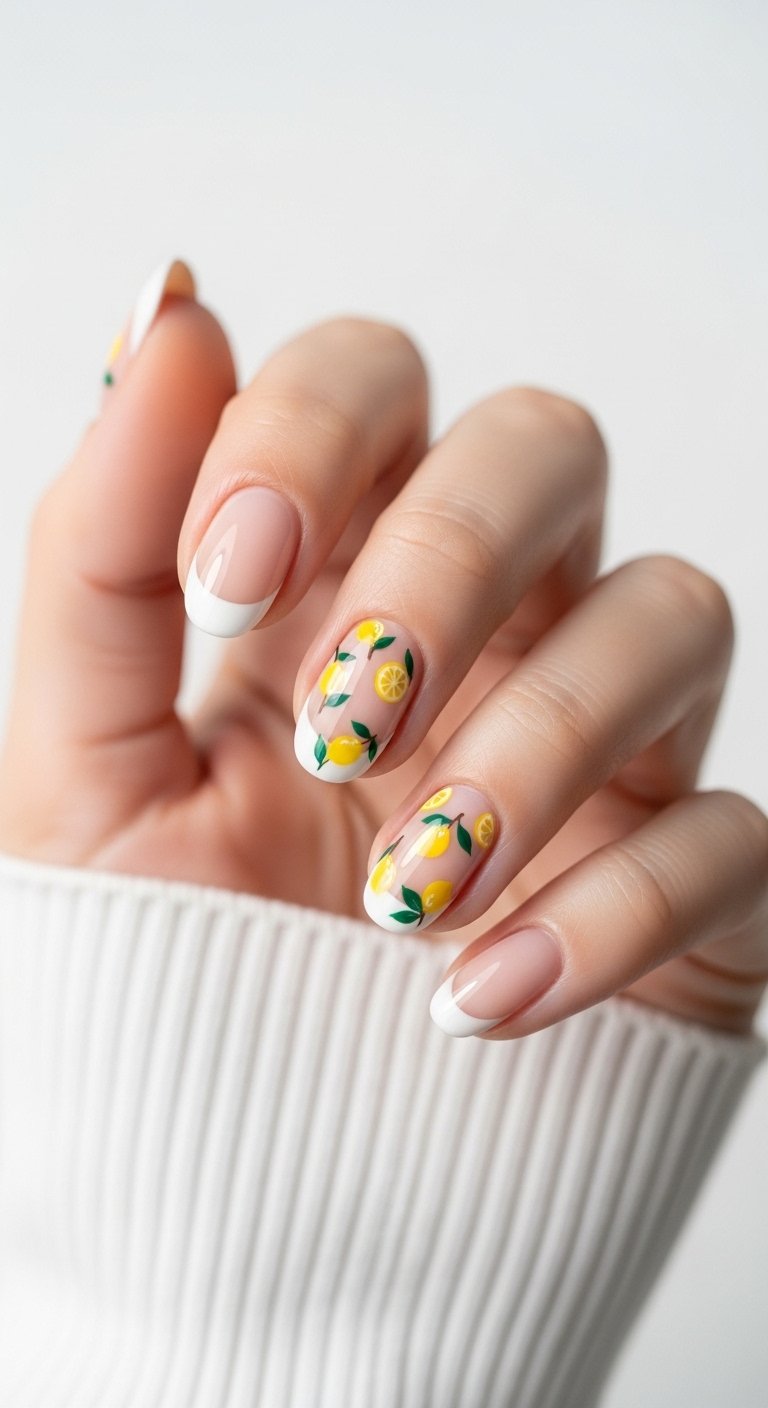
Short Oval Nails with Pink and Yellow Design for Summer Trends
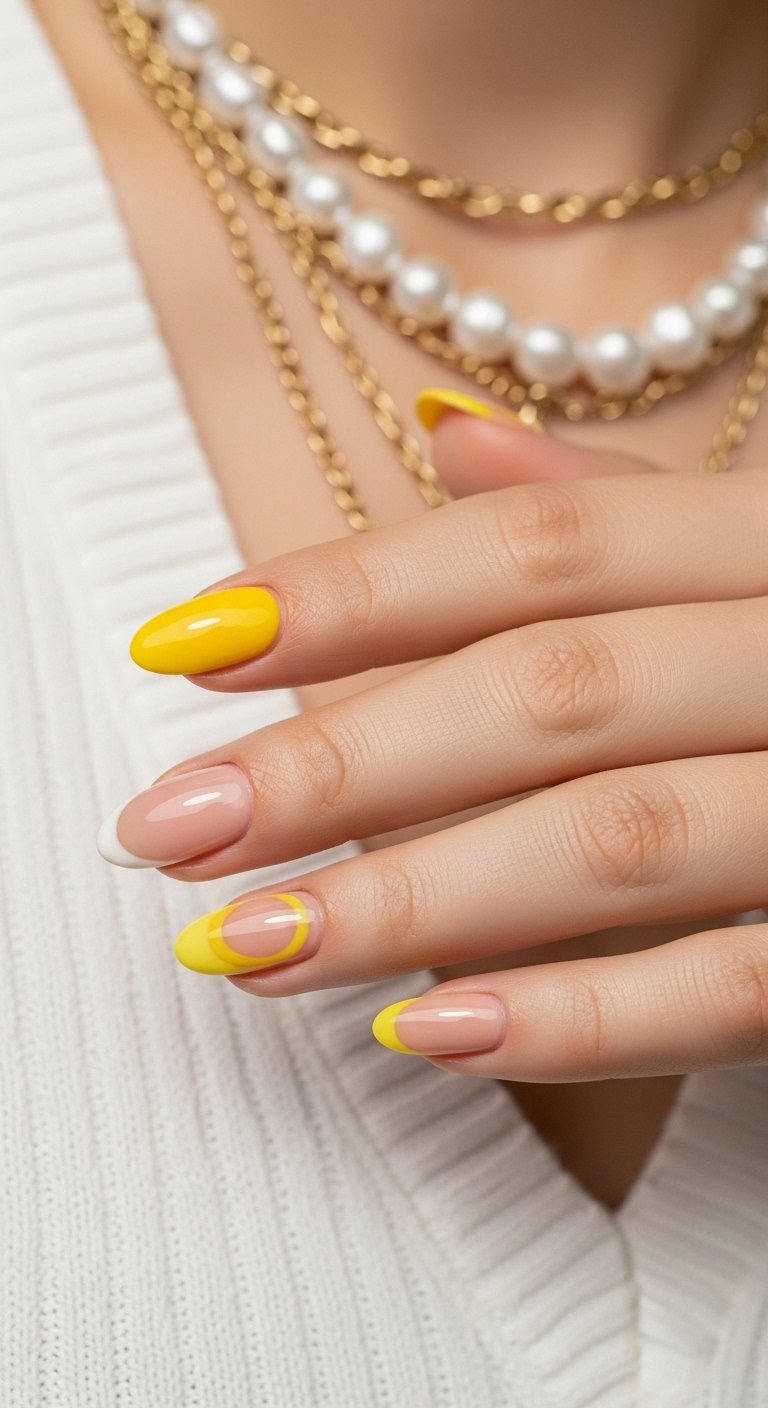
The summer short oval nail trends favor bright colors and soft shapes. The soft curve of the short oval shape softens the bright contrast between pink and yellow tones. This color pairing brings a cheerful energy right to your fingertips.
Warm yellow shades sit next to soft blush pink layers. The design creates a visual balance using warm color theory principles. The rounded edges prevent harsh lines. This shape protects weak nails from daily wear and tear.
Creating this look at home requires a steady hand and quality gel polish. Begin with a clear base coat to protect the natural nail bed. Paint the index and pinky fingers with an opaque pastel yellow.
Coat the middle and ring fingers in a sheer jelly pink. Use a fine detail brush to add small yellow daisies over the pink base. Cure the polish under a UV lamp for sixty seconds. Finish the manicure with a thick layer of glossy top coat to seal the design.
Daily hydration keeps the gel polish flexible. Massage cuticle oil into the nail beds every night. The oil prevents premature lifting around the edges.
Keep a glass nail file nearby to smooth any rough spots. The short length requires filing every two weeks to maintain the perfect oval shape.
Proper preparation determines the longevity of your gel manicure. Push back the cuticles using a wooden stick. Buff the nail surface to remove the natural shine.
Wipe each nail with rubbing alcohol to remove dust and natural oils. The clean surface allows the base coat to adhere perfectly. This careful process guarantees a salon quality finish right at home.
Pro Tip. Apply a white base coat under the yellow polish to make the pastel color pop.
Save this idea to your Pinterest.
Glitter and Solid Color Short Oval Nails for Brittle Nails
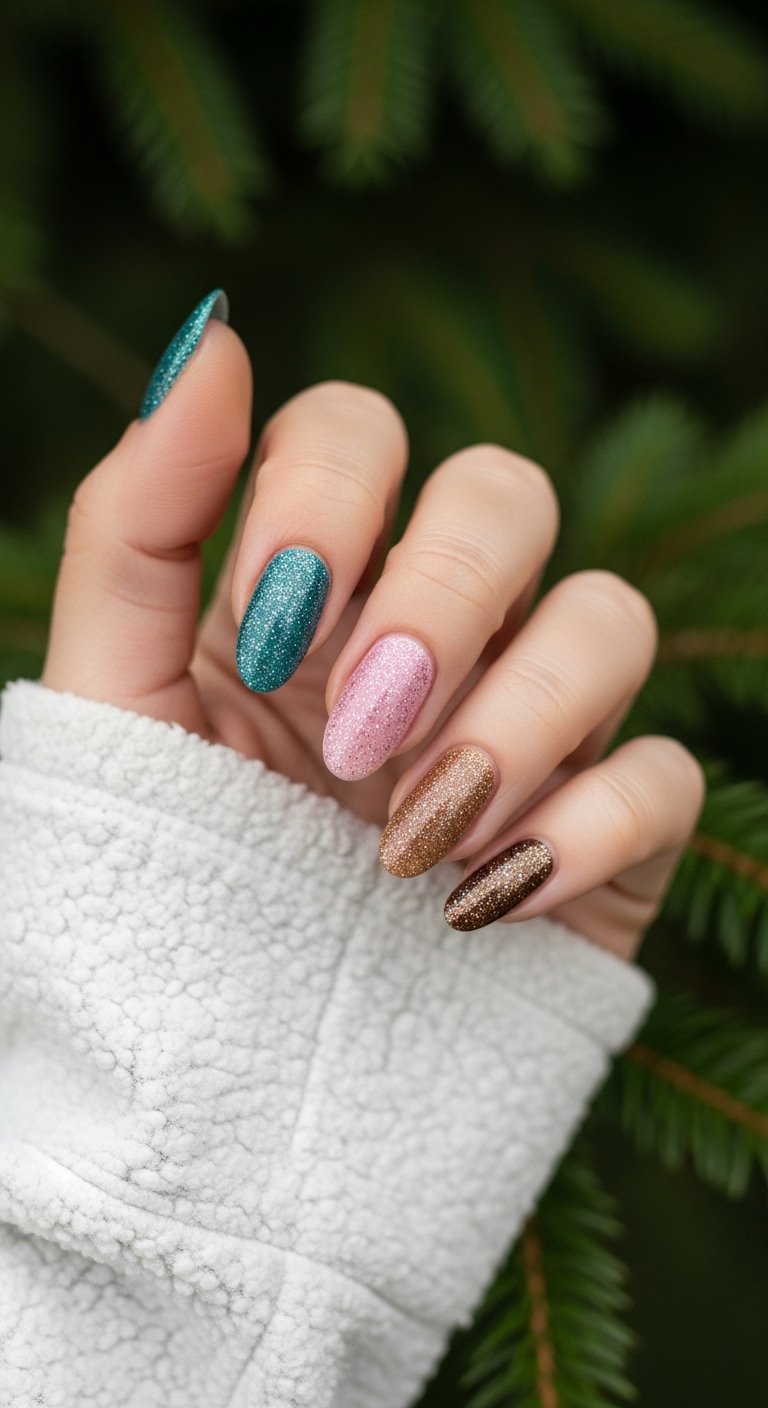
The best short oval nails for brittle nails combine strengthening builder gel with dazzling glitter accents. The short oval structure removes sharp corners. Sharp corners catch on fabrics and cause painful tears.
A solid color base provides a sturdy foundation for the nail plate. The glitter overlay adds structural thickness and visual depth. This combination offers maximum durability for delicate hands.
Start the application process with a builder gel base. Builder gel adds a protective layer over weak natural nails. Paint three nails with a solid muted mauve shade.
Apply a dense champagne glitter polish to the remaining two accent nails. The contrast between the flat solid color and the textured glitter creates a striking visual dynamic. Cure each layer under an LED light for sixty seconds. Cap the free edges with the top coat to seal the layers together.
Glitter polish requires a unique removal technique. Soak a cotton pad in pure acetone. Place the soaked pad over the glitter nail. Wrap the fingertip in a small square of aluminum foil.
Leave the foil wrap in place for fifteen minutes. The acetone breaks down the tough glitter particles. Slide the foil off the finger. The glitter polish slips away without damaging the delicate nail bed beneath.
Thick glitter polish often feels rough to the touch. Apply two layers of a self leveling top coat to smooth the surface. The double top coat method encases the glitter pieces. This creates a glass like finish that feels perfectly smooth.
Pro Tip. Use a makeup sponge to dab the glitter polish onto the nail for maximum sparkle density.
Save this idea to your Pinterest.
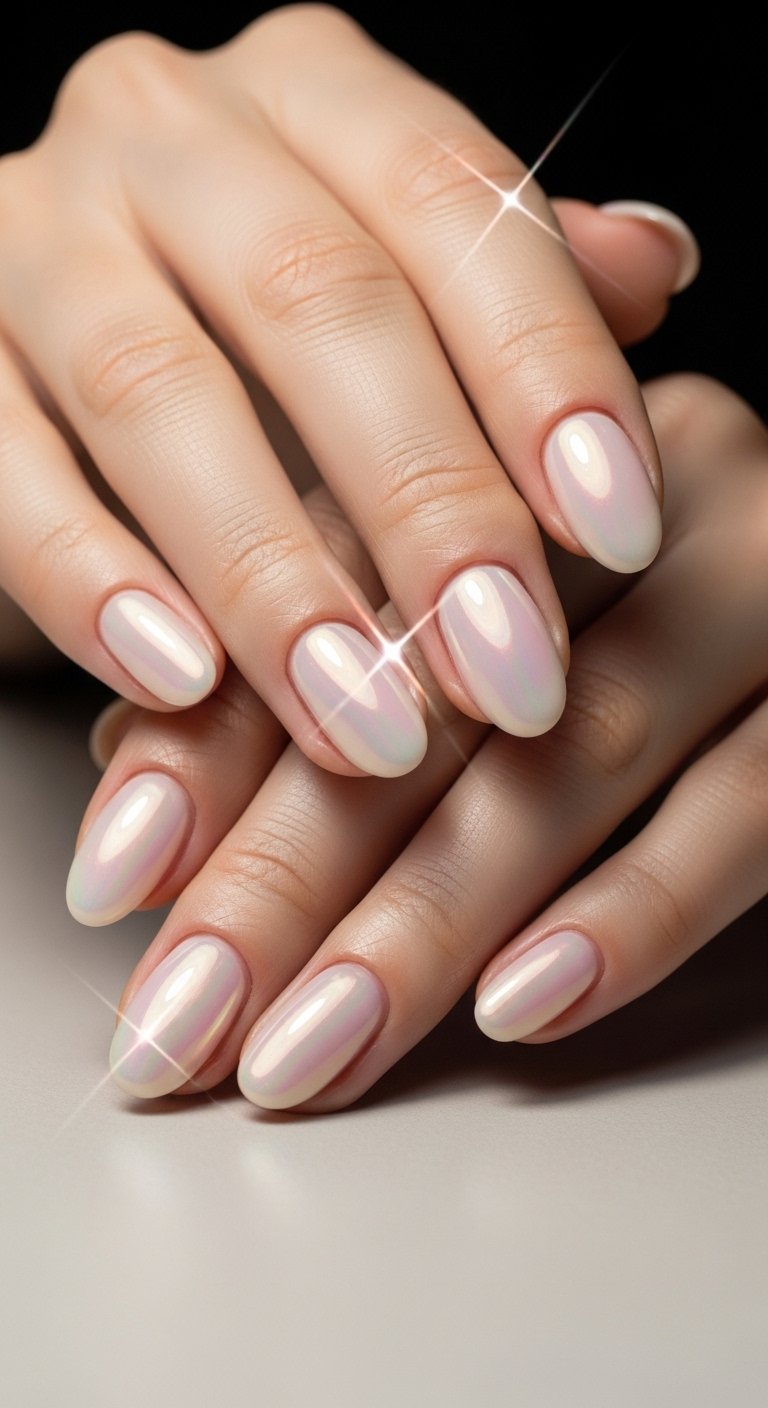
Classic Glossy Pink Short Oval Nail Polish Ideas
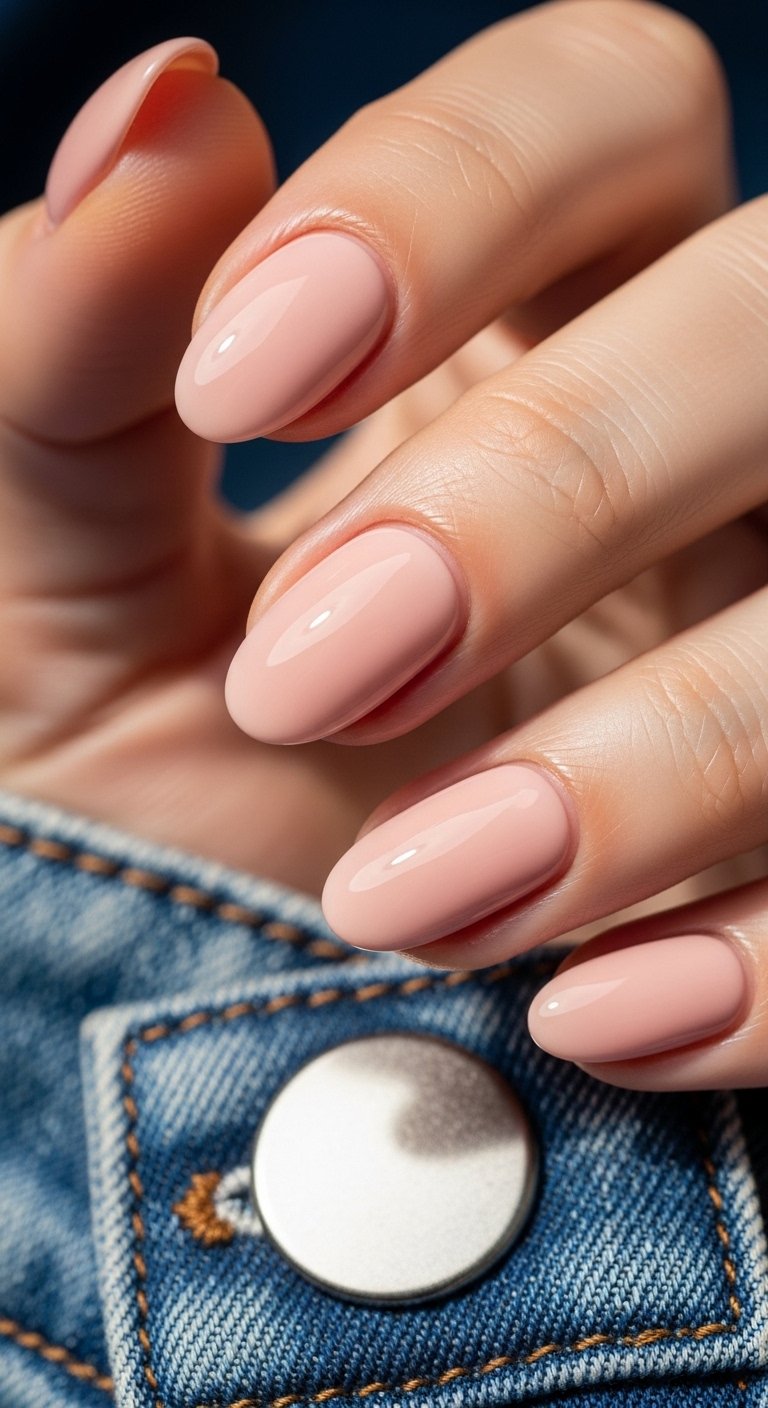
Glossy pink short oval nail polish remains a top choice for clean beauty enthusiasts in 2026. The sheer pink tint mimics the natural color of a healthy nail bed. The ultra glossy top coat creates a wet look finish similar to lip gloss.
This minimalist approach highlights the pristine grooming of the hands. The soft oval silhouette elongates short fingers gracefully.
Achieving the perfect lip gloss nail requires sheer translucent polishes. Start with a ridge filling base coat to create a flawless canvas. Apply one thin layer of a milky pink jelly polish.
The sheer formula lets the natural white tip of the nail peek through. Add a second coat only if you desire more color payoff. Choose an ultra glossy no wipe gel top coat. Float the top coat over the color layer to prevent streaks.
Maintaining the high shine finish requires daily attention. Hard water and cleaning chemicals dull the glossy surface fast. Wear rubber gloves during household chores.
Apply a fresh layer of regular glossy top coat every four days to revive the shine. Hydrate your hands with a rich lotion after every wash.
The right shade of pink flatters your specific skin undertone. Cool undertones look great with blue based bubblegum pinks. Warm undertones look radiant next to peachy pink shades.
Neutral undertones match true baby pinks without effort. Matching the polish to your undertone creates a cohesive and natural aesthetic.
Pro Tip. Keep your cuticle lines perfectly clean using a small brush dipped in acetone before curing the polish.
Save this idea to your Pinterest.
Simple Short Oval French Tip Variations with a Twist
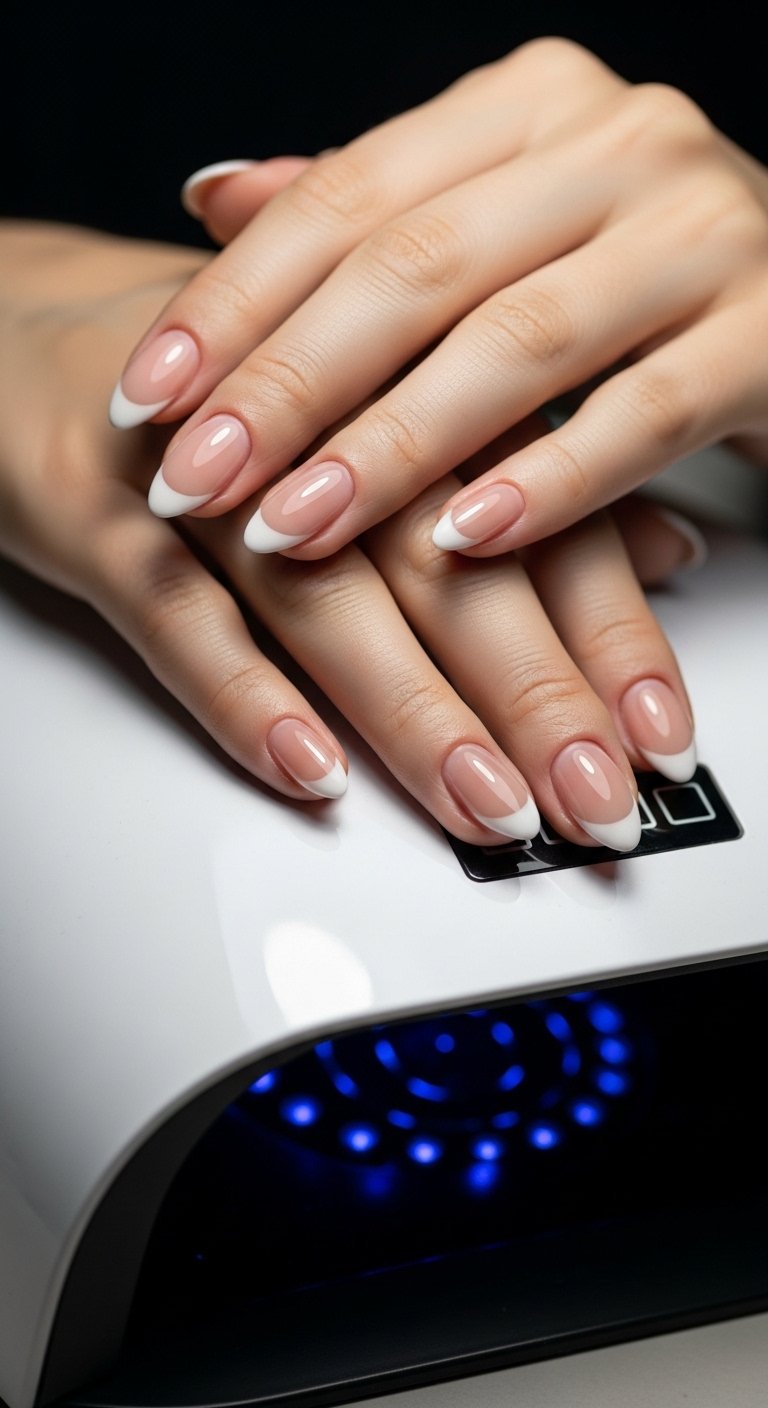
Simple short oval french tip variations update the traditional white tip manicure for modern tastes. The short oval shape provides a gentle curve that flatters the classic smile line.
Instead of a stark white edge this design uses subtle pastels or metallic accents. The thin micro french tip style makes the nail bed appear longer. This clever optical illusion benefits smaller hands greatly.
Creating a micro french tip requires precision and patience. Apply a neutral nude base color that matches your skin tone. Pour a small drop of your chosen tip color onto a palette.
Dip a long thin liner brush into the color. Roll the brush to remove excess polish. Rest your pinky finger on the table for stability. Draw a very thin line right along the free edge of the nail. Follow the natural curve of the oval shape closely.
You can modify the french tip to suit different moods. A double line french tip adds a second parallel stripe just below the main edge. A slanted french tip paints the color on a diagonal angle across the tip.
An ombre french tip blends the tip color softly into the nude base. These variations keep the classic style feeling fresh and interesting.
Protecting the delicate painted tip extends the life of the manicure. The thin stripe of color chips without proper sealing. Apply a generous layer of top coat over the entire nail.
Make sure to swipe the top coat brush across the very edge of the tip. This capping technique locks the color securely in place.
Pro Tip. Use a silicone stamping tool to create a perfectly curved french tip in just one quick motion.
Save this idea to your Pinterest.
Colorful Glitter Tip Short Oval Nail Art for 2026
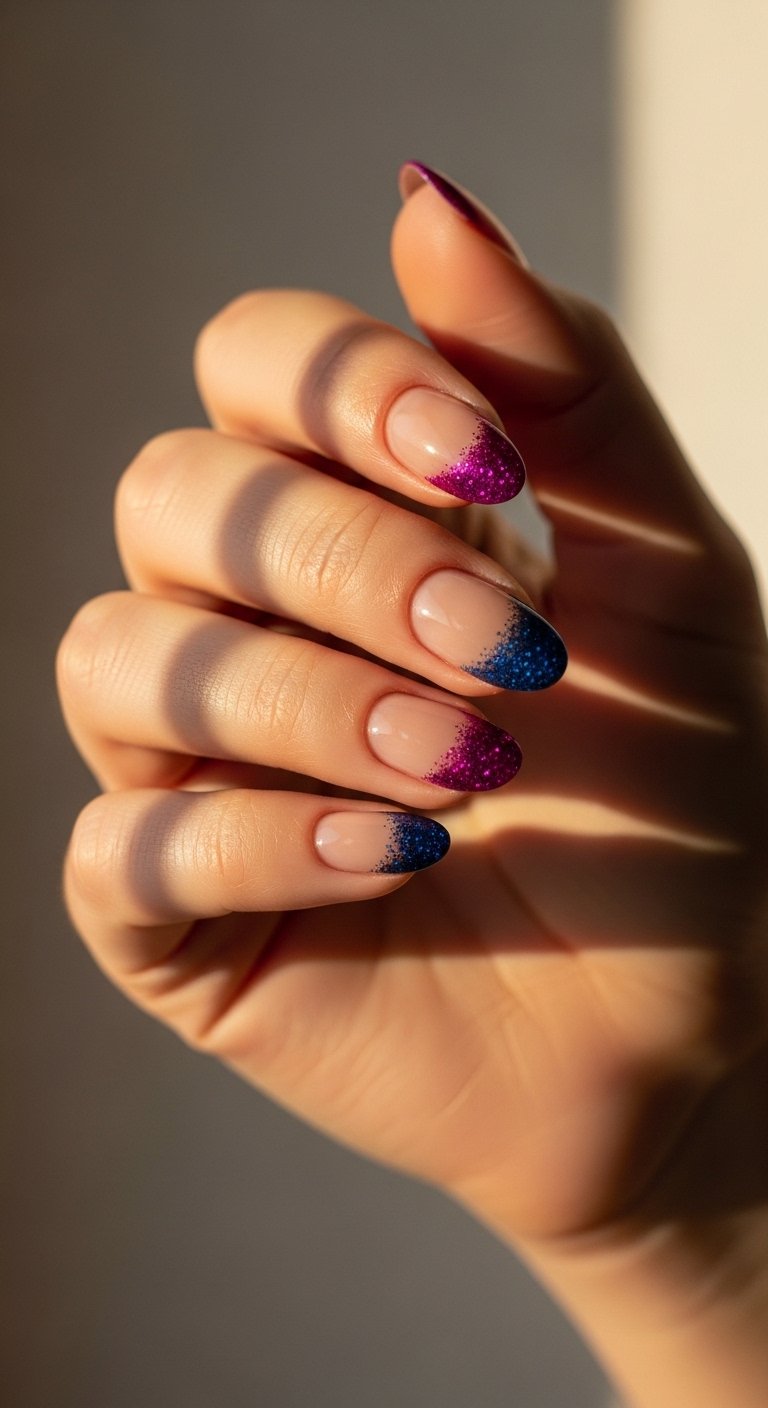
Colorful glitter tip short oval nail art brings a festive spirit to everyday outfits. The short oval structure keeps the bold glitter from looking overwhelming. A sheer base allows the vibrant glitter tips to stand out.
The chunky holographic glitter particles catch the light from every angle. This joyful design combines glamour with daily practicality.
Building a solid glitter tip requires a different technique than regular polish. Paint the nail with a sheer rosy base color. Apply a thin layer of clear building gel just to the tip of the nail.
Dip a small brush into loose cosmetic grade glitter. Press the loose glitter into the wet building gel. Concentrate the largest glitter chunks at the very edge. Fade the smaller glitter pieces down toward the middle of the nail.
Curing loose glitter requires extra time under the lamp. The thick glitter particles block the UV light from reaching the gel underneath. Cure the nails for double the normal time.
Brush off any loose unattached glitter with a fluffy makeup brush. Encapsulate the entire tip with a thick layer of clear builder gel. This step smooths out the rough texture of the raw glitter.
Choosing the right glitter mix elevates the final look. Blend different sizes of glitter together for maximum dimension. Mix fine holographic dust with larger hexagonal sequins.
The varied textures reflect light in complex patterns. Match the glitter colors to your favorite jewelry pieces for a coordinated style.
Pro Tip. Mix a tiny amount of loose glitter directly into a clear top coat to create a custom glitter polish.
Save this idea to your Pinterest.
Short Oval Acrylic Nails vs Natural Nails Comparison
| Feature | Short Oval Acrylic Nails | Natural Short Oval Nails |
|---|---|---|
| Strength | Very strong and rigid structure | Flexible and prone to bending |
| Maintenance | Requires salon fills twice a month | Requires weekly filing at home |
| Cost | Higher initial cost and expensive upkeep | Very budget friendly and cheap |
| Damage Risk | High risk during improper removal | Very low risk of surface damage |
| Polish Wear | Polish lasts for weeks without chipping | Polish may chip within days |
Get The Look Tool Kit
Creating these designs at home requires the right equipment. Gather these supplies before starting your manicure session.
- High wattage UV LED nail lamp
- Glass nail file with a fine grit
- Wooden cuticle pushers
- Pure acetone polish remover
- Lint free nail wipes
- Sheer pink builder gel
- Ultra glossy no wipe top coat
- Fine detail nail art brushes
- Nourishing jojoba cuticle oil
Abstract Yellow and White Short Oval Nails for Small Nail Beds
Abstract yellow and white short oval nails for small nail beds create an illusion of space and length. The organic flowing lines draw the eye vertically along the finger. The bright white polish creates a sharp contrast with the sunny yellow accents.
Negative space sections break up the color blocks cleverly. The soft oval tip mirrors the natural shape of the cuticle base perfectly.
Painting abstract lines requires a relaxed grip and fluid movements. Apply a sheer nude base coat over the entire nail. Drop a small amount of bright opaque yellow and crisp white polish onto a mixing palette.
Use a long striping brush to pick up the white polish. Sweep the brush across the nail in a soft curving motion. Add a parallel yellow stripe right next to the white line. Leave large sections of the nude base exposed to create negative space.
Abstract designs hide minor mistakes. The irregular shapes look intentional and artistic. You do not need perfect symmetry between the fingers.
Each nail acts as a unique canvas. This freedom makes abstract nail art perfect for beginners. The lack of rigid rules removes the stress of painting with your non dominant hand.
Yellow polish creates streaks and patchy spots. Apply three very thin coats rather than two thick coats. Let each layer cure for sixty seconds before adding the next layer.
A matte top coat transforms the abstract design completely. The matte finish gives the yellow and white lines a cool modern pottery vibe.
Pro Tip. Remove stray polish marks around the cuticles using a small angled brush dipped in pure acetone.
Save this idea to your Pinterest.
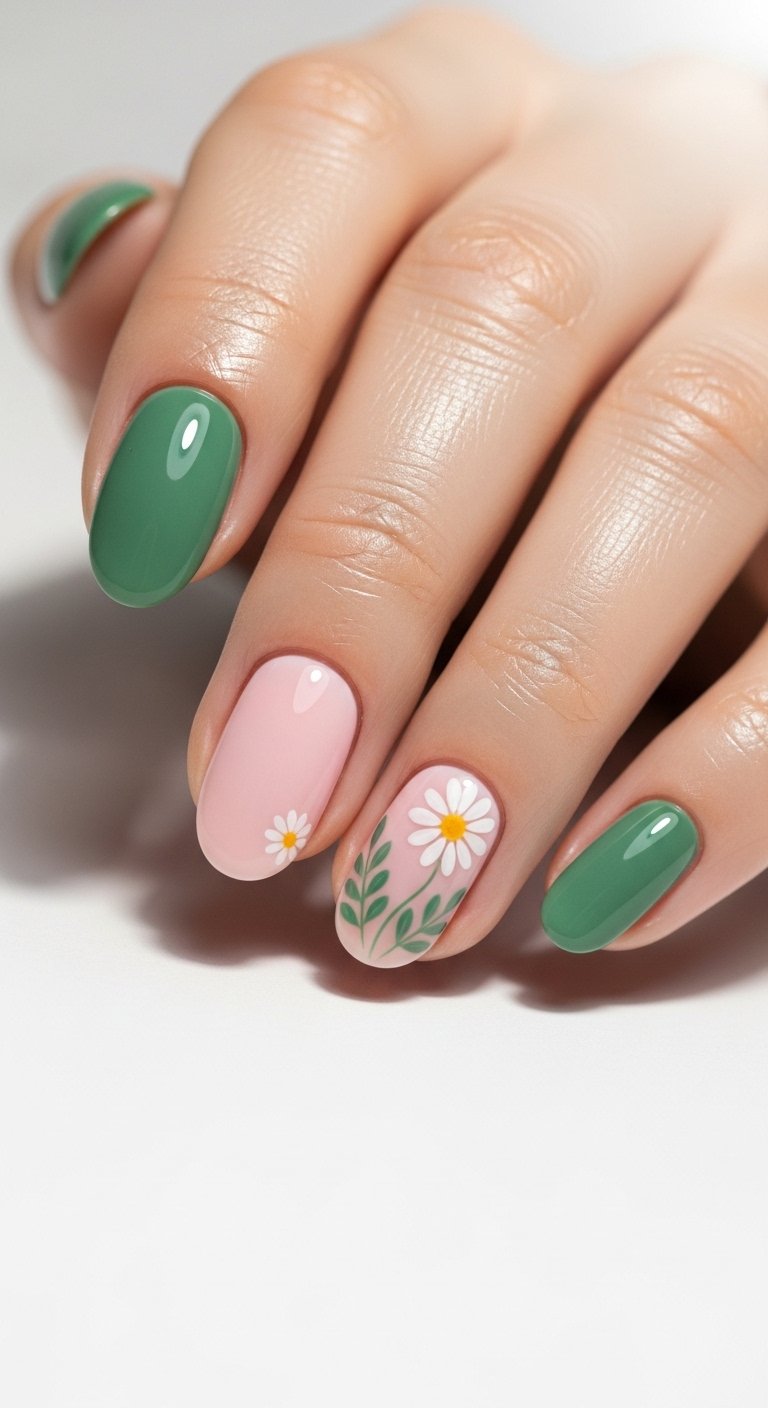
Minimalist Short Oval Nail Art with Delicate Leaf Designs
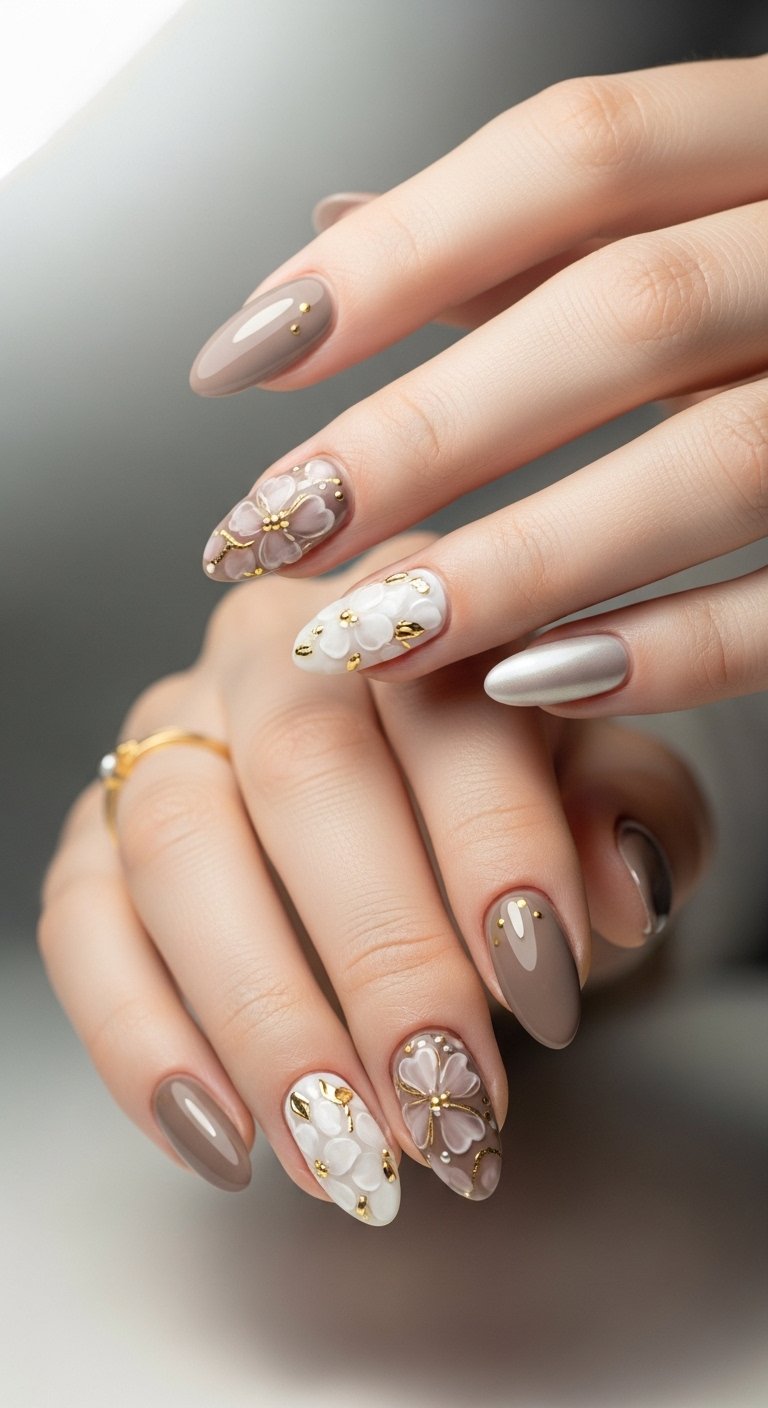
Minimalist short oval nail art with delicate leaf designs brings nature to your hands. The botanical theme feels fresh and calming. The short oval canvas provides just enough room for tiny green vines.
A milky white base color makes the green leaves stand out. This quiet luxury aesthetic matches any outfit in your wardrobe.
Drawing tiny leaves requires the thinnest detail brush available. Paint the nails with two coats of a milky translucent white gel. Pick up a small amount of forest green polish with the detail brush.
Draw a very thin curving line down the center of the nail to form the main vine. Press the tip of the brush down and lift up to create tiny leaf shapes along the vine. Cure the design right away to prevent the fine lines from spreading.
Botanical designs look best with a muted earthy color palette. Swap the bright green for a soft sage or deep olive shade. Add tiny dots of gold foil near the leaves for a magical touch.
The gold accents catch the sunlight. You can paint a single vine on the ring finger for a subtle accent or cover every nail for a bolder statement.
Protecting fine nail art requires a generous layer of top coat. Float the top coat brush over the nail without touching the bristles to the design.
Pressing too hard smears the delicate green lines across the white base. Cap the free edge to seal the artwork.
Pro Tip. Practice drawing the leaf shapes on a piece of paper before attempting them on your actual nails.
Save this idea to your Pinterest.
Glossy White Short Oval Nails for Budget Friendly Manicures
Glossy white short oval nails for budget friendly manicures offer incredible value and style. Crisp white polish looks luxurious and highly maintained. The bright stark color highlights the natural healthy tan of your skin.
The short oval shape keeps the white tips clean and free from trapped dirt. This simple monochromatic look saves time and money at the salon.
Applying solid white polish challenges many home manicure enthusiasts. White polish shows every brush stroke and uneven bump. Start with a high quality self leveling base coat.
Apply a thin first coat of white polish. The first coat will look streaky and terrible. Do not panic or try to fix it. Cure the thin layer for sixty seconds. Apply a thicker second coat. The second coat covers the streaks and builds full opacity.
Keeping white nails pristine requires daily maintenance. White polish stains fast from makeup and dark clothing. Wash your hands right after applying foundation or tinted moisturizer.
Avoid touching new dark denim jeans. If the white polish starts looking yellow just buff the top surface lightly. Apply a fresh layer of clear top coat to restore the bright white color.
A solid white manicure serves as a perfect base for future nail art. Wear the plain white nails for a few days. Add a simple glitter gradient over the white polish later in the week. This trick extends the life of your manicure and keeps your style feeling fresh.
Pro Tip. Roll the bottle of white polish between your hands before using it to mix the thick pigments smoothly.
Save this idea to your Pinterest.
Playful Polka Dot Short Oval Nails
Playful polka dot short oval nails bring a retro charm to modern manicures. The circular dots match the rounded oval tips. A clear base covered in multicolored dots feels youthful and fun.
The even spacing of the dots creates a satisfying geometric pattern. This design works perfectly for weekend parties or casual outings.
Creating perfect polka dots requires a specialized dotting tool. Paint your nails with a sheer pink builder gel base. Pour drops of blue red yellow and green polish onto a palette.
Dip the large round end of the dotting tool into the first color. Press the tool straight down onto the nail surface. Lift the tool straight up to leave a perfect circle. Wipe the dotting tool clean before switching to the next color.
The pressure you apply changes the size of the dots. Press down hard to create large statement dots. Tap the surface to make tiny delicate specks.
You can mix large and small dots together for a random confetti effect. Arranging the dots in straight lines creates a neat uniform appearance.
Thick polish drops create raised bumps on the nail surface. Let the colored dots settle and flatten for a minute before curing them. Apply two thick coats of a self leveling top coat.
The double top coat fills in the spaces between the dots. This step guarantees a perfectly smooth glass like finish.
Pro Tip. Use the round head of a sewing pin inserted into a pencil eraser if you lack a proper dotting tool.
Save this idea to your Pinterest.
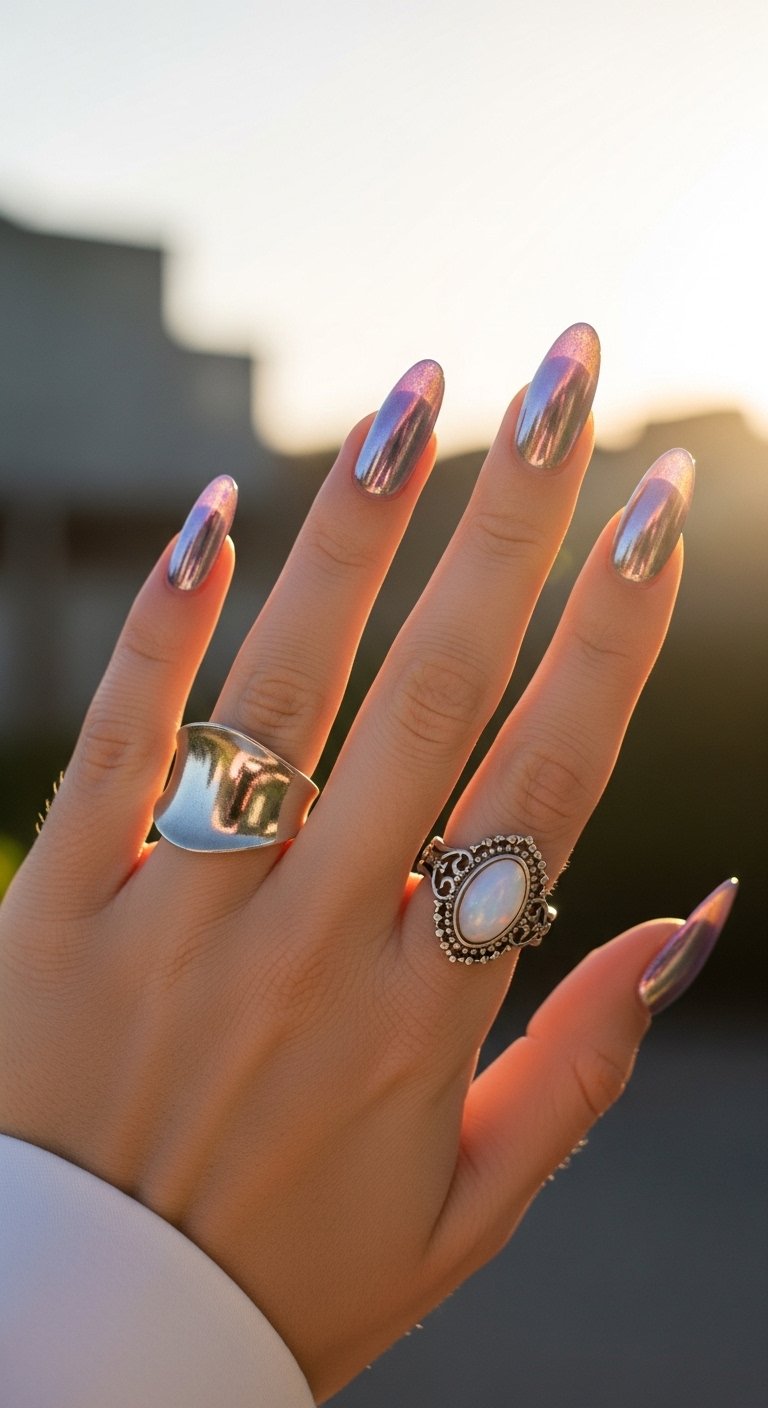
Easy DIY Short Oval Nail Designs with Gradient Purple
Easy DIY short oval nail designs with gradient purple blend soft lavender into deep plum. The gentle color transition mimics a twilight sky. The smooth gradient removes any harsh lines between the different polish colors.
The short oval silhouette improves the soft dreamy quality of the blended shades. This technique looks complex but requires very little actual skill.
Creating a smooth color gradient relies on a makeup sponge. Paint your nails with a light lavender base coat and cure it. Take a dense latex free makeup sponge. Paint a stripe of light lavender polish directly onto the sponge.
Paint a stripe of dark plum polish right next to the light lavender. Press the painted sponge onto the nail surface. Bounce the sponge up and down to blur the line between the two colors.
The sponging technique creates a messy cleanup situation. Paint a protective barrier of liquid latex around your cuticles before starting. Peel the liquid latex off after you finish sponging the gradient.
The skin underneath remains clean and polish free. Use a cleanup brush dipped in acetone to remove any remaining tiny specks of polish.
Sponged polish looks textured and bumpy at first. Do not worry about the rough surface. A thick layer of glossy top coat melts the textured polish together. The top coat smooths out the bumps and improves the blended gradient effect dramatically.
Pro Tip. Dampen the makeup sponge slightly with water before applying the polish to prevent the sponge from absorbing too much product.
Save this idea to your Pinterest.

Popular Asked Questions
What is the best overall nail shape for short nails?
The short oval shape ranks as the best overall choice for small hands. Imagine the gentle curve of an egg. This soft curve mirrors the natural shape of your cuticle base.
The matching curves make your fingers look longer and more elegant. Round shapes work well but oval styles provide a refined and grown up appearance. The short oval structure gives you the perfect mix of beauty and daily comfort.
Which nail shape is most durable for short nails?
Short oval nails and squoval nails tie for the most durable shapes. Sharp corners snap off fast when you bump your hands into doors or tables. Oval shapes remove all the sharp corners.
The smooth rounded edges glide off surfaces instead of catching and breaking. This makes the short oval nail shape great for people with weak or brittle nails that peel.
Which colors are currently popular for short oval nail designs?
The summer short oval nail trends for 2026 focus on soft earthy tones and sheer finishes. Imagine a milky pink lip gloss shining in the sun. That sheer jelly pink look dominates the current fashion scene.
Deep cherry reds and warm latte browns offer cozy options for the cooler months. Soft matcha green and delicate peach fuzz shades provide beautiful alternatives to classic neutral beige.
How do I maintain short oval nails at home?
Maintaining your easy DIY short oval nail designs takes just five minutes a day. Rub a drop of jojoba oil into your cuticles every single night before sleep. The oil keeps your natural nail plate bending instead of snapping.
Keep a soft glass nail file in your purse. File the edges once a week to keep the perfect oval curve smooth. Always wear thick rubber gloves when washing dishes to protect your polish from hot water damage.
The Future of Short Oval Nails
The short oval nail trend proves that practical beauty never goes out of style. Clean aesthetic manicures replace massive and unmanageable acrylics in 2026. The soft oval shape protects delicate hands and provides a chic canvas for sheer colors and minimalist art. You save time at the salon and enjoy comfortable hands all day long.
Which of these gorgeous short oval designs will you try for your next manicure appointment? Tell us your favorite color combination in the comments below.
Follow us on Pinterest for more short oval nail ideas inspiration.

Leave a Comment