
The Holiday Manicure You Need Right Now
Christmas nails often feel complicated or expensive. You see intricate designs on social media and assume you need a professional artist. That is rarely the truth. Most high impact looks rely on simple tricks like negative space or a single glitter accent. You want a festive look that lasts from your office party through New Year’s Day.
This guide solves the problem of choosing a design. We curated specific styles for every skill level and aesthetic. You will find options for short nails, long acrylics, and budget friendly DIY solutions. These designs focus on durability and visual impact. You do not need hours of free time to achieve them. A great manicure completes your holiday outfit and boosts your confidence instantly.
Check out our related guide on Winter Skincare Routines to keep your hands soft for these photos.
Key Takeaways
- Minimalism Dominates
Simple lines and negative space designs are trending because they grow out gracefully without visible gaps.- Texture Adds Depth
Sweater knits and sugared glitter effects transform basic colors into professional looking art.- Dark Tones Return
Black and deep brown offer a sophisticated alternative to traditional bright red and green palettes.- DIY is Accessible
Tools like dotting pens and striping tape make complex geometric patterns easy for beginners to execute at home.
Table of Contents
- Enchanting Minimalist Christmas Nails
- Frosty White Christmas Nails
- Joyful Red and White Nails
- Cozy Brown Christmas Nails
- Cheerful Red and Green Nails
- Merry and Cute Christmas Nails
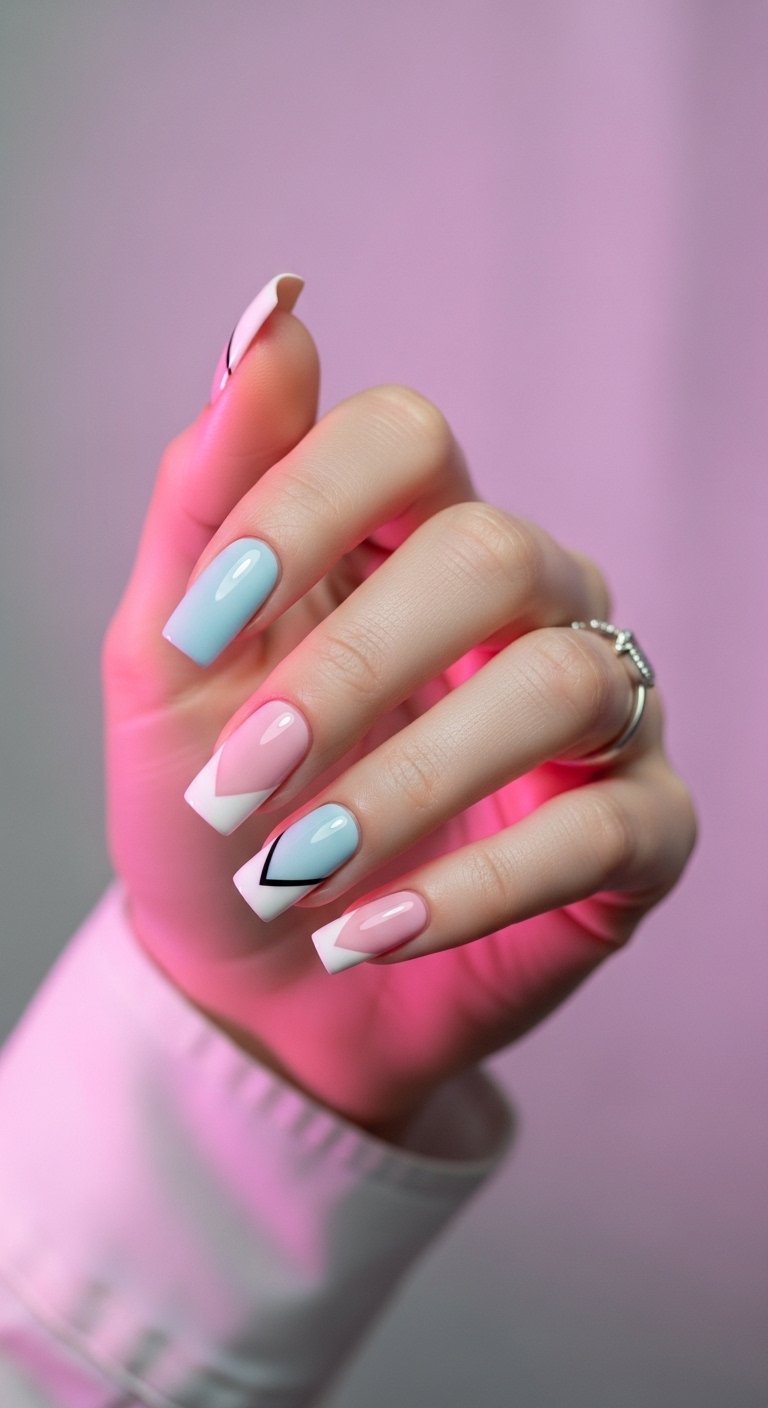
- Whimsical Blue Christmas Nails
- Elegant and Stylish Christmas Nails
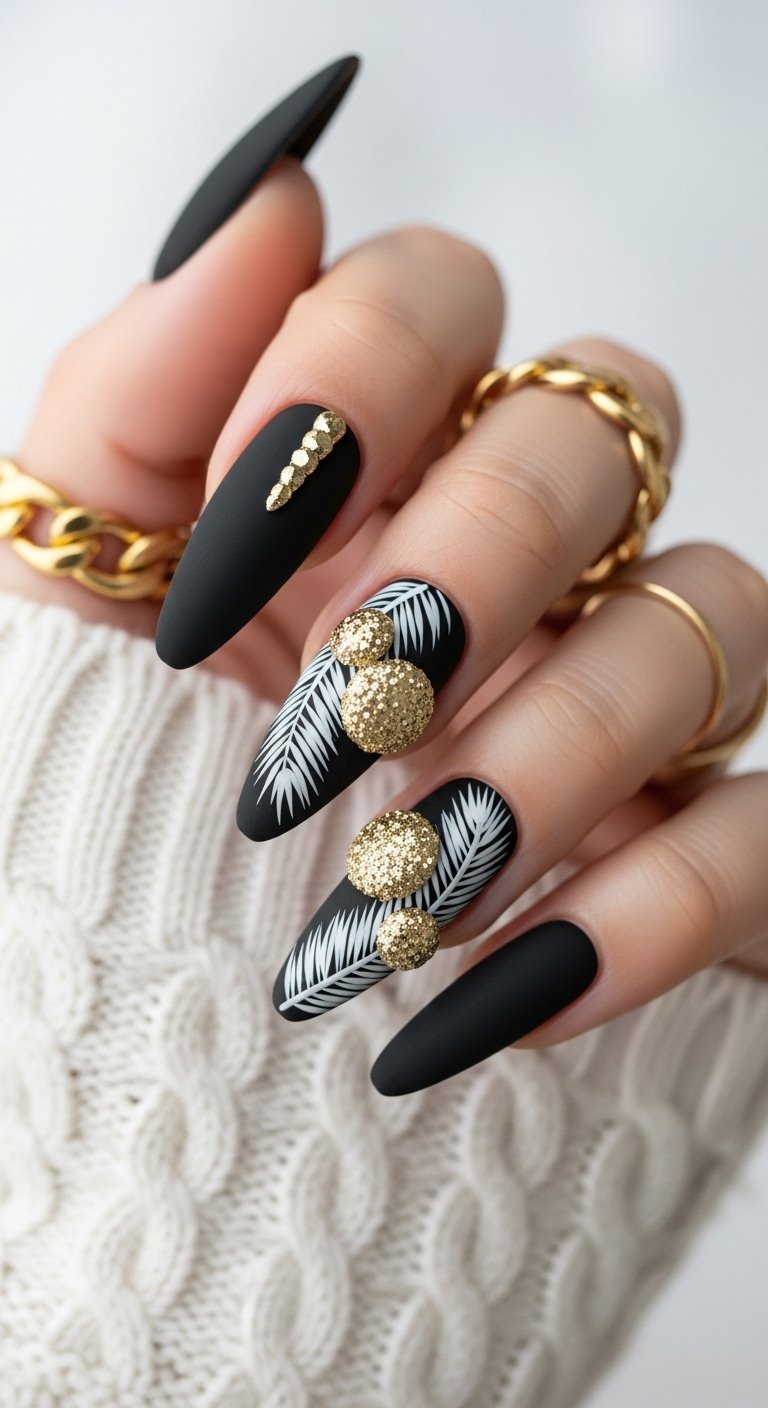
- Magical Black Christmas Nails
- Popular Asked Questions
- Conclusion
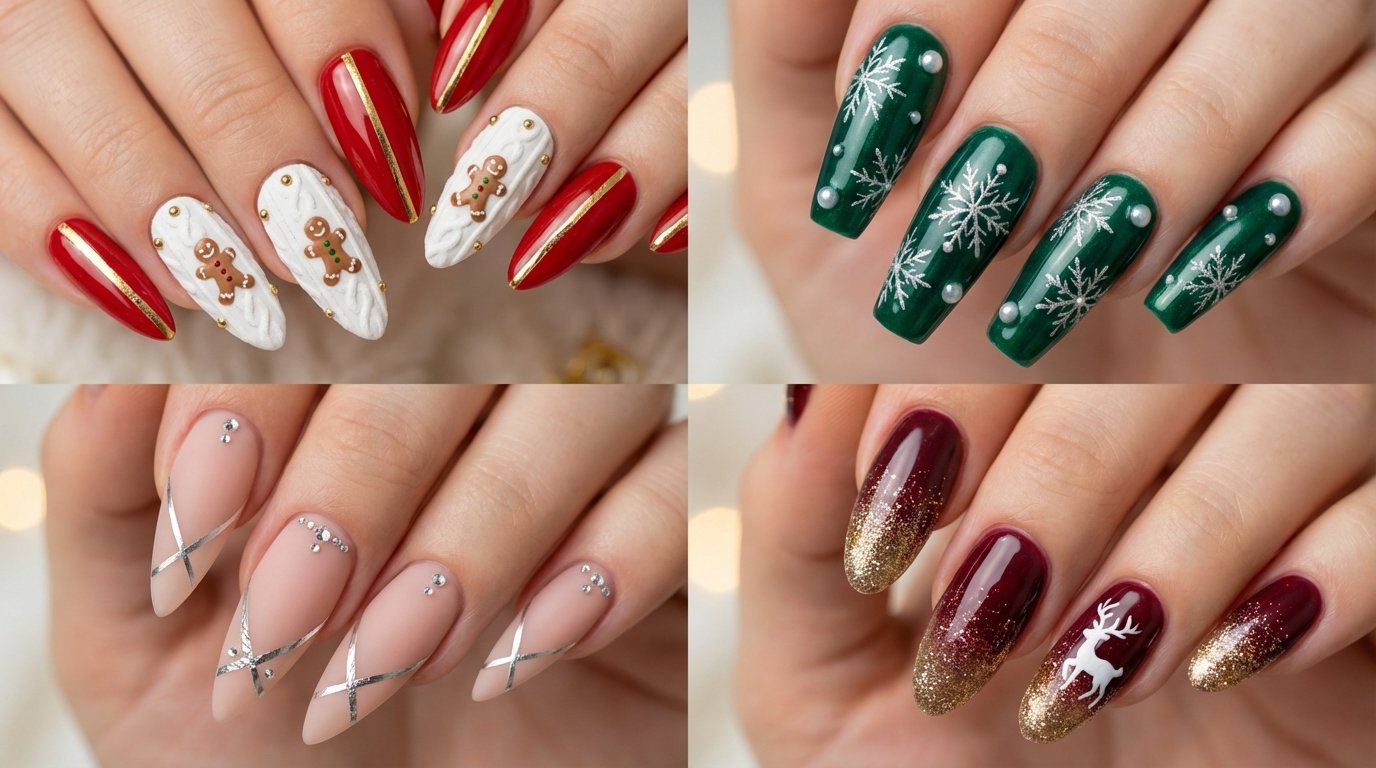
Enchanting Minimalist Christmas Nails
Micro Red French Tips
The micro French tip redefines subtlety for the holiday season. You replace the traditional thick white strip with a razor thin line of cherry red. This design works exceptionally well on short or squoval nails because it elongates the nail bed visually. The clear base allows your natural nail health to shine through while the pop of color signals holiday cheer.
You can achieve this look with a fine liner brush and a steady hand. Dip the brush into your red polish and drag it swiftly across the free edge. Clean up any mistakes immediately with a brush dipped in acetone. The high gloss top coat seals the edge to prevent chipping. This style suits professional environments where loud nail art might feel out of place. It transitions seamlessly from day wear to evening events.
Pro Tip: Use a sheer pink base coat instead of clear to hide any discoloration on your natural nail plate.
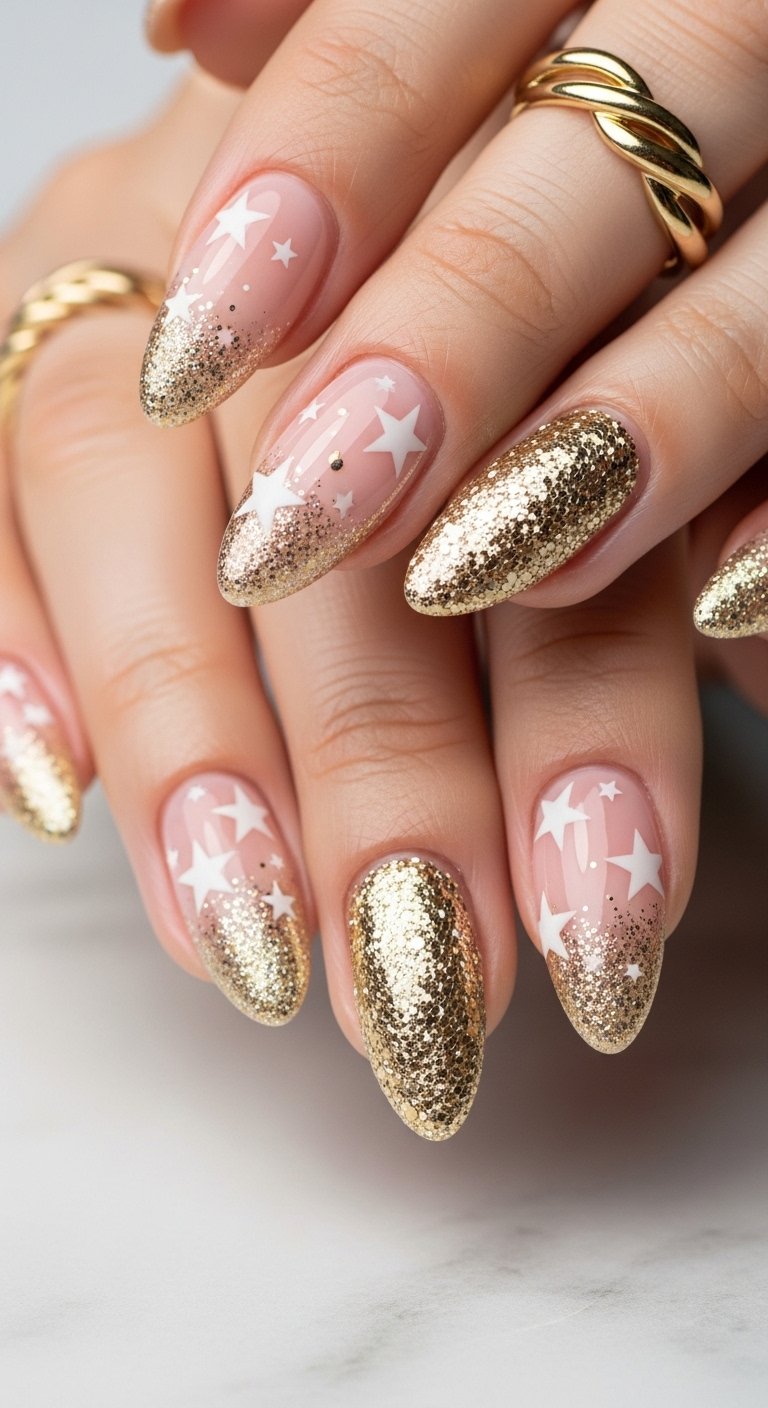
Negative Space Gold Stars
Negative space designs utilize the unpolished nail as a canvas. This specific look features tiny gold stars painted directly onto a nude or clear base. The metallic gold catches the light beautifully against the skin tone. It creates a celestial vibe that fits both Christmas and New Year celebrations. The lack of a full color coat means chips are less noticeable.
Placement is key here. You should stagger the stars randomly rather than aligning them in rows. This creates a whimsical and organic feel. You can use star shaped sequins if painting them feels too difficult. Press the sequins into wet polish and cover with two thick layers of top coat. The result is a flat and smooth surface that does not snag on sweaters. This design represents the “clean girl” aesthetic adapted for the holidays.
Pro Tip: Apply a matte top coat for a modern twist that makes the gold stars pop even more.
Single Dot Holly
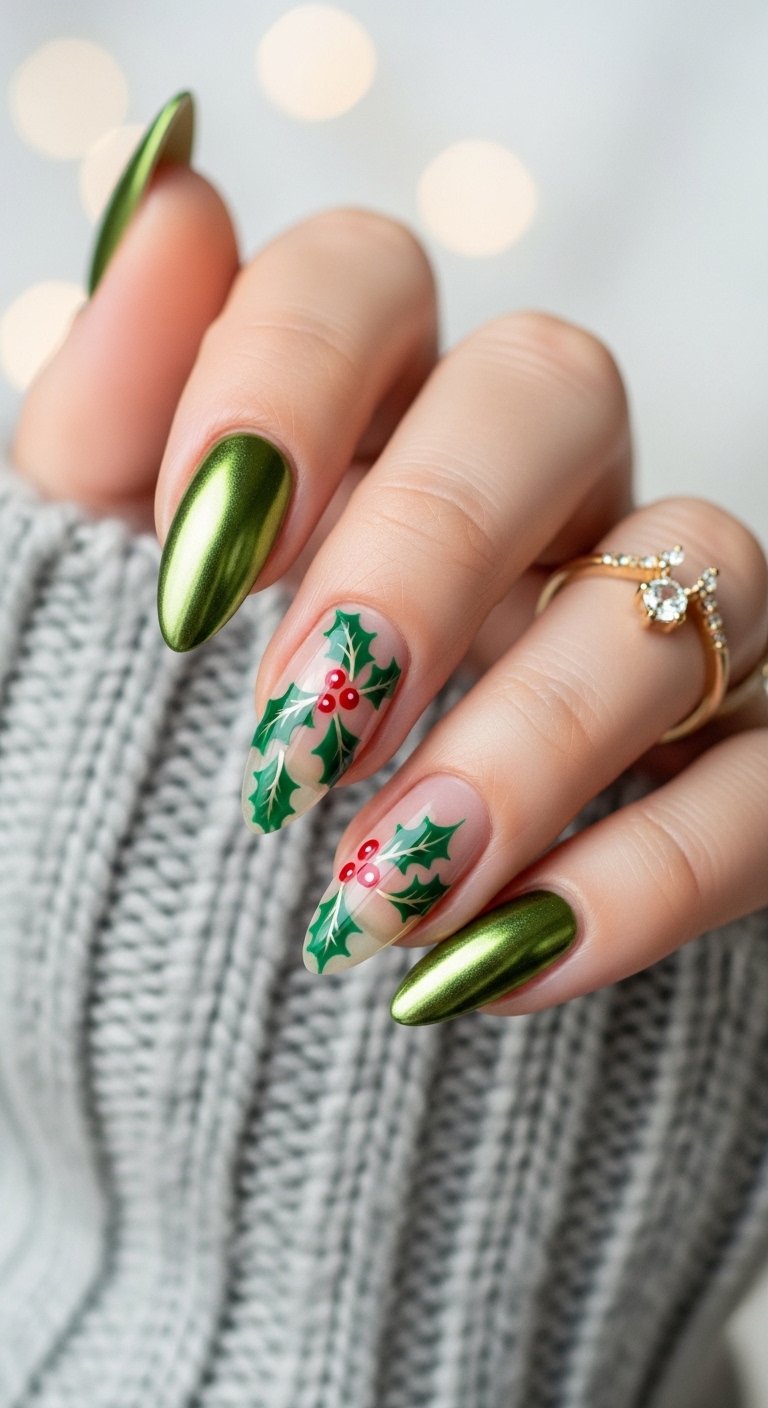
Holly leaves usually require intricate detailing. This version simplifies the motif into three dots. You place two green dots near the cuticle or corner and one red dot sitting atop them. It mimics the shape of holly berries without the need for drawing jagged leaves. This approach fits the minimalist trend perfectly by implying the shape rather than defining it.
You need a dotting tool or even the end of a bobby pin for this. Dip the tool into green polish for the leaves and red for the berry. The circular shapes provide a soft and friendly look compared to sharp geometric lines. Minimalist art like this saves you time and polish. It dries much faster than full coverage manicures. You get a festive accent that does not scream for attention but rewards a closer look.
Save this idea to your Pinterest.
Thin Gold Striping
A single vertical or horizontal line of gold tape transforms a bare nail. This design focuses on geometry and structure. You apply a nude base coat and let it dry completely. You then place a piece of self adhesive gold striping tape down the center of the nail. The metal finish of the tape contrasts with the softness of the nude polish.
This look elongates the fingers powerfully. It creates a vertical axis that draws the eye upward. The simplicity speaks to high end fashion and modern interior design principles. You must trim the tape slightly short of the nail edge. This prevents the tape from lifting when you wash your hands. A generous layer of top coat encapsulates the tape to keep it secure.
Pro Tip: Use tweezers to place the tape precisely without touching the sticky back with your fingers.
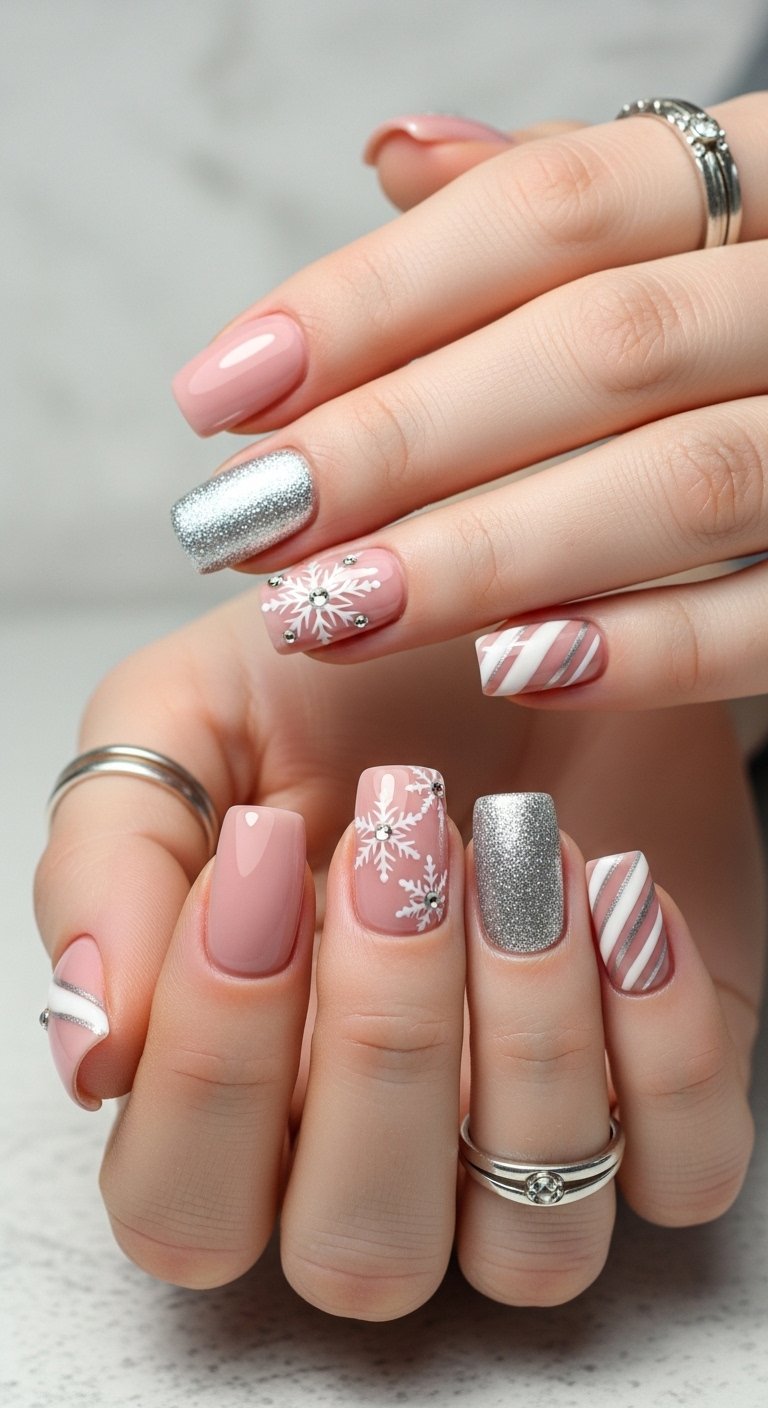
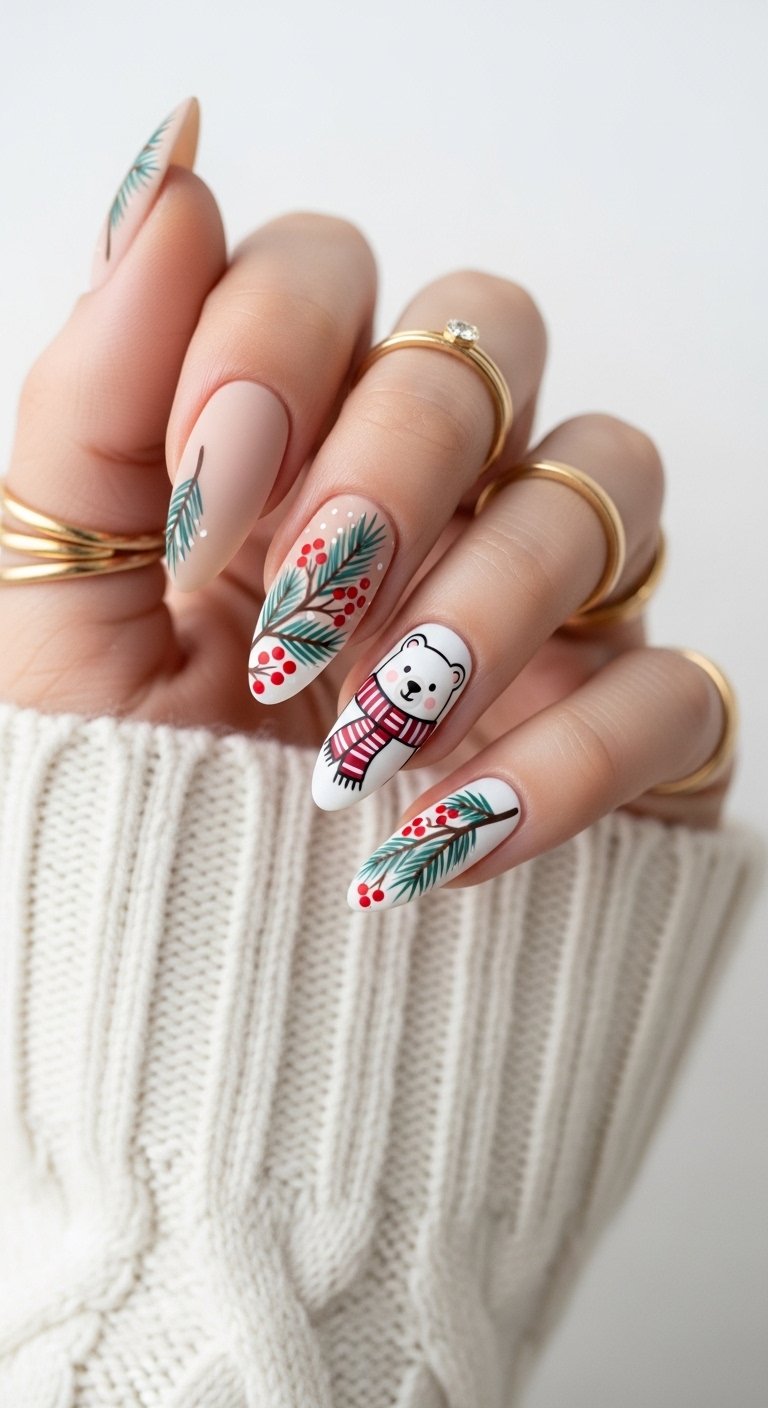
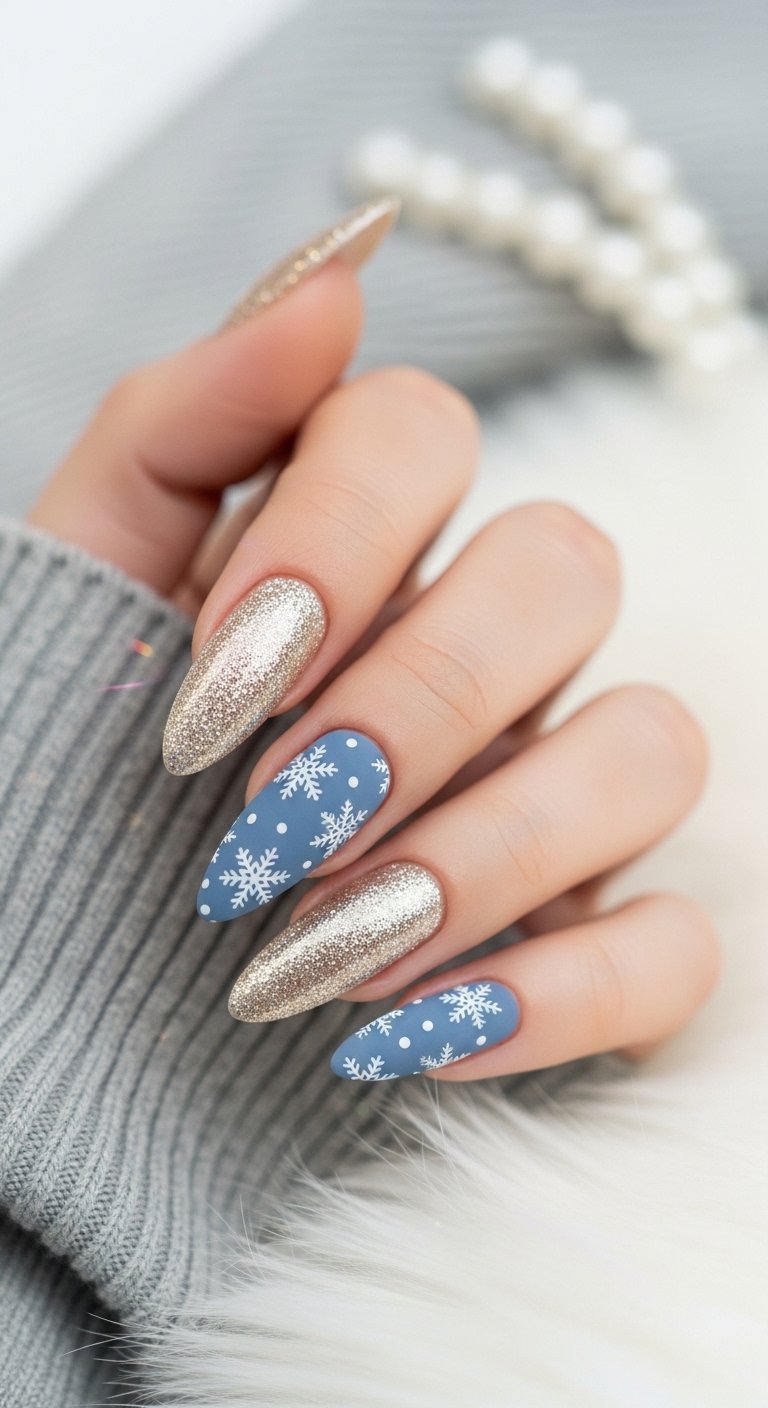
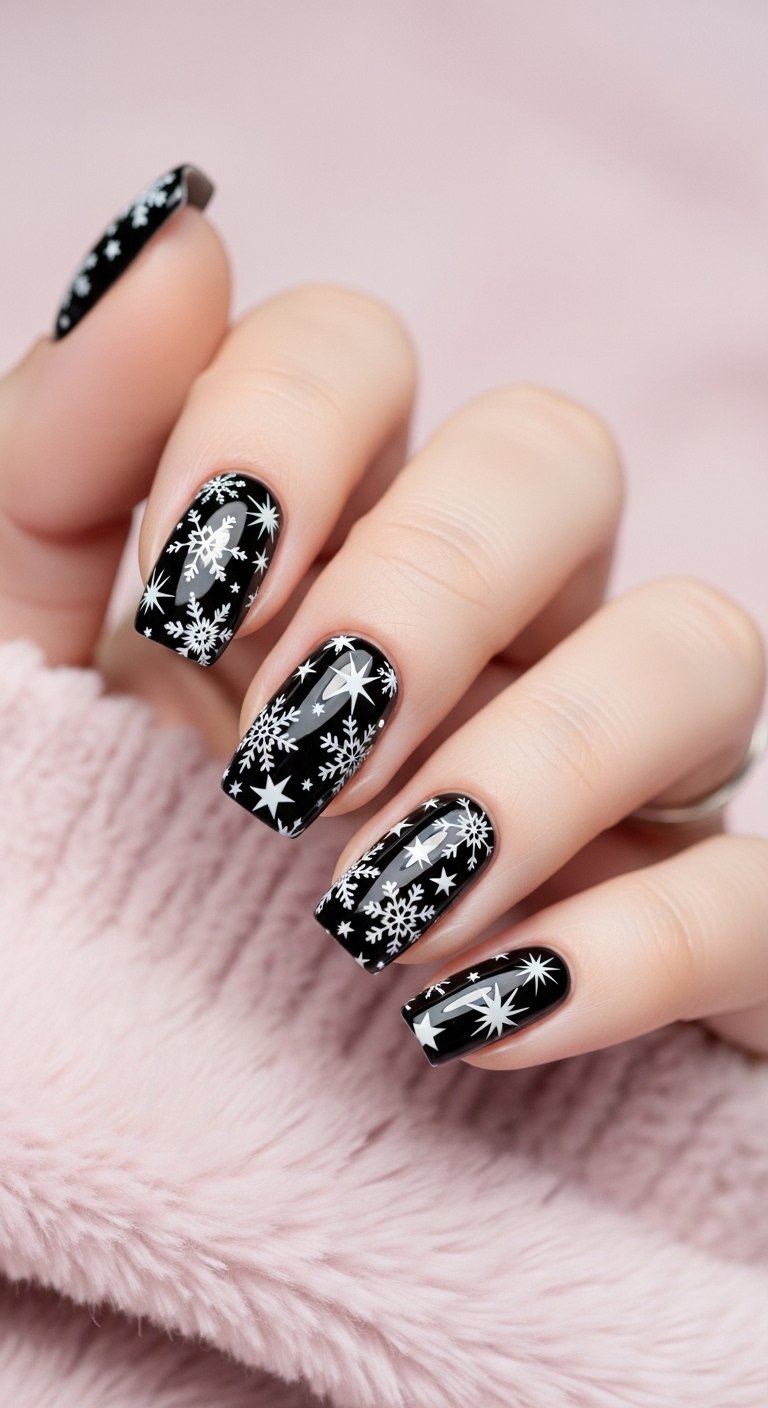
Nude Snowflake Accent
White snowflakes on a beige background offer a whisper of winter. You paint four nails in a solid glossy nude. On the ring finger you paint a delicate white snowflake. The low contrast between white and beige creates a soft and dreamy effect. It reminds one of snow falling on a sandy beach or a cozy cashmere sweater.
The snowflake does not need to be perfect. You start with a simple cross and add smaller “V” shapes to the arms. The imperfect nature of hand painted art adds charm. This design works for people who prefer neutral wardrobes. It does not clash with colorful holiday outfits. The subtle approach makes your hands look polished and expensive without trying too hard.
Frosty White Christmas Nails
Pearl Finish White
Pearl finishes bring a sophisticated luster to plain white nails. This is different from a standard crème white polish. The formula contains micro shimmer that reflects pink or silver tones. It mimics the inside of an oyster shell or a string of pearls. The finish softens the harshness that pure white sometimes has against pale skin tones.
You need to apply this in thin even layers to avoid streaks. Pearl formulas are notorious for showing brush strokes. Keep your brush parallel to the nail and use long fluid strokes. This style captures the essence of a snowy morning. It feels bridal yet perfectly seasonal. The light reflection gives the nails a three dimensional quality that looks wet even when dry.
Pro Tip: Roll the polish bottle between your hands instead of shaking it to prevent bubbles in the pearl formula.
Milky White Glazed

The “glazed donut” trend adapts perfectly for Christmas. This look involves a semi sheer milky white base topped with chrome powder. The result is a translucent ethereal glow. It looks like ice or frosted glass. This style gained massive popularity for its ability to make nails look healthy and hydrated.
You achieve this by mixing clear polish with a drop of white. After curing or drying you rub a white chrome powder over the surface. The friction creates the mirror like shine. This is less opaque than the pearl finish. It allows the natural white free edge of your nail to show through slightly. It fits the “icy” winter theme without being literal snow art.
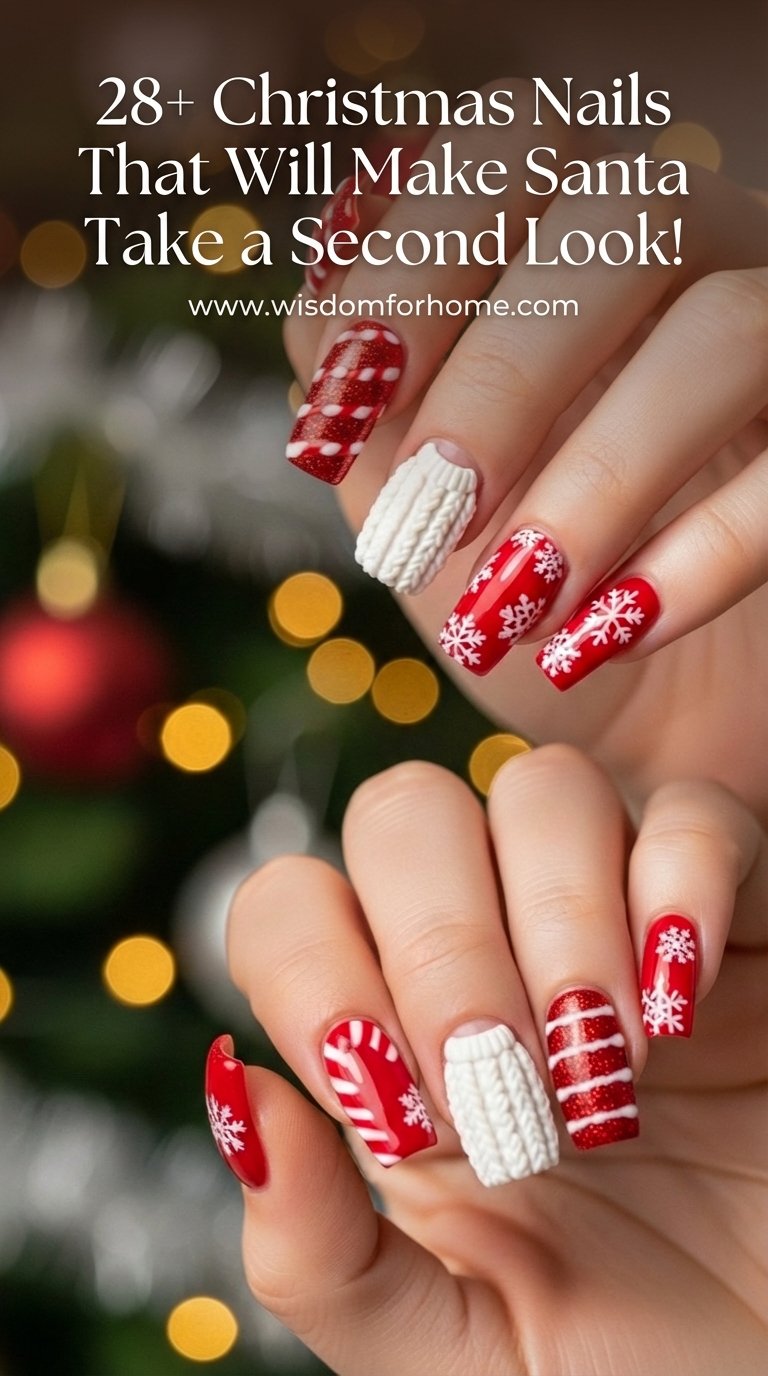
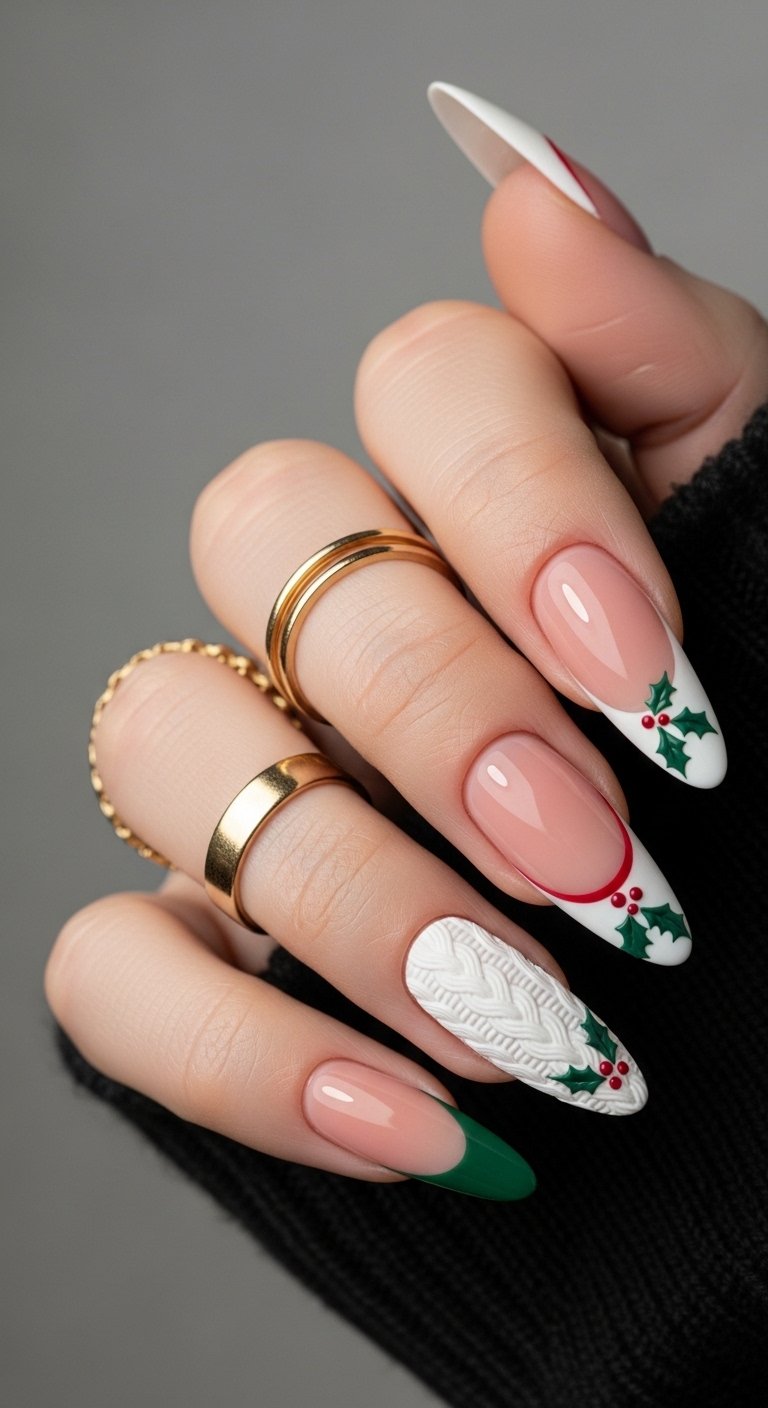
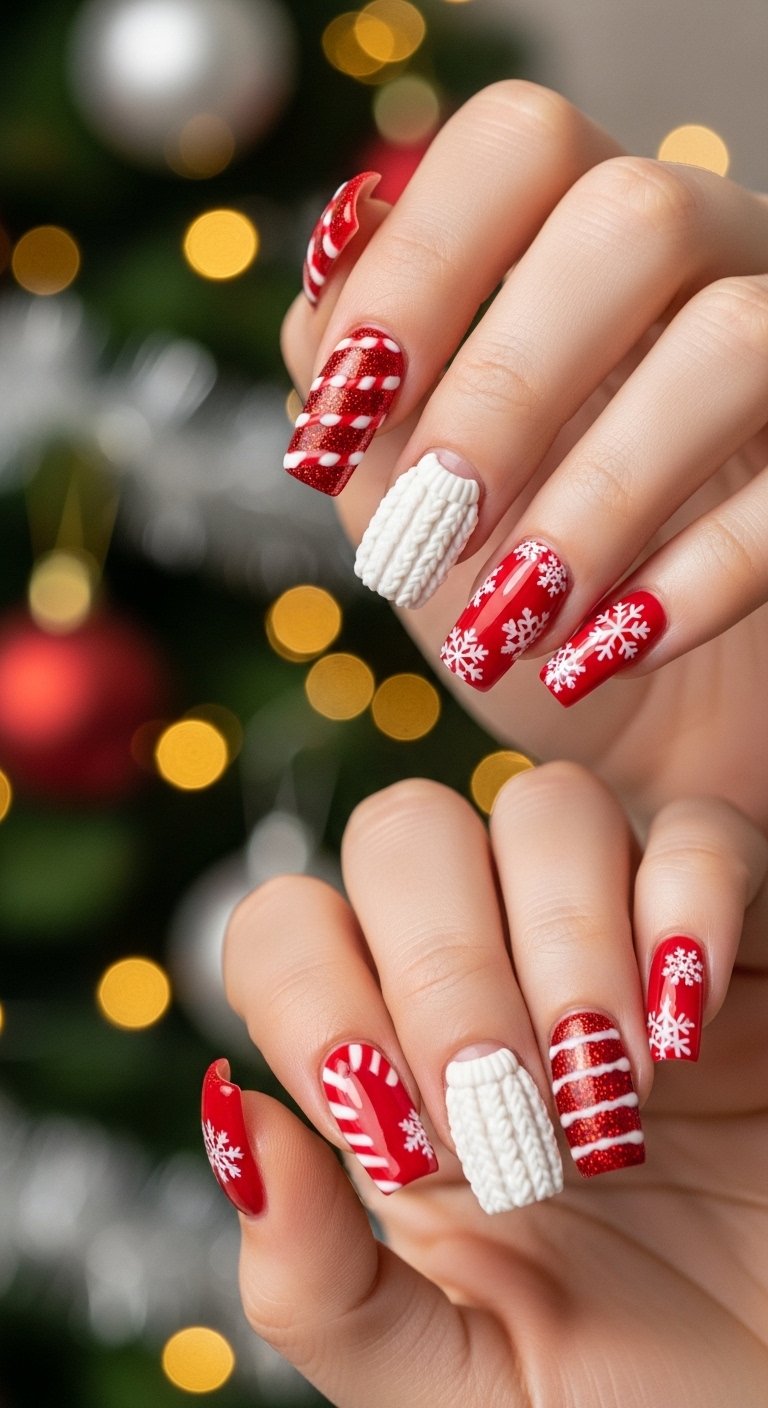
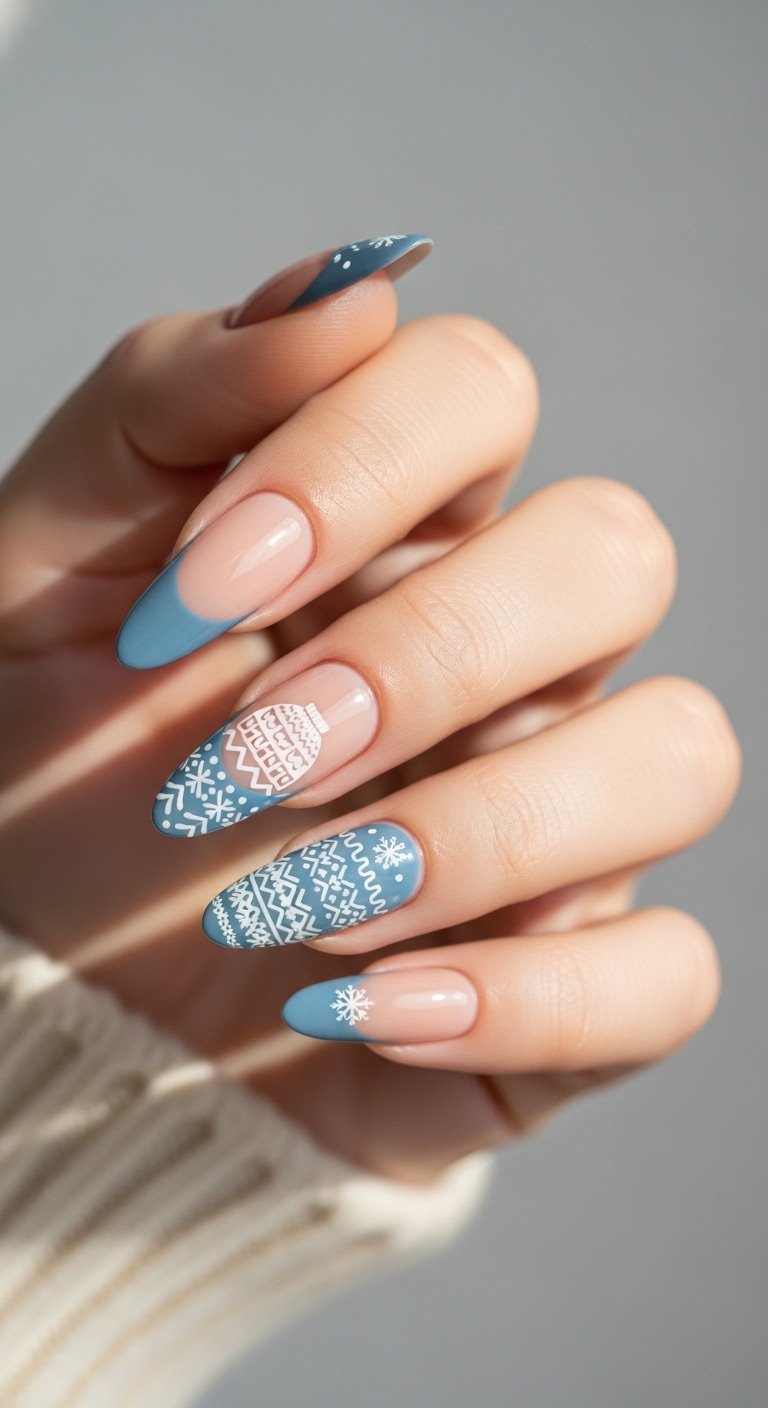
Textured Sweater Knit
Sweater nails use 3D texture to mimic the cable knit pattern of a wool jumper. You usually do this with gel polish and acrylic powder. You paint the base white and cure it. Then you use a fine brush to draw the cable pattern with wet gel. You sprinkle clear acrylic powder over the wet design before curing. This creates a matte sugary texture that you can feel.
The tactile element makes this design unique. It adds coziness to the stark white color. The shadows created by the raised ridges define the pattern. You do not need a top coat over the textured parts. The matte finish enhances the fabric like appearance. It pairs beautifully with actual knitwear for cozy winter photos.
Save this idea to your Pinterest.
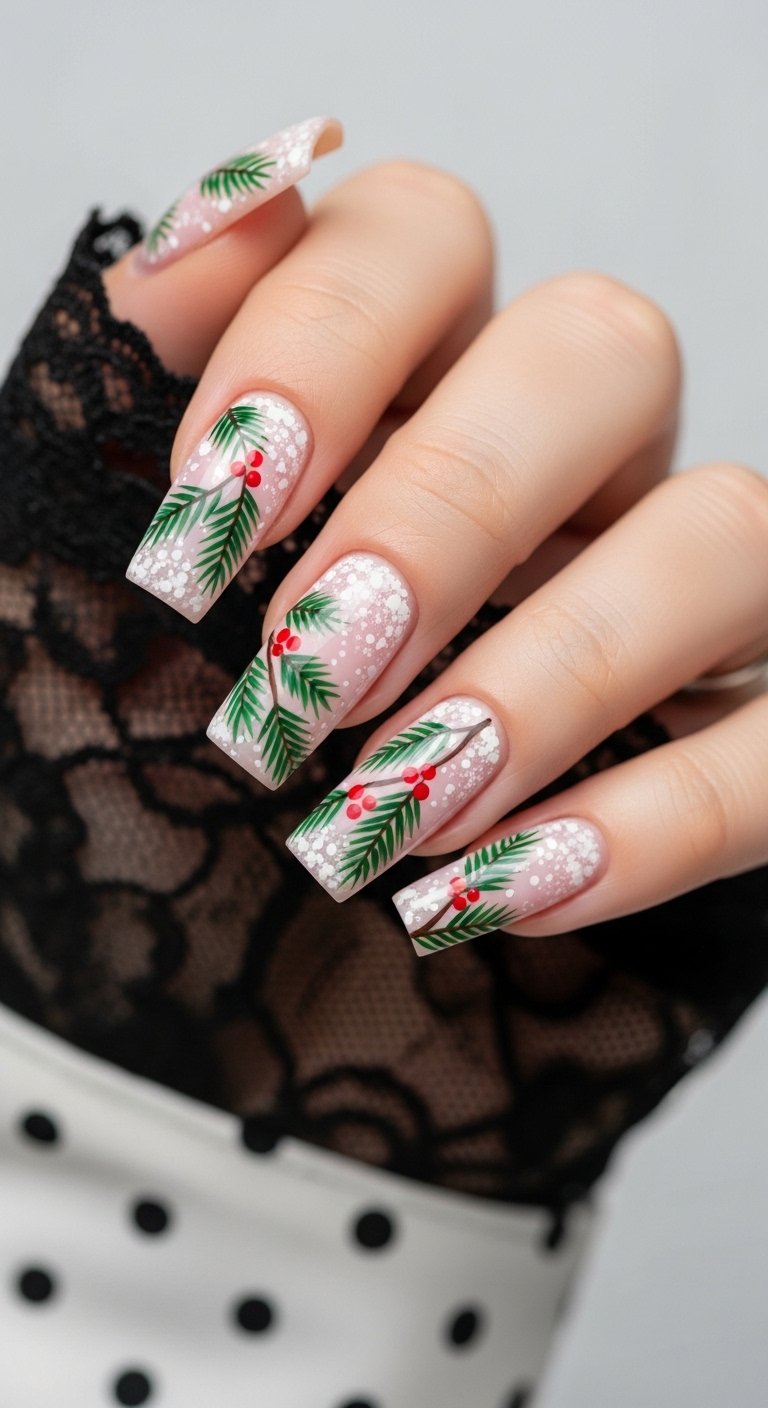
White Glitter Ombre
A glitter fade mimics a blizzard. You start with a sheer nude base. You sponge white glitter onto the tips and fade it down toward the cuticle. Or you can do the reverse by fading from the cuticle up. The gradient effect prevents a harsh line of demarcation. It looks soft and magical.
The varying sizes of glitter particles create depth. Chunky hexagonal glitter mixed with fine dust looks best. This reflects light in multiple directions. It gives the appearance of falling snow accumulating on your fingertips. This design is very forgiving for beginners. The sponge technique hides imperfections in application.
Pro Tip: Use a makeup sponge to dab the glitter on for a seamless transition rather than brushing it.
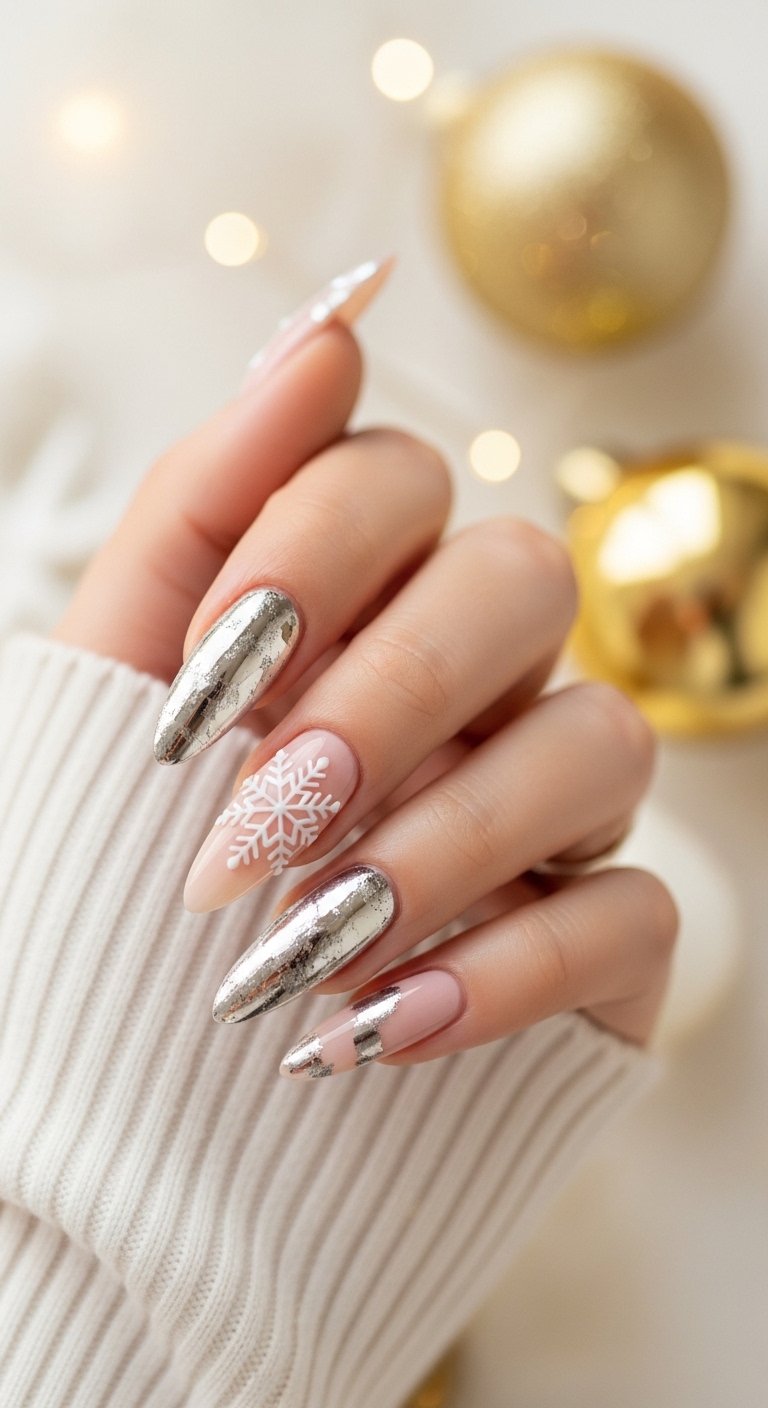
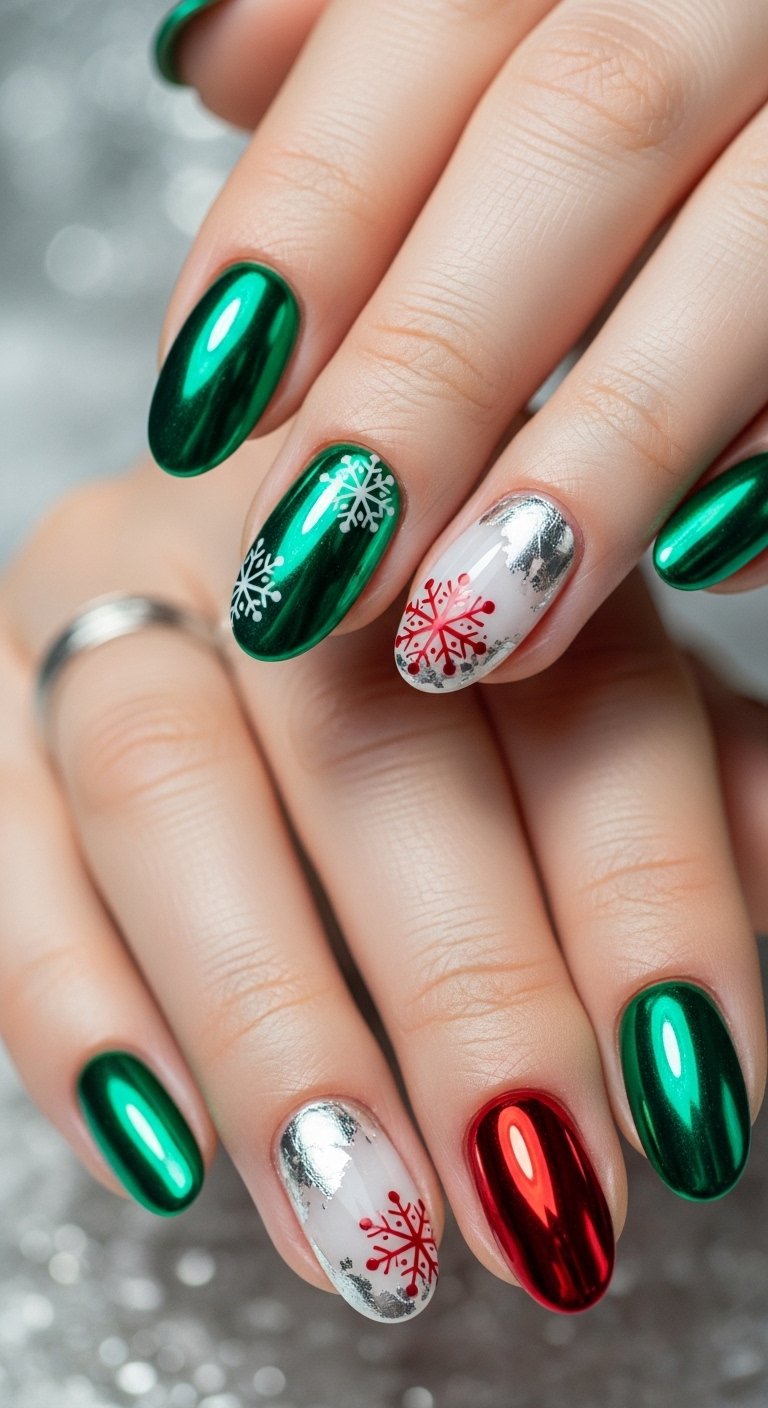
Marble White and Silver
White marble nails resemble expensive stone counter tops or snowy landscapes. You swirl grey or silver polish into a wet white base. The veins should be wispy and random. You can use a water marble technique or simply use a detail brush to drag the colors together. Silver foil accents added to the wet polish elevate the look.
This design feels cold and elegant. It uses the principle of organic movement to break up the solid color. The silver adds a festive sparkle that catches the light. No two nails will look exactly alike. This uniqueness is part of the appeal. It turns every nail into a miniature abstract painting.
Joyful Red and White Nails
Candy Cane Stripes
Nothing says Christmas quite like candy cane stripes. Diagonal lines of red and white wrap around the nail. You can vary the thickness of the stripes to add visual interest. A mix of thick and thin lines looks more dynamic than uniform spacing. This design is high energy and instantly recognizable.
Using striping tape is the best way to get crisp lines. Paint the nail white first. Apply the tape firmly. Paint red over the top and remove the tape while the polish is still wet. This reveals the perfect white lines underneath. The sharp contrast between the two colors vibrates visually. It is a playful and nostalgic look that brings out the inner child.
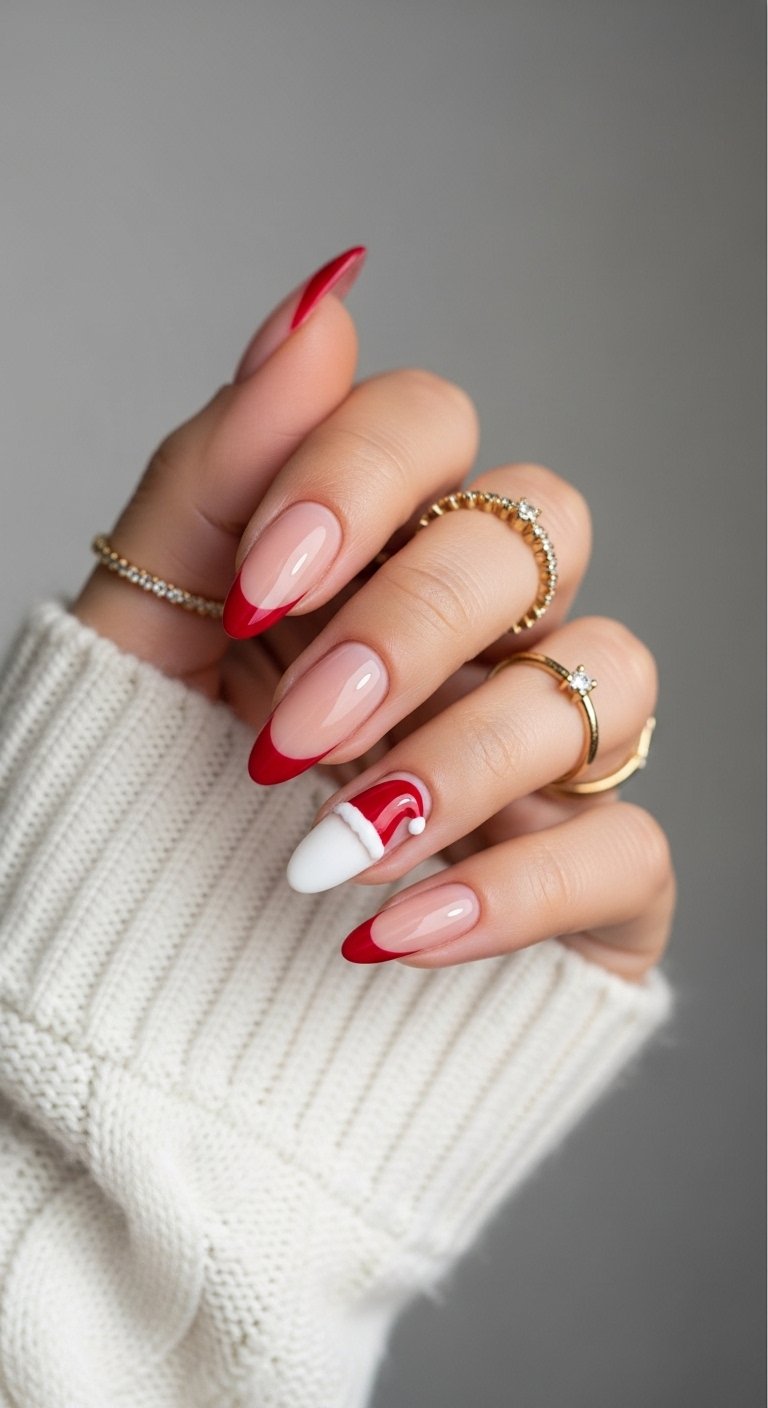
Santa Hat Tips

This is a whimsical take on the French manicure. You paint the tip of the nail red. You add a line of white fuzz at the smile line and a white pom pom on one side of the tip. It transforms the French tip into a tiny Santa hat. This works best on almond or stiletto shapes where the curve mimics the hat’s flop.
You can use a texturing tool to make the white parts look fluffy. Dabbing the white polish creates a cloud like effect. The rest of the nail remains nude or pink. This design uses negative space to keep the look light. It is a character design that remains sophisticated enough for adults.
Pro Tip: Use a dotting tool to create the fluffy texture of the hat’s trim and pom pom.
Peppermint Swirls
Peppermint swirls take inspiration from round starlight mint candies. You start with a white center and spiral red lines outward. This is a hypnotic design that draws the eye into the center of the nail. It is more complex than simple stripes. It implies motion and energy.
You need a steady hand for the curves. Painting the spiral from the center out is easier than going inward. The red against white offers maximum contrast. This design is often used as an accent nail on the ring finger. It breaks up a solid red manicure with a burst of pattern. It feels sweet and energetic.
Save this idea to your Pinterest.
Red French with White Snow
This combines a red French tip with delicate snow art. You paint a classic red tip. Then you add tiny white dots and stars on the nude part of the nail and the tip itself. It looks like snow falling over a red landscape. The red tip grounds the design while the white details add lightness.
The overlay of white on red creates a dimensional look. Some dots can be opaque while others are sheer to mimic distance. This is a romantic and feminine style. It marries the boldness of red with the softness of winter snow. It works beautifully on square or coffin shaped nails.
Polka Dot Mix
Polka dots are retro and fun. You can alternate the colors on each nail. Red base with white dots on one and white base with red dots on the next. The repetition of the circular shape ties the look together. Dots are the easiest nail art to execute.
You can vary the size of the dots for a bubbly effect. Large dots feel mod and graphic. Tiny dots feel like a print or fabric. This style feels joyful and unpretentious. It is perfect for casual holiday parties. The alternating colors keep the eye moving across the hand.
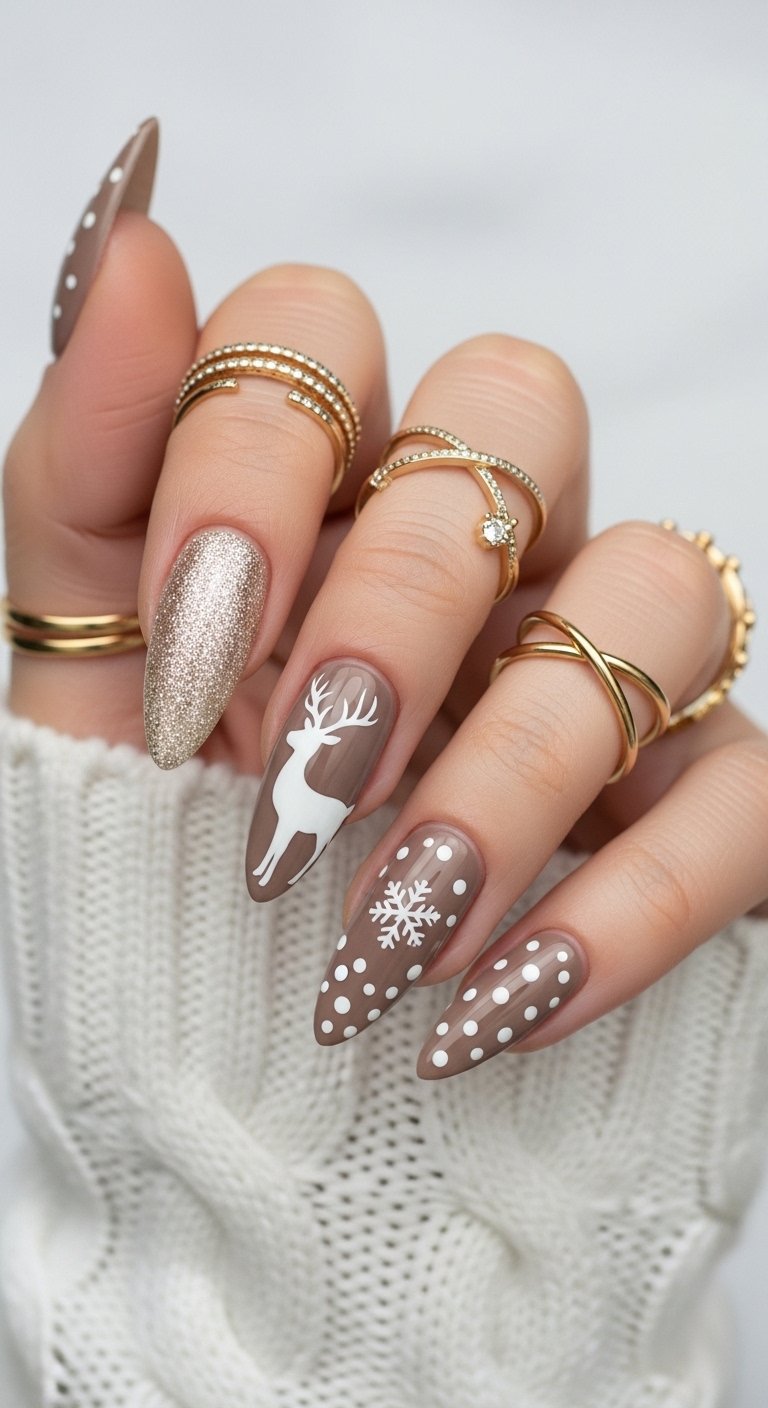
Cozy Brown Christmas Nails
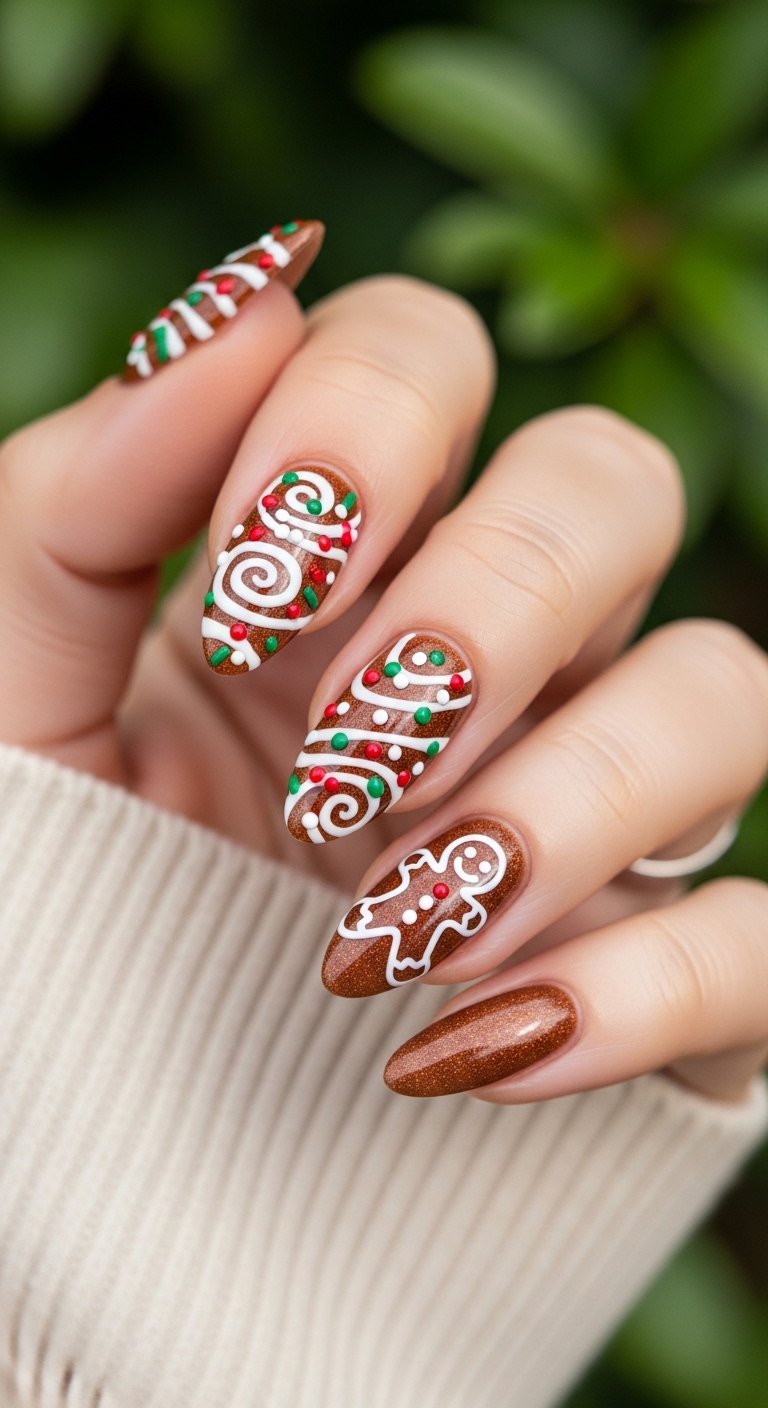
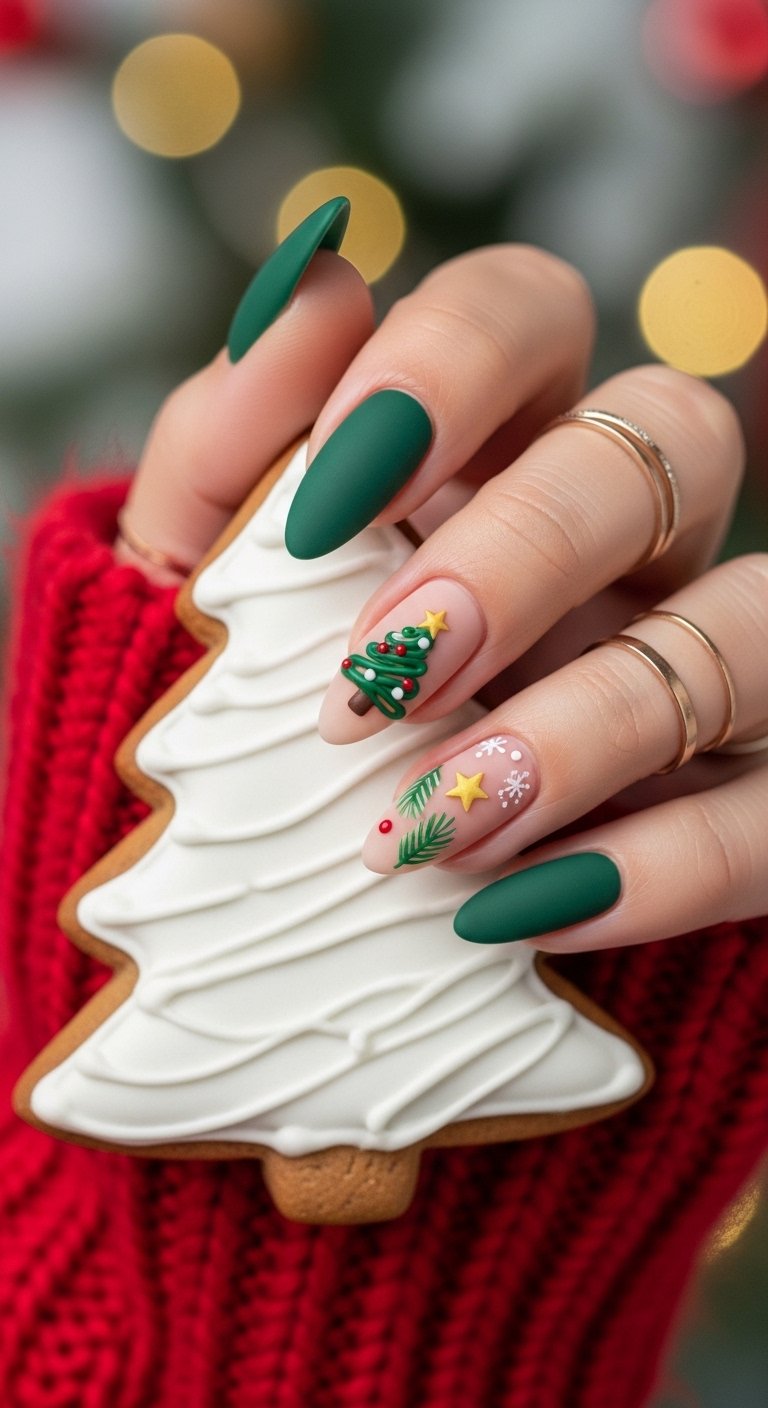
Gingerbread Man Accent
Brown nails provide the perfect canvas for gingerbread art. You paint the nails a warm cookie brown. On one nail you draw a tiny gingerbread face or body. You use white for the icing details and red/green for buttons. The warm brown tone is neutral yet festive.
The gingerbread motif is cute without being loud. The brown color matches many winter outfits. It feels earthy and grounded. You can use a matte top coat to mimic the texture of a baked cookie. This design evokes the scent of spices and the warmth of the kitchen.
Pro Tip: Mix a little yellow into your brown polish to get that golden baked cookie color.
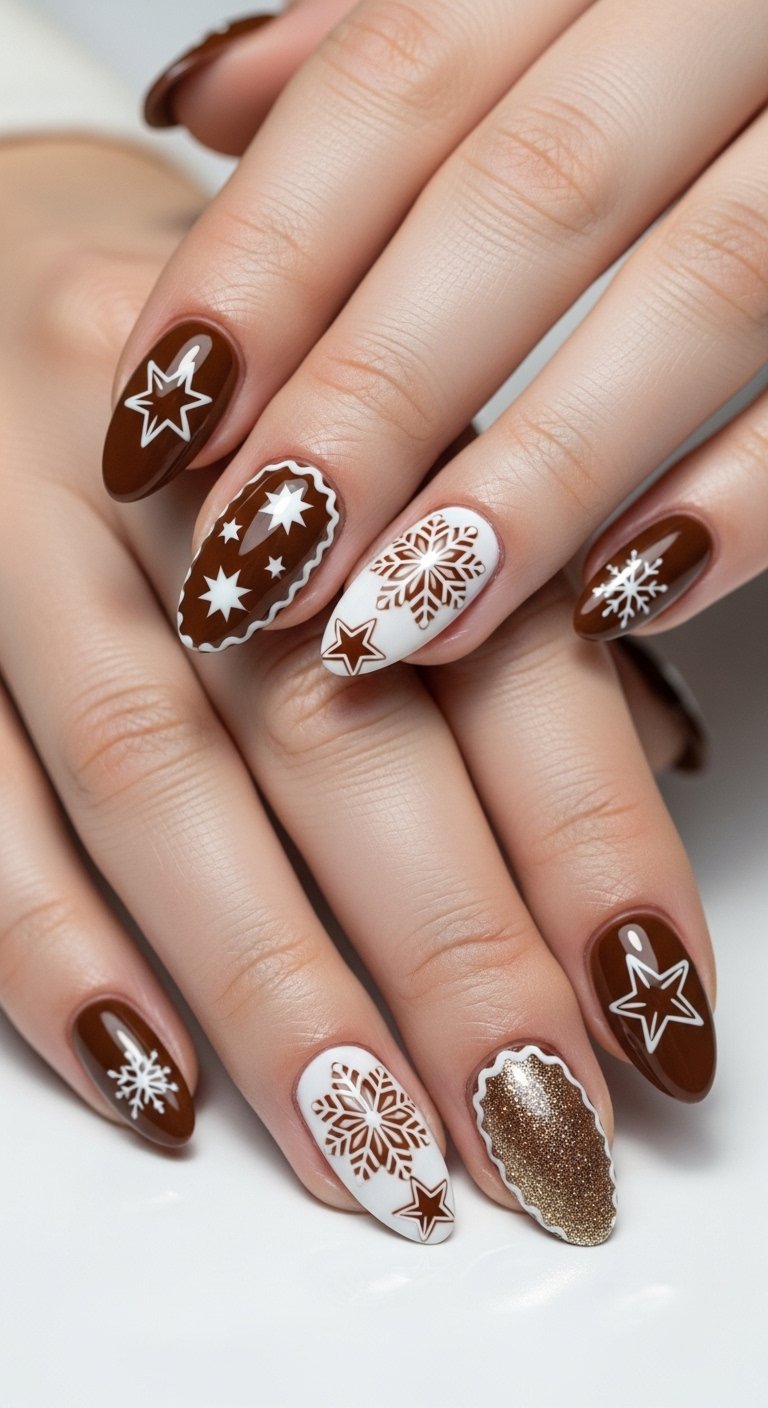
Reindeer Silhouette

A dark brown silhouette of a reindeer against a lighter brown or nude background looks artistic. You do not need to draw the whole deer. Just the antlers peeking out from the side or the cuticle adds mystery. This relies on positive and negative space.
The silhouette technique is elegant. It avoids the cartoonish look of full face character art. You can use a dark chocolate brown for the art. The high contrast ensures the shape is readable. This fits a rustic or cabin themed Christmas aesthetic.
NAILS Glazed
Deep brown polish with a chrome overlay creates a luxe chocolate finish. It looks like melted ganache. This is the dark version of the white glazed donut nail. The chrome powder adds a metallic sheen that highlights the curve of the nail.
This is a rich and expensive looking style. It suits shorter nails very well. The darkness of the color creates a striking contrast with pale winter skin. It reflects the trend of “foodie” beauty aesthetics. It feels indulgent and warm.
Save this idea to your Pinterest.
Matte Mocha
Matte finish changes the personality of brown polish completely. It turns it into suede or velvet. A cool toned mocha brown looks chic and modern with a matte top coat. You can add a single glossy tip for a texture clash.
The matte surface absorbs light rather than reflecting it. This draws attention to the shape of the nail and the depth of the color. It feels cozy and soft to the touch. This is a subtle luxury look. It works well for office environments where glitter is too much.
Plaid Brown
Plaid patterns in shades of brown tan and cream look like a Burberry scarf. You paint a grid of intersecting lines. The mix of opaque and sheer lines creates the fabric illusion. You can add a thin line of gold glitter to lift the pattern.
This is a preppy and classic design. It requires patience to get the lines straight. The result is a tailored and structured look. It mimics the textiles we wear in winter. It ties your manicure to your wardrobe effectively.

Comparison: Top 3 Nail Systems for Christmas
| Feature | Gel Polish | Traditional Lacquer | Press-On Nails |
|---|---|---|---|
| Durability | High (2-3 weeks) | Low (3-5 days) | Medium (1-2 weeks) |
| Skill Level | Medium | Low | Very Low |
| Cost | High (Lamp required) | Low | Medium |
| Removal | Hard (Soaking) | Easy (Swipe) | Medium (Soak/Pry) |
| Best For | Long vacations | One night parties | Intricate art instantly |
Cheerful Red and Green Nails
Abstract Mismatch

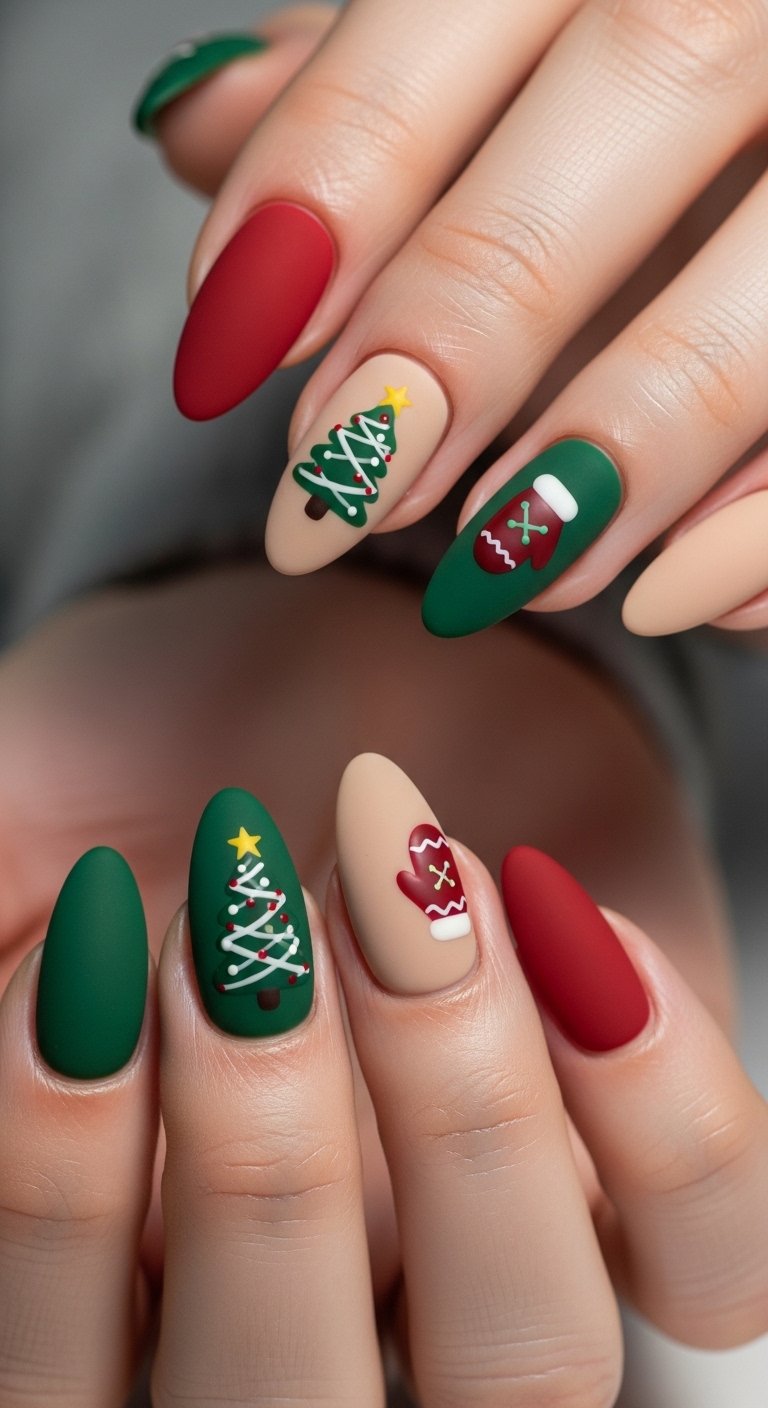
You do not need to choose one design. Mismatch nails feature a different abstract pattern on each finger using the same red and green palette. One nail might have swirls while another has blocks. The consistent color story unifies the chaos.
This style is artistic and expressive. It allows for creativity without strict rules. You can experiment with different shapes and lines. It feels modern and curatorial. It is perfect for the person who cannot decide on just one look.
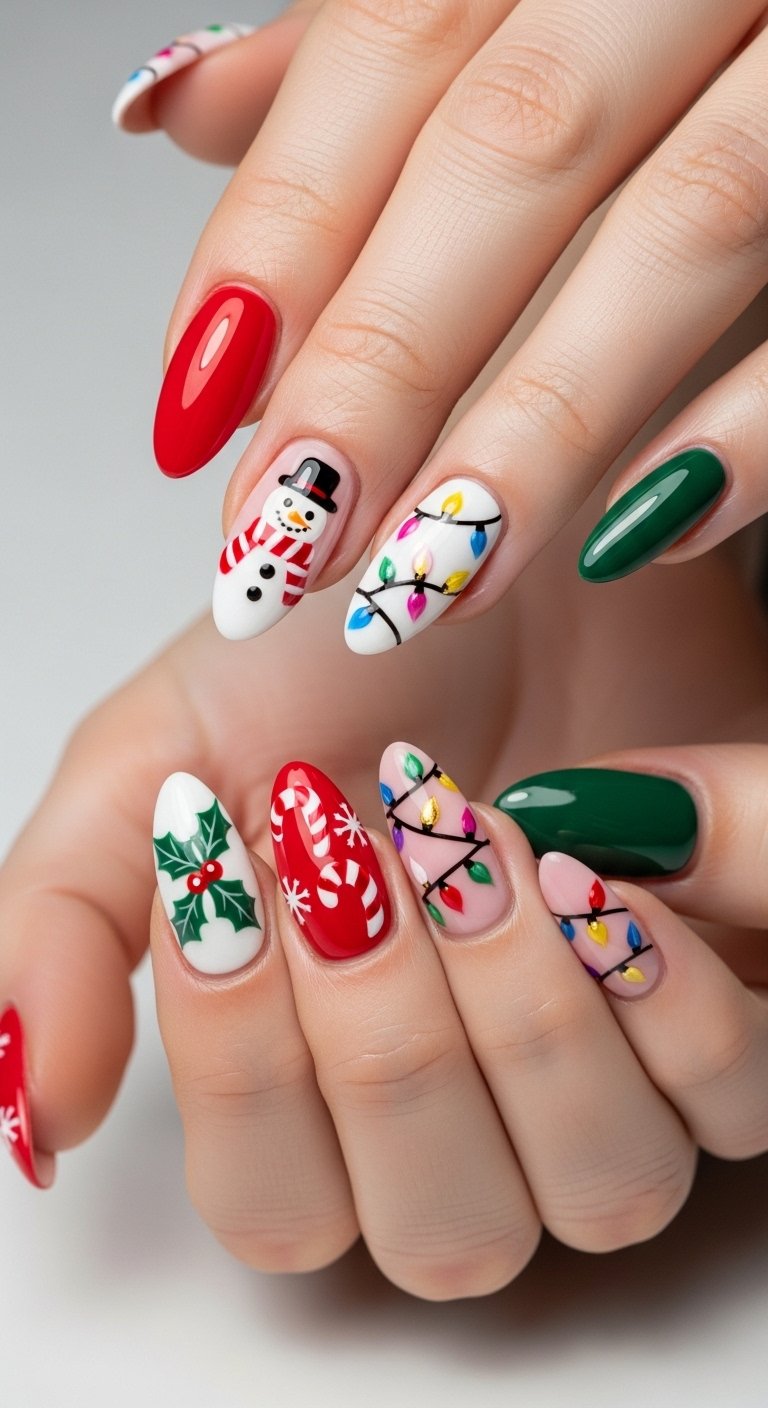
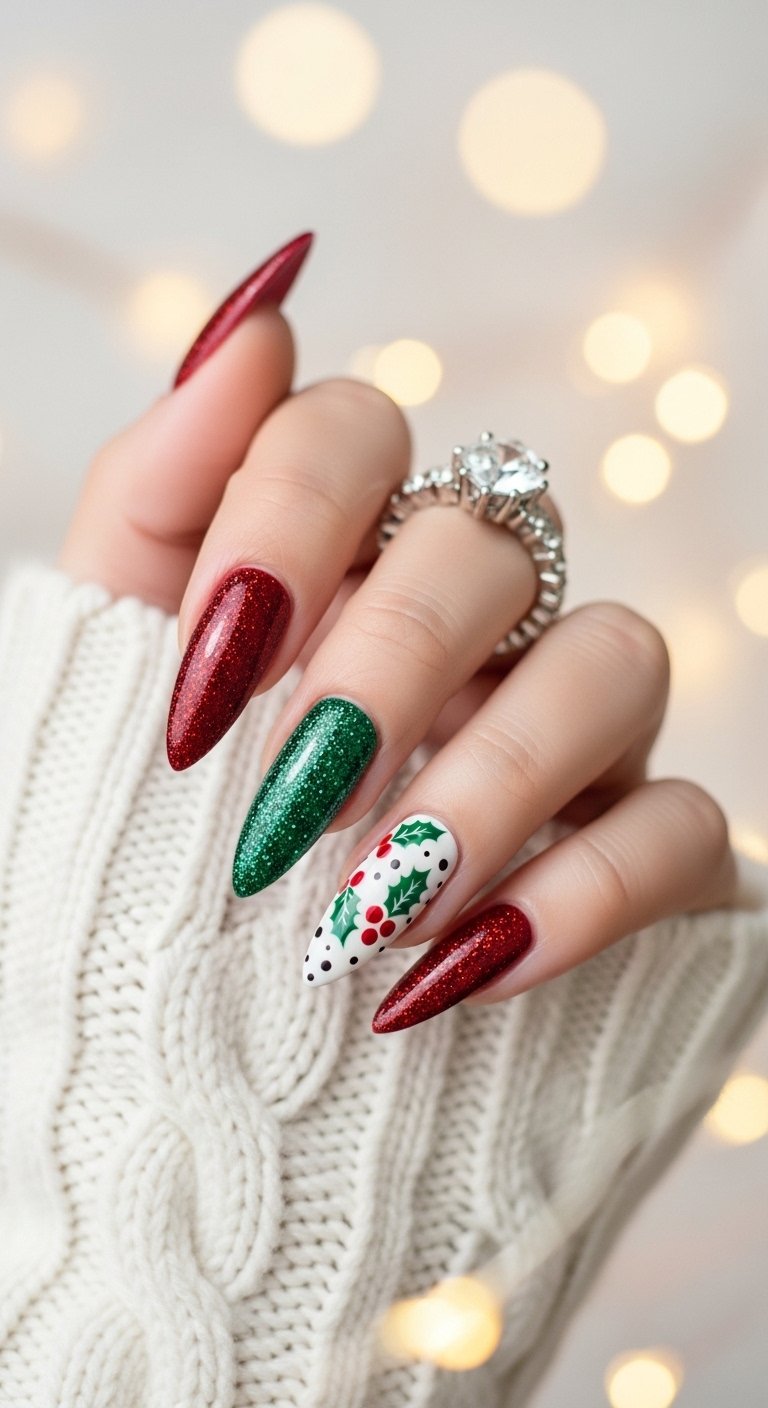
Holly Berry Art
Detailed holly berries painted on a clear or white base scream Christmas. You use two shades of green for the leaves to add depth. The bright red berries pop against the green. You can place them at the cuticle for a “cuff” look.
The botanical accuracy adds a touch of nature. It feels traditional and wholesome. The red and green are complementary colors that intensify each other. This is a timeless design that never goes out of style.
Pro Tip: Use a tiny brush to pull the green polish outward to create the sharp points of the holly leaves.
Plaid Tartan
Red and green tartan is the ultimate holiday fabric. You overlap wide red stripes with thin green and gold lines. The intersection of colors creates new darker shades. This looks like wrapping paper or a kilt.
The complexity of the pattern hides chips well. It is visually dense and rich. The gold accents usually added to tartan reflect the festive lights. This design feels warm and heritage focused.
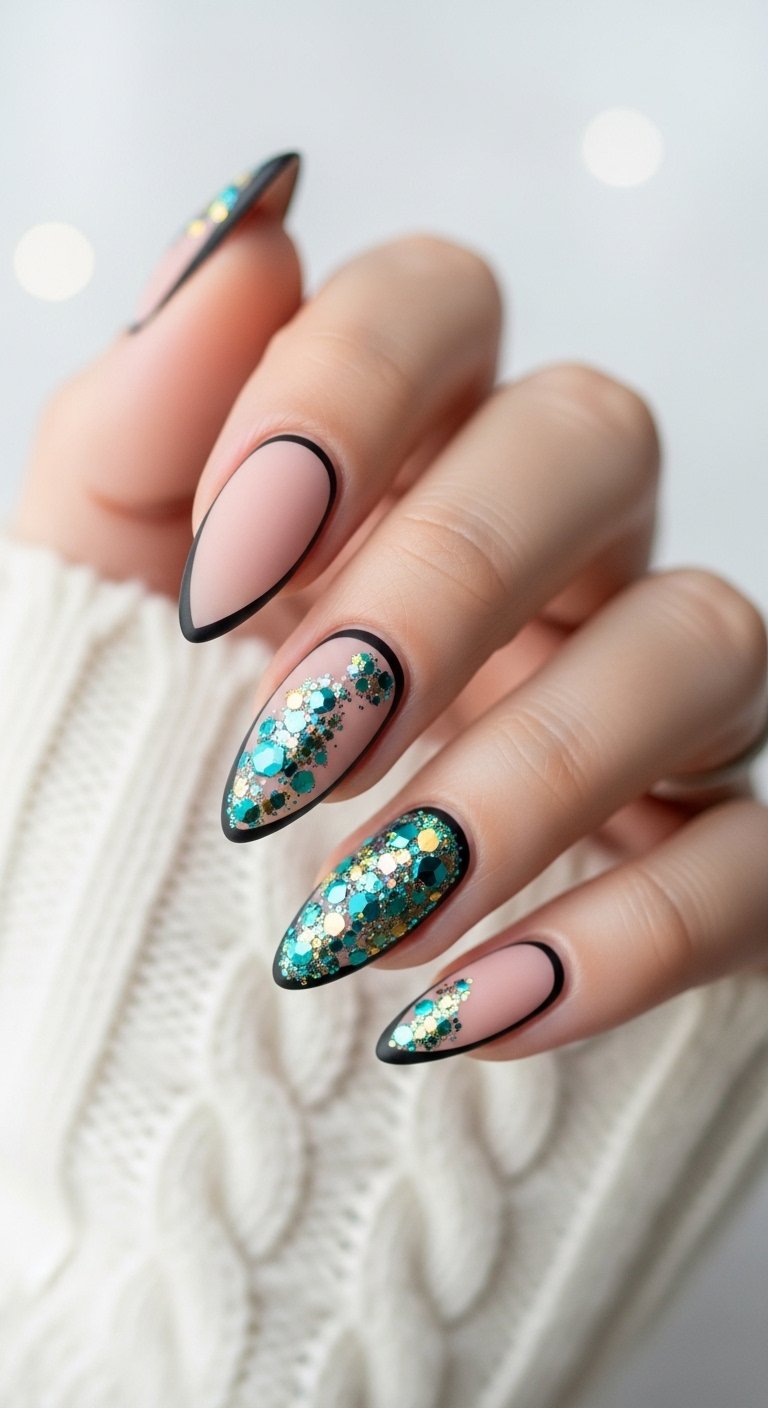
Glitter Block

Color blocking separates the nail into distinct sections. You might paint one half red and the other half green glitter. You separate them with a gold line. This is a geometric and bold approach.
The sharp lines create order. The glitter adds the festive party vibe. This design is architectural. It works well on square nails where the geometry mimics the nail shape. It is a modern take on the traditional colors.
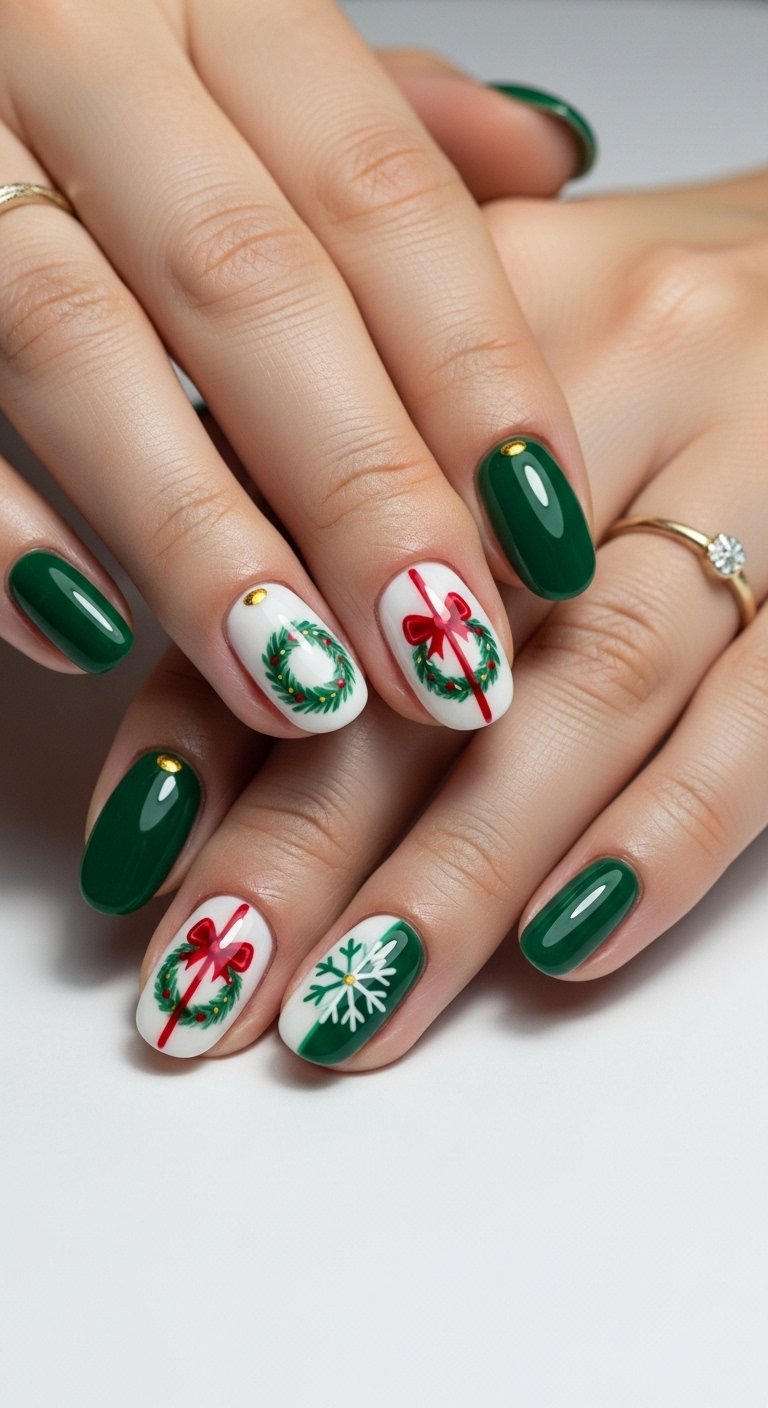
Wreath Tips

Instead of a white French tip you paint a green wreath curve. You add tiny red dots for berries. The wreath creates a semi circle frame for the end of the finger. It is delicate and detailed.
This design emphasizes the length of the nail. The greenery looks fresh and organic. It is a lighter way to wear red and green without painting the whole nail. It feels feminine and dainty.
Related posts :
- Easy DIY Winter Home Decor Ideas
- How to Style Your Home for Christmas on a Budget
- Top 10 Holiday Party Outfits
Popular Asked Questions
What are the Christmas nail trends for this year?
The biggest trends right now are “minimalist micro-art” and “textured finishes.” People are moving away from busy, cluttered designs. Instead, they prefer nude nails with tiny festive accents like a single snowflake or a thin red tip. Also, textured nails like sweater knits or velvet cat-eye polishes are very popular because they add depth without needing crazy colors.
How can I make my Christmas manicure last longer?
Preparation is the most critical step. You must wipe your nails with alcohol or acetone to remove all oils before painting. If you leave oil on the nail, the polish will peel off quickly. Always “cap the free edge” by running your brush along the very tip of your nail. This seals the polish and prevents chipping at the ends where you type or touch things.
Can I do nail art if I don’t have tools?
Yes, you absolutely can. You can find great tools around your house. A bobby pin or a toothpick works perfectly as a dotting tool for berries or snow. A piece of scotch tape can help you paint straight lines for French tips or geometric shapes. You do not need professional brushes to create simple, beautiful designs.
Is red or green more popular for Christmas nails?
Red is historically the most popular color. It is a classic that matches almost everything. However, forest green and emerald green have gained massive popularity recently. They offer a moodier, more sophisticated vibe. If you cannot decide, deep burgundy is a great middle ground that feels festive but elegant.
Conclusion

Christmas nails do not have to be stressful. Whether you choose a minimalist dot or a full glitter explosion, the right manicure brings joy to your daily life during the season. We explored styles ranging from the cozy brown aesthetic to the classic red and green. Remember that the best design is the one that makes you smile when you look at your hands.
Which of these 45+ designs will you try for your holiday party? Let us know in the comments below!
Follow us on Pinterest for more Christmas inspiration.

Leave a Comment