
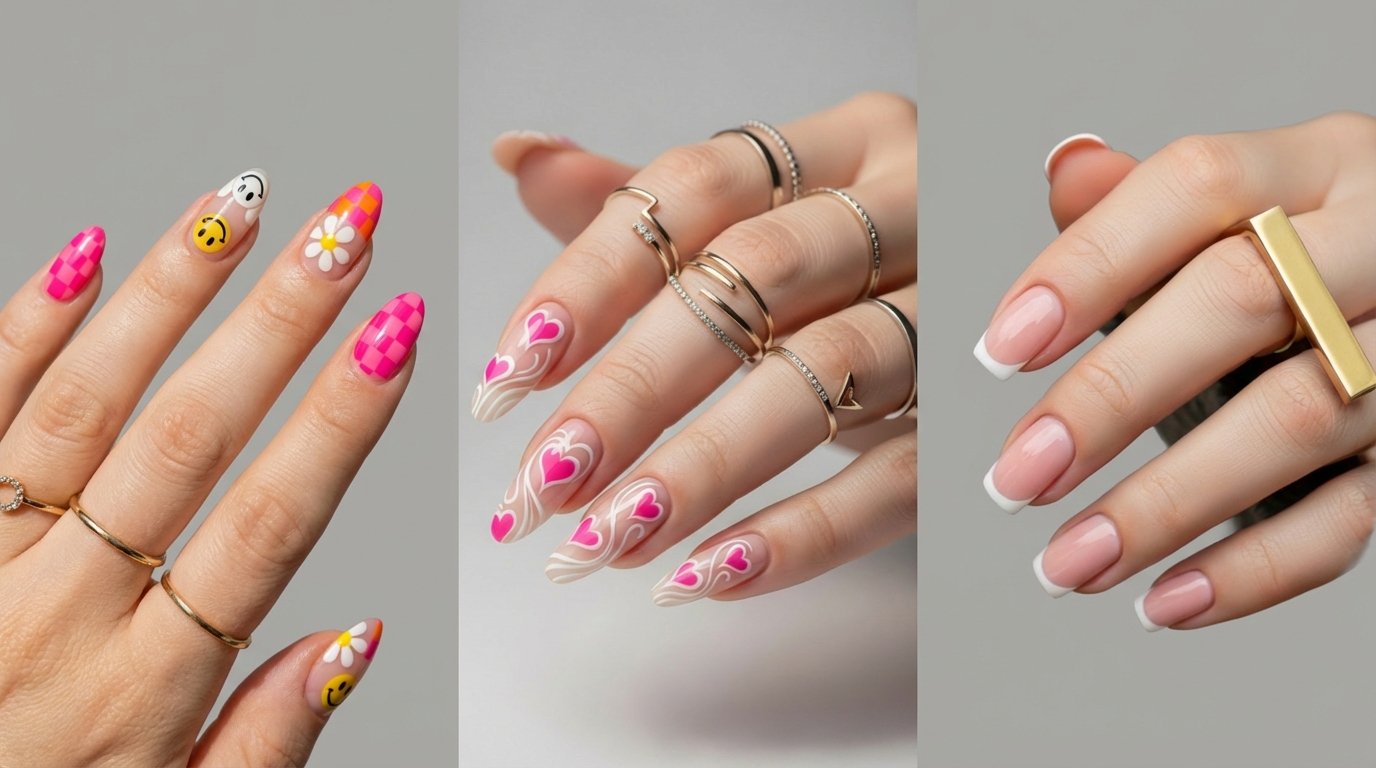
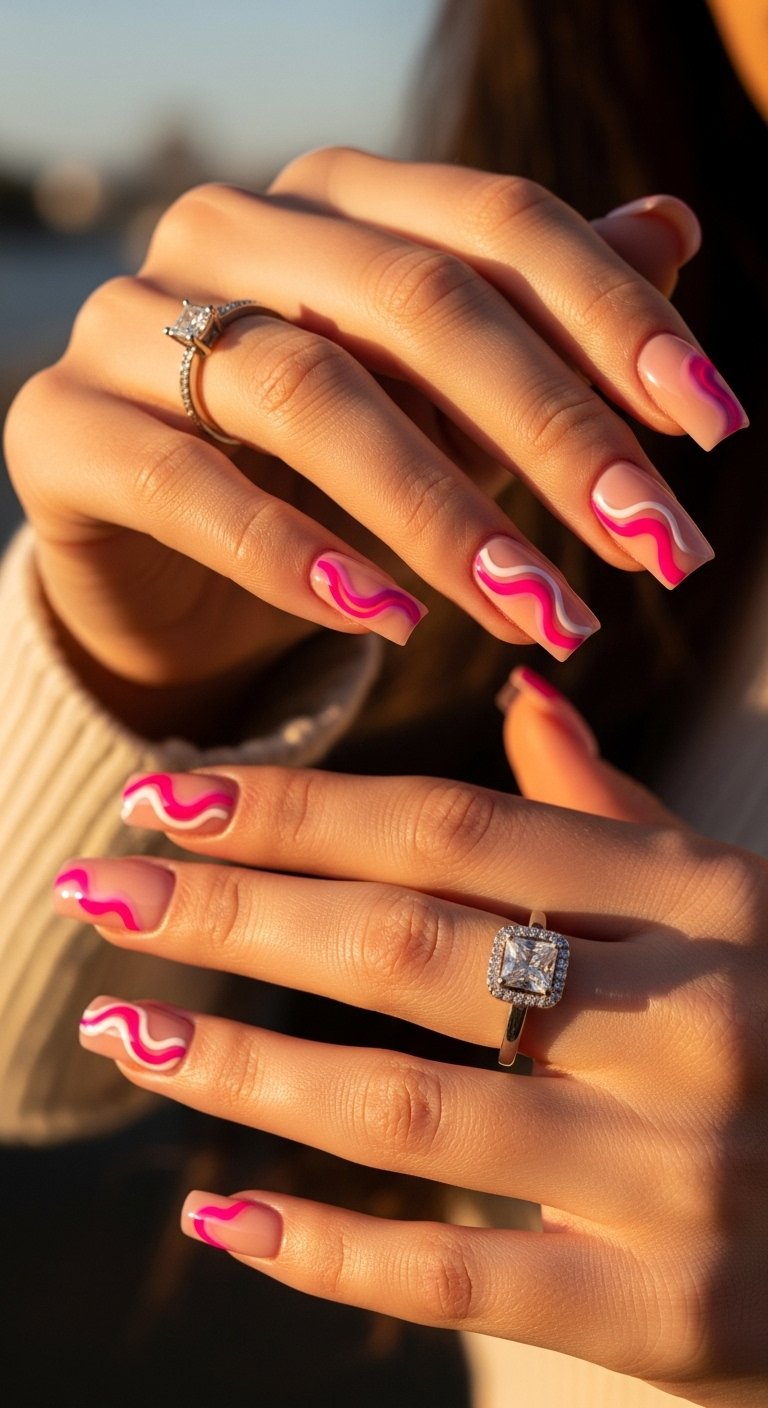
The classic combination of pink and white nails has officially moved beyond the standard French manicure. While that timeless look remains a staple, the current trend cycle favors creative reinventions that blend soft femininity with modern edge. From Y2K-inspired swirls to delicate floral accents, this color palette offers a versatility that few other combinations can match. It works seamlessly for a high-powered boardroom meeting, a casual brunch, or a romantic dinner date.
Many people hesitate to try intricate nail art because they worry it requires professional skills or expensive salon visits. The truth is that many of these stunning looks are achievable at home with the right tools and a bit of patience. This guide breaks down the specific aesthetic principles behind each design and provides actionable steps to recreate them. whether you prefer a subtle “clean girl” aesthetic or bold, artistic statements, you will find a style here that feels like it was made for you.
Check out our related guide on [DIY Manicure Essentials For Beginners].
Key Takeaways
- Versatility is King: Pink and white designs bridge the gap between minimalist office wear and playful weekend styles without needing a polish change.
- Texture Matters: Mixing glossy top coats with matte finishes or glitter accents instantly modernizes simple color blocks.
- Scalability: Most of these designs work equally well on short natural nails and long acrylic coffins, making them accessible to everyone.
- Maintenance: Light base colors like baby pink hide regrowth lines better than dark shades, extending the life of your manicure.
Table of Contents
- y2k-inspired-pink-orange-and-white-nail-designs
- squiggly-pink-and-white-french-tips
- hot-pink-glitter-tiger-print-nails
- baby-pink-nails-with-subtle-french-tip
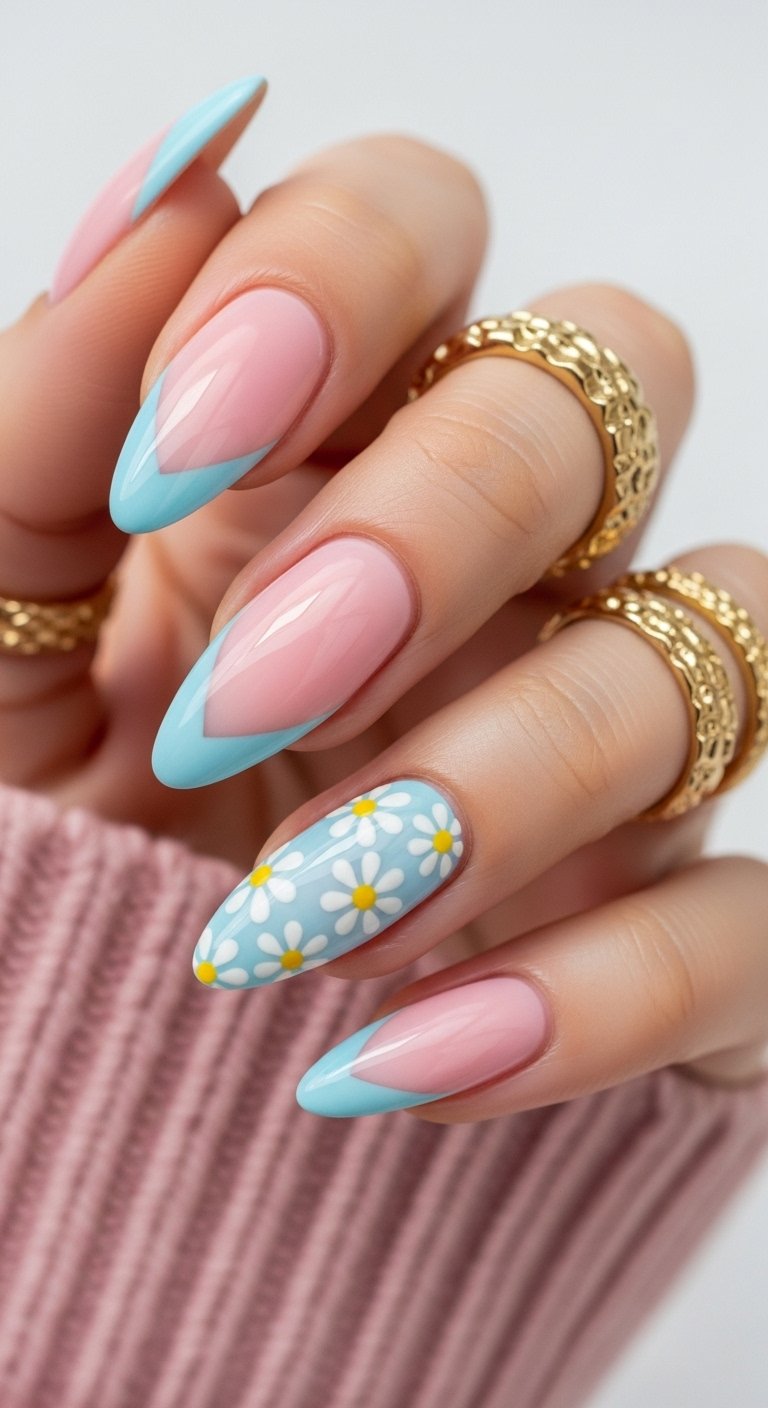
- pink-and-white-tiny-daisies-falling-flowers-nails
- pink-nails-with-neon-pastel-tips-tiny-daisies
- pink-baby-blue-and-white-daisy-dot-nails
- pink-and-gold-squiggle-delicate-flower-designs
- hot-pink-and-baby-pink-french-tips-with-daisy-design-party-nail
- wavy-baby-pink-tip-hearts-nail-design
- nude-pink-french-tips-with-rhinestone-accents
- wavy-baby-pink-solid-mix-and-match-nails
- pink-and-white-swirls-nail-designs
- simple-baby-pink-nails-with-white-scattered-daisy-designs
- swirls-butterflies-pink-and-white-nails
- popular-asked-questions
- conclusion
Y2K Inspired Pink, Orange, and White Nail Designs
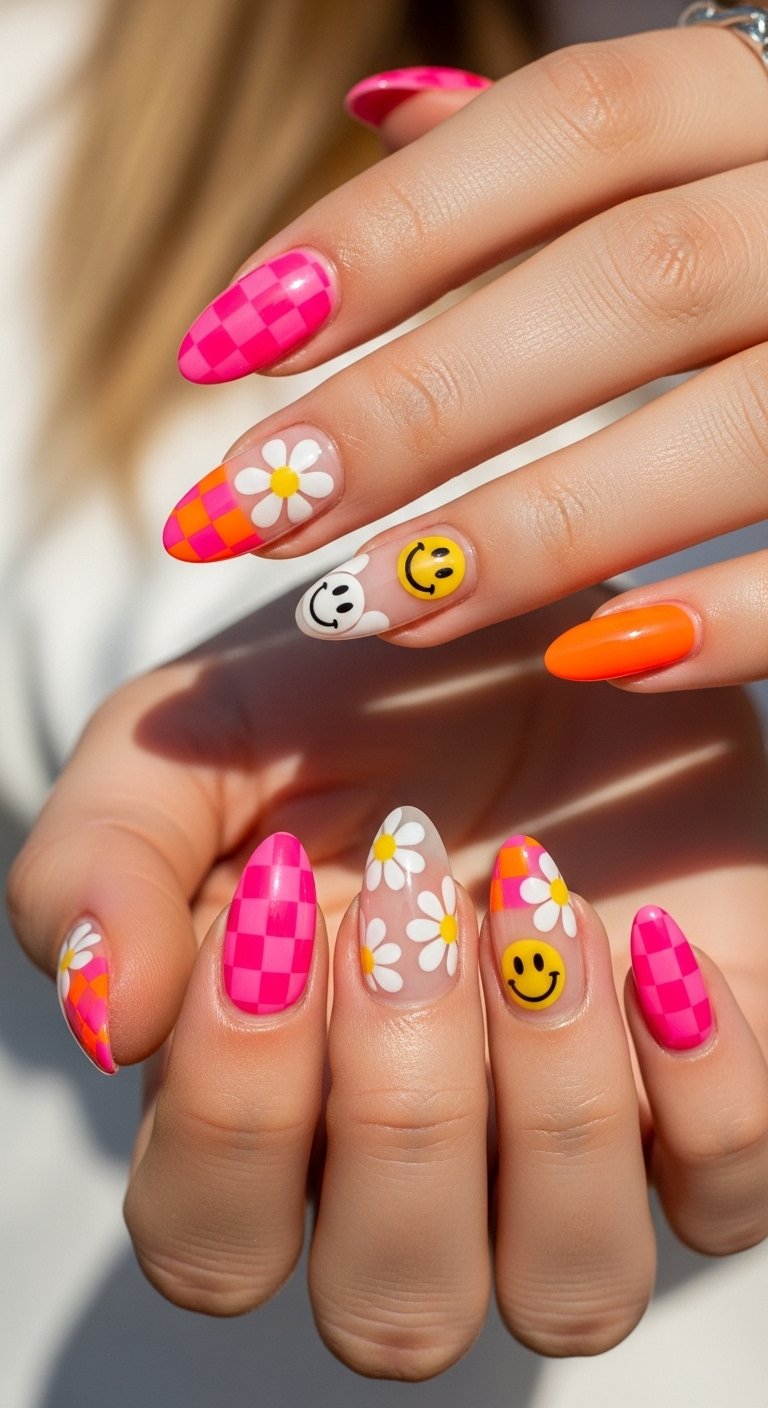
The resurgence of early 2000s fashion brings a playful energy to nail art, characterized by bold contrasts and retro motifs. This design pairs a vibrant hot pink with tangerine orange and stark white to create a look that demands attention. The visual impact relies on the high saturation of the pink and orange against the neutral white, which acts as a “palate cleanser” for the eye. The swirling, abstract patterns mimic the psychedelic prints popular in Y2K clothing, offering a sense of nostalgia wrapped in modern polish formulas.
To achieve this look, start with a sheer nude base to let the colors pop. You will need a fine liner brush to paint the organic, curvy lines. The key is to keep the movement fluid; do not overthink the placement of the swirls. Overlapping the orange and pink creates a dynamic depth that flat, side-by-side lines lack. A high-gloss top coat creates that “jelly” finish which was iconic during the turn of the millennium. This style works best on almond or stiletto shapes, as the tapered tip elongates the flow of the design.
Pro Tip: Use a dotting tool to add small white accents in the negative spaces to balance the visual weight of the bright colors.
Save this idea to your Pinterest.
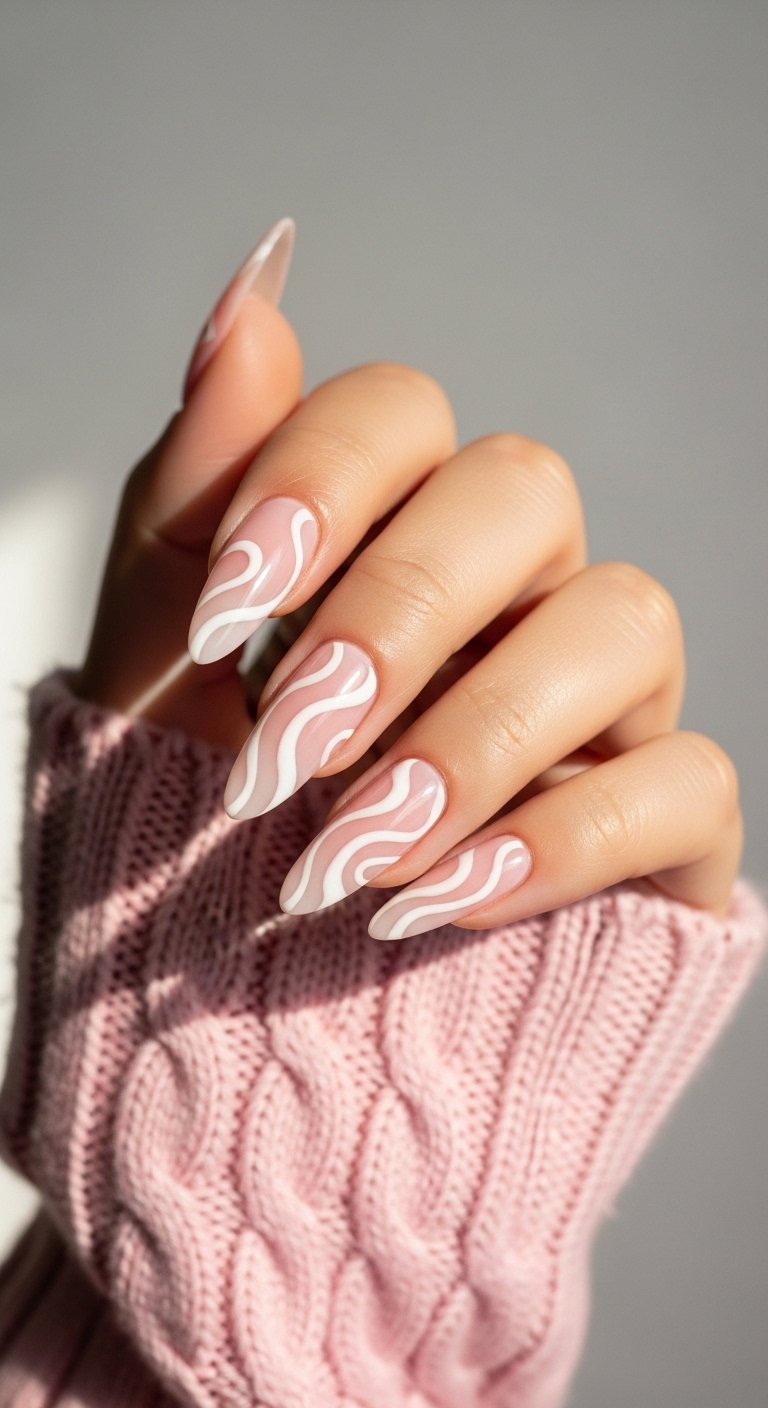
Squiggly Pink and White French Tips
This design offers a contemporary twist on the traditional French manicure by replacing the rigid, straight white line with a playful, organic squiggle. The visual appeal comes from the softness of the curves, which breaks up the geometry of square or squoval nails. By using a milky pink base instead of a clear one, you create a soft-focus background that makes the crisp white squiggle stand out without looking harsh. This style embraces the “imperfect is perfect” philosophy, making it much easier to execute at home than a standard French tip that requires a steady hand for straight lines.
You can create the squiggle using the very tip of the polish brush if you have a steady hand, or a striper brush for more control. Start from one side of the free edge and wave your hand slightly as you pull the brush across to the other side. The varying thickness of the line adds character and artistic flair. This design is particularly effective for those growing out their natural nails, as the wavy tip camouflages uneven free edges better than a straight line would.
Pro Tip: If you make a mistake with the white squiggle, use a clean brush dipped in acetone to tidy up the curve before curing or applying a top coat.
Save this idea to your Pinterest.
Hot Pink Glitter & Tiger Print Nails
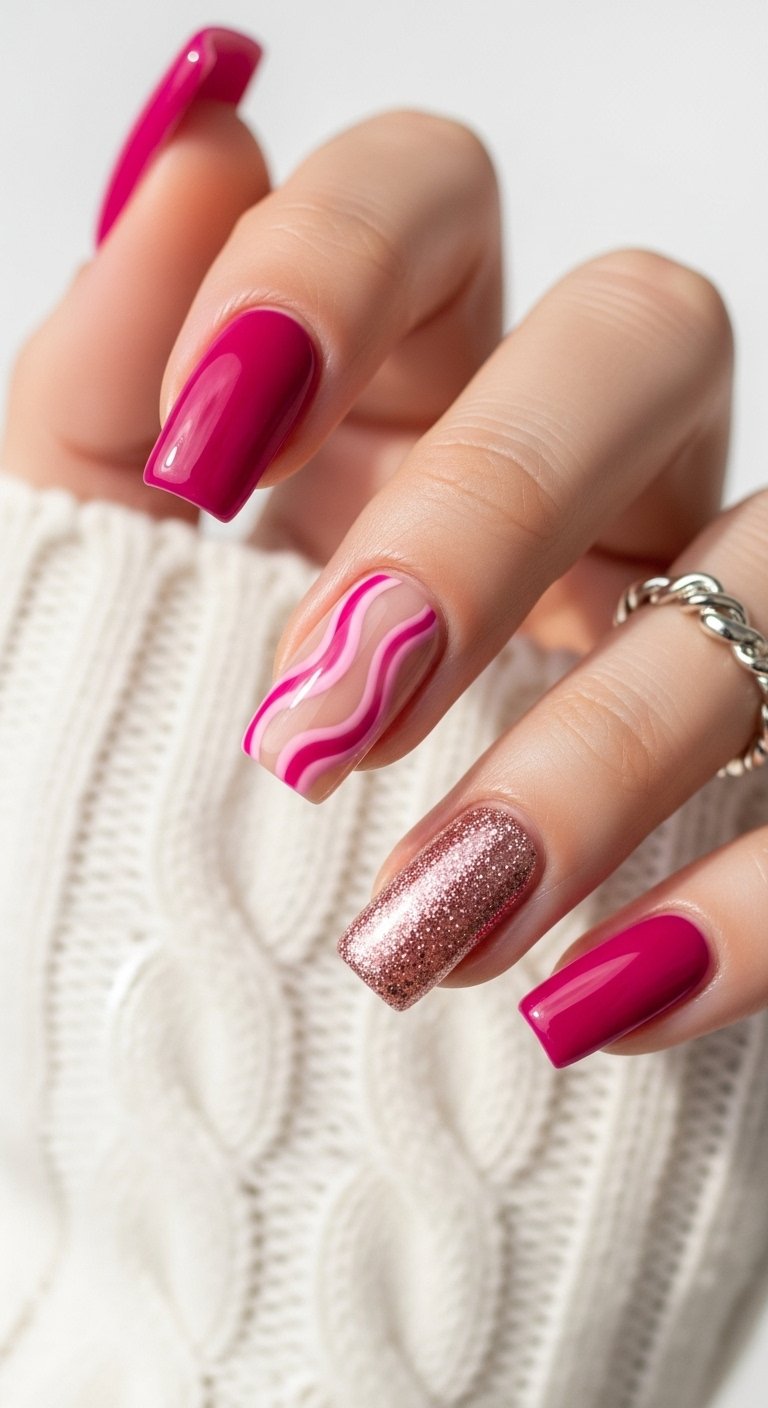
For those who want to make a bold statement, this combination of animal print and glitter strikes a balance between fierce and glamorous. The design typically features an accent nail or two with a hot pink glitter base, while the remaining nails showcase a white background with pink tiger stripes. The texture contrast is the star here; the gritty sparkle of the glitter plays off the smooth, creamy finish of the painted animal print. It draws the eye immediately and serves as a fantastic accessory for neutral outfits that need a pop of personality.
Creating tiger print is surprisingly simple. On a dried white base, use a thin brush to paint irregular, shaky lines coming from the sides of the nail toward the center. Taper the ends of your lines so they look like brush strokes rather than blocks. The pink glitter should be applied in thin layers to build opacity without creating a thick, lumpy surface. Sponge the glitter on for maximum density if your polish is too sheer.
Pro Tip: Apply a layer of clear builder gel or two coats of thick top coat over the glitter nails to ensure a glass-smooth finish that won’t snag on clothes.
Save this idea to your Pinterest.
Baby Pink Nails with Subtle French Tip
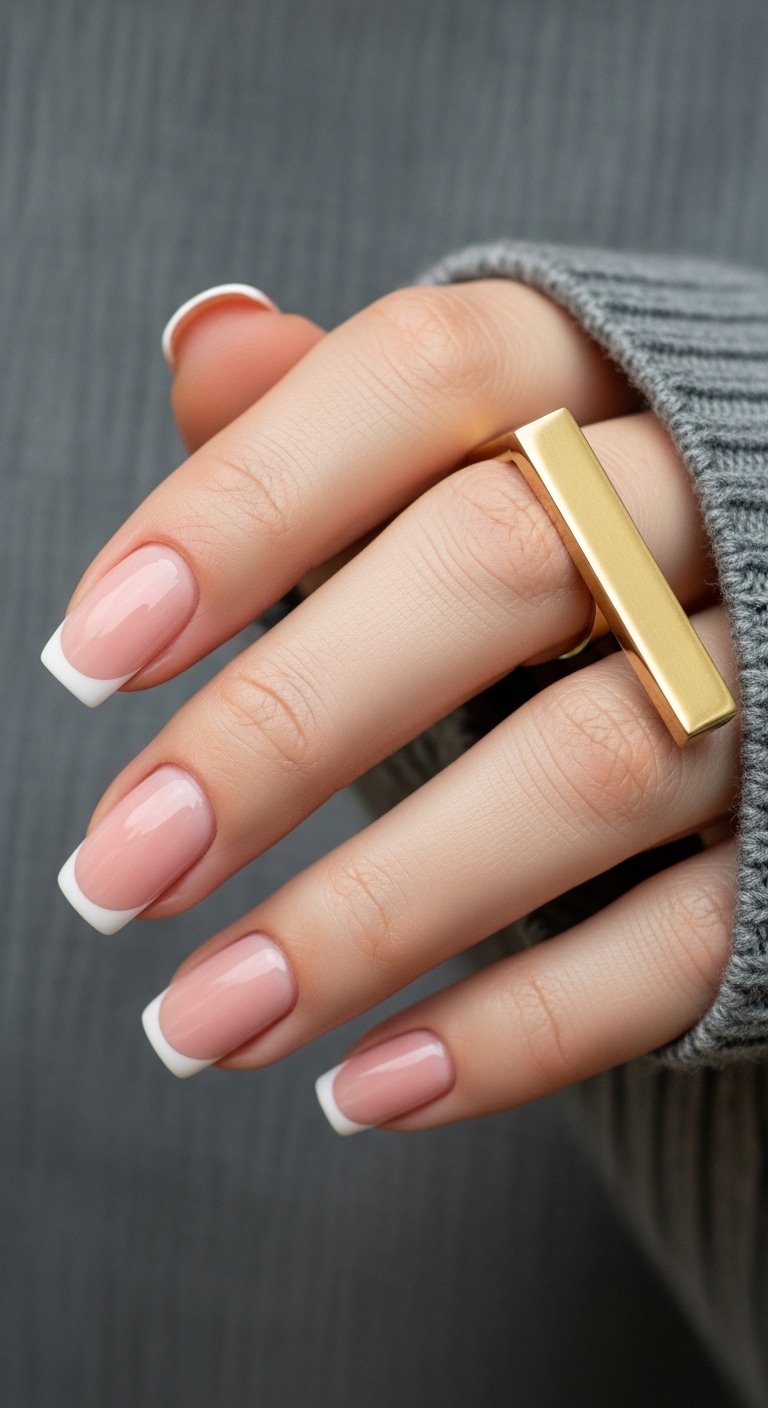
This style is the epitome of “quiet luxury” in the nail world. It features a sheer, baby pink base that mimics the natural color of a healthy nail bed, paired with a micro-thin white line at the very tip. The visual effect is one of extreme cleanliness and elongation. Unlike the thick, dramatic French tips of the 90s, this modern iteration is barely there, serving only to highlight the shape of the nail. It is perfect for professional environments where you want to look polished but not distracting.
The secret to this look is the base color. You want a pink that is translucent enough to show the lunula (the white half-moon at the cuticle) but pigmented enough to even out any discoloration. When painting the tip, use a fine liner brush and brace your pinky finger against a table for stability. Instead of dragging the brush across the nail, hold the brush still and rotate your finger. This technique yields a smoother, more consistent line.
Pro Tip: Use a matte top coat for a velvet-like finish that makes the skin around your nails look softer and more hydrated.
Save this idea to your Pinterest.
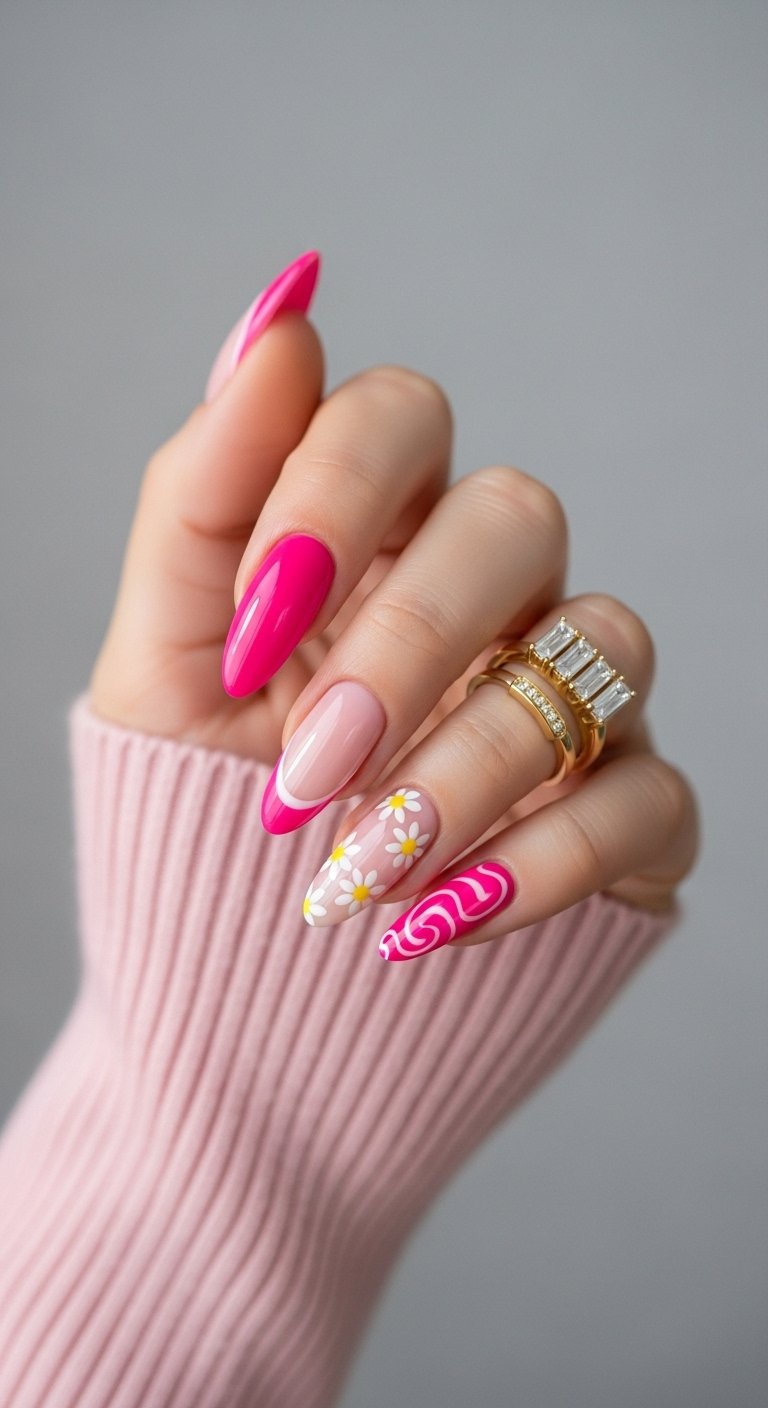
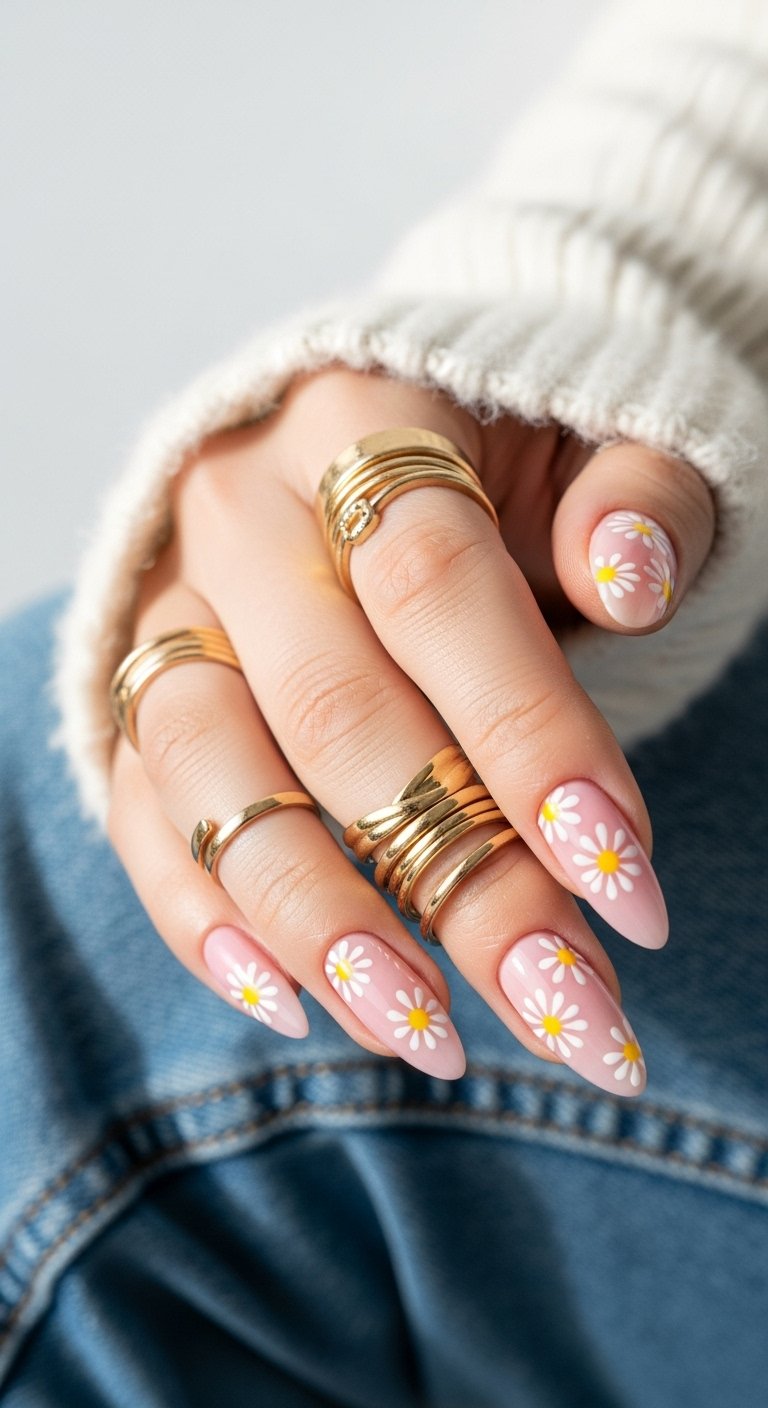
Pink and White Tiny Daisies Falling Flowers Nails
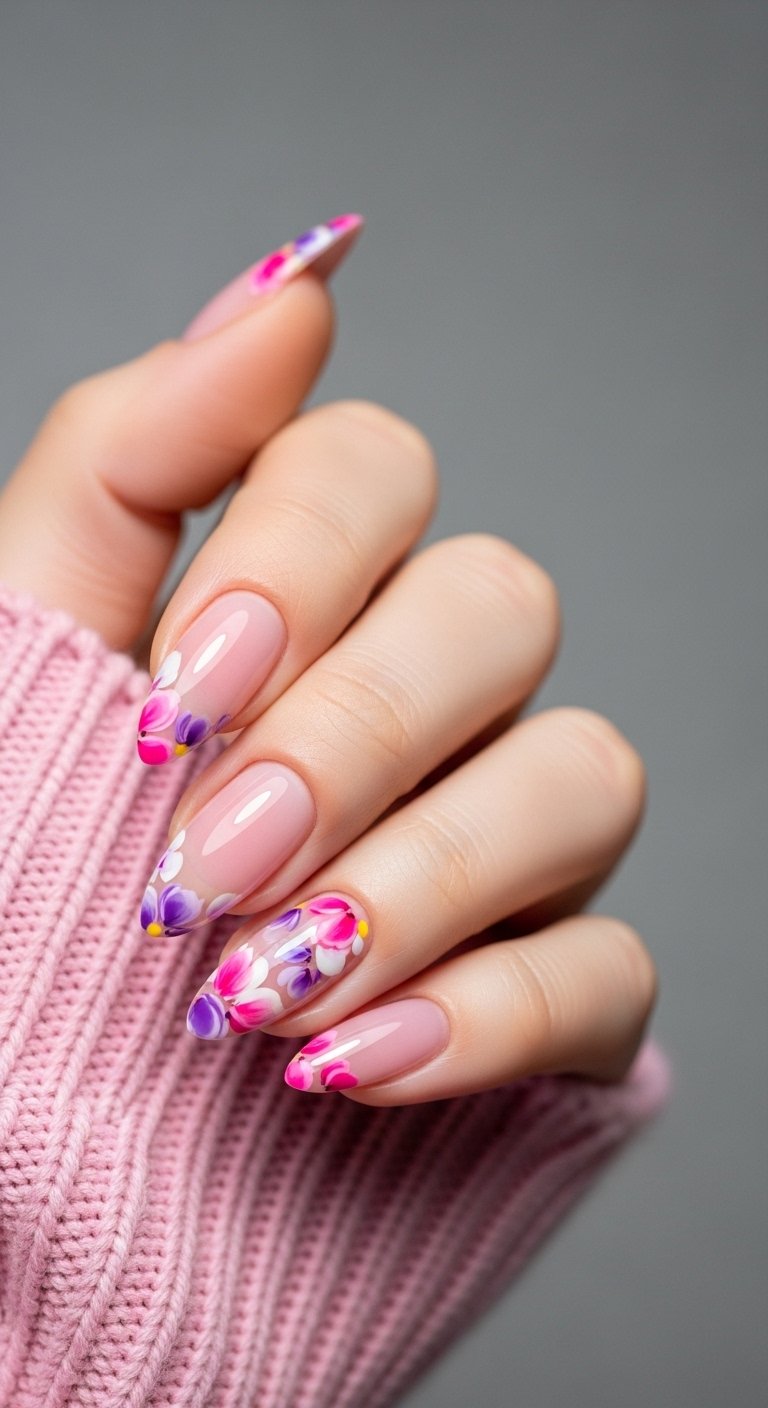
Floral designs are a spring staple, but the “falling flowers” placement gives this look a unique sense of motion. The design features tiny white daisies with yellow or pink centers that appear to be cascading from the cuticle down toward the tip, or vice versa. The negative space provided by the sheer pink background prevents the design from looking cluttered. This arrangement draws the eye along the length of the nail, subtly elongating the fingers.
To recreate the daisies, you do not need advanced painting skills. A dotting tool or even a toothpick is sufficient. Place five white dots in a circle and let them dry slightly before adding the center dot. Vary the size of the flowers to create a sense of perspective—larger flowers at the top and smaller ones as they “fall” down the nail. This mimics how objects look in nature and adds a 3D effect to a 2D surface.
Pro Tip: Place half-flowers at the edges of the nail to make the pattern look like a continuous fabric print rather than a sticker placed in the middle.
Save this idea to your Pinterest.
Comparison: Acrylic vs. Soft Gel for Detailed Designs
| Feature | Acrylic System | Soft Gel / Builder Gel |
|---|---|---|
| Best For | Long extensions and 3D embellishments. | Natural nail overlays and intricate hand-painting. |
| Durability | Harder, more rigid. Lasts 3-4 weeks. | Flexible, moves with the nail. Lasts 2-3 weeks. |
| Look | Can look slightly thicker if not filed well. | Naturally thinner and glossier finish. |
| Removal | Requires longer soaking and filing. | Soaks off faster with less damage risk. |
| Our Verdict | Choose Acrylic for the Y2K & Tiger Print looks. | Choose Gel for the Micro-French & Daisy designs. |
Pink Nails with Neon Pastel Tips & Tiny Daisies
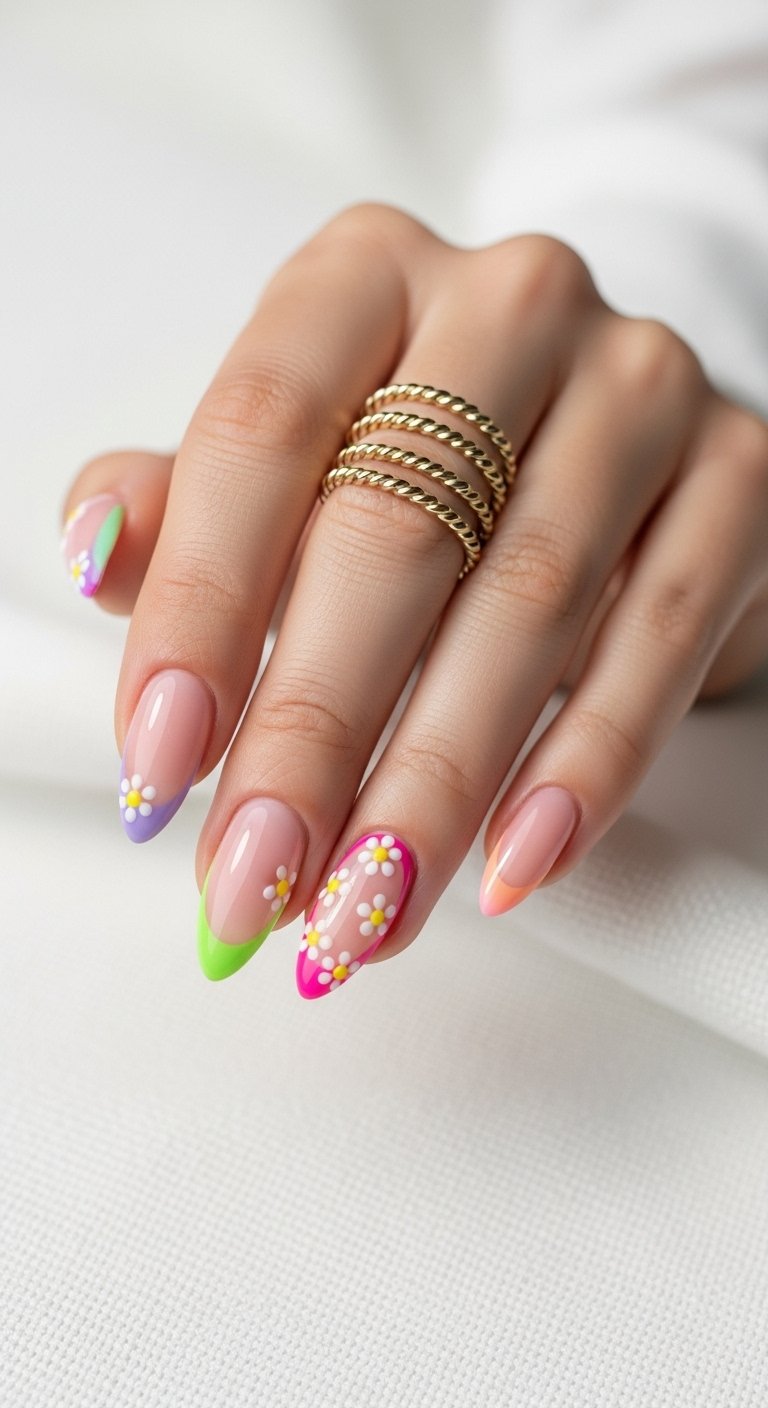
This design blends the softness of pastels with the electric energy of neon. The base is a standard soft pink, but the tips are painted in “neon pastel” shades—colors that are light but contain high fluorescent pigment. Adding tiny white daisies over the smile line (where the pink meets the tip) softens the transition and adds a whimsical touch. The visual tension between the sharp neon and the delicate floral motif creates a balanced, youthful aesthetic suitable for summer festivals or beach vacations.
When selecting your neon pastel, look for polishes labeled “bleached neon.” These offer the brightness you want without the harshness of a highlighter marker color. Use a dotting tool for the flower centers, perhaps matching them to the tip color to tie the whole look together. The placement of the flowers along the smile line also serves a practical purpose: it hides any shaky lines from your French tip application, making it a very forgiving design for beginners.
Pro Tip: Apply a white base layer under the neon tips to make the color pop vividly against the pink base.
Save this idea to your Pinterest.
Pink, baby blue, and White Daisy & Dot Nails
Combining baby pink and baby blue creates a classic cotton-candy aesthetic that reads as soft and innocent. This design alternates base colors or uses them in a pattern, overlaid with white daisies and scattered dots. The color theory here is analogous, as pink and blue often sit near each other in pastel palettes, creating a harmonious and calming visual. The addition of simple white dots fills empty space and adds texture without requiring complex drawing.
To keep this look cohesive, ensure that the pink and blue polishes have the same undertone—either both cool or both warm. A cool-toned bubblegum pink pairs best with an icy blue. Use the smallest dotting tool you have for the scattered dots; they should look like confetti or snow, not large polkadots. This design looks exceptionally cute on shorter, rounded nails, reinforcing the soft, rounded theme of the artwork.
Pro Tip: Use a fast-drying top coat immediately after the dots are semi-dry to prevent them from smearing, but float the brush so you don’t drag the color.
Save this idea to your Pinterest.
Pink and Gold Squiggle Delicate Flower Designs
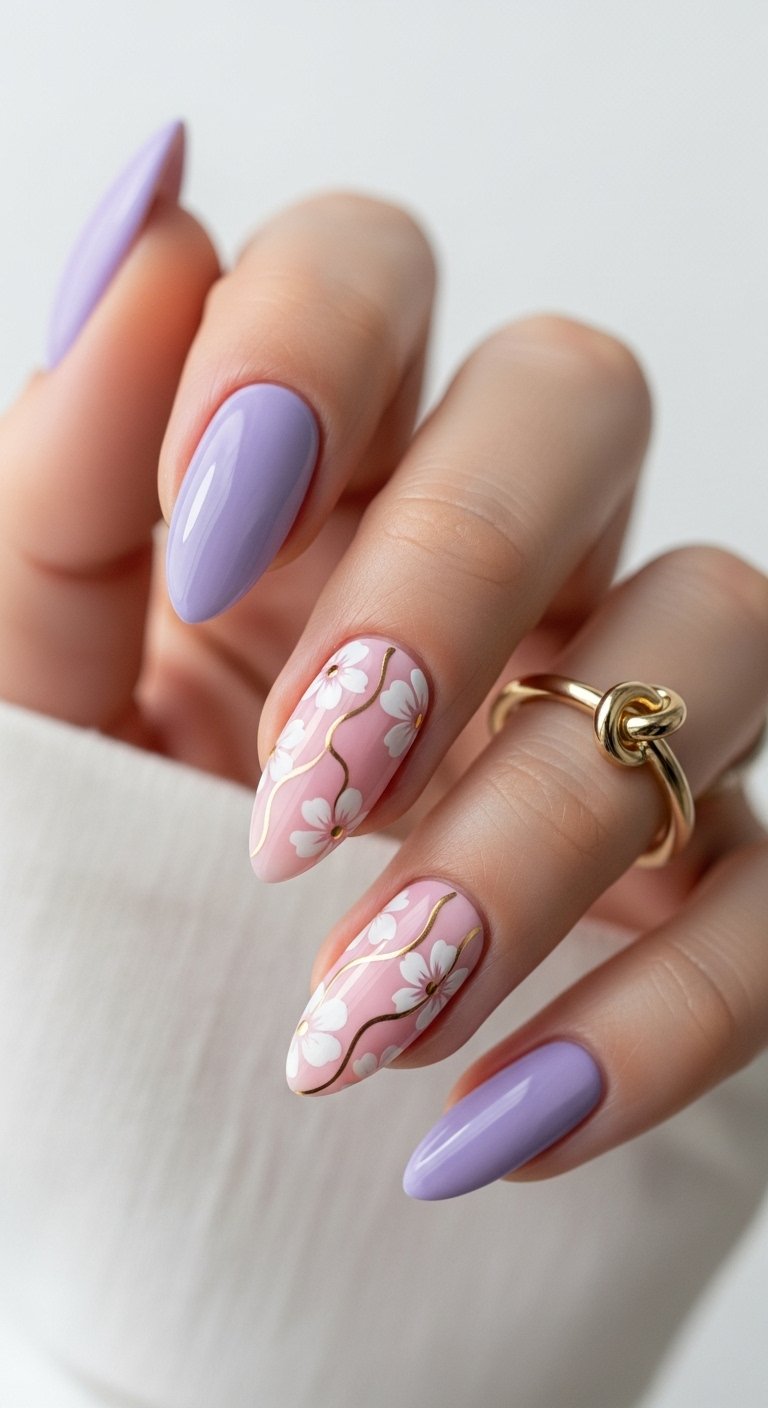
Adding metallic elements to a pink and white manicure instantly elevates the perceived value of the look. This design features delicate white flowers on a pale pink base, intertwined with thin, abstract gold squiggles. The gold catches the light, adding a dynamic shimmer that changes as you move your hands. It feels regal and sophisticated, making it an excellent choice for weddings or formal events where you want a bit of sparkle without full glitter.
For the gold lines, a metallic gel paint or a high-pigment nail lacquer is essential. Standard gold polishes can appear grainy or sheer. You want a product that looks like liquid metal. Paint the gold lines last, weaving them around the flowers you have already placed. The metallic line acts as a vine or a ribbon, connecting the floral elements. Keep the flowers small and sparse to let the gold shine through.
Pro Tip: If you struggle with painting gold lines, use gold foil transfer tape or thin gold nail stickers for a perfect metallic finish with zero effort.
Save this idea to your Pinterest.
Hot Pink and Baby Pink French Tips with Daisy Design Party Nail
This design plays with the “monochromatic” trend by using two different saturations of the same hue. The thumb, index, and pinky might feature hot pink tips on a baby pink base, while the ring finger (the party nail) reverses the scheme or features a full daisy pattern. This creates a curated, mix-and-match vibe that feels intentional and styled. The contrast between the electric hot pink and the soft baby pink adds visual interest while staying within a unified color family.
To nail this look, precision is key on the French tips. Because the colors are similar, a crisp line is needed to define the separation. Use French manicure guide stickers if freehand painting is difficult. For the party nail, cover the entire surface with medium-sized daisies. This heavy patterning on one nail acts as a focal point, drawing the eye and anchoring the simpler designs on the other fingers.
Pro Tip: Apply a coat of matte top coat to the party nail while keeping the others glossy for an extra layer of texture contrast.
Save this idea to your Pinterest.
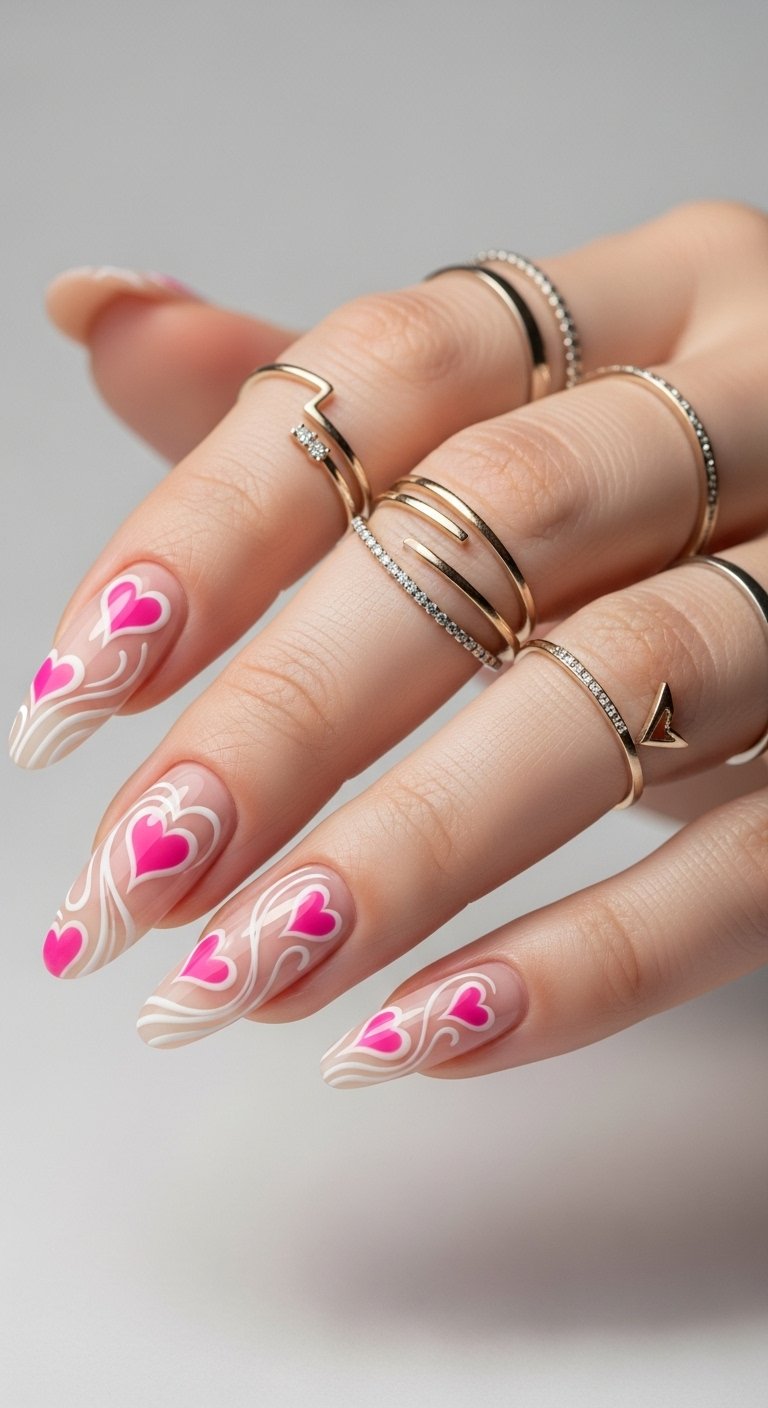
Wavy Baby Pink Tip & Hearts Nail Design
Romantic and playful, this design incorporates the popular “swirl tip” with small heart accents. The tips are painted in a wavy, organic shape using baby pink, rather than a straight line. nestled into the curves of the waves or floating in the negative space are tiny white or hot pink hearts. This design utilizes negative space effectively, keeping the look airy and light. It is a favorite for Valentine’s Day but works year-round for anyone who favors a coquette aesthetic.
Drawing hearts can be tricky. The easiest method is the “two-dot technique.” Place two dots side-by-side using a dotting tool, then use a fine brush or a toothpick to drag the bottom of the dots down to meet at a point. This ensures your hearts are symmetrical every time. Place the hearts strategically to cover any imperfections in your wavy lines.
Pro Tip: Use a sheer milky white base instead of a clear one. It creates a soft, filter-like effect that makes the hearts look like they are floating in milk.
Save this idea to your Pinterest.
Get The Look: The Essential Toolkit
To recreate these designs at home, you do not need a full salon setup. Here are the specific tools that make the difference between a messy attempt and a professional result.
- Double-Ended Dotting Tools: Essential for flowers, hearts, and polka dots. Get a set with varying sizes.
- Long Striping Brush: The secret to smooth swirls and straight French tips. The long bristles absorb hand tremors.
- Clean-Up Brush: An angled synthetic brush dipped in acetone to perfect your cuticles before curing or drying.
- Milky Pink Base Coat: The foundation of 90% of these looks. It hides nail staining and provides a smooth canvas.
Nude Pink French Tips with Rhinestone Accents
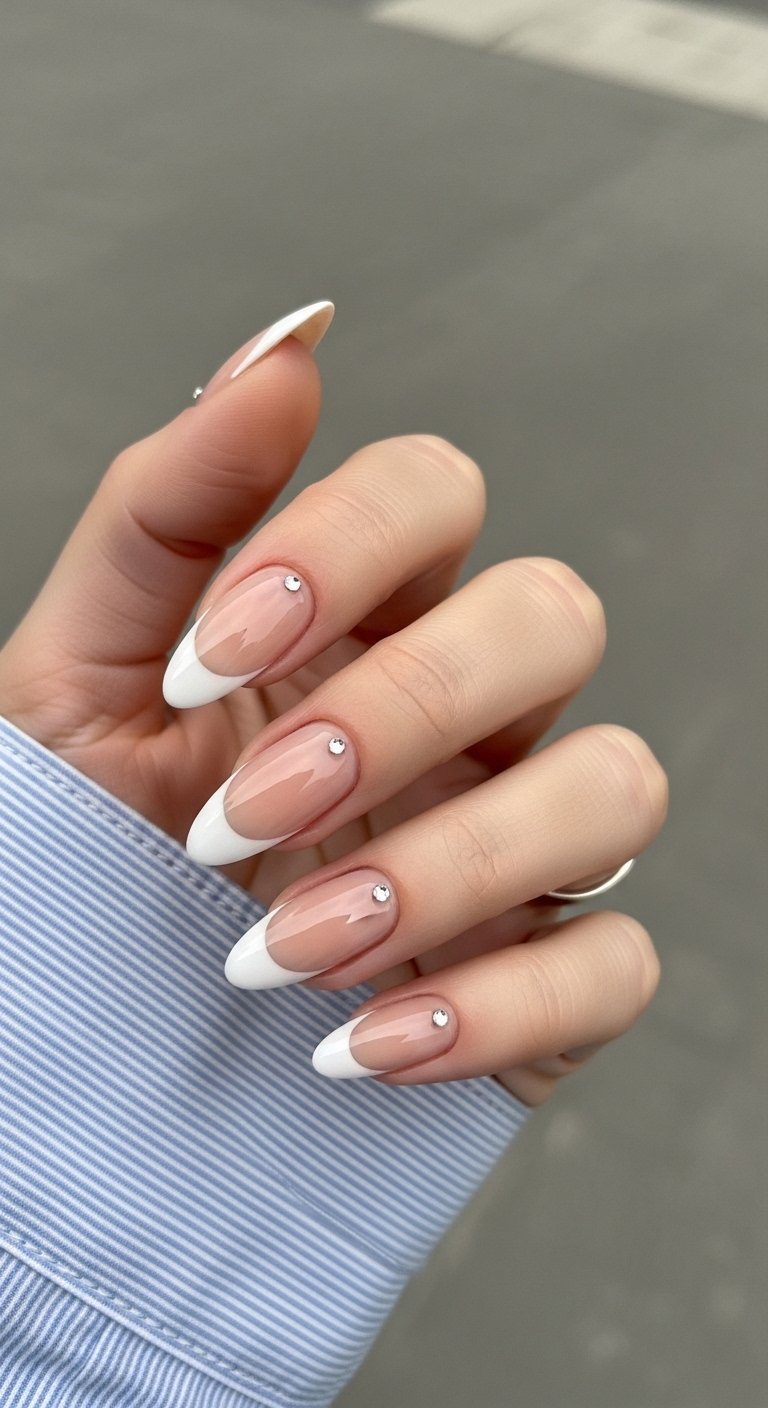
This design brings the drama with sparkle. It starts with a classic nude-pink French manicure but adds a single rhinestone or a cluster of crystals near the cuticle or along the smile line. The nude pink tone should closely match your skin tone to elongate the fingers, while the white tip provides a crisp border. The rhinestones act as jewelry for your nails, catching the light and adding a luxurious 3D element.
Adhesion is the main challenge here. Do not use standard top coat to stick gems; they will pop off within a day. Use a dedicated nail glue or a dab of clear builder gel. Place the rhinestone, cure or let dry, and then—this is crucial—use a thin brush to apply top coat around the base of the stone, not over it. Painting over the stone dulls its facets and ruins the sparkle.
Pro Tip: A single small crystal at the base of each nail looks more expensive and elegant than a nail completely covered in bling.
Save this idea to your Pinterest.
Wavy Baby Pink & Solid Mix and Match Nails
The “skittle” manicure trend—where every nail is slightly different—is perfect for the indecisive. This version mixes solid baby pink nails with nails featuring white and pink waves. The balance creates a gallery-like effect on your hand. Usually, the thumb and pinky are solid colors, while the middle three fingers feature the wavy art. This distribution keeps the look grounded and prevents it from feeling too chaotic.
Consistency in color is what ties this look together. Ensure the pink used in the waves is the exact same bottle used for the solid nails. When painting the waves, vary the thickness. Thick bands of pink next to thin ribbons of white create a dynamic, modern composition. This design looks fantastic on square-oval (squoval) nails, as the curves of the art soften the corners of the shape.
Pro Tip: If your solid pink polish is streaky, apply three thin coats rather than two thick ones to get a smooth, opacity without bubbles.
Save this idea to your Pinterest.
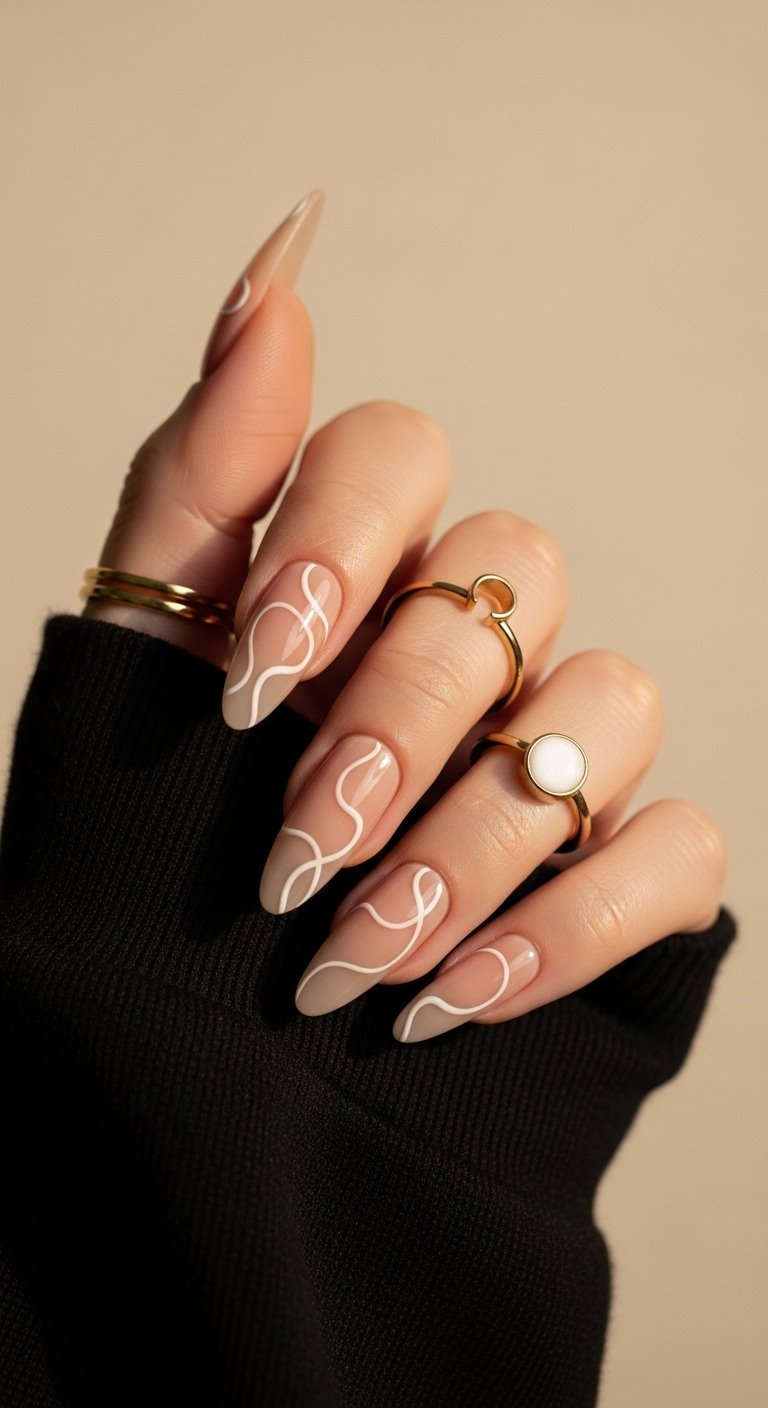
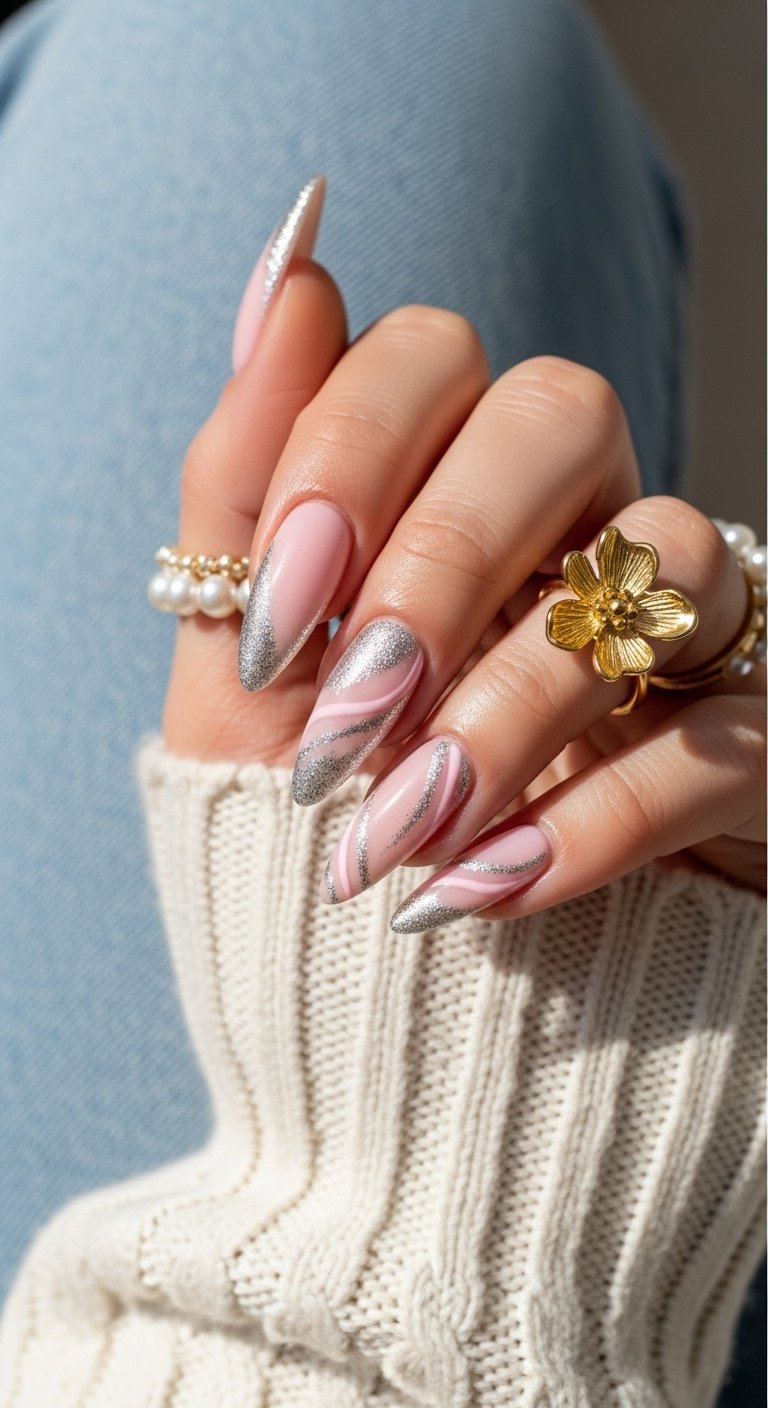
Pink and White Swirls Nail Designs
Abstract swirls are the defining nail art trend of the 2020s. This design abandons the French tip structure entirely in favor of organic lines that flow across the nail plate in random directions. The palette is strictly pink and white, but the negative space (your natural nail color) acts as a third shade. The result is a retro-modern look that resembles a lava lamp or marble. It is artistic, free-spirited, and incredibly forgiving since there is no “correct” pattern to follow.
To get smooth swirls, load your striping brush with paint and lay it flat against the nail. Drag your entire arm slowly rather than just moving your wrist. This stabilizes the line. Alternate between white swirls and pink swirls, allowing them to cross over each other. If you want depth, paint the white swirls first, apply a matte top coat, and then paint glossy pink swirls on top for a texture clash.
Pro Tip: Keep the cuticle area clean and mostly bare. This allows the manicure to grow out for weeks without an obvious ridge line.
Save this idea to your Pinterest.
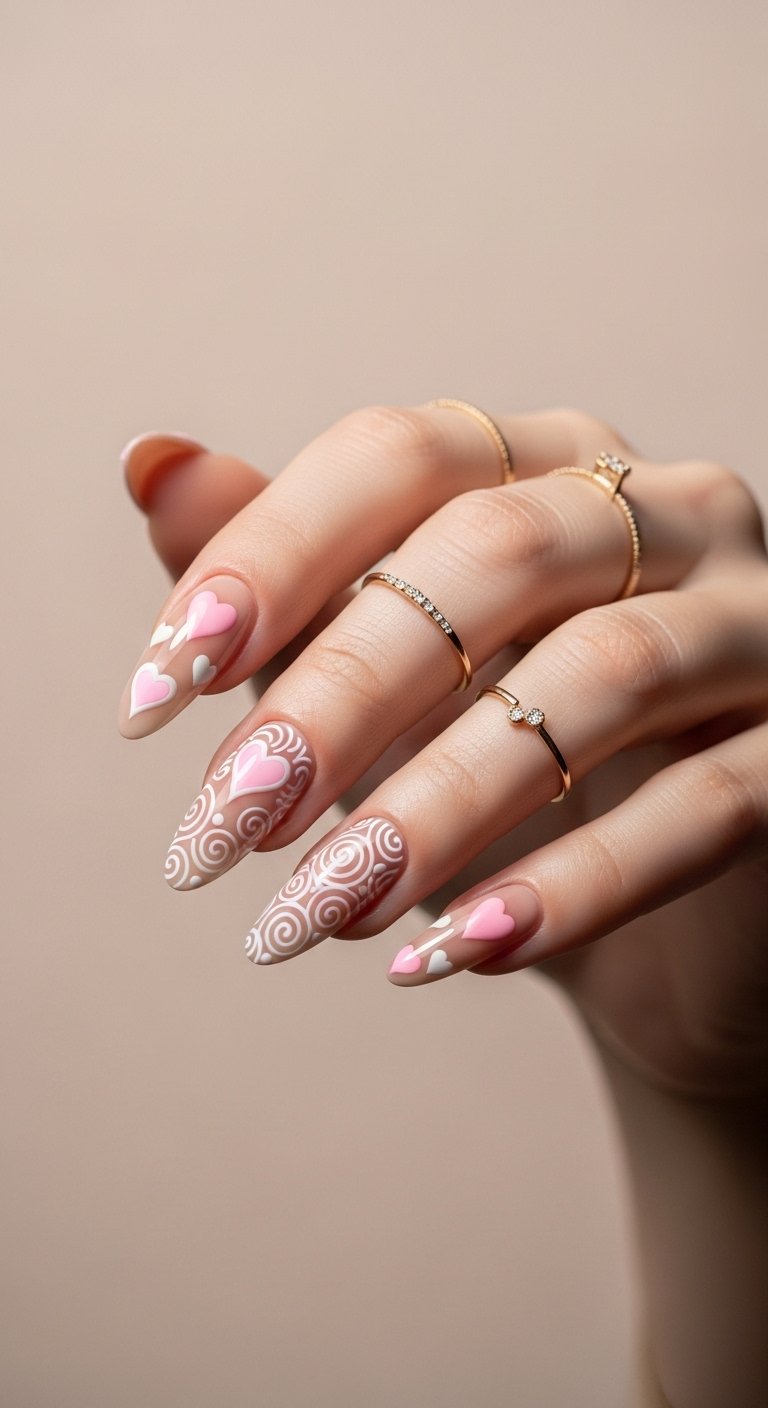
Simple Baby Pink Nails with White Scattered Daisy Designs
Minimalism meets cottagecore in this understated design. Unlike the “falling flowers” look, this style features just one or two small daisies placed randomly on each nail—perhaps one near the cuticle on the index finger and one near the tip on the ring finger. The base is an opaque baby pink rather than a sheer one, providing a solid, creamy backdrop that makes the white petals pop. It is sweet, youthful, and incredibly easy to wear.
The spacing is what makes this design work. “Random” placement actually requires careful thought to ensure the overall hand looks balanced. Avoid placing the flowers in the dead center of every nail. Off-center placement looks more organic and designer. Because the flowers are sparse, they need to be neat, so take your time with your dotting tool to ensure round, distinct petals.
Pro Tip: Add a tiny gold stud in the center of the daisies instead of a polish dot for a mixed-media effect that looks like jewelry.
Save this idea to your Pinterest.
Swirls & Butterflies Pink and White Nails
This is the ultimate fantasy nail design. It combines the fluid movement of pink and white swirls with the delicate structure of butterfly decals or hand-painted wings. The swirls usually frame the nail, acting as a breeze or a garden path, while the butterfly sits as the focal point. It is a complex, detailed look that tells a story. This design is particularly popular for spring events and feels very whimsical and feminine.
Unless you are a professional artist, use nail stickers or water decals for the butterflies. Hand-painting symmetrical wings is incredibly difficult. Apply your pink and white swirls first and let them dry completely. Then, apply the decal using tweezers to position it perfectly. Seal everything with two layers of top coat to ensure the edges of the sticker disappear seamlessly into the polish.
Pro Tip: Place the butterfly on the ring finger or thumb only. putting them on every finger can look cluttered and takes away from the specialness of the accent.
Save this idea to your Pinterest.
Popular Asked Questions
What is the difference between “Pink and White” and a French Manicure?
A standard French Manicure usually refers to painting the white tip on top of a natural nail using regular polish. “Pink and White” technically refers to a sculpted acrylic or gel application where the nail technician builds the pink base and the white tip using two different colored colored powders or gels. The “Pink and White” is a permanent structure, whereas a French manicure is often just a painted design.
How long do pink and white nails last?
If done with acrylic or hard gel (sculpted), pink and white nails typically last 2 to 3 weeks before you need a “fill.” A fill involves filling in the gap near the cuticle where your new nail has grown out. With proper maintenance, you can keep filling the same set for months. Painted designs on natural nails usually last 5 to 7 days with regular polish, or 2 weeks with soft gel polish.
Can I do these designs at home without professional tools?
Yes! Most of the designs listed above (like swirls, dots, and falling flowers) can be done with regular nail polish and simple tools like a toothpick or bobby pin. However, for the “sculpted” look or clear extensions, you would need a UV lamp and gel products. For beginners, we recommend starting with high-quality press-on nails that mimic these designs for an instant, damage-free result.
Why do my white tips turn yellow?
White tips can yellow due to exposure to sunlight (UV rays), smoking, or certain chemicals in cleaning products and lotions (like self-tanner). To prevent this, always apply a high-quality, non-yellowing top coat. If you use a UV gel system, ensure you are not “over-curing” the top coat, as excessive heat can sometimes cause discoloration.
Conclusion
The pink and white nail trend has evolved far beyond the classic French tip of the 90s. Whether you are drawn to the nostalgic energy of Y2K swirls, the quiet luxury of micro-tips, or the whimsical vibes of falling daisies, there is a variation of this palette that suits your personal style. These designs prove that you don’t need wild colors to make a statement; sometimes, a fresh take on a classic color combination is all you need to elevate your look.
Which of these designs are you planning to try for your next manicure? Let us know in the comments below!
Follow us on Pinterest for more Nail Design inspiration.

Leave a Comment