
The “Utility” Hook
You might believe your kitchen footprint prevents you from having an island. The reality is often different. Even the narrowest galley kitchens or tight L-shaped layouts can accommodate a central workstation if you understand scale and flow. A well-planned island adds up to 25% more storage and doubles your prep surface. It transforms a cramped cooking zone into a social hub.
We analyzed current design trends and spatial ergonomics to bring you layouts that maximize utility without blocking your walkways. These ideas prioritize flow, ensuring you can open your dishwasher and oven while still enjoying the luxury of a central hub. From repurposing vintage furniture to custom slimline builds, there is a solution here for every square footage.
Check out our related guide on [Kitchen Organization Hacks] for more ways to declutter your new surfaces.
Key Takeaways
- Mobility is King: Putting your island on casters allows you to reclaim floor space when entertaining or during heavy cooking sessions.
- Visual Weight Matters: Open shelving and legs create a sense of airiness that prevents a small kitchen from feeling boxy or crowded.
- The 36-Inch Rule: You need a minimum of 36 inches (approx. 90cm) of clearance around your island for safe traffic flow; 42 inches is ideal for two cooks.
- Dual Functionality: In small spaces, an island must serve at least two purposes—prep surface and dining table, or storage unit and room divider.
Contents
- Tuck in a kitchen island breakfast bar
- Choose an unobtrusive colour scheme
- Consider a slimline option
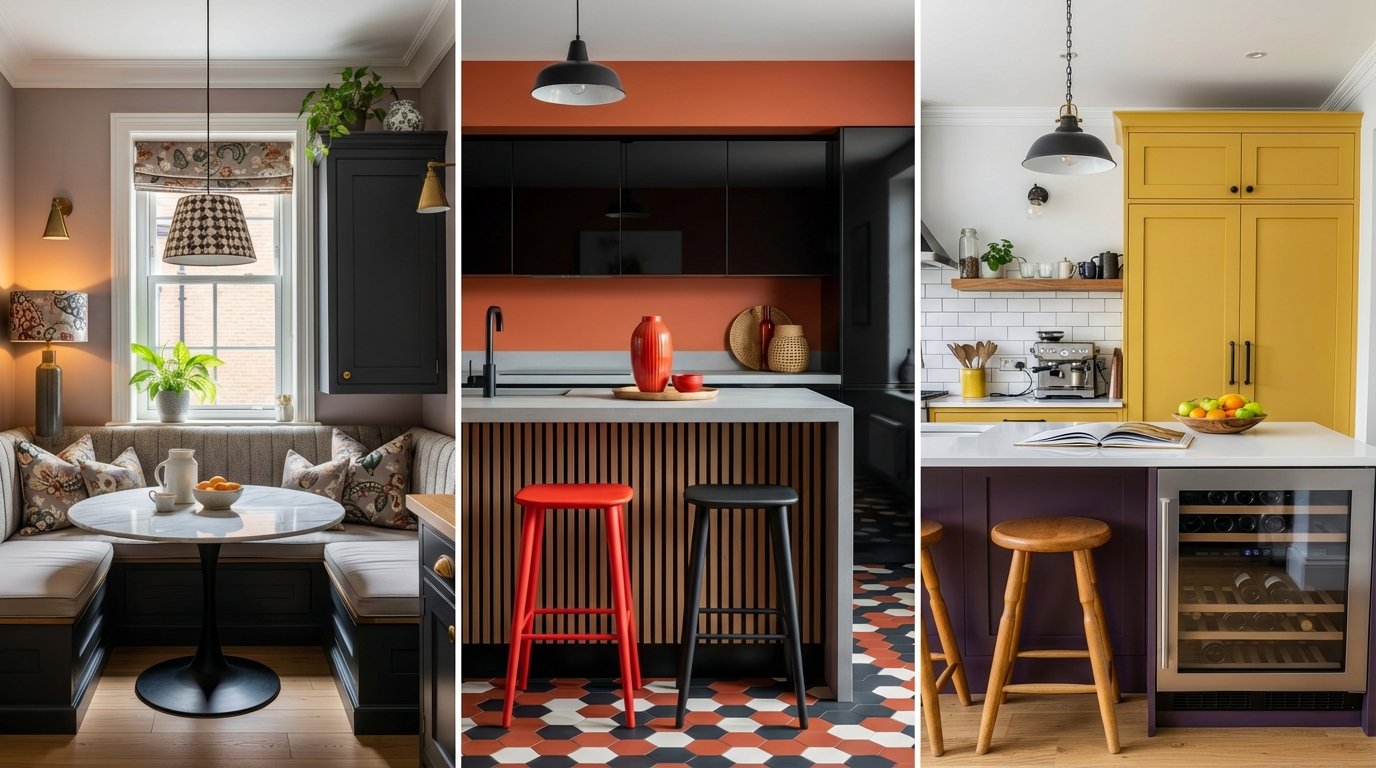
- Build in a banquette
- Turn a peninsula into a seating spot
- Squeeze in a second-hand table
- Include a preparation area
- Define your island with panelling
- Go for a modular unit
- Choose the shortest side for seating
- Introduce a pop of colour
- Choose open shelving
- Popular Asked Questions
- Conclusion
Tuck in a kitchen island breakfast bar
The dream of a social kitchen often dies in small spaces because we assume we need a massive slab of stone to seat guests. A tuck-under breakfast bar solves this by prioritizing legroom over cabinet depth. By extending your countertop 12 to 15 inches beyond the base cabinetry, you create a dedicated dining zone that requires zero extra floor footprint when not in use.
For the most efficient use of space, choose backless stools that slide completely under the overhang. This keeps the walkway clear of tripping hazards. Visually, this setup bridges the gap between a cooking station and a living area, making it perfect for open-plan apartments. You can use corbels or steel support brackets to hold the overhang, which adds an industrial or farmhouse detail depending on your style.
Pro Tip: If your island is exceptionally shallow, install shallow spice racks or distinct “pigeonhole” shelving on the seating side to utilize the dead space between the stool legs.
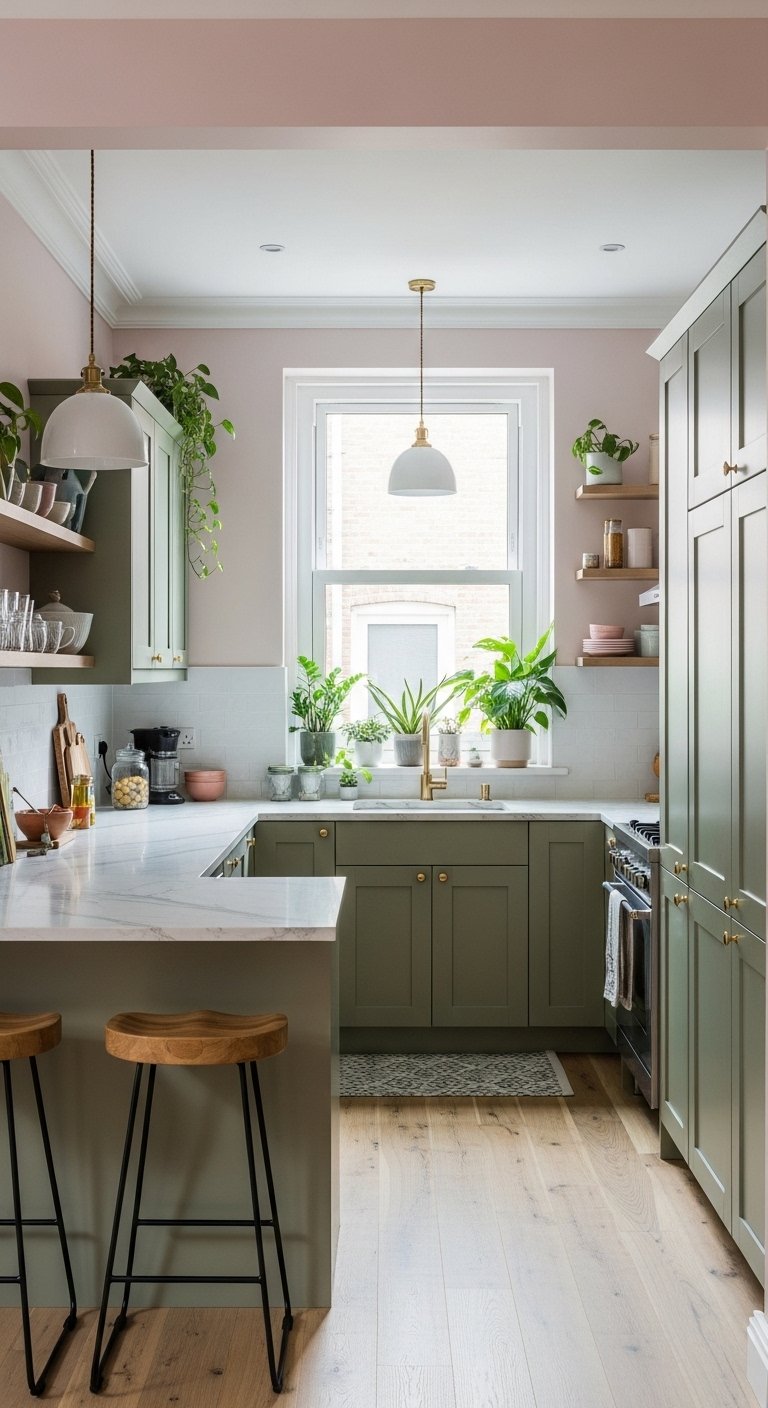
Choose an unobtrusive colour scheme
Visual clutter is the enemy of small spaces. When you introduce a new volume into a compact room, it can easily dominate the view. To combat this, colour-drench your island to match your perimeter cabinets or the walls. A monochromatic palette allows the eye to travel across the room without interruption, tricking the brain into perceiving the space as larger than it is.
Pale neutrals like soft taupe, creamy white, or the trending “mushroom” beige work exceptionally well. The goal is camouflage. You want the utility of the island without the visual weight. High-gloss finishes can also help by reflecting light, further enhancing the sense of space. If you match the island to the floor colour, it anchors the piece, but matching it to the cabinets creates a seamless, built-in look that feels high-end and intentional.
Pro Tip: Use handle-less “push-to-open” cabinetry hardware to maintain sleek lines and avoid catching your clothes on knobs in tight walkways.
Save this idea to your Pinterest.
Consider a slimline option
Standard kitchen islands run about 24 to 36 inches deep, but in a narrow galley kitchen, that depth is a luxury you cannot afford. Enter the slimline island. A custom or repurposed console table that is only 15 to 18 inches deep provides valuable counter space without choking the room. This is the perfect landing pad for groceries or a coffee station.
When styling a slimline unit, you must be ruthless with function. Since you lose depth for storage, focus on verticality. Use the space for baking sheets, cutting boards stored on their sides, or narrow pull-out pantries. Visually, a slim island looks best with legs rather than a solid box base, as seeing the floor underneath extends the sightlines of the room. Butcher block tops are a popular choice here as they can be cut to any custom narrow width easily.
Pro Tip: Anchor a lightweight slimline island to the floor or wall if possible, or ensure it is heavy enough not to tip over during vigorous dough kneading.
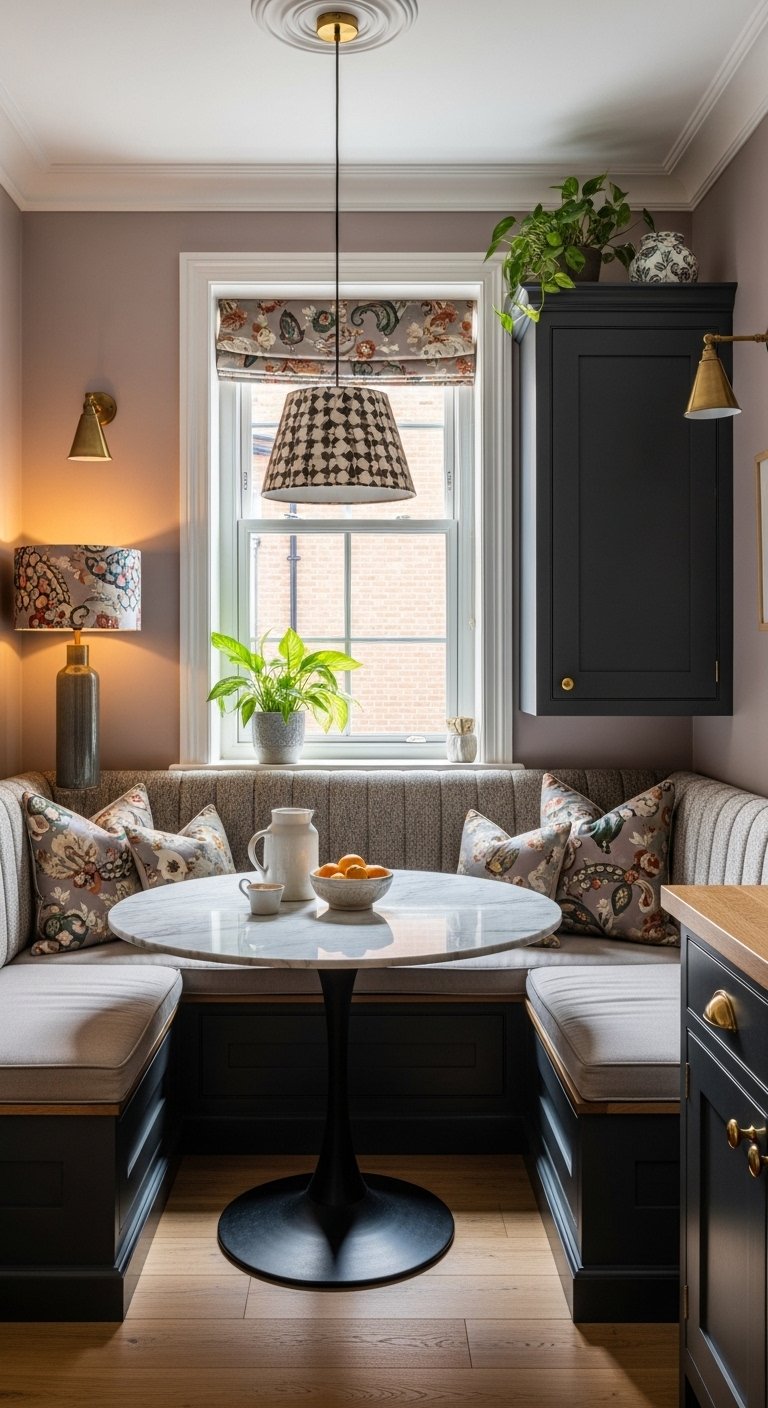
Build in a banquette
Integrating seating directly into the island structure is a brilliant way to merge a dining room and kitchen. By building a bench seat (banquette) off the back of your island, you eliminate the need for a separate table and chairs that clutter the walkways. This setup creates a cozy, restaurant-style booth feel that is incredibly space-efficient.
The back of the island acts as the backrest for the bench. This structure allows you to push the “dining” area right up against the prep zone. You can fit more people on a bench than on individual chairs, and you gain massive storage potential. The seat of the banquette should ideally lift up on hinges, revealing deep storage for seldom-used items like holiday platters or bulk pantry goods. Upholster the seat in wipeable performance fabric or faux leather to withstand kitchen spills.
Pro Tip: Ensure your table height matches the banquette seat height (standard table height is 30 inches), not the counter height (36 inches), unless you are using a bar-height table.
Turn a peninsula into a seating spot
Sometimes an island is simply impossible. A peninsula offers the same benefits—extra counter space, storage, and seating—but remains attached to a wall or existing run of cabinets. This L-shape or U-shape configuration often provides better flow in small square kitchens because it directs traffic around the cooking zone rather than through it.
Treat the peninsula exactly like an island. Extend the countertop for an overhang and add statement pendant lighting above it to define the zone. Because one side is anchored to the wall, you can often run electricity and plumbing more cheaply than to a freestanding island, allowing you to move the sink or dishwasher to this new arm. This clears up your main wall for uninterrupted cooking space.
Pro Tip: If your peninsula faces the living room, clad the back in beadboard or shiplap to make it feel like a piece of furniture rather than just the back of a kitchen cabinet.
Comparison: Floating Island vs. Peninsula
| Feature | Floating Island | Peninsula |
|---|---|---|
| Traffic Flow | Allows circulation on all sides. | Directs traffic around the perimeter. |
| Installation | Harder to run plumbing/electric. | Easier/cheaper for utilities. |
| Flexibility | Can be mobile/moveable. | Permanent fixture. |
| Space Needed | Requires clearance on 4 sides. | Requires clearance on 3 sides. |
| Best For | Open concept, square rooms. | L-shaped or narrow rooms. |
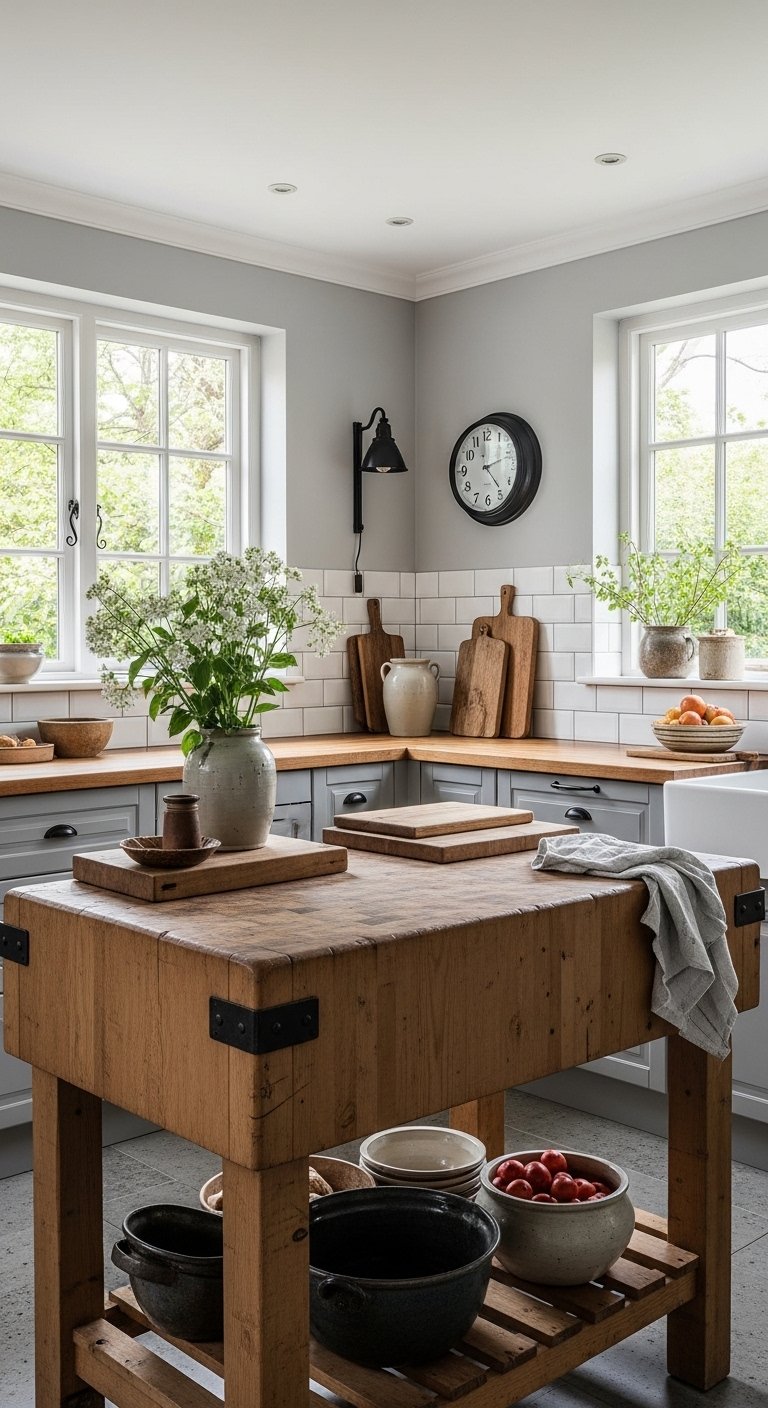
Squeeze in a second-hand table
Not every island needs to be a built-in cabinet. A vintage farm table, a tall prep table, or an antique desk can serve as a stunning, character-filled island. This approach is budget-friendly and sustainable. The open legs of a table keep the visual footprint light, which is crucial for tiny rooms.
Look for tables that are counter-height (approx. 36 inches). If you fall in love with a standard dining table (30 inches), you can add industrial casters or wooden risers to the legs to bring it up to an ergonomic prep height. The contrast between a sleek, modern kitchen and a battered wooden table adds immediate warmth and soul to the space. It feels collected and curated rather than manufactured.
Pro Tip: Seal the top of any vintage wood table with a food-safe polyurethane or tung oil to protect it from water damage and raw meat bacteria.
Save this idea to your Pinterest.
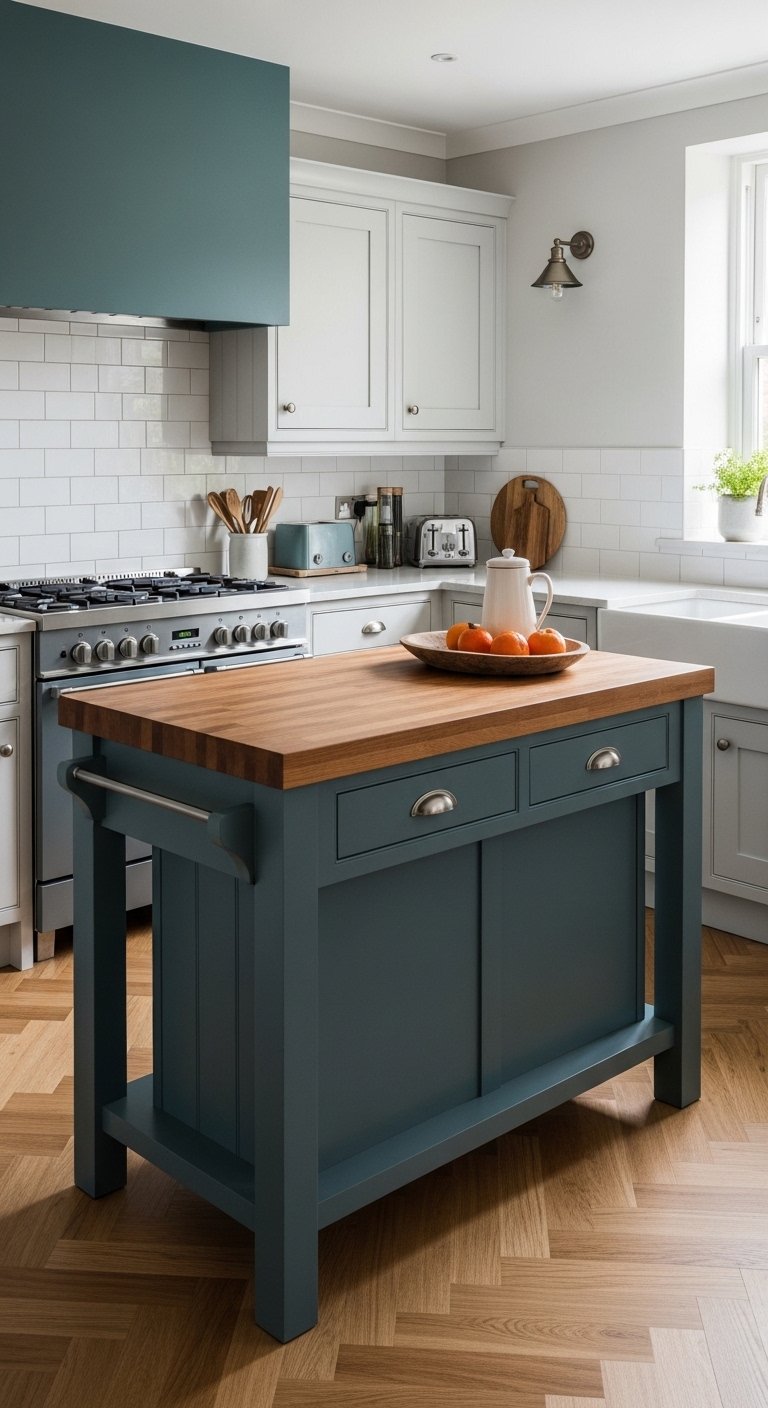
Include a preparation area

If your small kitchen lacks counter space, your island’s primary duty is function. Designate this surface as your “wet” or “messy” zone. To make this work in a compact footprint, consider an island with a built-in butcher block top specifically for chopping. You can even install a trash pull-out directly underneath the cutting zone to sweep scraps away instantly.
For ultra-small spaces, look for islands with slide-out cutting boards or drop-leaf extensions. These allow you to expand your workspace when you are cooking a big meal and fold it away when you need to walk through the room. Zoning your kitchen this way keeps the mess contained to the island, leaving your limited perimeter counters clean for appliances like the toaster and coffee maker.
Pro Tip: Install a pot rail or hooks on the side of the island to hang colanders and cutting boards, freeing up precious drawer space.
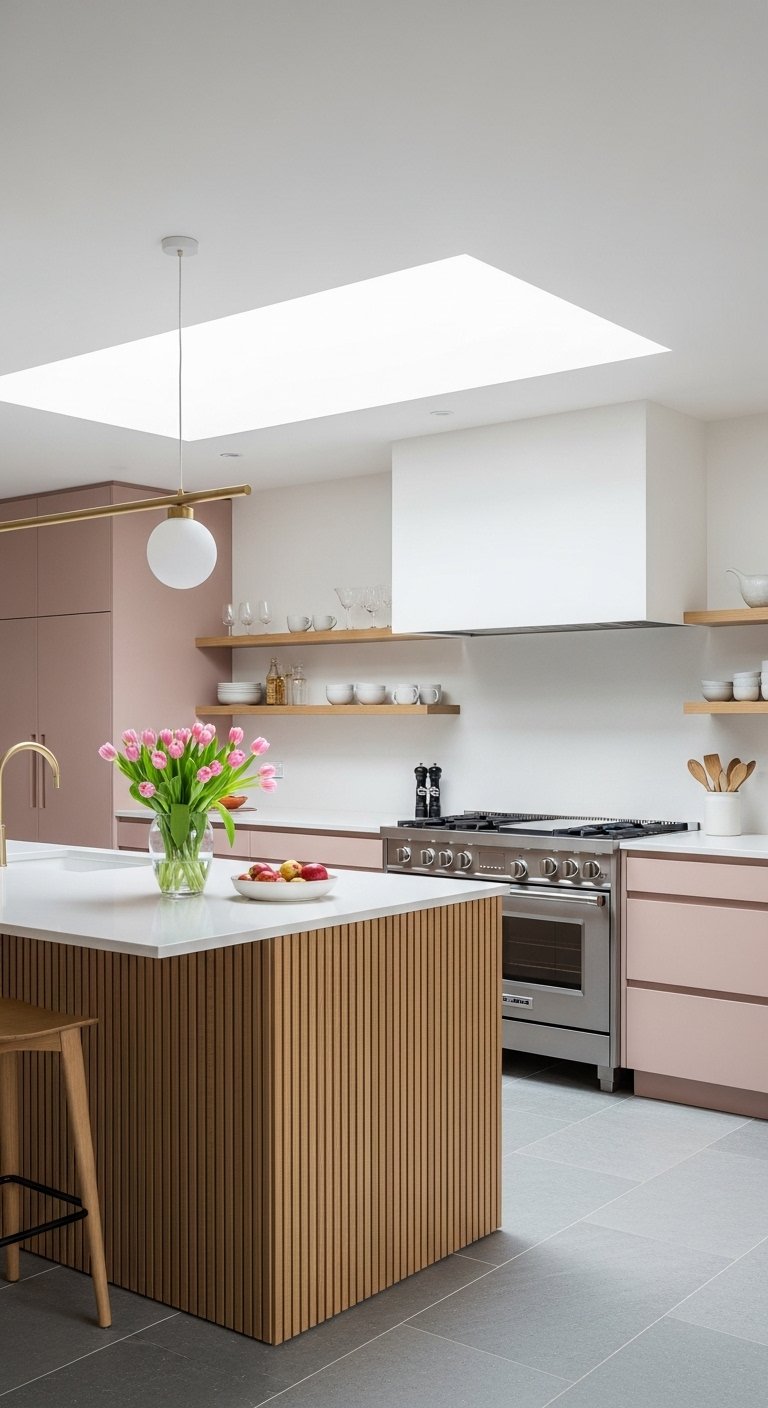
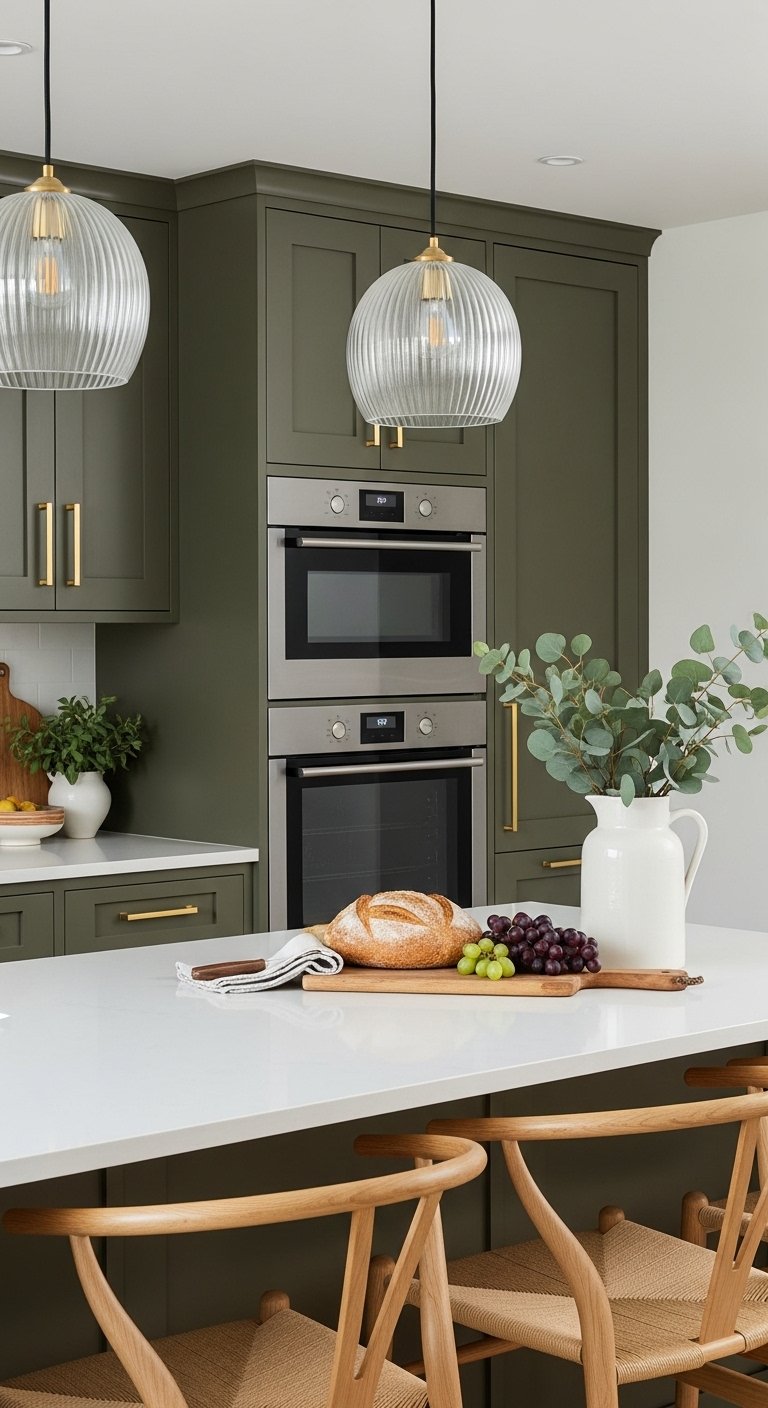
Define your island with panelling
Texture creates depth. In a small kitchen, where you might not have room for architectural grandiosity, adding panelling to your island makes it a focal point. Vertical shiplap, reed moulding, or fluted detail draws the eye upward, subtly making the ceilings feel higher and the island feel more substantial without taking up extra width.
This design trick works particularly well if you are using a stock cabinet box. simply gluing on decorative moulding and painting it creates a custom look for pennies. If your kitchen is white, a panelled island in a soft grey or sage green adds a layer of sophistication. The shadows created by the panelling add visual interest that flat doors simply cannot achieve.
Pro Tip: Use vertical lines for low ceilings to add height, and horizontal shiplap to make a narrow room feel wider.
Go for a modular unit
Rigidity is the enemy of the small home. A modular, freestanding island on sturdy locking wheels gives you the ultimate control over your floor plan. When you are hosting a cocktail party, roll the island against the wall to serve as a bar. When you are prepping Thanksgiving dinner, roll it to the center.
IKEA and other retailers offer fantastic modular kitchen carts that act as permanent islands. Look for stainless steel options for a chef’s kitchen vibe, or bamboo for a warmer look. The key is stability; ensure the wheels have high-quality locks so the unit doesn’t slide away while you are chopping vegetables. Modular units often come with open wire shelves, which are great for storing heavy pots and pans that take up too much cabinet space.
Pro Tip: Upgrade a basic IKEA cart by swapping the top for a piece of quartz remnant from a local stone yard for a high-end custom look.
Choose the shortest side for seating

If your kitchen is long and narrow, placing stools on the long side of the island might block the aisle completely. Instead, place your overhang and seating on the short end (the “cap”) of the island. This creates a bistro-style setup where two people can sit facing the kitchen, or facing each other if the island is wide enough.
This layout preserves the integrity of your work triangle. You can work on the long sides of the island without fighting with chair legs. It creates a distinct “zone” for socializing that is separate from the working zone. A rounded overhang on the short end helps traffic flow even better, removing sharp corners that you might bump into in a tight space.
Pro Tip: Use backless stools that can tuck fully under the overhang to keep the visual line clean.
Save this idea to your Pinterest.
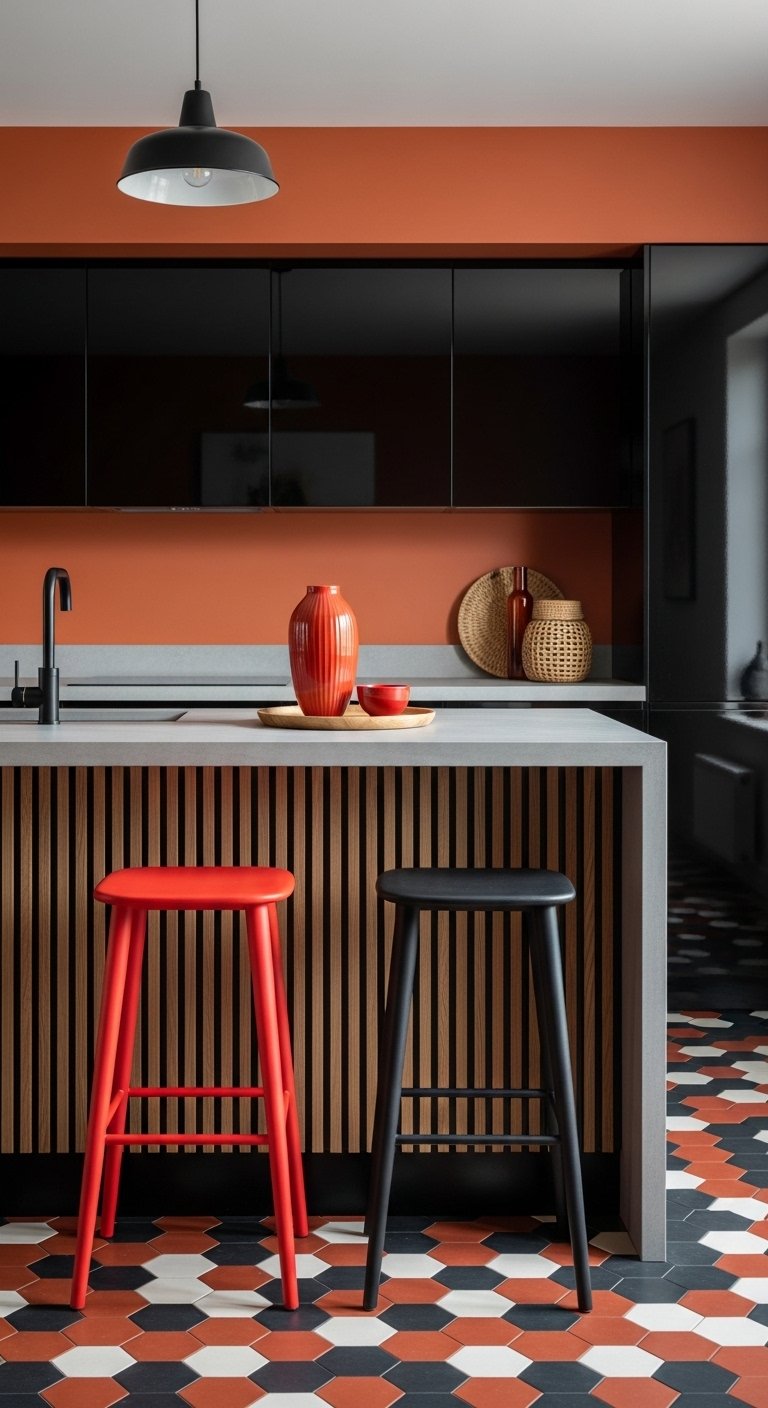
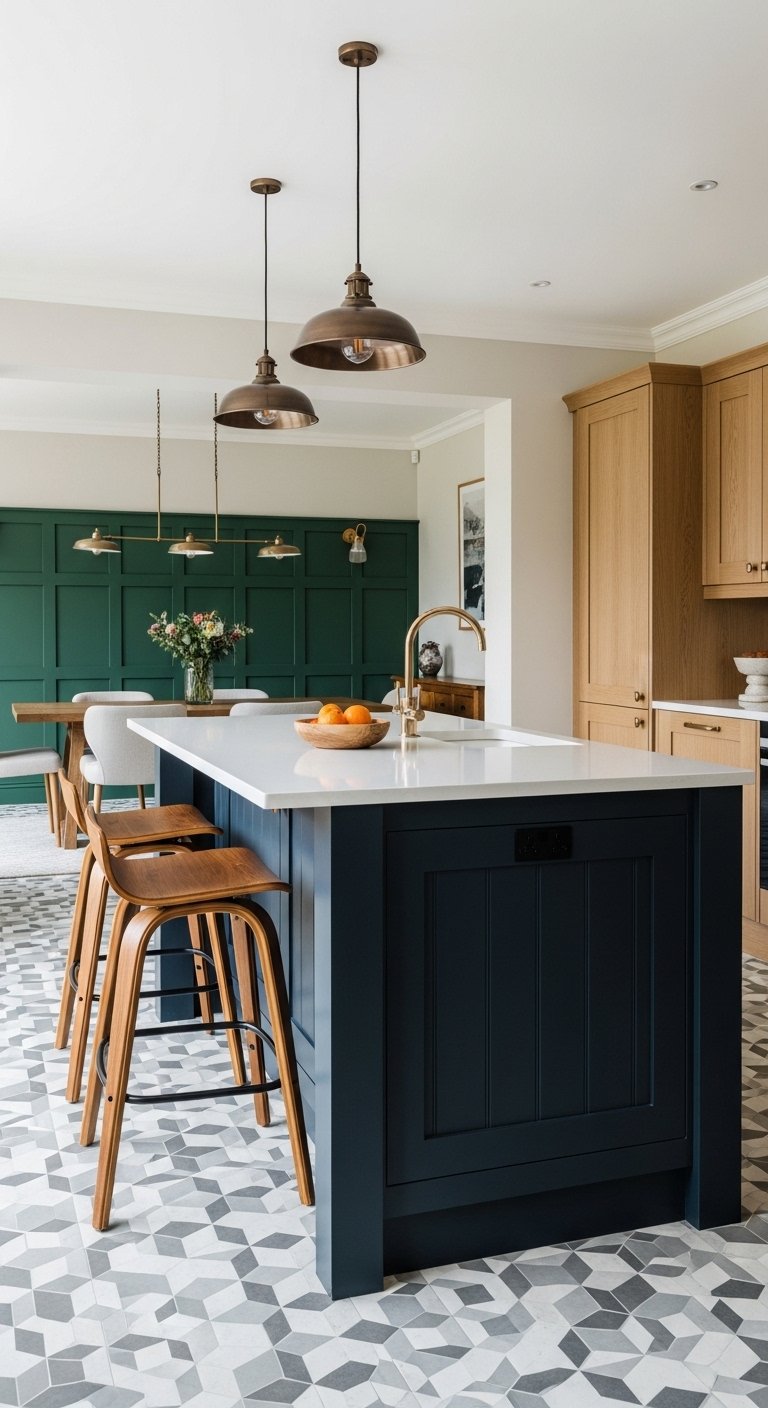
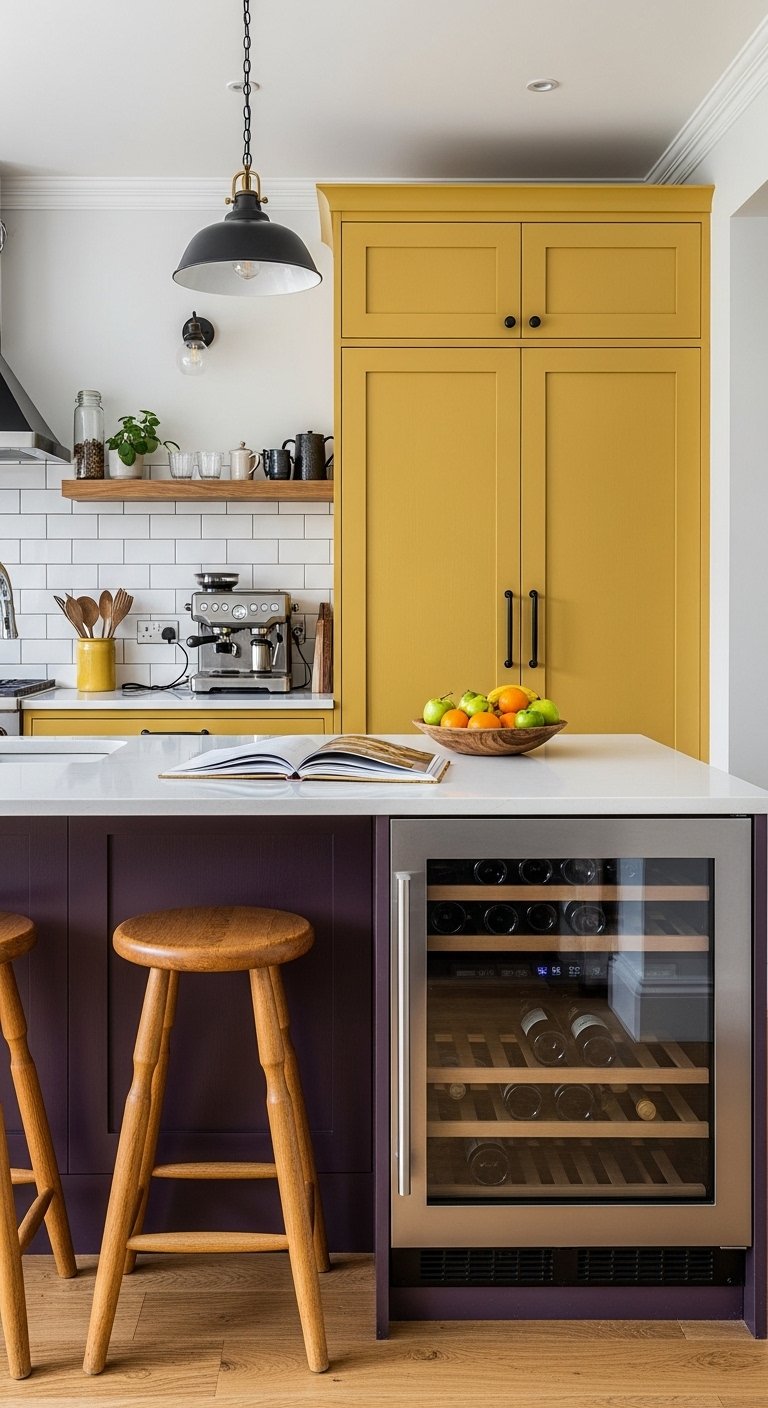
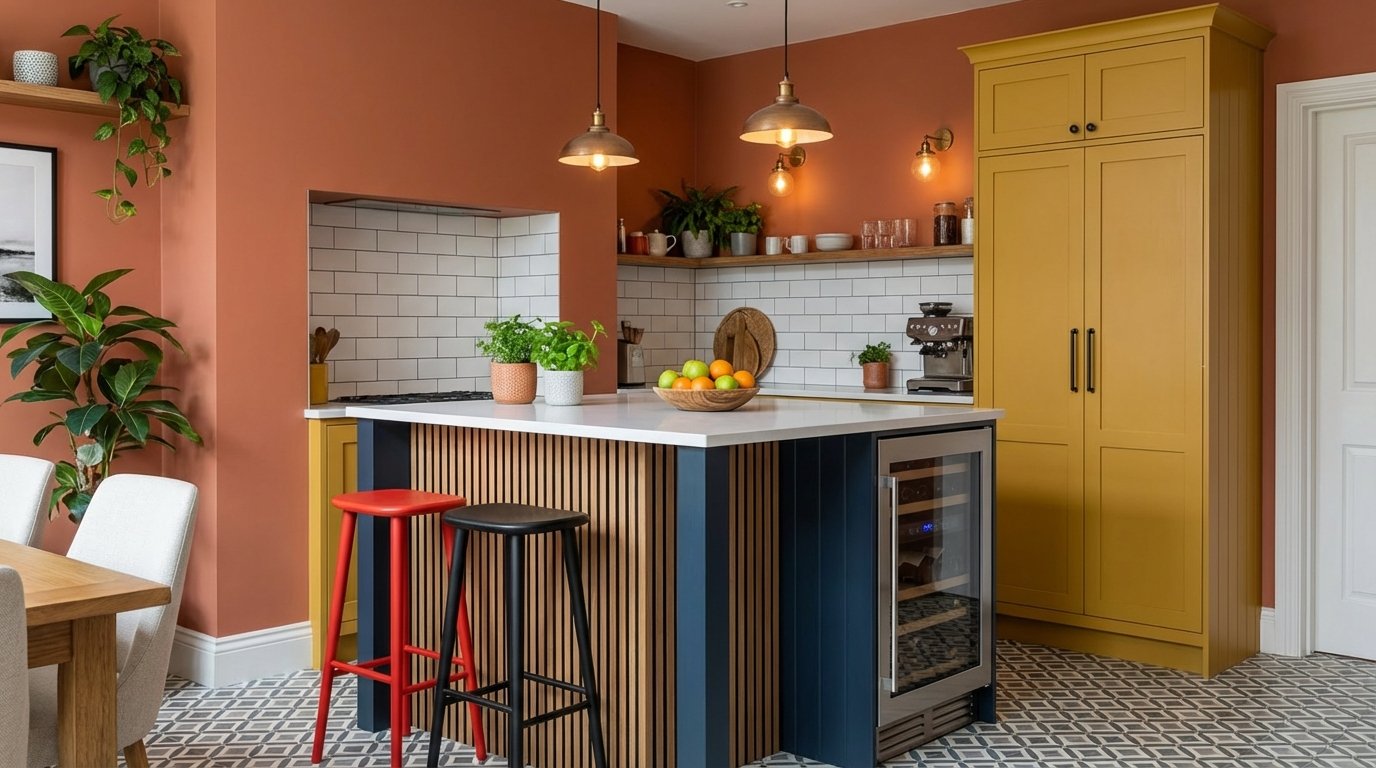
Introduce a pop of colour
Small spaces are the perfect canvas for bold decisions because the surface area is smaller—it’s less risky and cheaper to change. Painting your small island a vibrant hue like navy blue, emerald green, or even a sunny yellow turns it into a jewel box feature. It distracts the eye from the small size of the room and focuses attention on the design.
This technique is called “accenting.” By keeping the perimeter cabinets neutral and the walls light, the coloured island anchors the room. It gives the space personality and energy. If you are renting, you can achieve this with high-quality peel-and-stick vinyl wrap designed for cabinetry. It allows you to test a bold trend without losing your security deposit.
Pro Tip: Repeat the island colour in small accessories around the room—a tea towel, a plant pot, or a piece of art—to create a cohesive design thread.
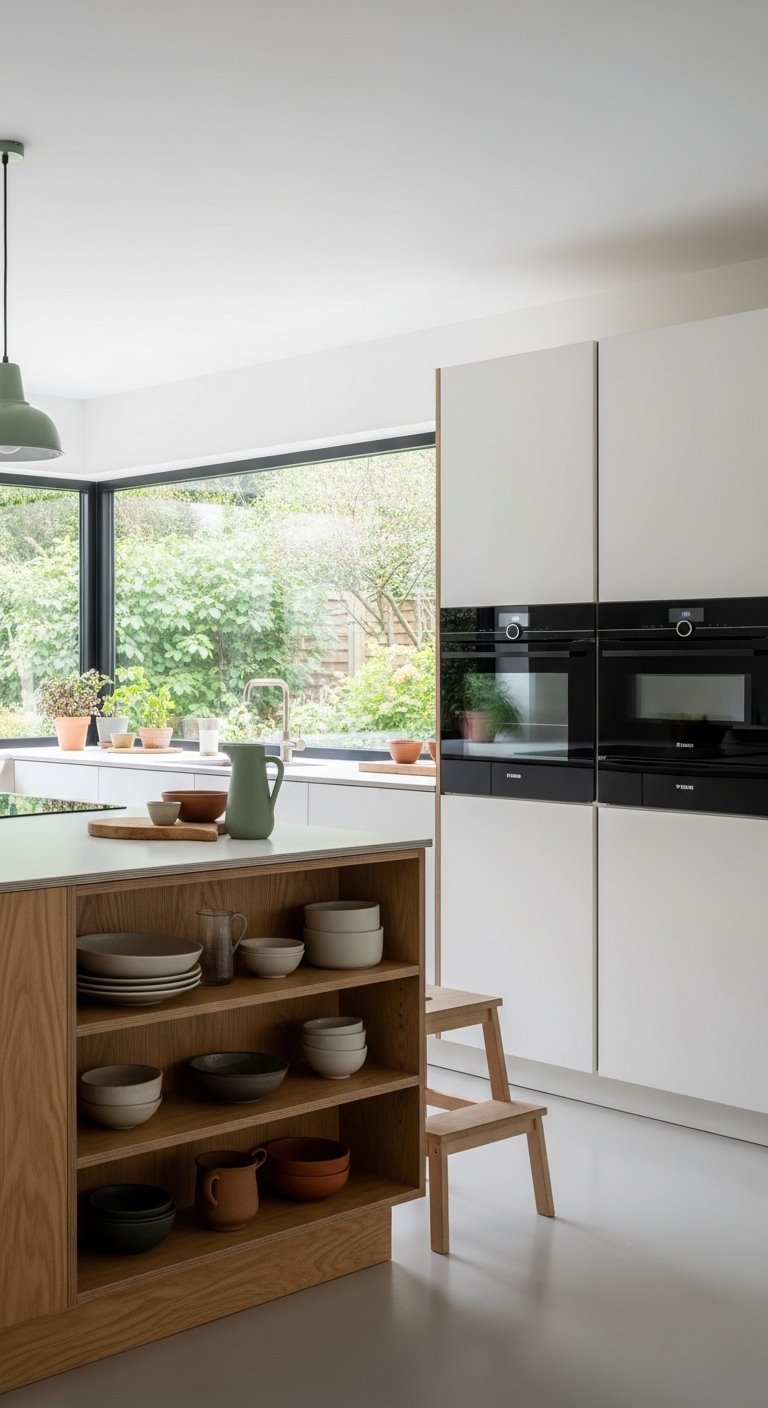
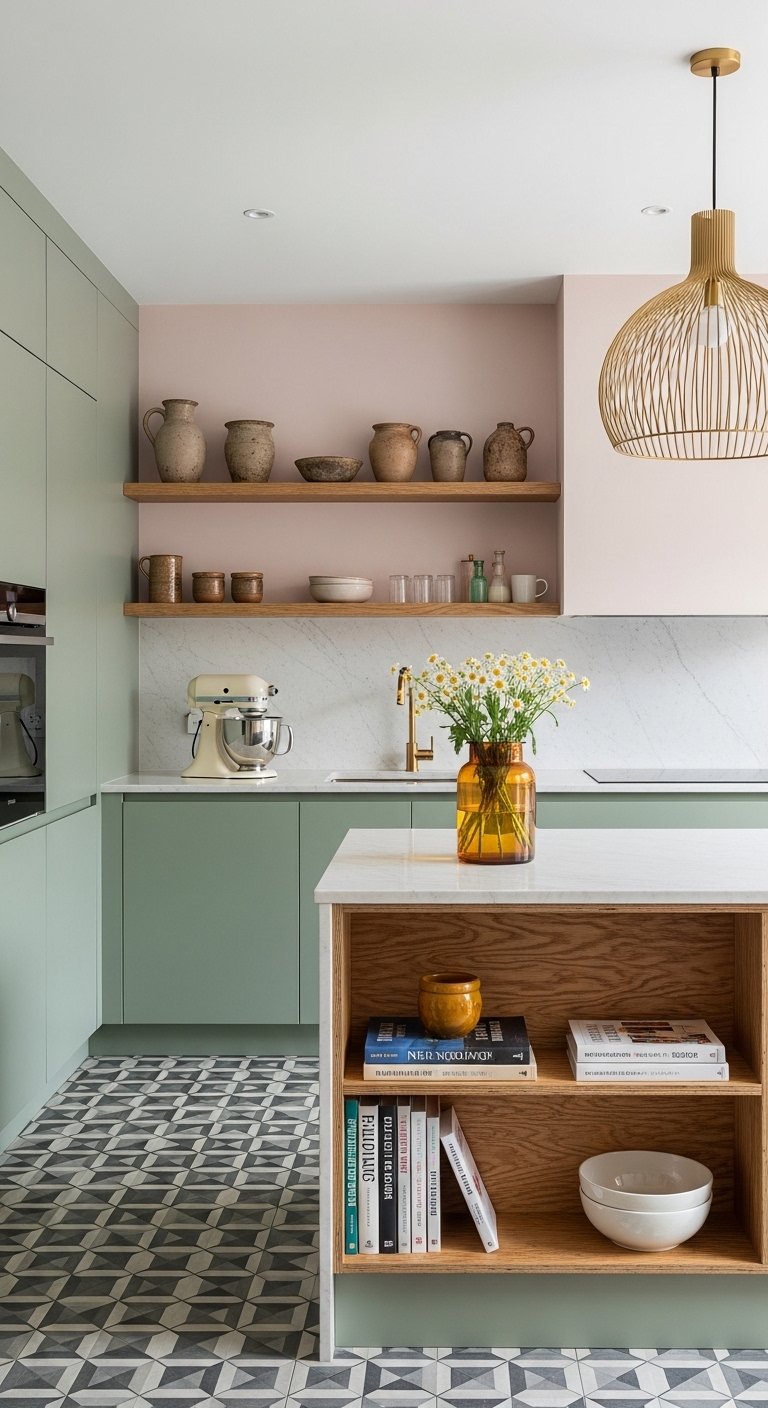
Choose open shelving
Cabinet doors take up space when they swing open, and solid boxes can make a small kitchen feel heavy. An island with open shelving offers a lighter, breezier aesthetic. It allows light to pass through the furniture, which is essential for maintaining a sense of openness.
Use the shelves to display your most beautiful items: a stack of ceramic bowls, woven baskets for onions and potatoes, or your collection of cookbooks. This turns your storage into decor. However, this requires discipline. Open shelving can easily look messy, so you must commit to keeping it organized. Use matching baskets or jars to contain loose items and maintain a clean visual rhythm.
Pro Tip: Line the shelves with a non-slip liner to prevent rattling, and place the heaviest items (like a stand mixer or dutch oven) on the bottom shelf for stability.
Popular Asked Questions
What is the minimum size for a kitchen island?
The absolute smallest fixed island should be about 40 by 40 inches (1 meter square). However, for a narrow mobile island or table, you can go as slim as 24 inches deep. Anything smaller than this tends to look like an obstacle rather than a useful piece of furniture.
How much walking space do I need around an island?
The “golden rule” of kitchen design is 42 inches of clearance. This allows two people to walk past each other. In very small kitchens, you can squeeze this down to 36 inches, but this is the bare minimum. If you have less than 36 inches, a permanent island will make your kitchen feel claustrophobic; consider a mobile cart instead.
Can I use a regular table as a kitchen island?
Yes, absolutely! The only issue is height. Standard dining tables are 30 inches high, while kitchen counters are 36 inches high. To fix this, you can add casters (wheels) to the legs, add wooden blocks to the base, or simply use it as a lower baking station, which is actually better for rolling out dough.
Does a kitchen island add value to a home?
Yes. Real estate data consistently shows that kitchens sell homes. Even a small island suggests “luxury” and “utility” to buyers. It creates a focal point and implies that the home has ample storage and prep space. A well-designed island is almost always a good return on investment.
How do I get electricity to a floating island?
If you can’t trench the floor (common in condos or rentals), you cannot have hardwired outlets. Your best solution is a “pop-up” charging tower that you can plug into a nearby wall when needed, or simply designing the island for prep and storage only, keeping appliances on the perimeter counters.
Conclusion
You do not need a sprawling estate to enjoy the benefits of a kitchen island. Whether you choose a slimline console, a mobile cart, or a clever breakfast bar extension, there is a solution that fits your square footage. The key is to respect the clearance zones and prioritize the function you miss most, be it storage, seating, or prep space.
Which of these small kitchen island ideas would work best in your layout? Let us know in the comments below.
Follow us on Pinterest for more Kitchen Design inspiration.

Leave a Comment