
Why Spray Paint Has Become My Go-To Solution
I’ll be honest with you. When I first considered using spray paint indoors, I was skeptical. The idea of bringing aerosol cans into my living space seemed messy and potentially disastrous. But after watching my neighbor transform an old bookshelf in half the time it would’ve taken me with a brush, I decided to give it a shot. That decision changed everything about how I approach home improvement projects.
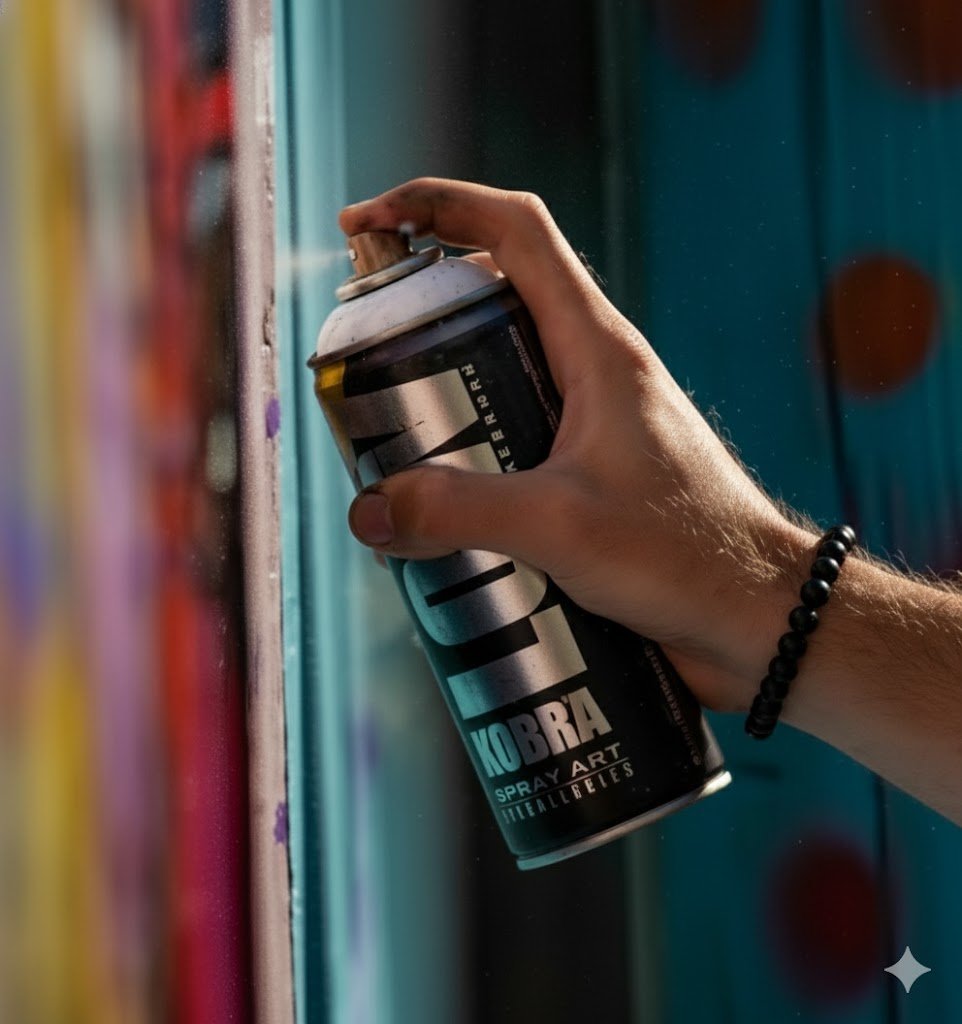
Let me tell you what makes spray paint such a game changer for indoor work. Picture this: you’ve got an intricate piece of furniture with all sorts of nooks and crannies. Maybe it’s a wrought iron side table or a wooden chair with spindles. Now imagine trying to get into every tiny space with a paintbrush. Your hand cramps up just thinking about it, right? That’s where spray paint comes in and saves the day. The fine mist reaches places your brush could only dream about touching.
The time factor alone makes spray paint worth considering. I remember spending an entire weekend painting a small dresser with traditional methods. Brush strokes, waiting for layers to dry, going back to fix drips. It was exhausting. When I switched to spray paint for a similar project, I finished in about three hours. Three hours versus two full days. The math speaks for itself.
What really sold me on spray paint was how professional the finish looks when you do it right. No brush marks. No roller texture. Just a smooth, even coat that makes your project look like you bought it that way. I’ve had friends ask me where I purchased certain pieces, refusing to believe I painted them myself. That’s the kind of result we’re talking about here.
But here’s the thing that nobody tells you upfront. Spray painting indoors isn’t just about picking up a can and going to town. There’s a method to this madness. You can’t just walk into your living room, point, and spray. Well, you could, but you’d end up with paint on your couch, your carpet, possibly your cat, and definitely places you never intended. Ask me how I know. Actually, don’t. It’s still a sore subject.
The learning curve isn’t steep, but it exists. When I started out, I made every mistake in the book. I painted on humid days and watched the finish turn cloudy. I didn’t protect my floors properly and spent hours scrubbing paint specks off hardwood. I held the can too close and created drips that looked like modern art gone wrong. Each mistake taught me something valuable, though, and now I want to share those lessons with you so you can skip the frustration part.
What we’re going to walk through together is everything I wish someone had told me before my first spray paint project. We’ll cover the preparation work that seems tedious but saves you hours of cleanup later. We’ll talk about the safety gear you actually need versus what’s overkill. And we’ll get into the nitty gritty of technique, like how far to hold the can and what motion creates the best coverage.
I’ve used spray paint on wood, metal, glass, plastic, and even fabric. Some projects turned out beautifully. Others taught me what not to do next time. The beauty of this medium is that once you understand the basics, you can tackle almost any small to medium project with confidence. That wobbly lamp base? Give it new life. The tired picture frames? Refresh them in minutes. The outdoor furniture that’s seen better days? Bring it inside for a winter makeover.
The best part about spray paint is how accessible it makes DIY projects. You don’t need to be particularly handy or artistic. You don’t need a workshop full of expensive tools. A few cans of paint, some basic supplies, and a willingness to follow simple guidelines will get you most of the way there. The rest comes down to patience and practice.
So whether you’re looking to update old furniture, add personality to plain objects, or just want to try something new, spray paint opens up a world of possibilities. I’m going to show you how to approach these projects methodically so you get results that make you proud rather than frustrated. We’ll start with the fundamentals and build from there, covering everything from weather conditions to hand positioning. By the end, you’ll understand not just what to do, but why you’re doing it. That understanding makes all the difference between a project that works out and one that ends with you staring at a paint splattered mess wondering what went wrong.
Let’s get into it. Grab your reading glasses if you need them, maybe a cup of coffee, and let’s talk about how to use spray paint indoors like someone who actually knows what they’re doing. Trust me, if I can figure this out through trial and error, you can definitely learn it the easier way.
Best Conditions for Spray Painting: Weather and Environment Matter More Than You Think
Here’s something I learned the hard way during my second spray paint project. I thought I could paint whenever the mood struck me. Middle of winter? Sure. Humid summer afternoon? Why not. Turned out the weather gods had opinions about my painting schedule, and they weren’t shy about expressing them through ruined finishes and wasted paint.
Let me paint you a picture, pun intended. It was a cold January morning, maybe 40 degrees in my garage. I figured since I was working indoors, the temperature didn’t matter much. I shook up my can of glossy white paint and went to work on a small table. The paint came out fine, hit the surface, and then something weird happened. Instead of forming a smooth coat, it looked textured and rough, almost like orange peel. I kept spraying, thinking I could fix it. I couldn’t. The cold temperature was causing the paint to dry too quickly as it traveled through the air, creating that awful texture before it even landed on the table.
Temperature plays a bigger role than most people realize. The sweet spot for spray painting sits somewhere between 50 and 85 degrees Fahrenheit. Below 50, and you run into the problem I just described. The paint particles start setting up mid air, and you get that grainy finish that looks amateur at best. Above 85, you’ve got a different issue. The paint dries so fast on the surface that subsequent coats don’t bond properly. You end up with layers that can peel or chip easier than they should.
But temperature is only half the battle. Humidity sneaks up on you like that friend who always arrives right when you’re about to eat. I once painted a metal shelf on what seemed like a perfect spring day. Sunny, warm, not too hot. What I didn’t realize was that the humidity level had climbed to about 80 percent. The paint went on beautifully. Looked great. Then over the next few hours, as it dried, the finish turned cloudy and dull. That’s moisture getting trapped in the paint layer, and there’s no fixing it once it happens. You have to strip everything and start over.
The ideal humidity range falls between 40 and 70 percent. Lower than 40, and you might get some of that quick drying action that causes texture issues. Higher than 70, and you’re gambling with that cloudy finish I mentioned. On really humid days, above 85 percent, just don’t paint. I know it’s tempting when you’ve psyched yourself up for a project, but trust me on this. Save yourself the headache and find something else to do that day.
Now let’s talk about what nobody mentions in the instructions on the can. Ventilation isn’t just about safety, though that’s obviously the big one. Good airflow actually affects how your paint applies and dries. In a stuffy, closed up room, you’re breathing recycled fumes and the paint takes longer to dry properly. That extended drying time means more chance for dust and debris to settle into your wet paint. I learned this when I painted a small box in my basement with the door closed. When I came back an hour later, the surface looked like I’d deliberately added texture with lint and dust particles.
Cross ventilation is your friend here. Open windows on opposite sides of your workspace if you can. That creates airflow that pulls fresh air in and pushes fumes out. If you’re working in a room with only one window, set up a box fan to pull air out the window. The negative pressure will draw fresh air in through the door or any gaps. You want to feel a gentle breeze moving through the space. Not a windstorm that blows your project over, just a steady, mild current.
I’ve done projects outside when weather permits, and there’s something liberating about it. No worrying about ventilation. No concern about overspray landing on furniture. Just you, your project, and the great outdoors. But even outside, you need to think about conditions. Wind can be tricky. A light breeze is fine, maybe even helpful. But once the wind picks up past 10 or 15 miles per hour, you’re going to struggle. The paint spray gets blown around, landing everywhere except where you want it. You waste paint, you waste time, and you still don’t get good coverage.
Direct sunlight presents another outdoor challenge. That table or chair you’re painting heats up fast in direct sun. Hot surfaces cause paint to dry too quickly, just like high ambient temperatures do. I now look for shady spots or wait until late afternoon when the sun isn’t so intense. Some people set up canopies or work under trees. Whatever keeps your project out of direct sunlight will improve your results.
Rain seems like an obvious thing to avoid, but mist and fog are sneakier. They feel harmless, barely noticeable. But that fine moisture in the air will absolutely ruin your paint job. I made this mistake on an early morning that felt cool and pleasant. Couldn’t figure out why my paint looked spotty and weird. Took me a while to realize the morning mist was the culprit. Now I check weather apps before committing to outdoor projects. If there’s any precipitation in the forecast, even light mist, I wait for a better day.
The garage deserves special mention as a painting location. It seems perfect at first glance. Sheltered from weather, more ventilated than indoor rooms, plenty of space. But garages can be deceptive. They get cold in winter and hot in summer, often more extreme than outdoor temperatures. That concrete floor stays cold long after the air warms up. I’ve had projects sitting on cold concrete where the bottom dried differently than the top, creating inconsistent finishes. Now I put cardboard or wood under anything I’m painting in the garage to insulate it from temperature extremes.
One more thing about environment that caught me off guard. Dust and debris in the air. You’d think your house is clean, right? But when you’re spraying paint, that wet surface acts like a magnet for every floating particle in the vicinity. I watched in horror once as a spider web I hadn’t noticed drifted down and plastered itself across my freshly painted surface. Now I do a thorough cleaning of my workspace before I start. Vacuum, dust, maybe even run a damp mop if I’m working on the floor. Those few extra minutes of prep save you from having to sand out imperfections later.
Checking conditions before you start seems like overkill until you’ve ruined a project by ignoring them. Now I’m almost obsessive about it. I check the thermometer, I look at humidity readings on my weather app, I feel the air for moisture. My family thinks I’m being ridiculous, but they also compliment how professional my painted projects look. Coincidence? I think not.
Safety First: Protecting Yourself from Fumes and Overspray
Let me tell you about the time I thought I was tougher than spray paint fumes. Spoiler alert: I wasn’t. I’d decided to paint a small bookshelf in my bedroom, figured it was such a quick job that I didn’t need to bother with a mask. I’d just hold my breath when spraying and breathe between coats, right? Wrong. So very wrong. About halfway through the project, my head started feeling fuzzy. Not in a pleasant way. More like someone had stuffed cotton in my brain. I felt dizzy, slightly nauseous, and my coordination went wonky. I’d given myself a nice case of solvent exposure, and I had to abandon the project, air out the room, and go lie down for a couple hours. Not my finest moment.
That experience taught me something valuable. The chemicals in spray paint aren’t messing around. These aerosol cans contain solvents, propellants, and various other compounds that your lungs really don’t appreciate. When you spray, you’re not just putting paint on your project. You’re creating a fine mist that hangs in the air, and you’re breathing that mist whether you realize it or not. Some of those particles are small enough that they go deep into your lungs. Your body can handle small exposures, sure, but why risk it when protection is cheap and simple?
I now own several respirator masks, and I use them every single time I spray paint. Not the flimsy paper dust masks, either. Those are about as useful as holding a tissue over your face. I’m talking about proper respirator masks with organic vapor cartridges. They look a bit intense, like something from a science fiction movie, but they work. The cartridges filter out the nasty stuff while still letting you breathe comfortably. You can pick up a decent respirator for under thirty dollars, and the cartridges last through multiple projects.
Wearing the mask feels weird at first. It’s bulky, it makes you sound like Darth Vader when you breathe, and it leaves marks on your face. But you know what? After about five minutes, you forget you’re wearing it. And when you finish your project without a headache, without that chemical taste in your mouth, without feeling lightheaded, you’ll wonder why you ever hesitated. I actually feel naked now if I start a project without my mask on. It’s become such a habit that I put it on before I even shake the paint can.
Let’s talk about your eyes for a minute. Spray paint creates a lot more overspray than you’d expect. That fine mist drifts and swirls, catching light like tiny particles of glitter in the air. Pretty to look at, not pretty when it lands in your eye. I learned this lesson when a gust of wind blew overspray back at me during an outdoor project. Got some right in my left eye. Burned like crazy. My eye watered uncontrollably, turned red, and I had to flush it with water for what felt like forever. Safety glasses would have prevented the whole ordeal.
Good safety glasses don’t have to be expensive or uncomfortable. I use clear ones that wrap around the sides of my face. They fog up sometimes when I’m wearing my respirator, which is annoying, but I’ve learned to work with it. Some people use anti fog spray or wipes. I just take breaks to let them clear. The minor inconvenience is worth protecting your vision. You only get one set of eyes, and spray paint in them is not an experience you want to have even once.
Gloves seem obvious, but I resisted them for a while. I thought they’d make me clumsy, that I’d lose the feel of holding the can properly. Then I spent an evening scrubbing paint off my hands with increasingly aggressive solvents. Nail polish remover. Paint thinner. That pumice based hand cleaner that feels like washing with sandpaper. My hands were raw and sore by the time I got most of the paint off. Still had stained cuticles for a week. Now I wear nitrile gloves every time. The kind mechanics use. They’re thin enough that you don’t lose dexterity, but they keep paint off your skin completely.
Here’s something I didn’t expect about gloves. They make cleanup so much easier. When you’re done painting, you just peel off the gloves and toss them. No scrubbing, no chemicals, no abrading your skin. Your hands come out clean and soft. I’ve even started keeping a box of gloves in my painting supplies because they’re cheap and disposable. You can get a hundred of them for less than the cost of a couple cans of paint.
Your clothes matter more than you might think. I ruined a perfectly good pair of jeans on my first spray paint project. Got overspray all over them. Tried to wash it out. Didn’t work. Now those are my official painting jeans, covered in splatters and spots of every color I’ve ever used. I’ve also got a painting shirt, painting shoes, even painting socks after an incident with drips that soaked through my sneakers. You don’t need to buy special painting clothes. Just designate some old stuff that you don’t mind destroying.
Some folks like those disposable coveralls you can buy at hardware stores. They’re cheap, they cover everything, and you can throw them away when you’re done. I tried them once and felt like I was wearing a plastic bag. They don’t breathe at all, and I ended up sweating like I’d run a marathon. But if you’re doing a big project or working with dark colors that show every speck, they might be worth the discomfort. Personal preference plays a big role here.
Shoes deserve special attention. Spray paint drips and splatters tend to land on the ground, which means they land on your shoes. I’ve got permanent speckles on several pairs of sneakers. Now I wear old canvas shoes that I’ve already beaten up. Some people go barefoot if they’re working outside in warm weather. I don’t recommend that unless you enjoy paint between your toes. Trust me, getting spray paint off skin is annoying. Getting it out from between your toes is a special kind of tedious.
The fumes are the invisible danger. You can’t see them after the initial spray settles, but they’re still there. Volatile organic compounds, or VOCs, continue off gassing as the paint dries. This is why you need ventilation even after you stop spraying. I keep fans running for hours after I finish a project, sometimes overnight if I’m painting in an enclosed space. The smell gives you a clue about fume concentration. If you can smell it strongly, the fumes are still heavy. Once the smell fades to barely noticeable, you’re in better shape.
I’ve read the warning labels on spray paint cans more times than I can count. They all say the same basic things. Use in well ventilated areas. Avoid breathing vapors. Keep away from heat and flame. Those warnings exist for a reason. People have gotten seriously sick from spray paint exposure. Some have even died in extreme cases, usually from deliberately huffing the fumes, but the point remains. These chemicals demand respect.
Building good safety habits takes time, but they become second nature eventually. Now I automatically reach for my mask before I pick up a paint can. I check that my gloves are in my pocket. I make sure my safety glasses are clean and ready. It’s like buckling your seatbelt when you get in a car. You don’t think about it anymore. You just do it. That automatic response keeps you safe project after project, and the small investment in safety gear pays dividends in protecting your health long term.
Protecting Your Space: Floor and Furniture Coverage Strategies
The first time I spray painted indoors, I thought I’d be careful enough to avoid making a mess. I positioned my project on a small piece of cardboard and figured that would catch any overspray. I was so naive. So blissfully, foolishly naive. By the time I finished, I had tiny paint specks on the floor extending about six feet in every direction. My hardwood floor looked like someone had sneezed paint all over it. I spent the next two hours on my hands and knees with mineral spirits and a rag, scrubbing each tiny speck. My back hurt, my knees hurt, and I swore I’d never make that mistake again.
Protecting your floor starts with understanding how spray paint behaves when it leaves the can. It doesn’t travel in a straight line and land neatly on your project. Think of it more like a cloud that expands as it moves through the air. Some of it hits your target. The rest becomes overspray that drifts and settles on whatever’s nearby. Wind, air currents from fans or HVAC systems, even the way you move the can all affect where that overspray goes. You need a much bigger protected area than you initially think.
I now use what I call the “newspaper carpet” method. I lay down newspapers in overlapping sheets, creating a covered area that extends at least four feet beyond my project in all directions. For bigger projects or if I’m feeling paranoid, I go six feet. The overlapping matters because paint has a way of finding gaps. If two sheets just touch at the edges, paint will sneak through that seam. I overlap by at least six inches everywhere, and I tape the edges down with painter’s tape so the papers don’t shift while I’m working.
The number of layers makes a difference too. One sheet of newspaper might catch the paint on the surface, but newspaper is porous. Paint can soak through, leaving a ghost image on your floor underneath. I use at least three layers, sometimes four if I’m spraying dark colors. Yeah, it uses a lot of newspaper. I started saving them weeks before a project or asking neighbors for theirs. You can also buy rolls of builder’s paper at home improvement stores. It’s basically heavy kraft paper that comes in wide rolls. One roll will cover way more area than a stack of newspapers.
Drop cloths offer another option. The canvas ones are great if you own them already. They’re reusable, they catch everything, and they last forever. But they’re expensive upfront. I’ve got a couple that I use for really big projects. For regular stuff, I stick with my newspaper method. Plastic drop cloths are cheap and effective, but they have a downside. They’re slippery. I nearly fell on my backside once when I stepped on plastic sheeting with paint on it. It was like stepping on ice. If you use plastic, tape it down securely and watch your footing.
Here’s a trick I picked up from a professional painter. Create a spray booth effect using cardboard boxes. For small projects, I’ll sometimes set up large pieces of cardboard behind and beside my project, creating three walls. This catches a lot of overspray that would otherwise drift across the room. You can get boxes for free from retail stores or from your own online orders. Just break them down flat, and suddenly you’ve got instant spray booth walls. When you’re done, fold them up and save them for next time, or toss them if they’re too covered in paint.
Furniture removal seems obvious, but people always underestimate it. You think your couch is far enough away. It’s not. That armchair in the corner looks safe. It’s not. Trust me, move everything out that you can move. What you can’t move needs to be covered. I use old sheets for this. Drape them over furniture, tuck them in tight, and tape them down if possible. Plastic sheeting works here too. Just remember that spray paint mist is sneaky. It finds uncovered spots like water finds cracks.
I once painted a small box while sitting on my couch, thinking I’d be careful enough. Spoiler alert: I wasn’t. I got overspray on the couch cushion. Not a lot, just a few specks, but they were bright red paint on a beige couch. I tried every cleaning method I could find online. Rubbing alcohol. Dish soap. Commercial upholstery cleaners. Nothing completely removed those red specks. Now that cushion lives with its decorative side down, hiding my shame. Learn from my mistake. Cover the couch or work in a different room entirely.
Walls need protection too if you’re working close to them. I’ve gotten overspray on walls and had to repaint the whole wall to match. Now I hang plastic sheeting or tape up cardboard if I’m working within six feet of a wall. Ceilings can catch overspray as well, though that’s less common unless you’re spraying upward. Still worth considering if you’re painting tall objects.
Let me tell you about protecting outlets and switches. This seems minor until you get paint in an outlet and realize you’ve created a potential fire hazard. I now cover all outlets with painter’s tape. The wide kind that covers the whole outlet face. Same with light switches. Takes two minutes and prevents problems. Paint in a light switch makes it sticky and hard to flip. Paint in an outlet is genuinely dangerous. Don’t skip this step.
Doors present a special challenge. If you’re working in a room with a door you need to keep accessible, cover the door or accept that it might get some overspray. I usually tape plastic sheeting over the door if I need to keep it closed. If the door will be open, I cover the floor on both sides of the doorway. Paint dust travels farther than you think, and you don’t want to track it through your house.
Ventilation equipment like fan grills and heat registers need protection too. Paint can get sucked into your HVAC system and distributed throughout your house. That’s a nightmare scenario. I tape plastic bags over floor vents and close any ceiling vents in the room where I’m working. If I’m using a fan for ventilation, I set it to blow outward so it’s pulling clean air past me rather than potentially pulling paint particles into the room.
The cleanup rags I mentioned deserve a permanent spot in your painting setup. Keep a couple of old towels or rags within easy reach. When you get a drip or spill, you want to deal with it immediately, while it’s still wet. Spray paint dries fast. Wait even a few minutes and that drip becomes exponentially harder to clean. I’ve learned to keep a rag in one hand or stuffed in my back pocket at all times while painting. The instant I see a problem, I can address it.
Sometimes despite all your precautions, paint gets where it shouldn’t. Accept this reality and have a plan. For hard floors, keep some mineral spirits or paint thinner on hand. For carpet, have carpet cleaner ready. For upholstery, keep upholstery cleaner nearby. The faster you tackle a mistake, the better chance you have of fixing it completely. I’ve learned not to panic when something goes wrong. Just grab the appropriate cleaner and deal with it methodically.
One final thought on protection. It feels like a lot of work upfront. All this taping and covering and moving takes time. You might be tempted to rush through it or skip parts. Don’t. I’ve learned the hard way, multiple times, that the hour you spend on proper protection saves you three or four hours of cleanup afterward. Good prep work is invisible when everything goes right. You only notice it in hindsight when you pack up your project and realize your floor is still pristine and your furniture is still spotless. That’s the goal. That’s when you know you did it right.
Surface Preparation: The Foundation of a Great Paint Job
I used to think surface prep was something people made too big a deal about. Paint is paint, right? It’ll stick to whatever you spray it on. That attitude resulted in some spectacularly failed projects. The worst was a metal shelf where the paint looked great for about a week, then started chipping off in sheets. Big chunks of paint just peeling away, leaving bare metal underneath. I’d skipped the prep work, and the paint had no reason to stick around. It took the easy way out and left me with a disaster.
Cleaning the surface seems basic, but it matters more than almost anything else you’ll do. Your project might look clean to your eye. There’s no visible dirt or grime. But there’s probably a layer of dust, oils from handling, maybe some old wax or polish. All of that interferes with paint adhesion. I learned to clean everything before painting, even if it looks pristine. A damp cloth with some mild detergent, wipe it down thoroughly, let it dry completely. That simple step improves results dramatically.
For wood projects, cleaning takes on extra importance. Wood often has natural oils, old furniture polish, or wax buildup. I once tried to paint a wooden picture frame that had been polished to a high shine. The paint beaded up on the surface like water on a freshly waxed car. Total failure. Now I clean wood with mineral spirits or denatured alcohol to remove any waxy residue. Then I let it dry overnight before painting. Seems excessive until you see the difference in how the paint lays down.
Metal surfaces present their own challenges. Rust is the obvious enemy. If you’re painting over rust, you’re building your project on a crumbling foundation. The rust will continue spreading under the paint, causing it to bubble and peel. I wire brush any rust I can find, getting down to bare metal if possible. For stubborn rust, I use a rust converter product that chemically changes rust into a stable surface. Then I can paint over it with confidence.
Grease and oil are common on metal items, especially things that have been stored in garages or used outdoors. I clean metal with a degreaser before painting. The automotive kind works great. Spray it on, let it sit for a few minutes, wipe it off. Sometimes I go through this process twice on really grimy pieces. The goal is to get the surface so clean that water would sheet off it rather than beading up. That tells you there’s no oil left.
Glass and plastic are tricky surfaces that many people get wrong. They’re both smooth and non porous, which sounds good but actually makes adhesion harder. Paint needs something to grip onto. On glass, I lightly rough up the surface with fine steel wool. Not enough to scratch it visibly, just enough to give it some tooth. On plastic, I use fine sandpaper, maybe 220 grit. Light pressure, quick passes, just to dull the shiny surface.
Speaking of sandpaper, let me talk about roughness for a minute. Paint sticks better to slightly rough surfaces than to perfectly smooth ones. Think of it like velcro. The hooks need loops to grab onto. If your project is glass smooth, sand it lightly. Not to create visible scratches, just to scuff it up a bit. I keep a variety of sandpaper grits around, but for prep work, I usually reach for 220 or 320 grit. Fine enough not to leave obvious marks, coarse enough to create texture.
Old paint on a surface complicates things. If the old paint is in good shape, bonded tightly, not chipping or peeling, you can usually paint over it after a light sanding and cleaning. But if it’s flaking or bubbling, you’ve got to remove it. I’ve tried painting over bad old paint. Doesn’t work. The new paint bonds to the old paint, not to the surface underneath. When the old paint fails, your new paint goes with it. Strip bad paint down to bare material, or sand it smooth if you can’t get it all off.
Primer is one of those things I resisted for a long time. It seemed like an extra step, an extra expense, another can to buy and use. But primer transforms difficult surfaces into paint friendly ones. On metal, primer prevents rust and gives paint something to bond to. On glass or plastic, primer creates a layer that both the surface and the paint can grip. On bare wood, primer seals the grain and creates a uniform surface for your color coat.
I now use primer on almost everything. The only exception is projects where I’m repainting something that’s already painted in good condition and made of a paint friendly material like wood. For metal, always primer. For glass or plastic, definitely primer. For bare wood, absolutely primer. For previously painted smooth surfaces in good shape, I might skip it. But when in doubt, prime. The couple extra dollars and fifteen minutes of work pay off in results that last.
Spray primer is convenient and matches your application method. You can get it in the same aerosol cans as your color paint. I usually spray one or two light coats of primer, let it dry according to the can’s instructions, then proceed with color. The primer fills in small imperfections, creates a uniform surface, and gives your color paint the best possible foundation. Your final finish will be smoother and more durable.
Drying time between prep and painting matters more than I initially realized. After cleaning, the surface needs to be completely dry. Not just dry to the touch, but actually dry. I once painted a metal box about an hour after cleaning it with water. Seemed plenty dry. It wasn’t. The paint developed tiny bubbles as moisture trapped under the paint turned to steam. Now I wait at least four hours after wet cleaning before I paint, longer if I can. Overnight is ideal.
After sanding, you’ve got to remove the dust. All of it. Sanding creates a fine powder that settles everywhere, including on your project. If you paint over sanding dust, those particles get trapped in your paint film, creating a gritty texture. I use a tack cloth for this. It’s a sticky piece of fabric that picks up dust like magic. Wipe down the entire project with a tack cloth, and you’ll see how much dust it picks up even from surfaces that look clean.
For projects with complex shapes, cleaning and prepping takes patience. All those nooks and crannies need attention too. I use cotton swabs for tiny spaces, old toothbrushes for textured areas, and various brushes and rags for everything else. The time invested in thorough prep work directly translates to quality results. I’ve never regretted doing thorough prep. I’ve regretted skipping it many times.
Painting Technique: Getting Professional Results from a Spray Can
The first time I used spray paint, I treated it like I was using a fire extinguisher. Point and blast. That resulted in runs, drips, and uneven coverage that looked like an abstract art experiment gone wrong. Spray paint requires finesse, rhythm, and a technique that feels unnatural at first but becomes smooth with practice.
Shaking the can properly is where most people start wrong. The instructions always say to shake for a couple minutes, but who actually does that? I used to shake for maybe thirty seconds, figure that was close enough, and start spraying. The result was sputtering paint, inconsistent color, and separation in the finish. Now I take shaking seriously. I shake vigorously for a full two minutes before starting, and I continue shaking periodically as I work.
The shaking motion matters. Don’t just rattle the can up and down like a salt shaker. Hold it at the top where the cap is, and rotate the bottom in circles while moving it up and down. This churns the paint thoroughly, mixing the pigments with the solvents and propellant. You’ll hear the mixing ball inside clacking around. That sound tells you things are moving. When I forget to shake well, I can see the difference in the spray pattern. It’s splotchy and inconsistent.
Distance from the surface might be the single most important variable you control. Hold the can too close, and you get drips and runs as too much paint lands in one spot. Hold it too far away, and the paint dries partially in the air, hitting your surface as a rough, textured finish. The sweet spot is around eight to twelve inches. I know the instructions often say 20 to 30 centimeters, which is roughly the same thing, but thinking in inches makes more sense to my American brain.
Finding that perfect distance takes practice. I now judge it by extending my hand toward my project with fingers spread. The distance from my thumb to pinky is about eight inches. That’s my reference point. If I hold the can where my hand would touch the project if I reached out, I’m in the right range. Sounds silly, but this hand measuring trick keeps me consistent.
Movement technique separates good spray painting from mediocre results. You want smooth, steady passes across your project, moving your whole arm from the shoulder. Don’t pivot at the wrist. That creates an arc pattern where the can gets closer to the middle of your pass and farther at the ends. The result is heavy paint in the center and light coverage on the edges. I made this mistake for weeks before someone pointed out what I was doing wrong.
The proper motion feels robotic at first. Keep your arm locked at a consistent angle, move from your shoulder and core, sweep across the project at a steady speed. Start spraying before the can reaches the edge of your project, and keep spraying until you’re past the other edge. Trigger on before the project, trigger off after the project. This prevents that heavy paint buildup you get when you start and stop directly on the surface.
Speed matters as much as distance. Move too slowly and paint builds up, creating runs. Move too fast and you don’t get enough coverage, leaving a thin, transparent coat. I’ve found that counting helps establish rhythm. I count one thousand one, one thousand two as I make each pass. That timing keeps my speed consistent. Your counting speed might be different depending on the paint, temperature, and your natural rhythm, but the point is to establish something repeatable.
Overlapping passes creates even coverage. Each pass should overlap the previous one by about half. Think of mowing a lawn. You don’t leave gaps between rows, and you don’t mow the same strip three times. Same principle applies here. The overlap ensures no bare spots show through, while not wasting paint or creating heavy areas. I used to overlap too much, thinking more was better. It’s not. Half overlap is the target.
Multiple thin coats beats one thick coat every single time. This took me a while to accept. One heavy coat seems efficient. Get all the paint on there at once and be done. But thick coats sag, drip, run, and take forever to dry properly. Thin coats dry faster, adhere better, and give you more control. I typically do three to four thin coats on most projects. Each coat looks slightly transparent and imperfect. That’s fine. They build up into a solid, professional finish.
The waiting time between coats tests your patience. The can usually says to wait 15 minutes or so between coats, but I’ve found that conditions affect this timing. On humid days, I wait longer. On hot, dry days, sometimes I can go a bit faster. The key is that each coat needs to be dry to the touch before you add the next one. If you spray over wet paint, you can reactivate the solvents and create a mess. I test a hidden spot with my fingertip. If paint transfers to my finger, I wait longer.
Spraying angles change based on your project shape. For flat surfaces, hold the can perpendicular. For edges and corners, angle the can slightly so the spray hits straight on rather than glancing off. I painted a picture frame once and couldn’t figure out why the edges looked terrible. I was spraying straight across, so the spray was hitting the edge at an angle and mostly missing it. Now I angle the can to match whatever surface I’m targeting.
Projects with multiple sides require strategy. You can’t paint all sides at once, obviously. Pick a sequence that makes sense. I usually start with the least visible side, then work toward the most prominent surfaces. This way if I make mistakes early on, they’re on the back or bottom where nobody sees them. By the time I get to the front, I’ve worked out the rhythm and technique for that particular project.
Drying racks or props help when painting multiple sides. I use overturned cups, blocks of wood, nails driven through boards, whatever lets me elevate the project so I can access all sides. For small items, I sometimes push a screw into the bottom so I have a handle to hold while painting. Then I can rotate the piece, painting it from all angles without touching the wet paint.
The nozzle on the can affects your spray pattern. Different nozzles produce different spray widths. Some create a narrow jet, others a wide fan. Most spray paint comes with a standard nozzle that works fine for general use, but you can swap nozzles between cans. I’ve collected nozzles from empty cans and keep them in a small jar. When I need a specific spray pattern, I can try different nozzles until I find one that works.
Clogged nozzles are frustrating but fixable. If paint stops spraying correctly or sputters, the nozzle probably has dried paint blocking it. Don’t just spray harder. That wastes paint and doesn’t fix the problem. Pull off the nozzle and soak it in paint thinner or mineral spirits for a few minutes. Use a pin or needle to clear the tiny hole. Shake off the excess cleaner, put it back on, and you’re good to go. I learned to clear the nozzle at the end of each painting session by turning the can upside down and spraying until only propellant comes out. This clears paint from the nozzle and helps prevent clogs next time.
Temperature of the can affects performance. A cold can sprays differently than a warm one. If your paint has been sitting in a cold garage, bring it inside to warm up before using it. Room temperature paint atomizes better, creating a finer mist that lays down smoother. I keep my paint cans stored at room temperature, which also extends their shelf life.
Vertical surfaces present unique challenges. Gravity works against you, pulling wet paint downward. This creates runs if you’re not careful. On vertical pieces, use even lighter coats than you would on horizontal surfaces. Build up coverage gradually with more coats rather than trying to get solid coverage in fewer passes. Watch for drips forming at bottom edges. If you see one starting, stop spraying and let that coat dry before adding more.
Inside corners and recesses trap paint if you’re not careful. The spray bounces back out, creating a lighter coat than surrounding areas. I make extra passes over these spots, or angle my spray to reach them better. Outside corners and edges are the opposite problem. They receive paint from multiple angles, building up heavier than flat surfaces. Lighter pressure and faster movement help prevent buildup on corners and edges.
Fine details and delicate parts need special attention. I reduce spray pressure by not pressing the nozzle as hard, creating a lighter mist. Multiple passes with this light mist give me control over detailed areas without flooding them with paint. This technique takes practice, but it’s the difference between sharp, clean details and blurred, paint clogged messes.
Ambient air movement affects your spray. Even gentle breezes can blow overspray around, causing uneven coverage. If I’m working outside, I position my body to block wind from hitting the project. Indoors, I’m aware of fans and air conditioning vents. Sometimes I’ll turn off HVAC systems while I’m actively spraying, then turn them back on during drying times.
Holding the can consistently throughout a project prevents variation in your finish. I grip it the same way every time, middle fingers on the nozzle, thumb supporting the bottom, can body resting in my palm. This grip gives me control and lets me maintain steady pressure on the nozzle. Some people use their index finger on the nozzle. Either way works. Pick what’s comfortable and stick with it.
Fatigue affects technique more than you’d think. Your arm gets tired holding a can at the same angle, making repeated motions. I take breaks between coats to rest my arm and shake out the tension. This is another advantage of multiple thin coats. Each coat gives you a natural break to step back, check your work, and let your muscles recover. Trying to power through in one session usually results in sloppy technique toward the end.
Final coats get my best technique. By then I’ve warmed up, worked out the rhythm, and I’m just adding that last layer of coverage and protection. I slow down slightly, pay extra attention to my distance and speed, and really focus on smooth, even passes. That final coat is what people see. It’s worth taking your time to get it right.
Clear coat finishing is optional but transforms some projects. After your color coats dry completely, you can add clear spray over the top for extra durability and sheen. Matte, satin, or gloss clear coats each create different looks. I use clear coat on projects that will see heavy handling or outdoor exposure. The clear layer protects your color and extends the life of your paint job significantly.
The learning curve for spray painting isn’t steep, but it exists. Your first few projects might not turn out perfectly. That’s normal and expected. Each project teaches you something. You’ll discover what works for your hand, your rhythm, your style. The techniques I’ve described work for me, but you might find variations that work better for you. The key is to start with solid fundamentals and adjust from there based on results.
Practice pieces help you dial in technique before tackling projects you care about. I keep cardboard boxes around specifically for testing. Before starting a real project, I spray the cardboard to check my distance, speed, and coverage. This warmup helps me find my rhythm and lets me adjust technique if needed. Those few minutes of practice on scrap material often prevent mistakes on the actual piece.
Mistakes happen even to experienced spray painters. Accept this reality. When you mess up, don’t panic. Let it dry, sand it smooth, and repaint. I’ve salvaged projects I thought were ruined by simply sanding away the mistakes and starting over with better technique. The beauty of paint is that it’s forgiving if you’re willing to put in the work to fix problems.
The satisfaction of nailing a spray paint project is hard to describe. When you step back and see smooth, even coverage with no runs, no drips, no texture issues, and the color is exactly what you wanted, it feels great. That transformation from dingy and worn to fresh and new happens because you invested time in learning proper technique. Each successful project builds your confidence and skill, making the next one easier and better.


Leave a Comment