

Pink nails dominate summer and spring trends right now. Many people struggle to find the right shade for their skin tone. Others find complex manicures too difficult to do at home. This guide solves those problems. We show you how to recreate stunning styles with ease. You will discover the exact materials that work best for long wear. You get straightforward steps to save time and money on your next manicure. Check out our related guide on simple hand care routines for soft skin.
Key Takeaways
- Bright hot pink shades flatter deep skin tones
- Milky bubble bath pink offers a minimalist clean girl aesthetic
- Chrome powders add a modern glossy finish to any base color
- Short square shapes prevent chipping and breaking during daily tasks
- Proper cuticle preparation makes press on nails last twice as long
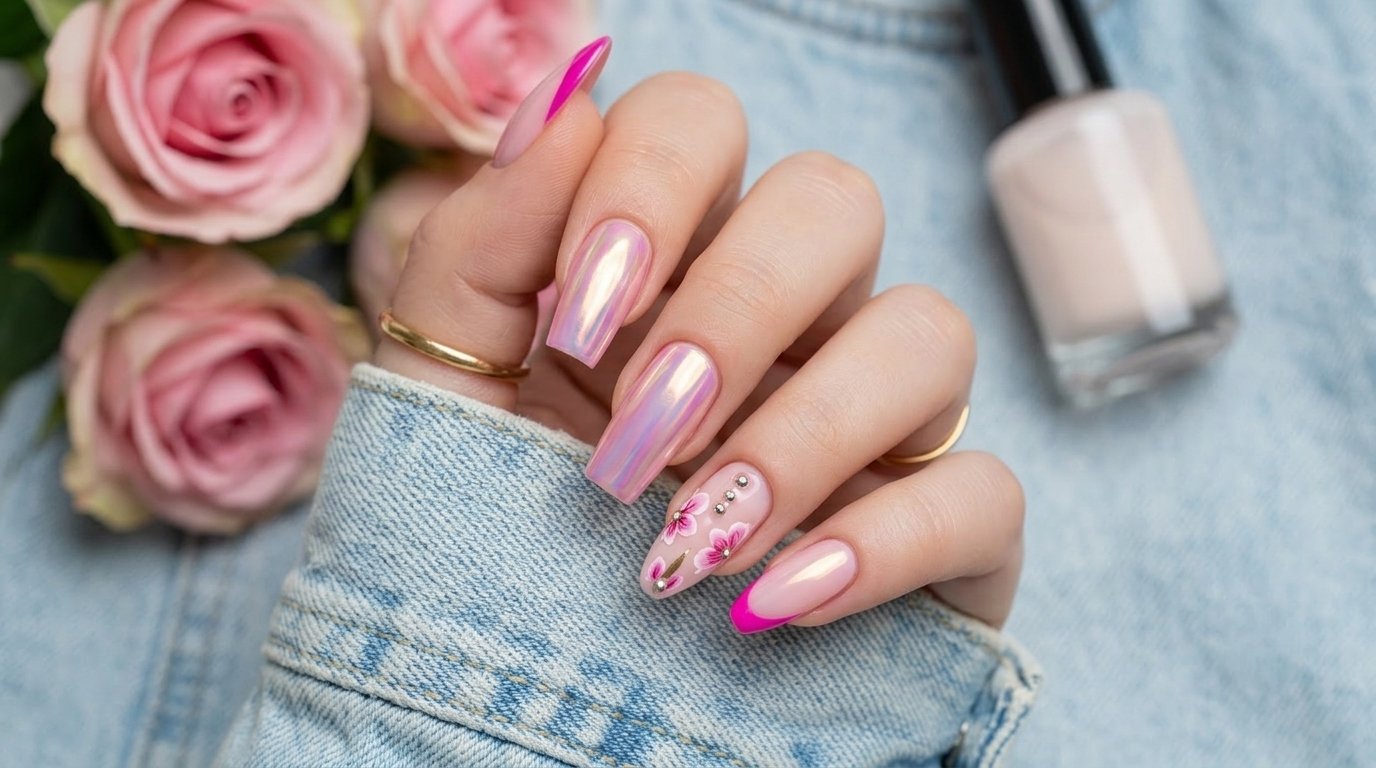
Table of Contents
- A Gradient of Pink Perfection
- Barbie Dreams in a Modern World
- Elegance with a French Twist
- Playful Hearts on a Pink Canvas
- Modern Art Meets Classic Pink
*Acrylic Versus Gel For Pink Manicures
*Splatter of Fun Pink Meets Polka - Gold Trimmed Pink Sophistication
*Soft Pink Waves with a Hint of Blue - Twinkle of Pink Stardust
*Deep Blush Elegance - Best Shapes For Pink Manicures
- Popular Asked Questions
- Conclusion
A Gradient of Pink Perfection
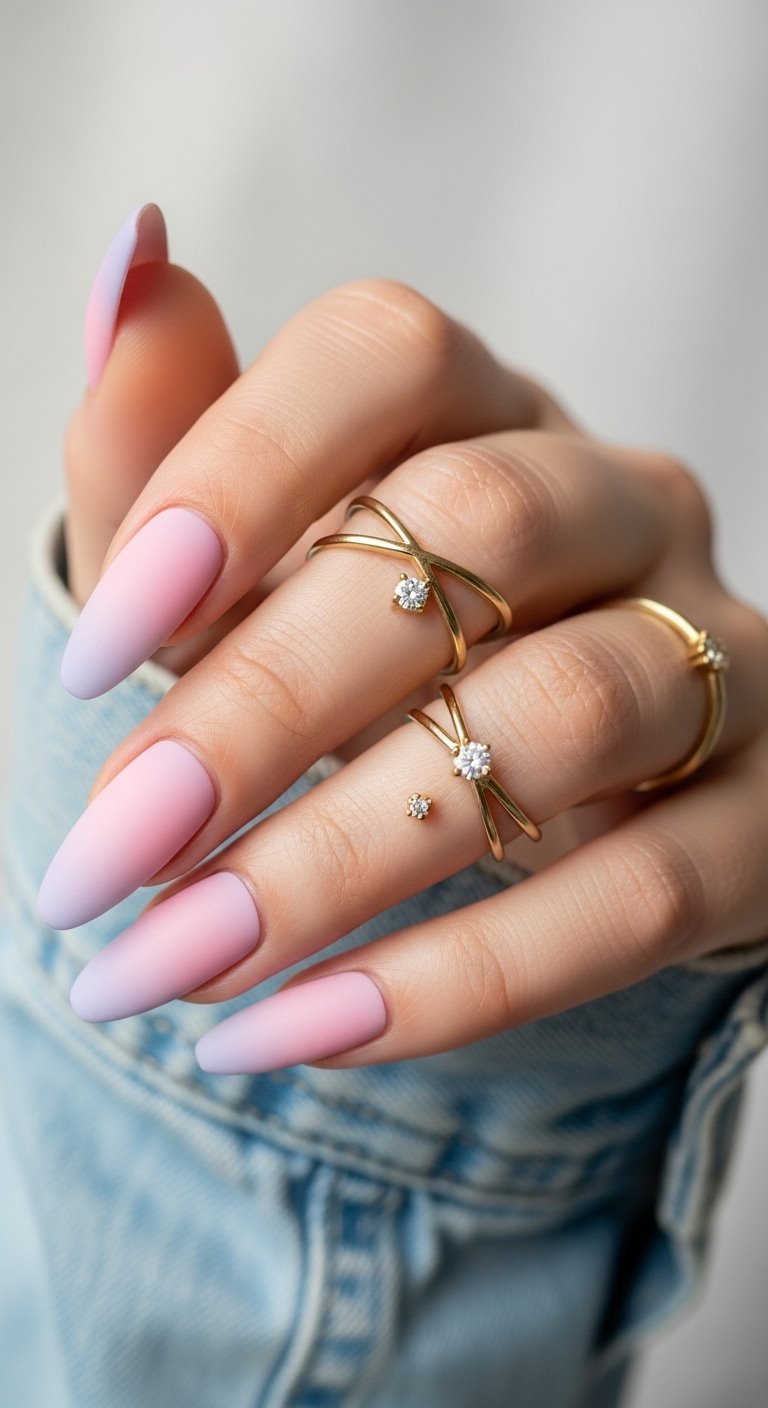
Soft pastel pink fading into bright magenta creates a striking visual. This ombre effect draws the eye down the hand. The transition makes short fingers look much longer. You get a soft blend that mimics a natural sunset. The style balances boldness and subtlety well.
Color theory explains the appeal of this design. Monochromatic schemes use different shades of one color. This approach guarantees visual harmony. The light blush base matches natural nail beds. The bright tip adds a fun pop of color.
You can create this look at home with a makeup sponge. You paint the light pink base coat first. You let the base dry. You brush a line of light pink and a line of dark magenta onto the sponge. You dab the sponge onto the nail surface. You repeat this dabbing process three times for full coverage. You apply a thick glossy top coat to smooth the texture.
You should cap the free edge of the nail with your top coat. This step prevents premature chipping. A moisturizing cuticle oil applied daily keeps the gradient looking fresh.
Pro Tip. Use a liquid latex barrier around your skin before sponging to make cleanup effortless.
Save this idea to your Pinterest.
Barbie Dreams in a Modern World

Neon pink acrylic nails scream confidence and fun. The bright opaque color covers the entire nail bed. The high gloss finish reflects light like glass. This intense shade demands attention right away. Summer vacation outfits look much better with this striking manicure.
High contrast design makes this style work. The bright neon pigment pops against every skin tone. Deep skin tones make the color look electric. Fair skin tones provide a sharp striking background. The solid block of color creates a clean uniform aesthetic.
You need a thick pigmented polish for this bright look. You apply two thin coats of neon pink polish. Thick coats tend to bubble and peel. You cure each layer under an LED lamp for gel polish. You finish with a hard gel top coat for maximum shine.
Neon colors often fade in strong sunlight. You protect the color by using a UV blocking top coat. Wearing gloves during household chores protects the glossy finish. Regular filing keeps the shape crisp and modern.
Pro Tip. Apply a pure white base coat under the neon polish to make the pink color much brighter.
Save this idea to your Pinterest.
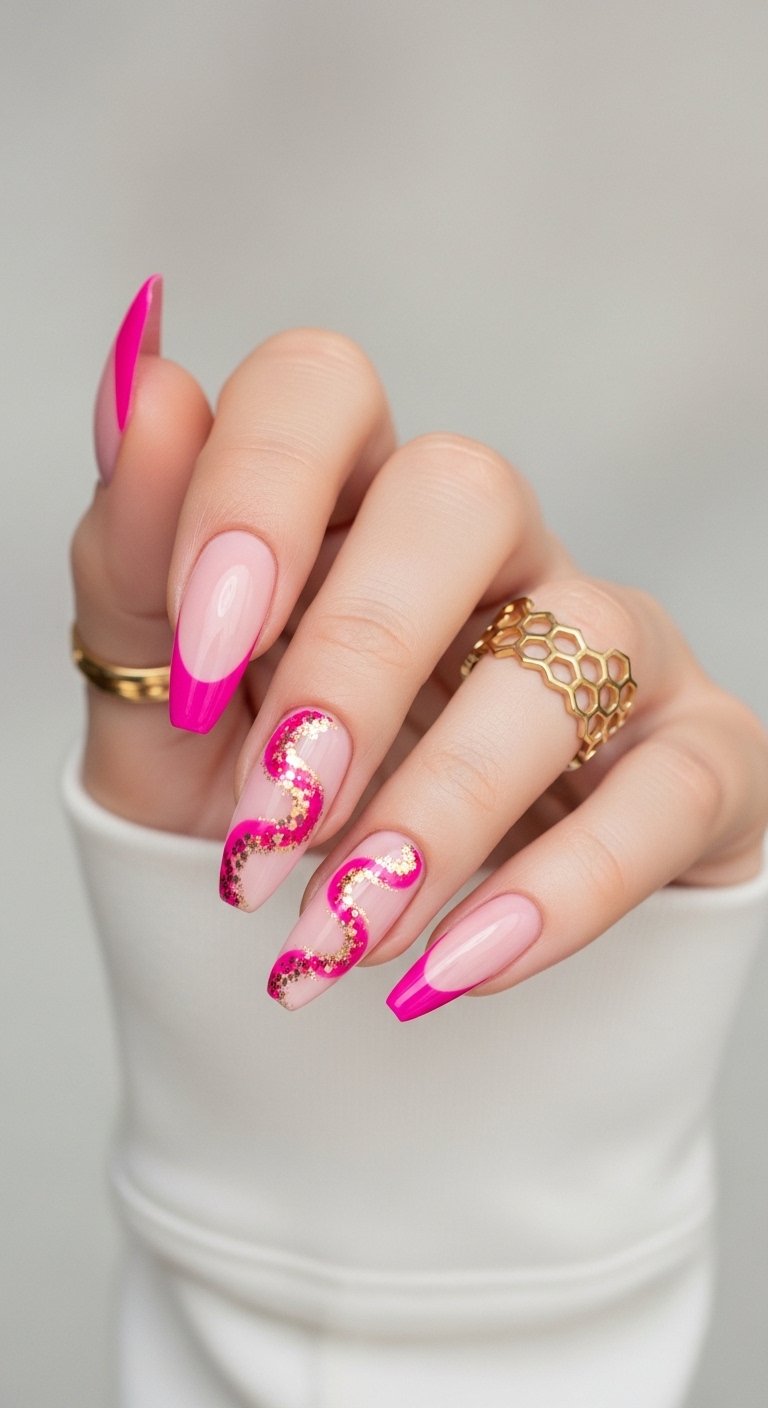
Elegance with a French Twist
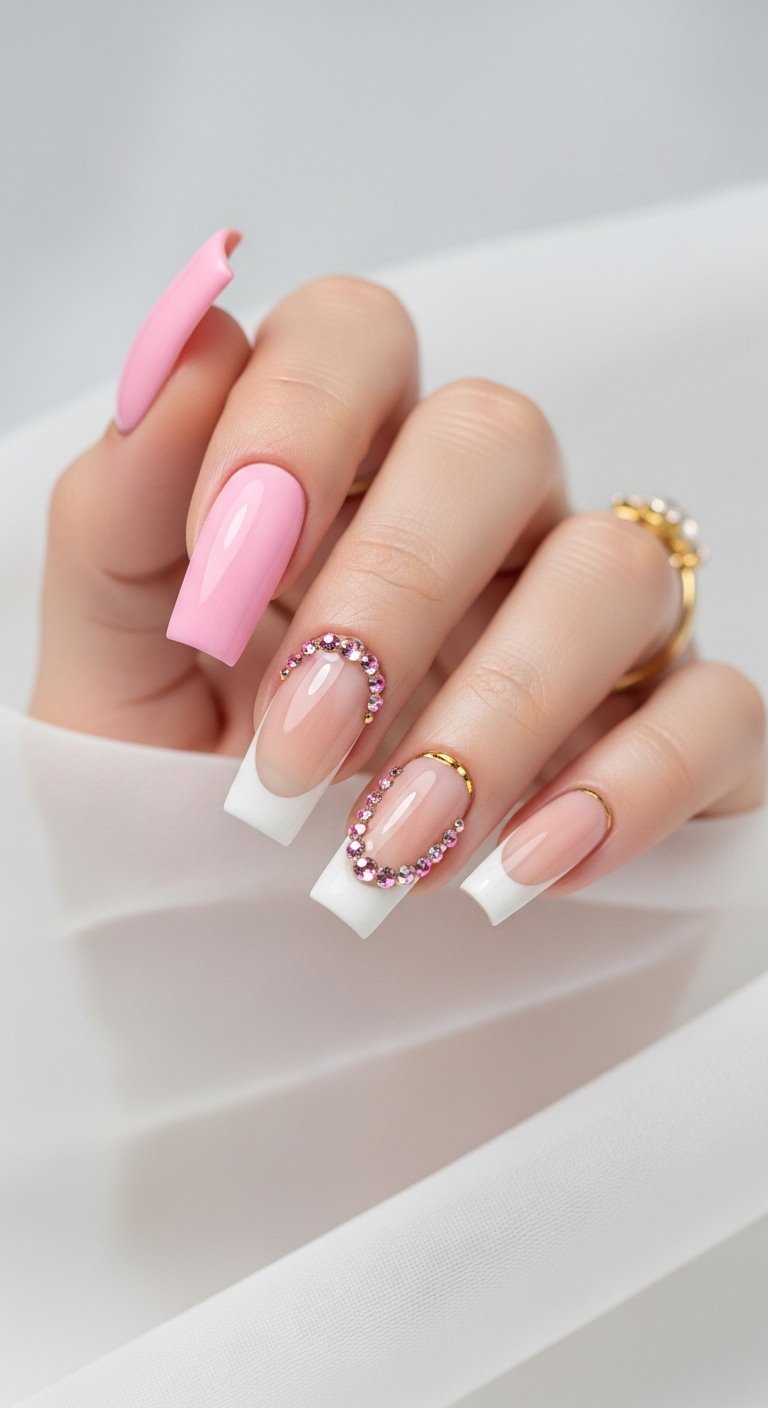
A soft blush base paired with bright hot pink tips reinvents a classic look. The natural sheer bed looks squeaky clean. The colored tip adds a modern playful surprise. This design suits professional office settings. The subtle approach offers beauty without overwhelming your outfit.
Negative space principles guide this manicure. The sheer base acts as empty visual space. The colored tip becomes the focal point. This proportion creates a balanced and elegant geometry. The curved line of the tip mimics the natural smile line of the finger.
You start with a sheer jelly pink base. You apply two thin coats for a milky finish. You use a thin liner brush to draw the hot pink tip. You anchor your elbow on a table for a steady hand. You sweep the brush from the side toward the center.
This style grows out smooth. The sheer base hides natural nail growth. You rarely notice the line of demarcation. You just add cuticle oil daily to maintain a fresh appearance.
Pro Tip. Dip a clean angled brush in acetone to clean up any mistakes on your smile line.
Save this idea to your Pinterest.
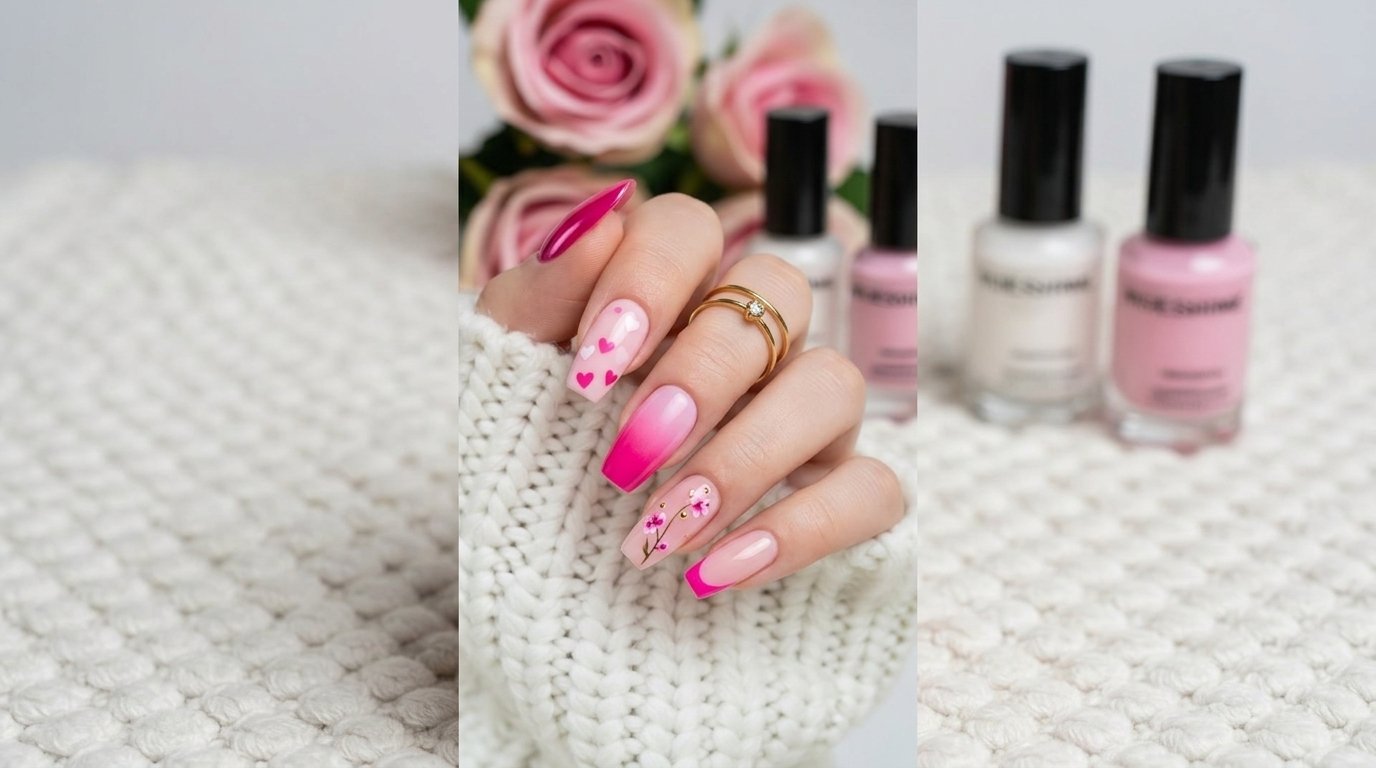
Playful Hearts on a Pink Canvas

Tiny red hearts float across a sheer pink background. The combination feels sweet and romantic. The glossy finish gives the hearts a subtle 3D effect. This pattern looks lovely for date nights and spring events.
Color contrast makes the small shapes visible. The warm red pops against the cool sheer pink base. Repetition of the heart shape creates a rhythmic pattern. The scattered placement keeps the design feeling organic and relaxed.
You create this art with ease using a simple dotting tool. You apply the sheer pink base coat first. You place two small red dots side by side. You drag the polish down from each dot to meet at a point. You seal the small hearts with a floating layer of top coat.
Hand painted designs need extra protection. You should apply a fresh layer of top coat every three days. This prevents the tiny hearts from scratching off. You keep your hands out of hot water to prevent peeling.
Pro Tip. Use a toothpick if you lack a professional dotting tool to make perfect tiny hearts.
Save this idea to your Pinterest.
Modern Art Meets Classic Pink
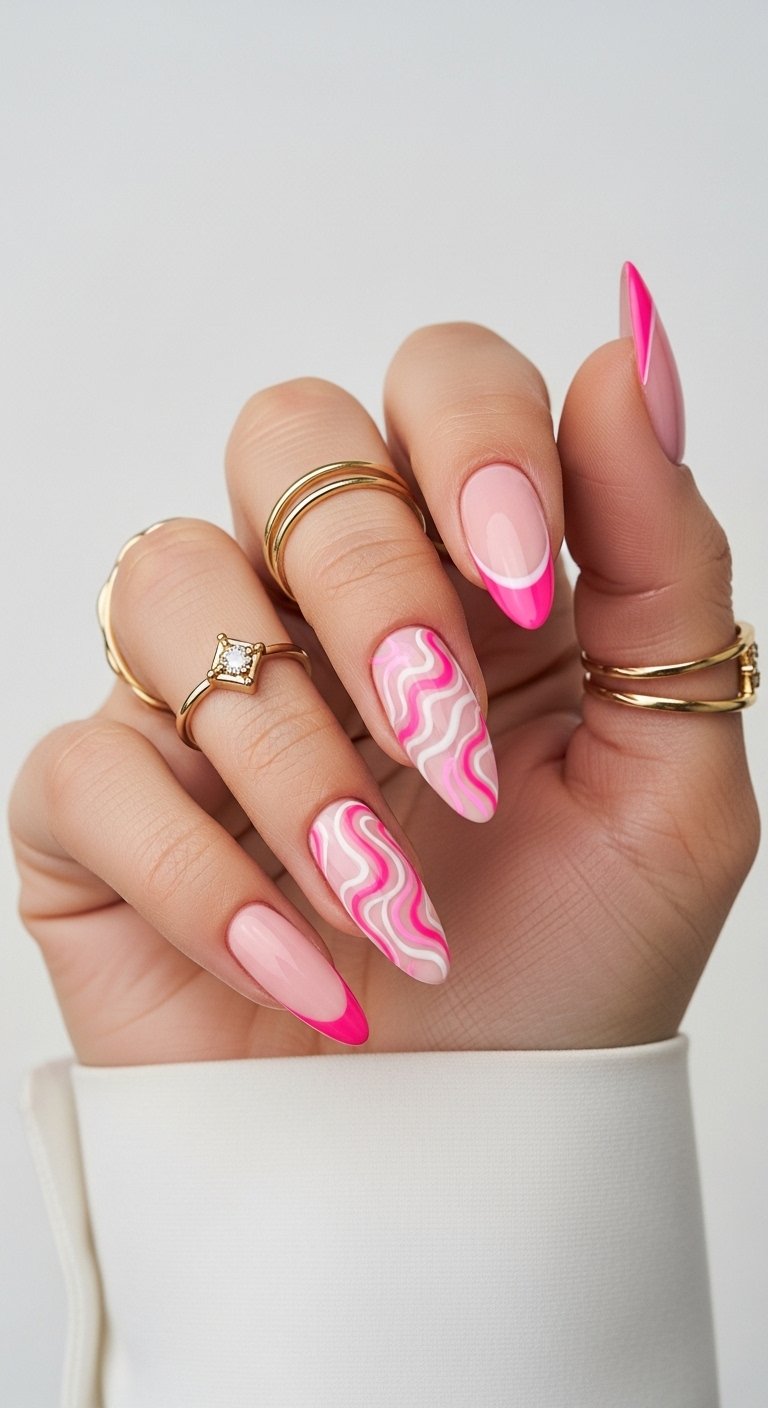
Abstract squiggles and geometric lines cross a matte pink base. The shiny painted lines contrast with the flat background. The asymmetrical design looks fresh and creative. This manicure feels like wearing tiny paintings.
Texture contrast elevates this style. The matte base absorbs light. The glossy abstract lines reflect light. This difference creates deep visual interest. The organic wavy lines soften the strict square shape of the nail.
You need a good matte top coat for the background. You paint your favorite solid pink polish. You apply the matte top coat and let it dry. You use a thin striping brush to paint glossy lines. You cure the glossy lines fast to prevent spreading.
Matte polish shows dirt much faster than glossy polish. You wipe your nails with rubbing alcohol to remove makeup stains. You avoid heavy hand creams that can ruin the flat matte finish.
Pro Tip. Use a thick builder gel for the squiggly lines to create an intense raised 3D texture.
Save this idea to your Pinterest.
Acrylic Versus Gel For Pink Manicures
| Material Type | Top Advantages | Main Disadvantages |
|---|---|---|
| Hard Builder Gel | Flexible structure and gentle on natural beds | Requires a UV lamp to cure and hard to remove at home |
| Traditional Acrylic | Extreme durability and fixes broken tips fast | Strong chemical odor during a pplication and can feel heavy |
| Press On Tips | Fast application and causes zero damage | Shorter wear time and popping off risk |
Basic Supplies
You need a few reliable items for perfect manicures. A glass file shapes edges smooth without tearing the keratin layers. A pure acetone remover cleans oils from the nail plate before painting. A dense sticky base coat grabs the color. A flexible silicone mat protects your table from spills.
Splatter of Fun Pink Meets Polka
Bright white polka dots cover a bright bubblegum base. The retro pattern looks cheerful and energetic. The perfect circles create a satisfying uniform texture. This happy style fits casual weekend outings.
Scale determines the success of this pattern. Large dots feel bold and cartoonish. Tiny dots feel delicate and vintage. Even spacing provides comfortable visual order. The high contrast between white and bright pink catches the eye.
You can stamp or dot this pattern. You paint the bright bubblegum base coat. You dip a medium sized dotting tool into white polish. You press the tool straight down onto the surface. You lift the tool straight up to prevent smearing. You arrange the dots in an alternating grid pattern.
White polish often turns yellow over time. You apply a stain resistant top coat to protect the bright white dots. You wash your hands after using spices or hair dyes.
Pro Tip. Practice your dotting pressure on a piece of paper first to get uniform circle sizes.
Save this idea to your Pinterest.
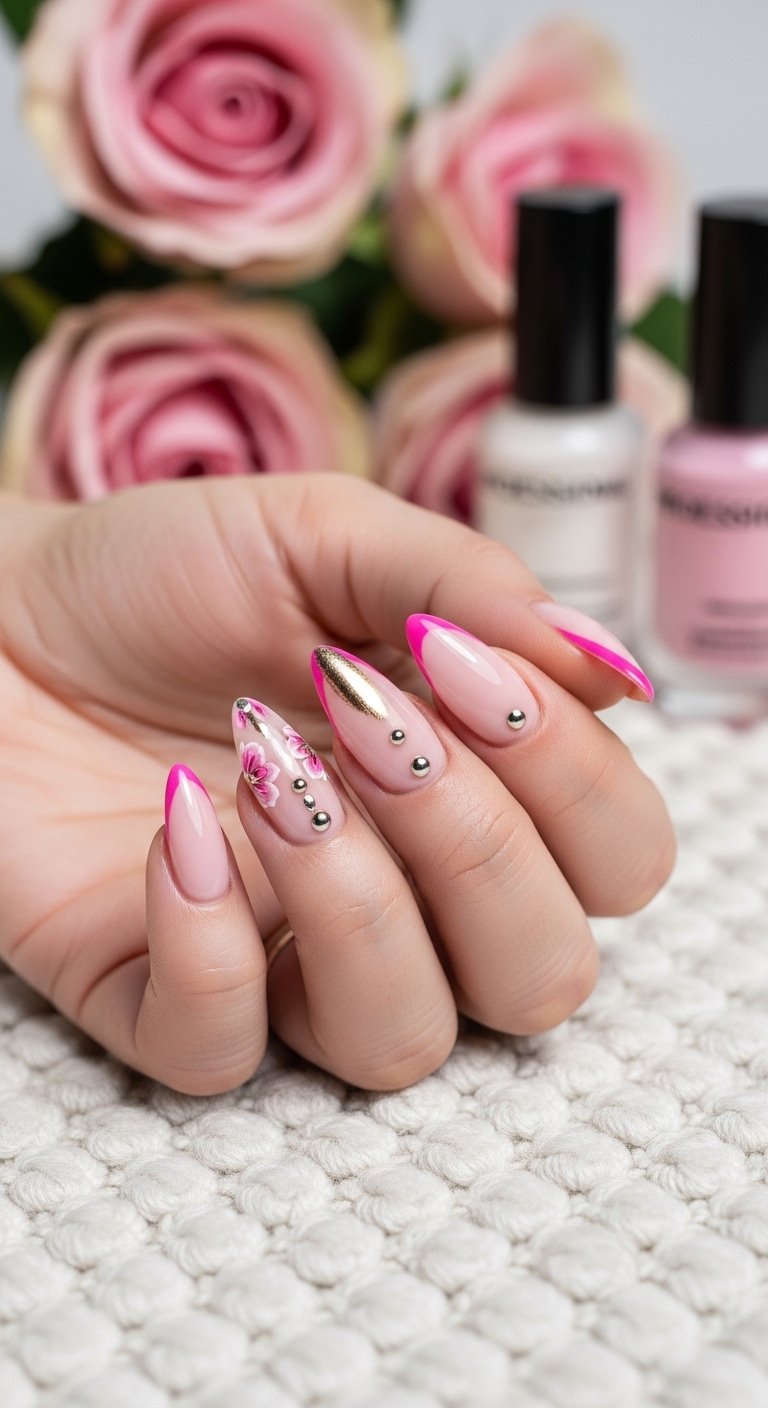
Gold Trimmed Pink Sophistication
Thin gold metallic flakes border a muted dusty rose base. The metallic shine frames the soft muted color. The luxurious gold adds an expensive looking finish. This combination works for formal events and weddings.
Metallic accents change the temperature of a design. The dusty rose acts as a cool neutral background. The yellow gold adds intense warmth. Framing the edges draws attention to the neat shape of the cuticle.
You start with an opaque dusty rose polish. You use fine tweezers to pick up pieces of gold leaf. You press the foil into the sticky inhibition layer of the polish. You place the foil right along the cuticle line. You encapsulate the foil with two thick layers of clear top coat.
Foil pieces often poke through thin top coats. You buff the first layer of top coat gentle until smooth. You apply the second top coat for a glass like finish.
Pro Tip. Use a silicone hoof stick to flatten the foil against the curved nail plate.
Save this idea to your Pinterest.
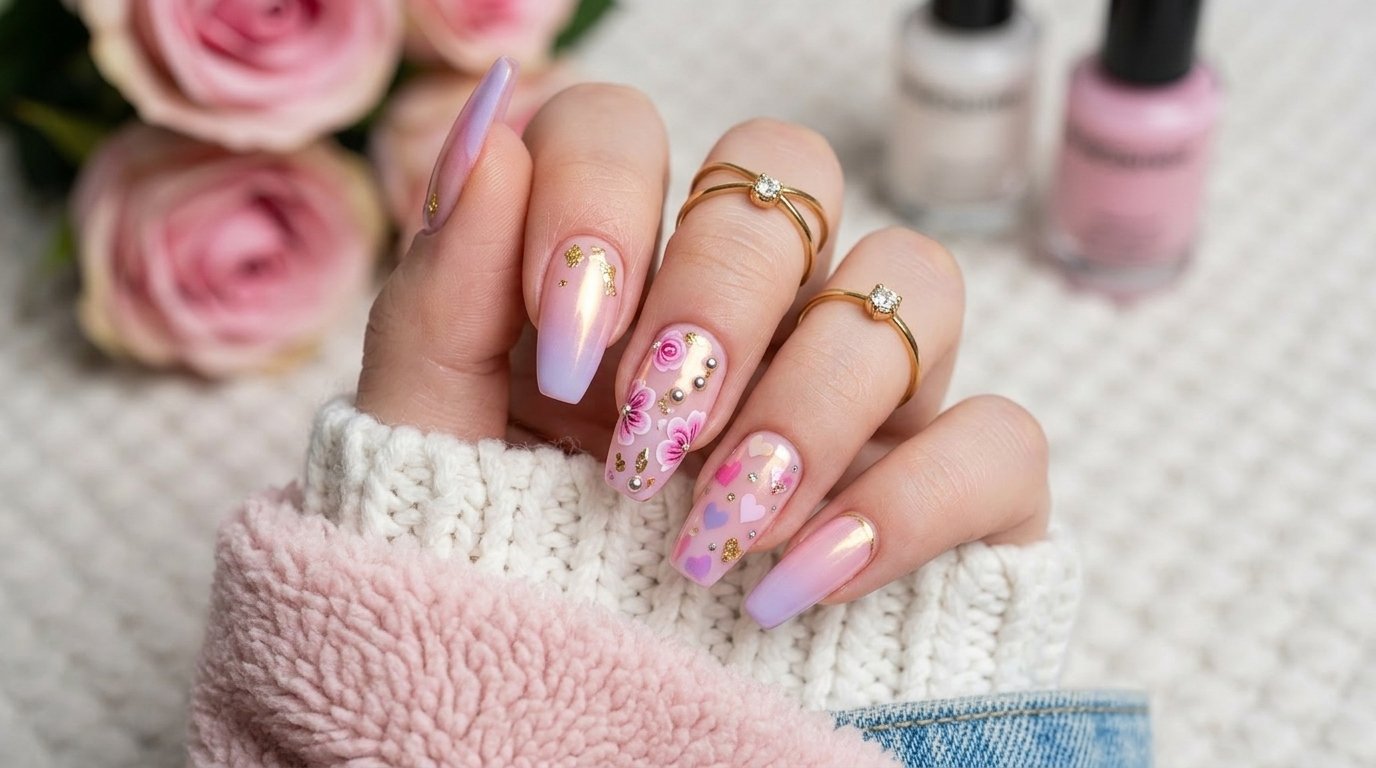
Soft Pink Waves with a Hint of Blue
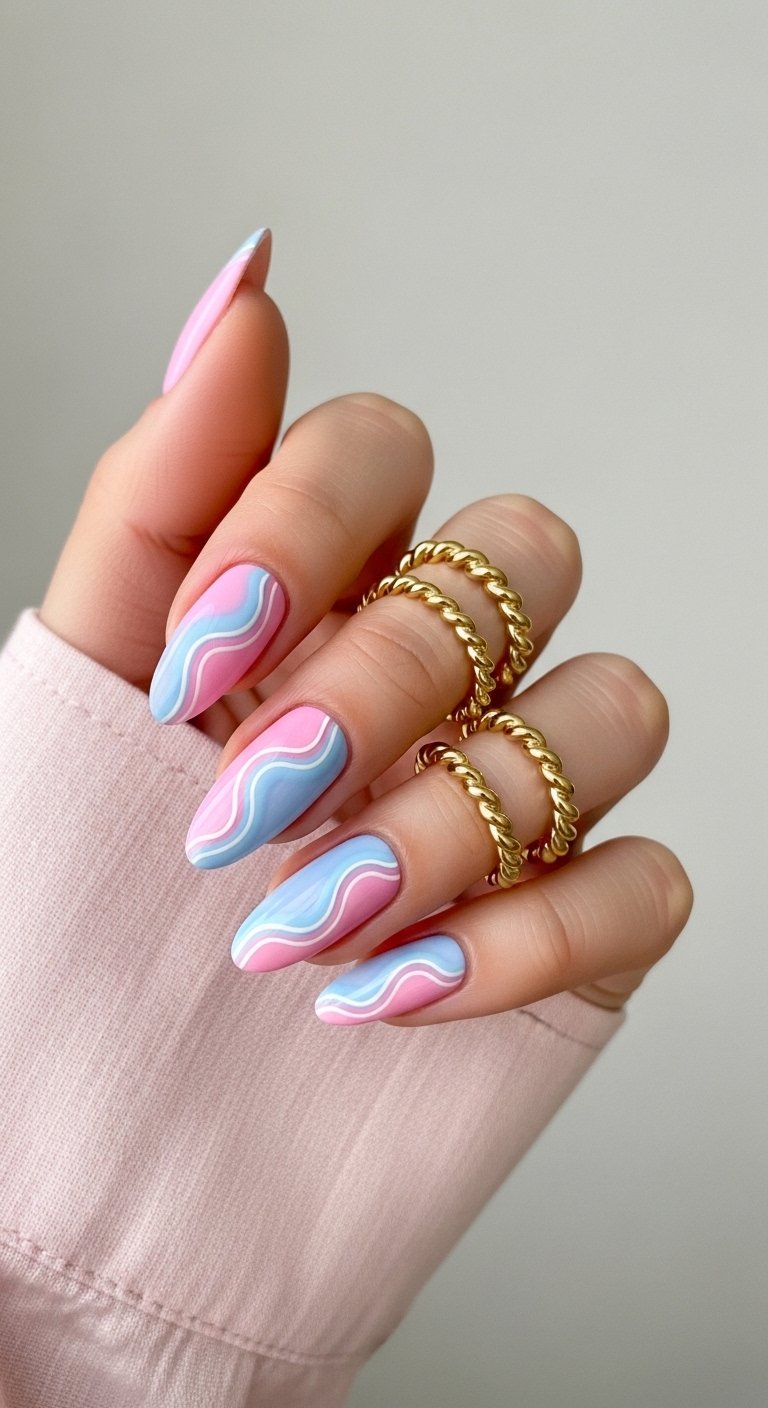
Pastel blue and light pink swirl together like marble. The soft colors blend into each other. The fluid pattern mimics natural stone or water ripples. This relaxing design brings a calm energy to your hands.
Analogous colors sit near each other on the color wheel. Blue and pink create a soothing visual harmony. The soft curves break up rigid straight lines. The swirling pattern keeps the eyes moving across the surface.
You use the blooming gel technique for this marble effect. You apply a layer of clear blooming gel without curing it. You drop small amounts of pink and blue polish onto the wet gel. You use a thin brush to swirl the colors. You wait ten seconds for the colors to spread. You cure the design once the pattern looks perfect.
Blooming gel designs require precise timing. You work on one finger at a time to control the spreading process. You wipe your swirling brush clean after every single stroke.
Pro Tip. Mix a tiny drop of white into the pink and blue swirls to create realistic stone veins.
Save this idea to your Pinterest.
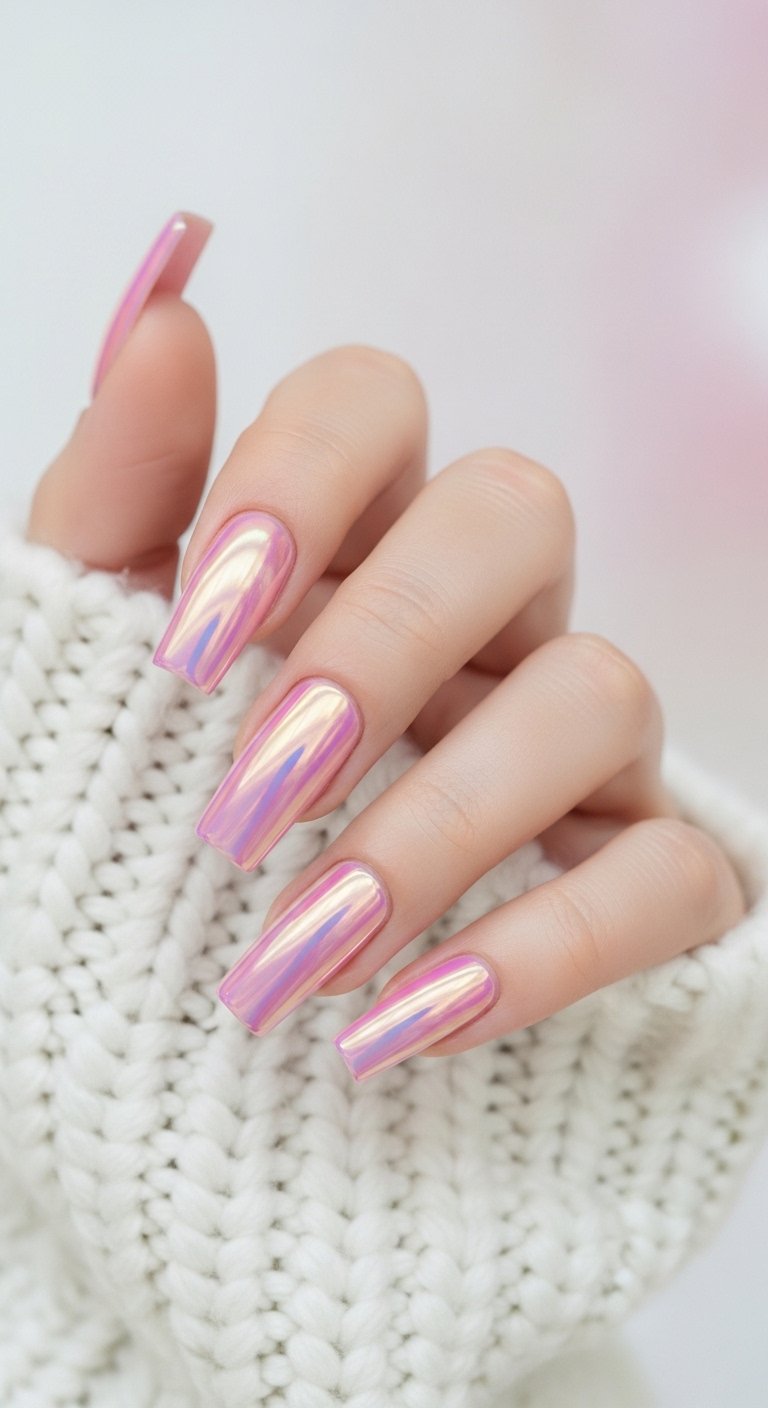
Twinkle of Pink Stardust
Holographic glitter covers a sheer strawberry base. The tiny glitter particles shift colors in direct sunlight. The magical sparkle looks different at every angle. This dazzling style commands attention at night.
Light reflection drives this aesthetic. The smooth sheer base allows the glitter to stand out. Holographic pieces break light into tiny rainbows. The scattered placement of glitter creates a starry night illusion.
You need a loose cosmetic grade glitter for the best sparkle. You paint the sheer strawberry base. You pick up loose glitter with a fluffy eyeshadow brush. You tap the brush over the wet polish. You press the glitter flat with your finger. You seal everything with a thick glossy top coat.
Glitter polish feels stubborn during removal. You soak cotton balls in pure acetone. You place the cotton on the nail and wrap it in aluminum foil. You wait ten minutes before sliding the glitter off.
Pro Tip. Paint a peel off base coat underneath the glitter to make future removal effortless.
Save this idea to your Pinterest.
Deep Blush Elegance
A rich dark magenta covers short square tips. The deep saturated color looks luxurious. The simple solid application feels chic. This deep tone transitions from day to evening wear.
Color depth adds maturity to a design. Bright neons feel young and loud. Deep jewel tones feel grounded and wealthy. The short square shape keeps the dark color from looking aggressive. The clean edges provide a tailored appearance.
You achieve this look with careful application near the skin. You push the cuticles back with a wooden stick. You apply the deep blush polish close to the skin line. You use a clean up brush to perfect the side walls. You apply a high shine top coat for a gel like finish.
Dark polish chips show up. You file the free edge smooth before painting. You apply cuticle oil twice a day to prevent the polish from cracking.
Pro Tip. Warm the polish bottle between your hands before painting to make the dark liquid apply smoother.
Save this idea to your Pinterest.
Best Shapes For Pink Manicures
| Shape Name | Visual Effect | Best Used For |
|---|---|---|
| Short Square | Clean neat appearance and strong edges | Deep blush tones and minimalist styles |
| Medium Almond | Elongates the fingers for a feminine look | Soft gradients and delicate floral art |
| Long Coffin | High drama and lots of canvas space | Neon block colors and heavy glitter |
Basic Hand Care Routine
You must maintain soft skin to make your manicures stand out. A thick shea butter cream hydrates deep skin layers. A jojoba based cuticle oil penetrates the nail matrix fast. A gentle sugar scrub removes dry patches from your knuckles. A pair of cotton gloves traps moisture overnight.
Popular Asked Questions
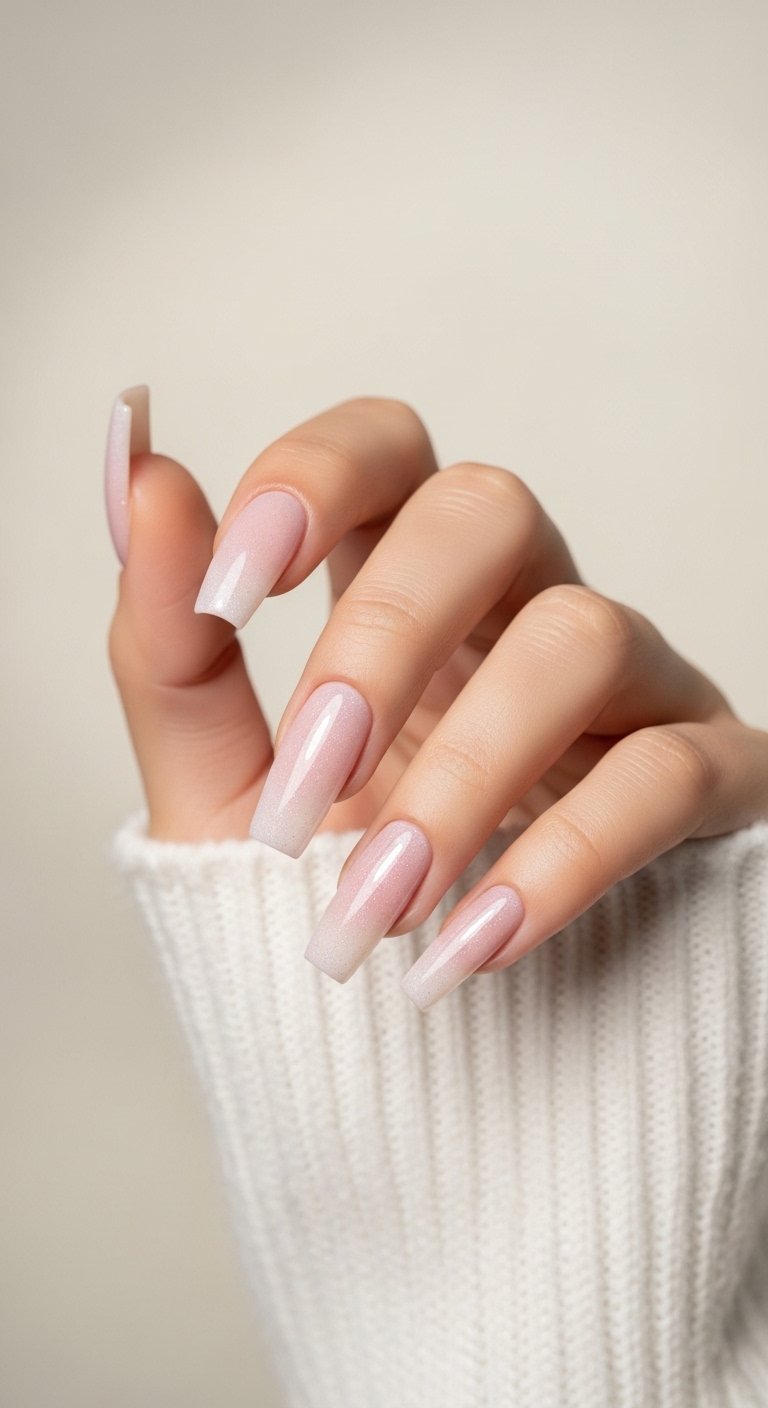
What are bubble bath nails
Bubble bath nails use a sheer pink polish topped with a milky white finish. This style creates a squeaky clean aesthetic. The soft translucent layers mimic the look of natural healthy nail beds. Minimalists love this style for its natural and glossy appearance.
What is the difference between bubble bath nails and Funny Bunny nails
The main difference lies in the underlying color tone. Bubble bath manicures sit in the warm pink color family. Funny Bunny manicures belong to the neutral white color family. You choose bubble bath for a rosy glow and Funny Bunny for a stark milky look.
What are the best trendy pink nail colors for this year
Soft pearlescent pinks and bold raspberry tones lead the trends right now. The pearlescent shades offer a subtle iridescent glow perfect for spring. The deep raspberry shades provide an energetic and bold choice for summer. Many people mix both shades together for unique contrasting designs.
How do you make simple hot pink nails look elegant
You pair bright pink shades with short natural shapes to maintain elegance. A simple medium square cut keeps the loud color looking tailored. You add a high quality glossy top coat to make the color look expensive. You keep your cuticles moisturized to frame the bright color neat.
Conclusion
Pink nails offer an amazing spectrum of choices for every single style preference. You can switch from a soft elegant blush to a loud neon magenta. The right shape and the right shade elevate your daily outfits. We want to know which exact design you plan to try next. Will you choose the soft gradient or the bold metallic trim? Drop a comment below to share your favorite look. Follow us on Pinterest for more stunning pink nail inspiration.

Leave a Comment