
Trendy acrylic nail designs 2026 feature detailed art and rich textures. You want gorgeous nails but worry complex patterns require extreme length. This guide eliminates that concern. We present 30 elaborate nail designs suited for any nail shape. You will discover techniques to replicate these looks. You get exact tool recommendations and step by step methods to elevate your style.
Check out our related guide on budget friendly nail art tools.
Key Takeaways
- Elaborate manicures adapt to short and long nail shapes.
- Negative space designs make complex art look balanced.
- Proper gel application secures 3D elements and rhinestones.
- Magnetic polishes and chrome powders create instant texture.
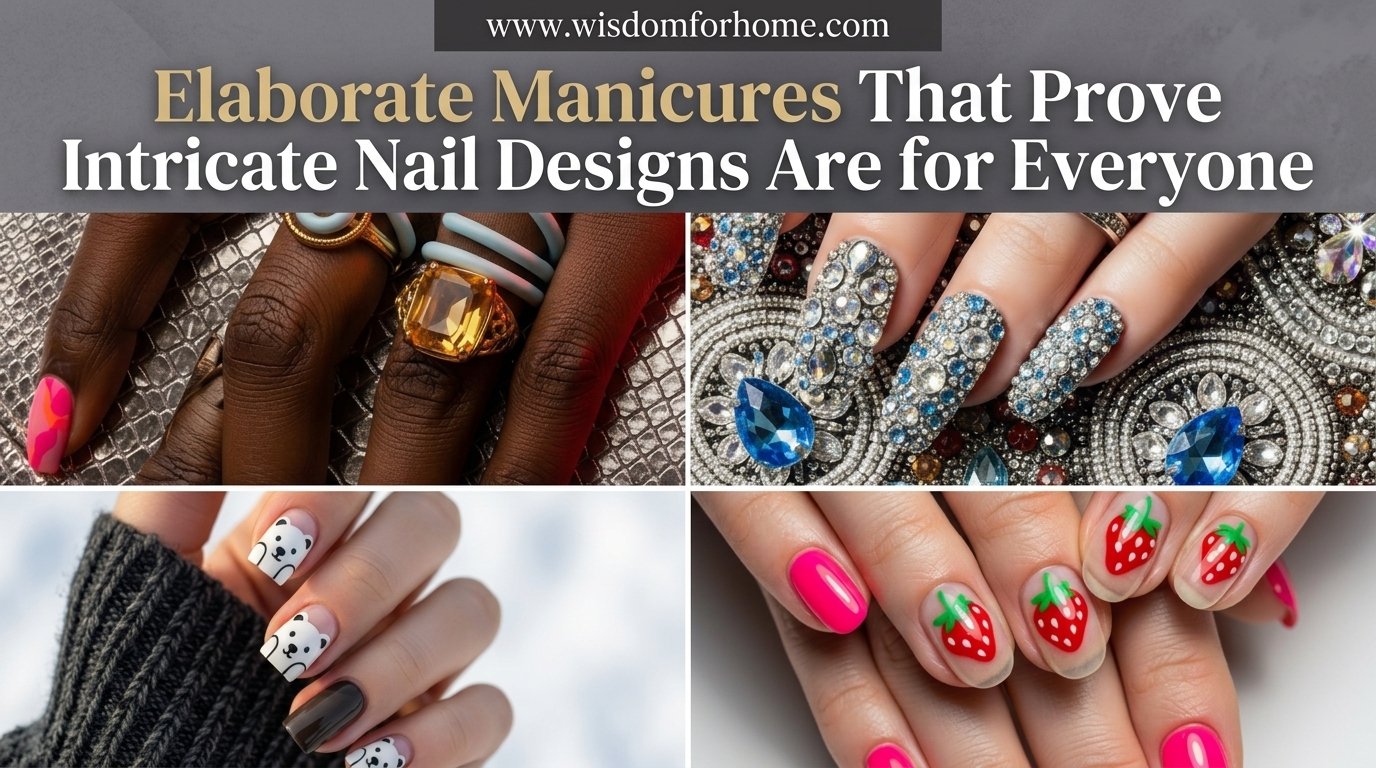
Table of Contents
- Bedazzled Gemstones
- Marbleized Metallic
*Rainbow Ombre Tips - Two Toned Tips
*Sweet Strawberries - Gel Versus Acrylic Extensions
- The Far From Typical French
*Bowie Lightning Bolts - Geometric Half Moons
- Floral Ombre
- Soft Smiles
- Get The Look Essential Nail Art Tools
*Precious Polar Bears - Popular Asked Questions
- Conclusion
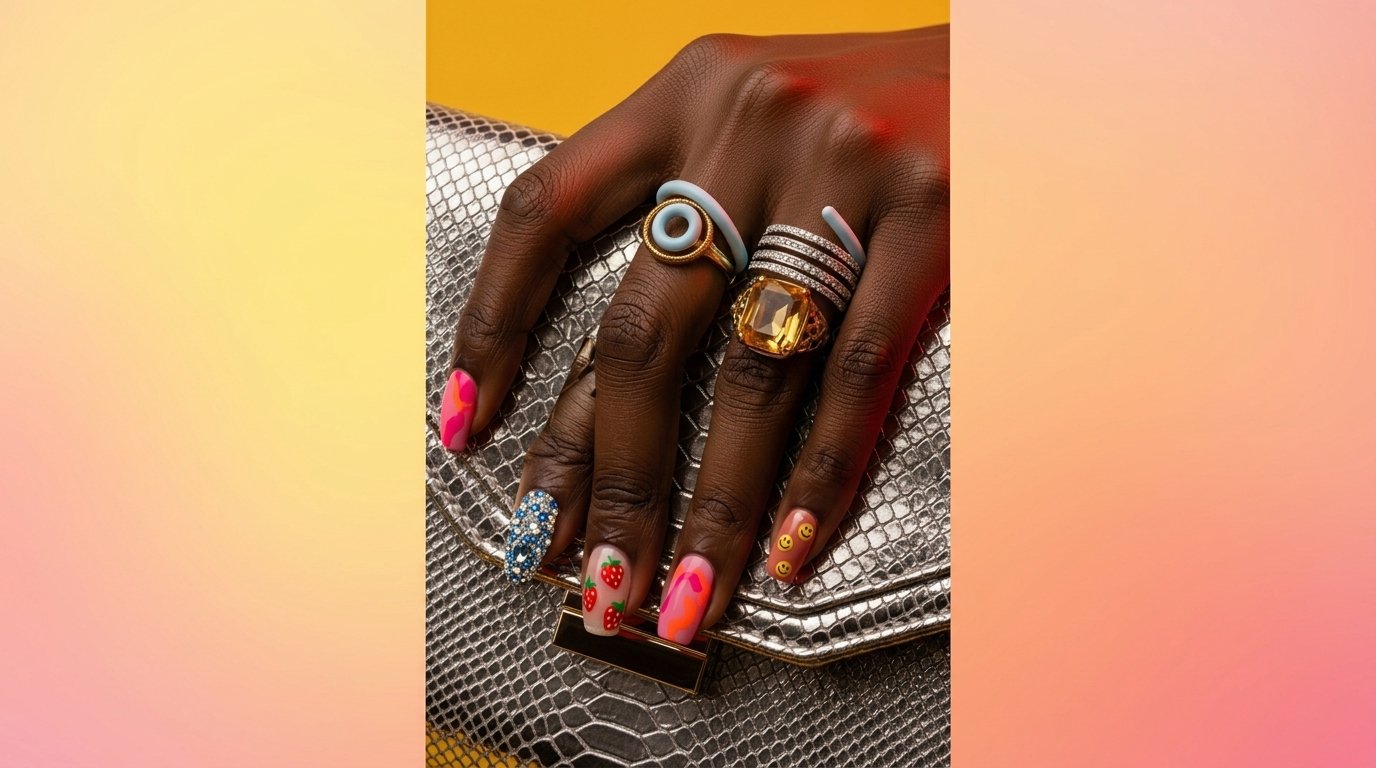
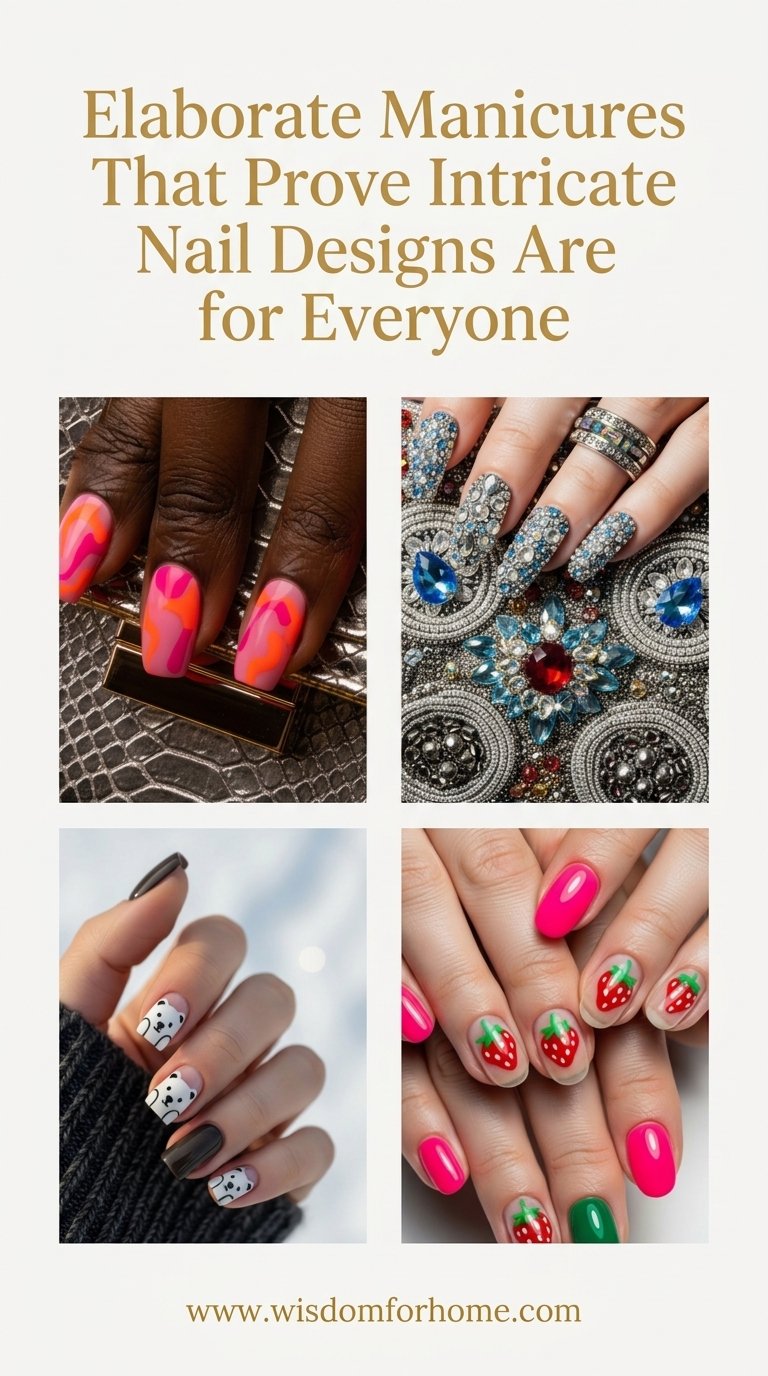
Bedazzled Gemstones
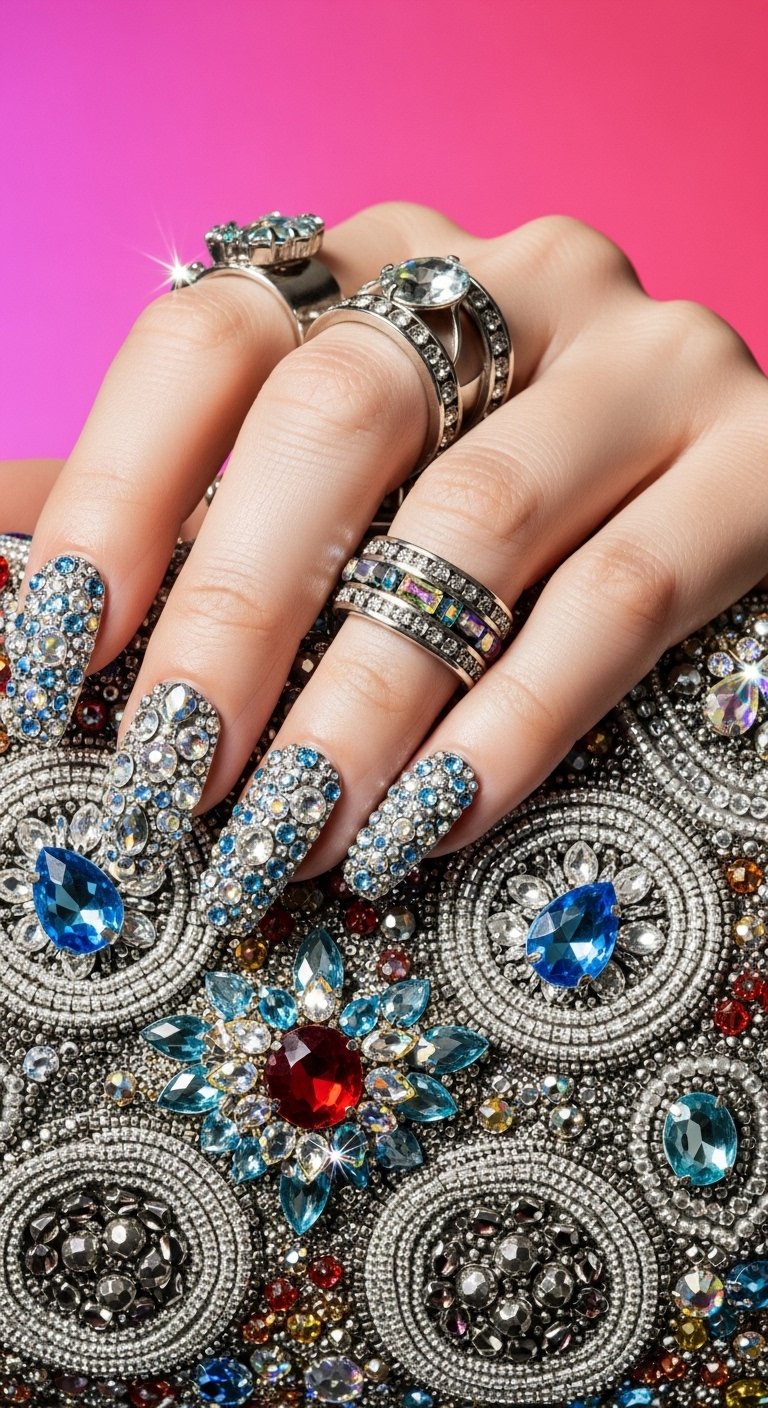
Clear base coats create a floating effect for bright rhinestones. The negative space balances the heavy embellishments. This structural choice keeps the final look grounded and sophisticated. Minimalist nail designs with rhinestones offer a luxurious aesthetic for everyday wear. You can build this look at home with a wax pencil and clear builder gel. Apply a small dot of gel to the nail bed. Press the gemstone into the wet gel. Cure the entire hand under a UV lamp to lock the stones in place.
Pro Tip Seal the edges of each gem with a fine detail brush to prevent snagging on clothes.
Save this idea to your Pinterest.
Marbleized Metallic
Swirling gold and silver polish through a white base creates a luxurious marble texture. The metallic accents catch the light and add depth to flat color palettes. This design principle relies on fluid movement and abstract composition. Metallic chrome nail designs elevate basic neutral bases into high fashion statements. Use a blooming gel base to achieve this organic dispersion. Swirl metallic polish over the wet surface using a metal dotting tool. The gel spreads the polish out and forms organic veins across the nail bed. Cure the design once the desired pattern emerges. A thick top coat encapsulates the design and creates a glass finish.
Pro Tip Use thin layers of polish to prevent the colors from pooling at the cuticle line.
Save this idea to your Pinterest.
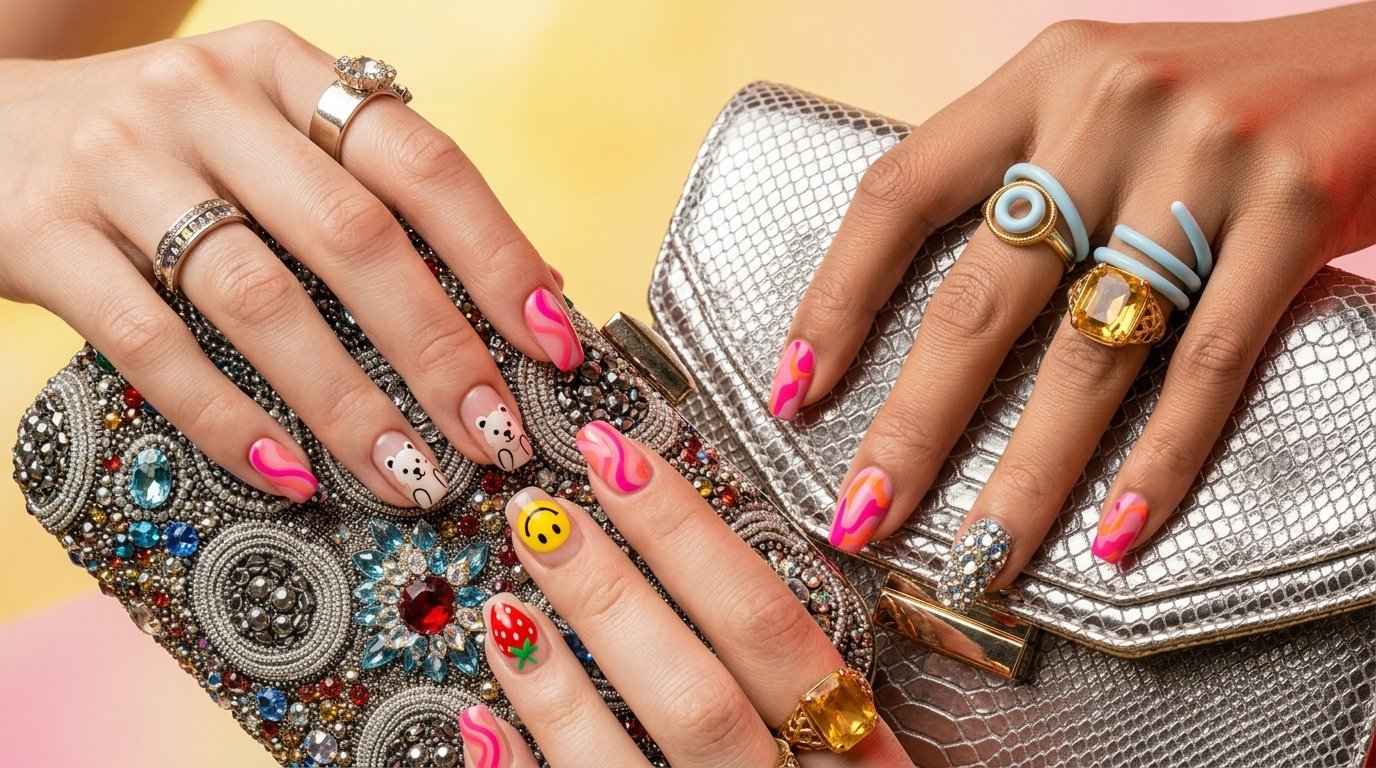
Rainbow Ombre Tips
A gradual fade from bright neon to a soft neutral base modernizes the classic French manicure. The bright colors draw the eye upward. This visual trick elongates the fingers and flatters all nail shapes. Blend two bright colors on a makeup sponge. Press the sponge against the tip of the nail. Repeat this process until the pigment reaches full opacity. Clean the skin around the nail with acetone and a stiff brush. Seal the gradient with a high gloss top coat for a smooth finish.
Pro Tip Apply a liquid latex barrier around your cuticles to make cleanup fast and easy.
Save this idea to your Pinterest.
Two Toned Tips
Contrasting colors on a single nail tip create a sharp graphic aesthetic. Splitting the tip down the middle provides structural balance to the entire hand. This layout turns a basic shape into a striking focal point. Paint one half of the tip with a fine liner brush and cure the gel. Apply the second color on the opposite side. Meet the first color in the center to form a crisp dividing line. This technique requires practice and steady hand movements.
Pro Tip Rest your elbow on a stable table to steady your hand during the painting process.
Save this idea to your Pinterest.
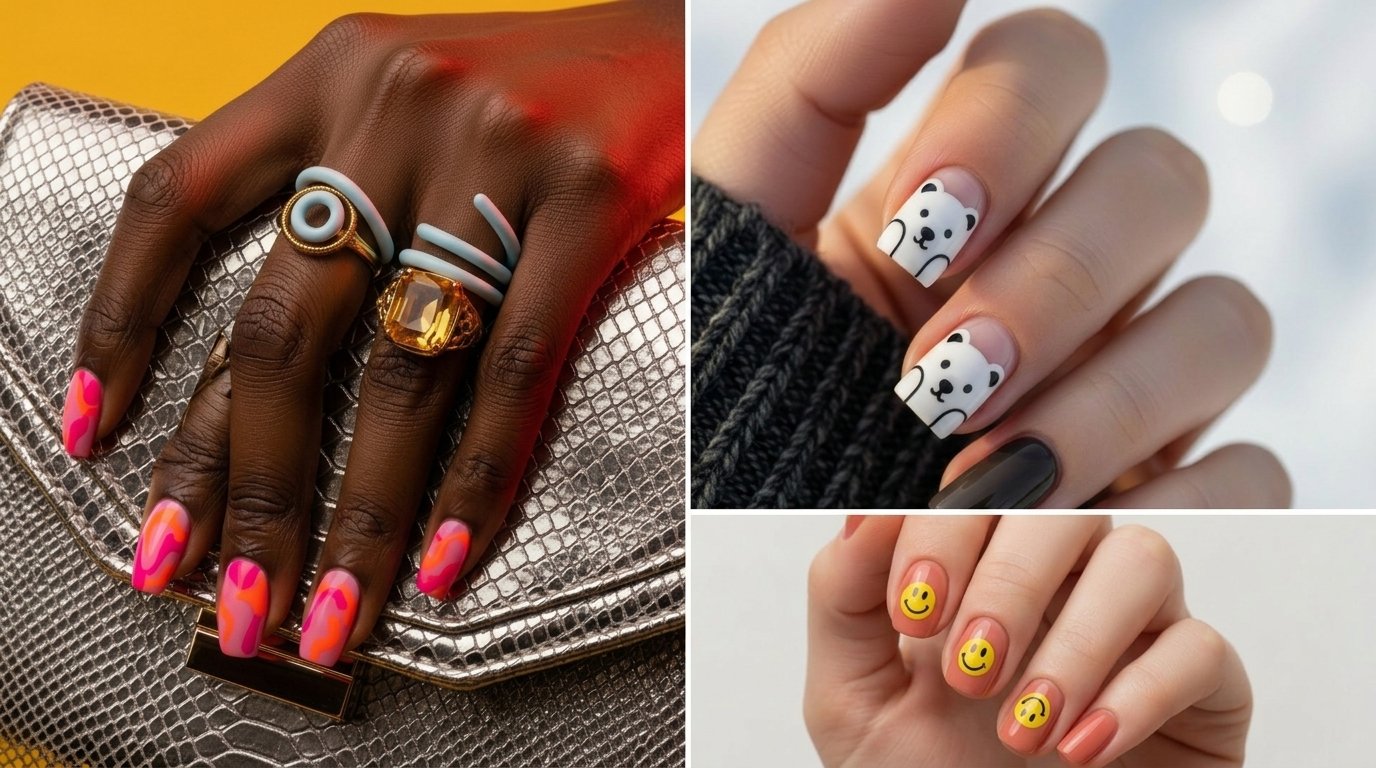
Sweet Strawberries
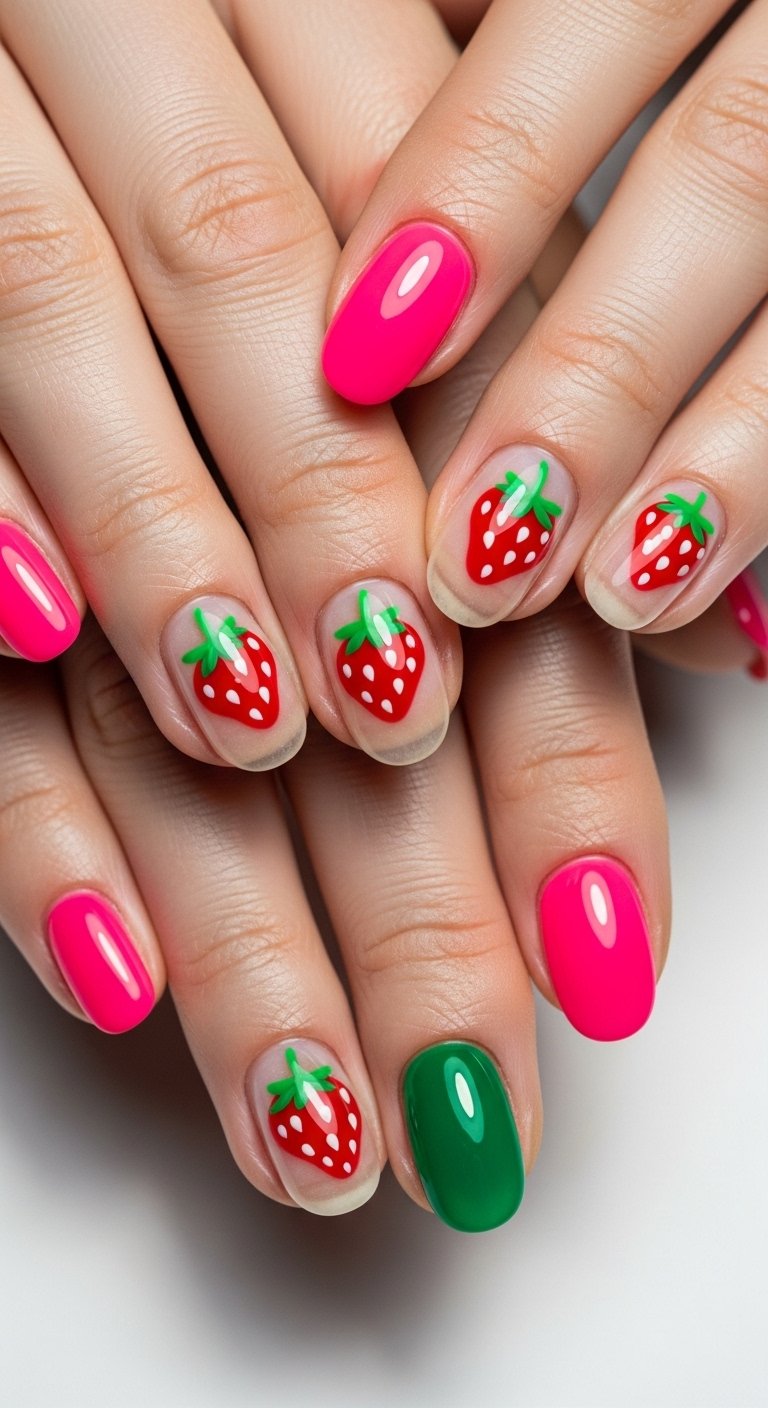
Tiny hand painted strawberries add a playful touch to a sheer pink background. The red fruit provides a bright pop of color against the natural nail bed. The negative space keeps the vibrant art from looking cluttered. Use a large dotting tool to place small red circles across the nail. Add tiny green leaves at the top with a liner brush. Finish the berries with tiny white dots for the seeds. Cure the red polish before adding the green leaves. This step prevents the colors from bleeding together.
Pro Tip Leave one or two nails bare as accent nails to balance the busy pattern.
Save this idea to your Pinterest.
Gel Versus Acrylic Extensions
| Feature | Gel Extensions | Acrylic Extensions |
|---|---|---|
| Application | Cured with UV light | Air dries without lamps |
| Flexibility | High flexibility and bounce | Very rigid structure |
| Removal | Soak off with pure acetone | Requires filing and soaking |
The Far From Typical French
Replacing the standard white line with abstract shapes transforms a basic manicure into modern art. The asymmetrical lines create visual interest and flatter all nail shapes. This style turns empty space into a primary design feature. Outline your desired shape with a thin detail brush. Fill the interior space with your chosen color. You can mix pastels and neon shades for a striking visual contrast. A thin brush allows you to paint intricate curves without pooling the polish.
Pro Tip Use a cleanup brush dipped in rubbing alcohol to sharpen your lines before curing.
Save this idea to your Pinterest.
Bowie Lightning Bolts
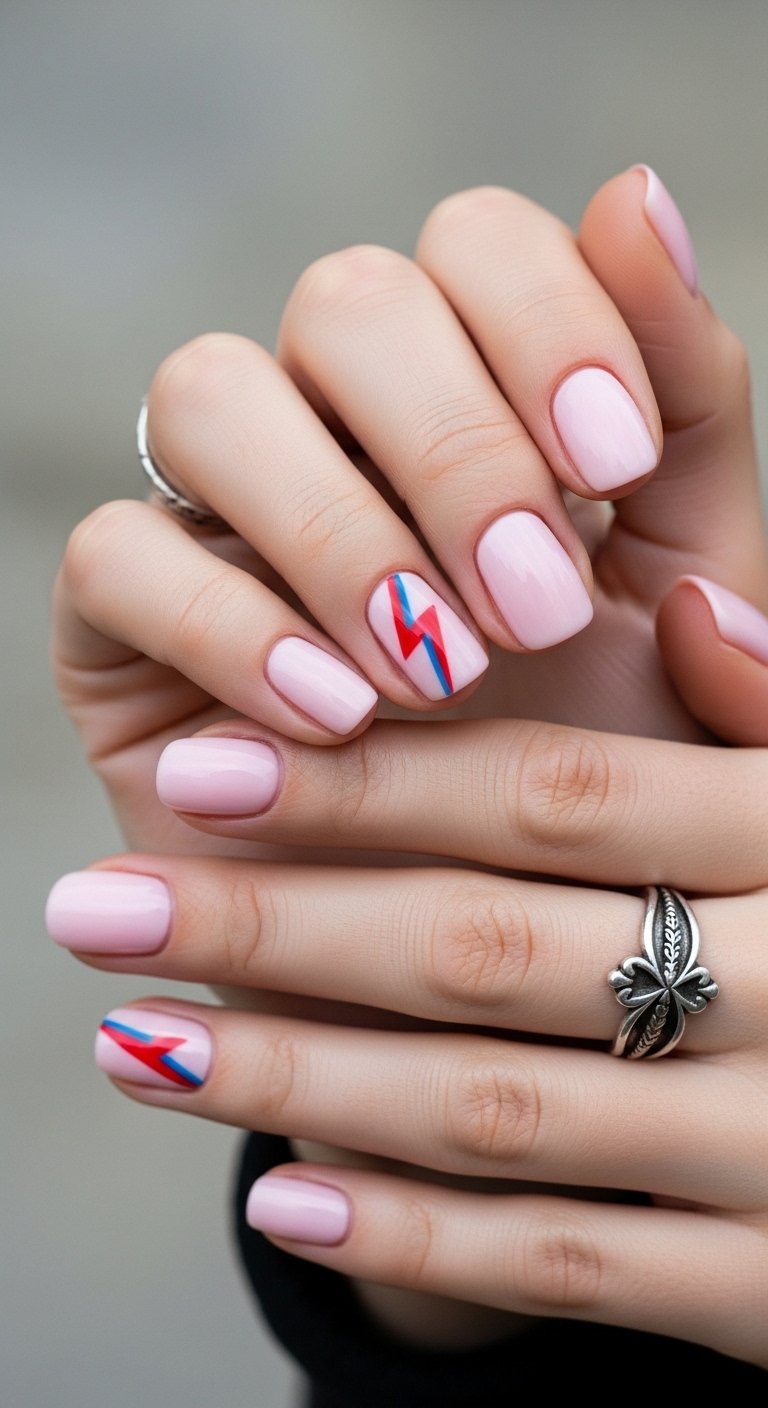
Sharp lightning bolts across an opaque base channel retro rock and roll energy. The angular lines create a sense of movement across the nail surface. Trace the outline of the bolt with a micro detail brush. Fill the inside with a highly pigmented polish. A steady hand and slow strokes produce the cleanest edges. Contrast a glossy bolt against a matte background for extra dimension.
Pro Tip Flash cure the outline for ten seconds to lock the shape in place.
Save this idea to your Pinterest.
Geometric Half Moons
Leaving the lunula bare creates a chic negative space design near the cuticle. The curved shape mirrors natural nail growth. This geometry extends the life of your manicure by hiding the regrowth line. Apply circular paper guides near the cuticle line. Paint the rest of the nail with your chosen color. Peel the guide away before the polish dries to reveal a crisp half moon shape.
Pro Tip Apply cuticle oil every day to keep the bare portion of the nail hydrated.
Save this idea to your Pinterest.
Floral Ombre
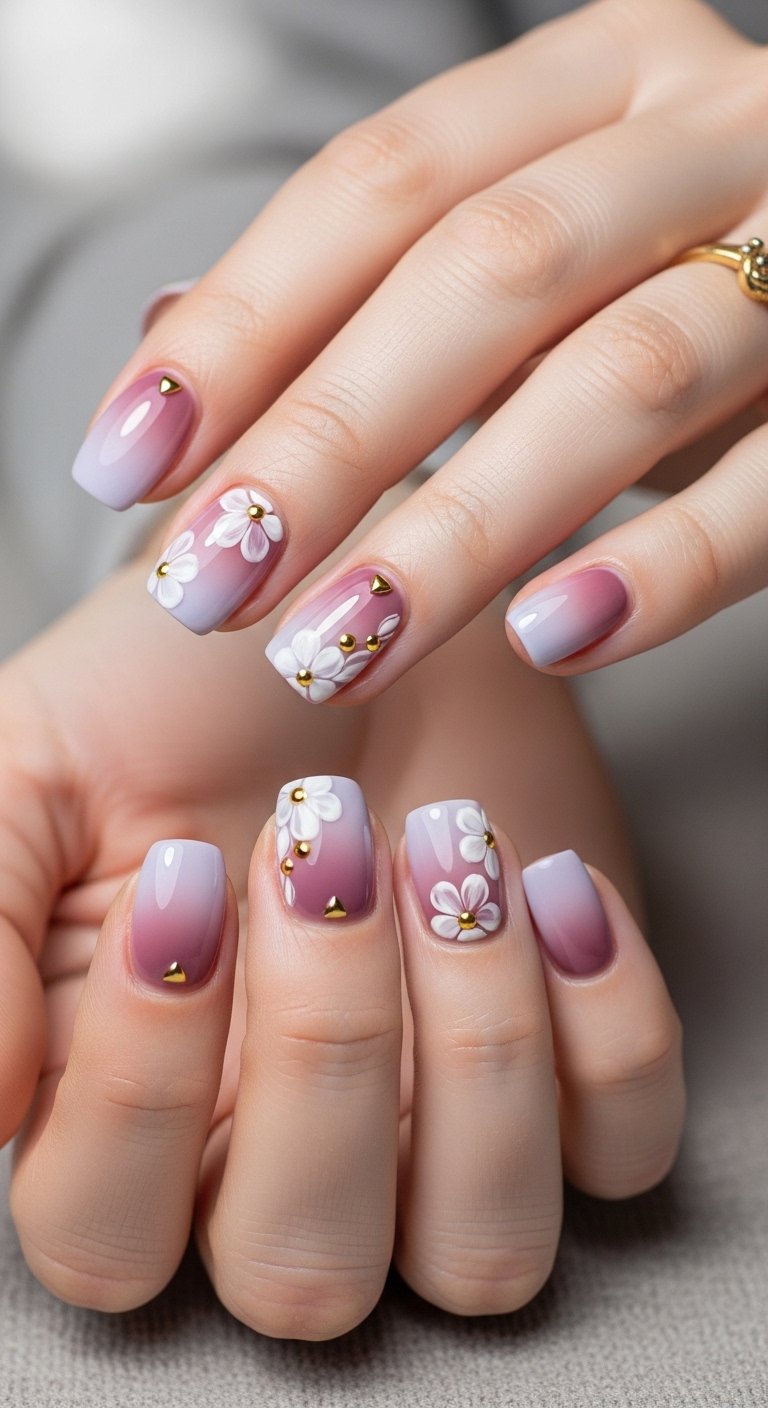
Soft flower petals fading into a solid color block create a romantic spring aesthetic. Spring floral nail designs 2026 focus on blending intricate art with soft gradients. The gradient softens the transition between the detailed art and the plain polish. Stamp a floral design over a sponge painted base. Add tiny pearls to the center of each flower to introduce a subtle 3D element.
Pro Tip Roll the stamper side to side over the nail to transfer the image without smudging.
Save this idea to your Pinterest.
Soft Smiles
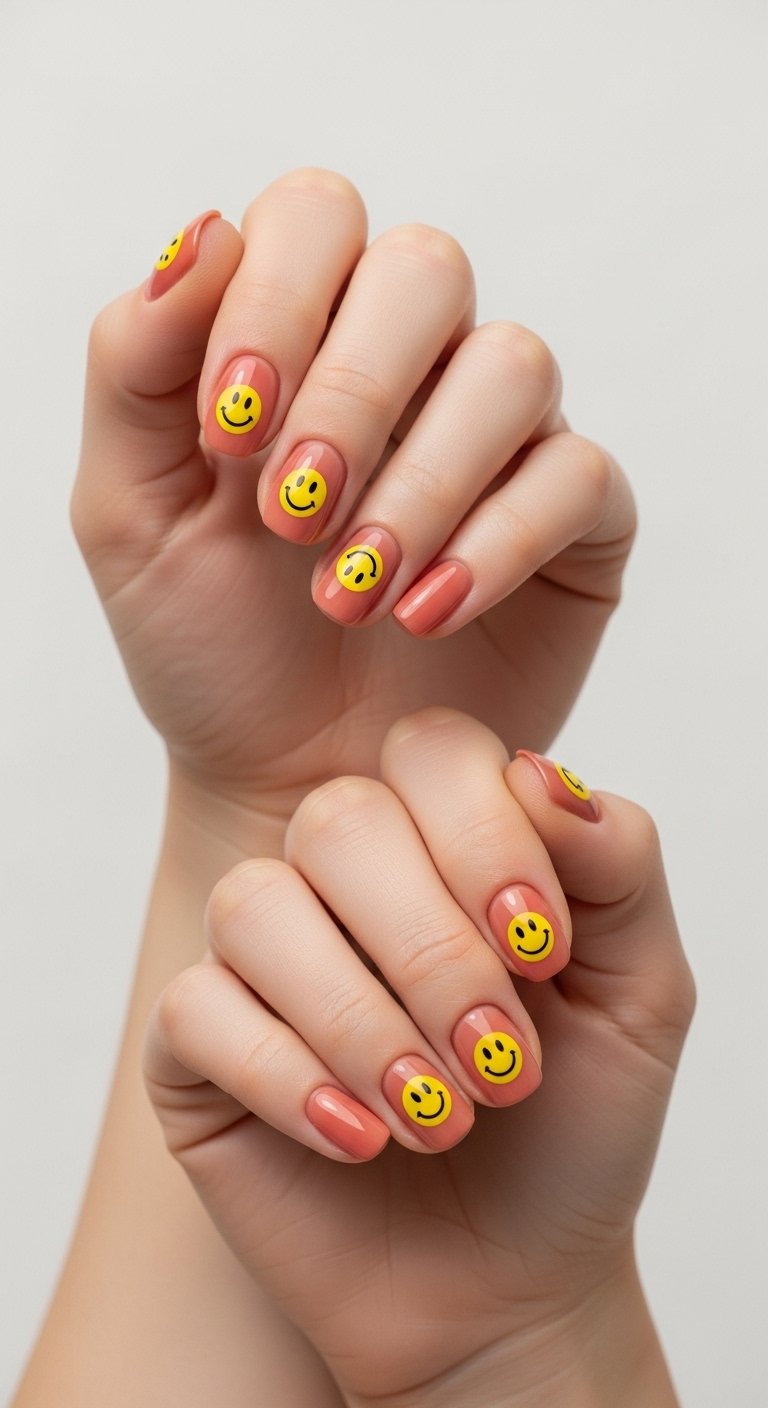
Tiny smiley faces scattered across a neutral background bring joy to everyday manicures. The simple yellow circles contrast against a sheer nude base. Use a large dotting tool for the yellow face. Switch to a micro liner brush for the black eyes and mouth. The minimalist approach keeps the design feeling fresh and light.
Pro Tip Keep the faces small to maintain an elegant overall look.
Save this idea to your Pinterest.
Get The Look Essential Nail Art Tools
Building a proper kit makes easy DIY nail art at home possible for anyone.
- Thin liner brushes for sharp lines
- Double ended dotting tools for perfect circles
- Clear builder gel for attaching rhinestones
- Lint free wipes for cleaning brushes
- High gloss top coat for lasting shine
Precious Polar Bears
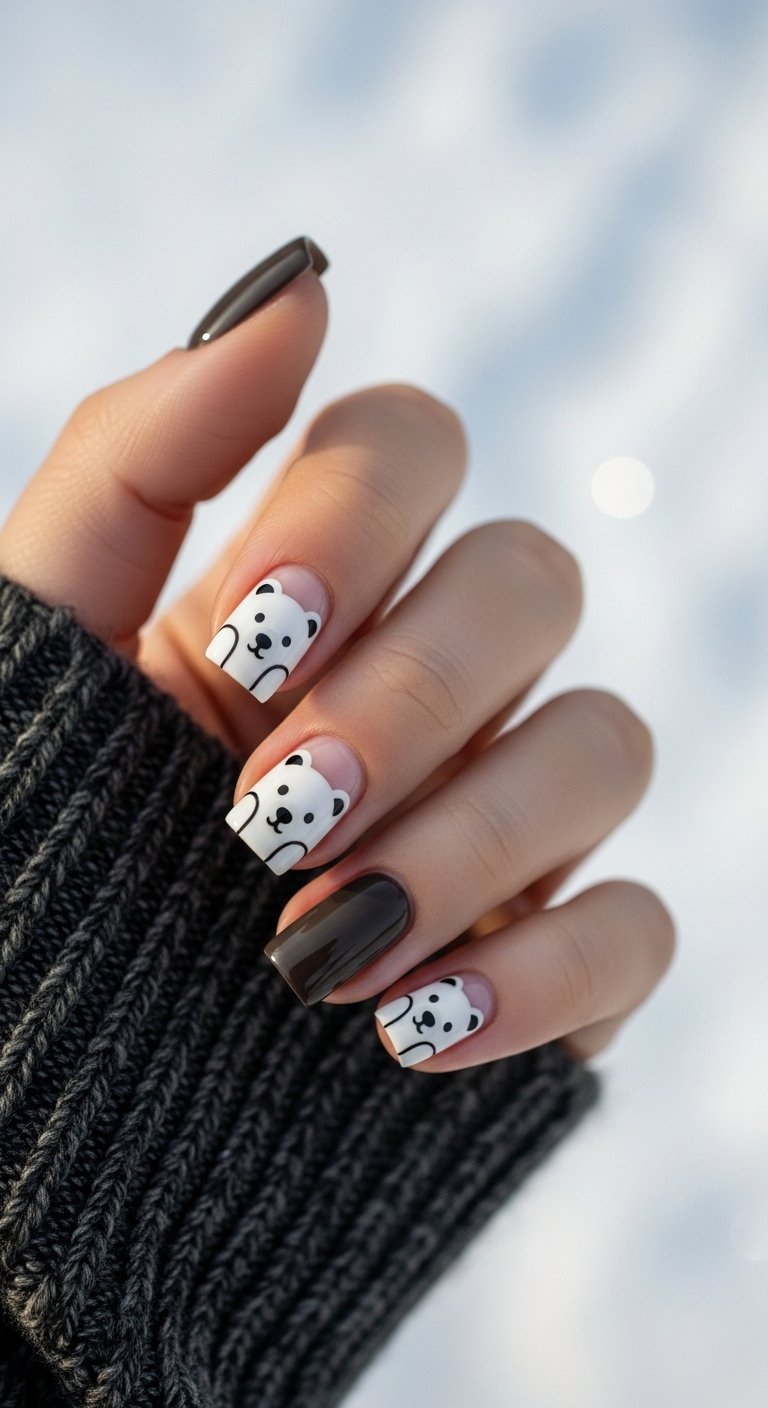
Winter themes shine with miniature polar bear faces painted over a frosty blue base. The white characters pop against the cool toned background. Paint a white semi circle at the tip of the nail. Add small black dots for the nose and eyes. Use a matte top coat to mimic the texture of soft snow. The simple shapes make this design approachable for beginners.
Pro Tip Add a tiny drop of pink polish to the cheeks for a sweet finishing touch.
Save this idea to your Pinterest.
Press Ons Versus Salon Extensions
| Method | Application Time | Longevity |
|---|---|---|
| Glue On Press Ons | Under twenty minutes | Lasts up to two weeks |
| Salon Acrylics | Up to two hours | Lasts four weeks or more |
| Gel Extensions | One hour | Lasts three weeks |
Popular Asked Questions
How do you maintain elaborate nail art
Thick layers of builder gel protect intricate designs from chipping. Apply cuticle oil every day to keep the nail bed hydrated and flexible. Wear gloves when washing dishes to prevent water damage to the gel seals. Good maintenance extends the life of long lasting gel manicure ideas.
What are the best elaborate nail designs for short nails
Micro French tips and negative space designs flatter shorter nail beds. Small geometric shapes create the illusion of length. The minimal art avoids cluttering the small surface area. Sheer neutral bases make the fingers look longer and more elegant. Best nail designs for short nails focus on vertical lines and tiny accents.

How long does 3D gel nail art last
Proper prep work keeps 3D gel designs intact for up to three weeks. The technician must seal the edges of the 3D elements with a top coat. This step prevents the shapes from lifting off the nail plate. Hard gel materials resist daily wear better than soft gels.
How much do elaborate nail designs cost
Salon pricing depends on the skill level of the technician and the time required. Intricate hand painted designs cost between sixty and one hundred dollars. Adding gemstones or 3D elements increases the final price. Using budget friendly nail art tools at home offers a great alternative for saving money.
Conclusion
Elaborate manicures offer endless opportunities for personal expression and style. Complex art looks stunning on every nail shape and length. The right techniques and tools make elaborate nail designs accessible for everyone. These 30 styles provide a perfect starting point for your next manicure appointment or home session.
What is your favorite nail art trend this season?
Follow us on Pinterest for more elaborate manicures inspiration.

Leave a Comment