
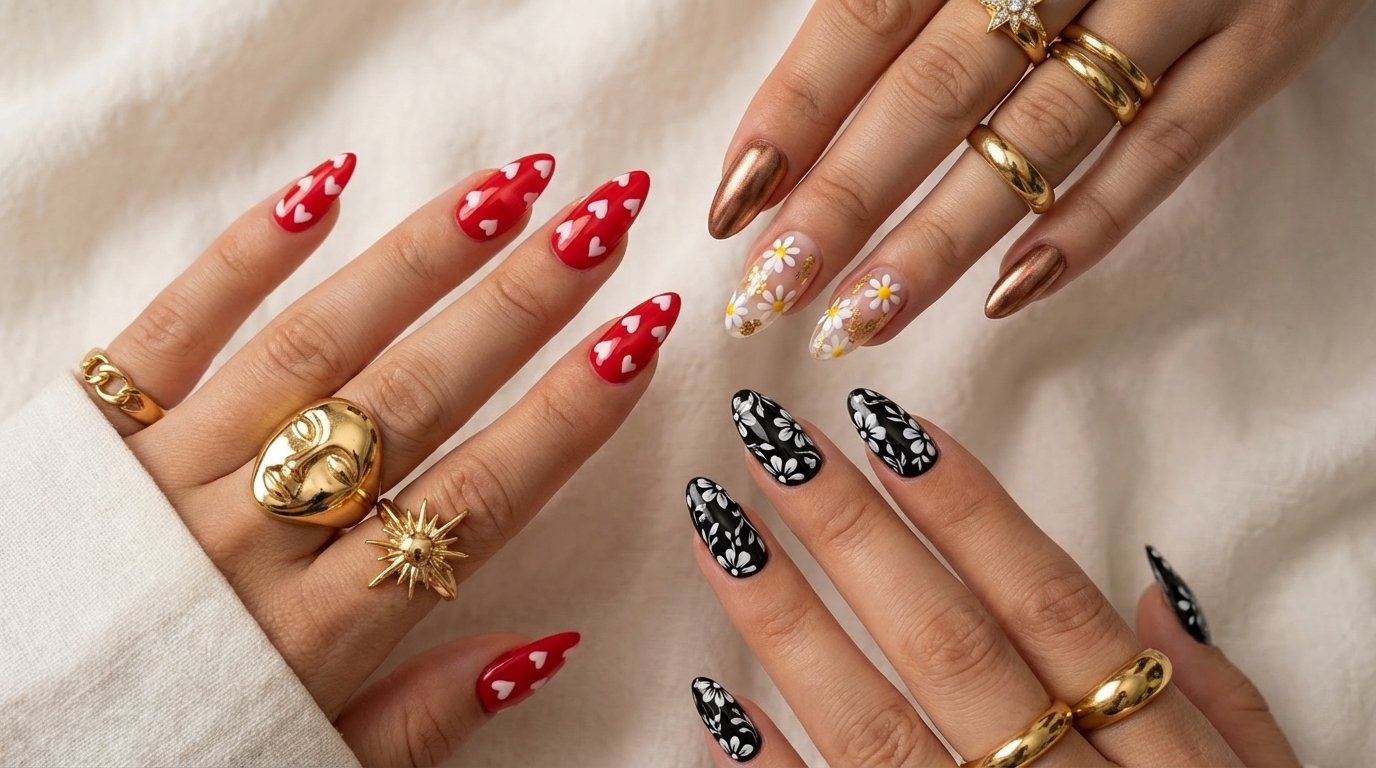
Floral nail art remains a timeless choice for anyone wanting a fresh, feminine look. You might think flowers are only for spring, but modern techniques make them suitable for every season. The right design transforms your hands into elegant accessories that complement your outfit rather than clashing with it. Whether you prefer minimalist daisies or intricate 3D roses, there is a style here for you.
This guide provides a curated gallery of floral inspiration. We break down the visual elements of each look and explain exactly how to achieve it. You will find styles ranging from office-safe accents to bold weekend statements. Get ready to screen-shot these designs for your next salon visit or DIY session.
Check out our related guide on Spring Fashion Trends.
Contents
- Milk Bath Dried Flowers
- Micro Daisy French Tips
- Vintage Porcelain Roses
- Golden Outline Botanicals
- Moody Dark Florals
- Abstract Petal Swirls
- Soft Watercolor Blooms
- Textured 3D Acrylic Flowers
- Minimalist Single Stem
- Sunflower Statement Nails
- Matte Versus Glossy Contrast
- Tropical Hibiscus Vibes
- Cherry Blossom Branches
- Negative Space Tulips
- Gothic Rose Garden
- Pastel Mix and Match
- Metallic Chrome Petals
- Lavender Fields Forever
- Popular Asked Questions
- Conclusion
Milk Bath Dried Flowers

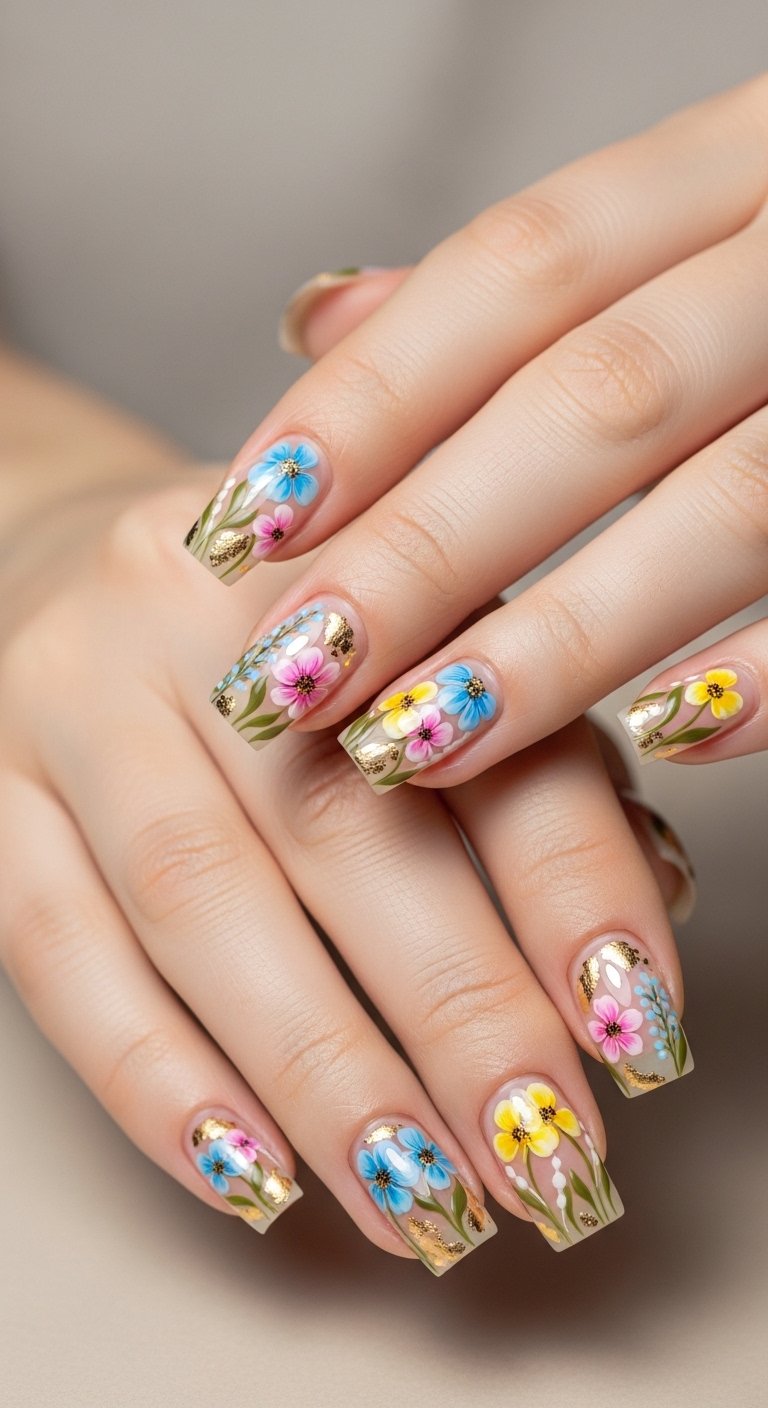
The milk bath manicure takes inspiration from luxury spa treatments. This style submerges tiny, real dried flowers into a semi-sheer, milky white or nude gel polish. The visual effect creates depth and softness that looks incredibly high-end. It mimics the look of flowers floating in creamy water. The milky base softens the bright colors of the petals, making this an ideal choice for brides or anyone preferring a subtle aesthetic.
Achieving this requires specific materials. You need dried pressed flowers, which you can buy in small pots, and a milky builder gel or sheer polish. Place the flowers onto a wet layer of base coat. Apply the milky color over the top to “drown” the petals slightly. Finish with a thick, glossy top coat to encapsulate everything smoothly. The result feels organic and whimsical. This design works best on oval or almond-shaped nails as the curves mimic natural organic shapes.
Pro Tip: Use tweezers to place the dried flowers to ensure they lay flat against the nail curve before curing.
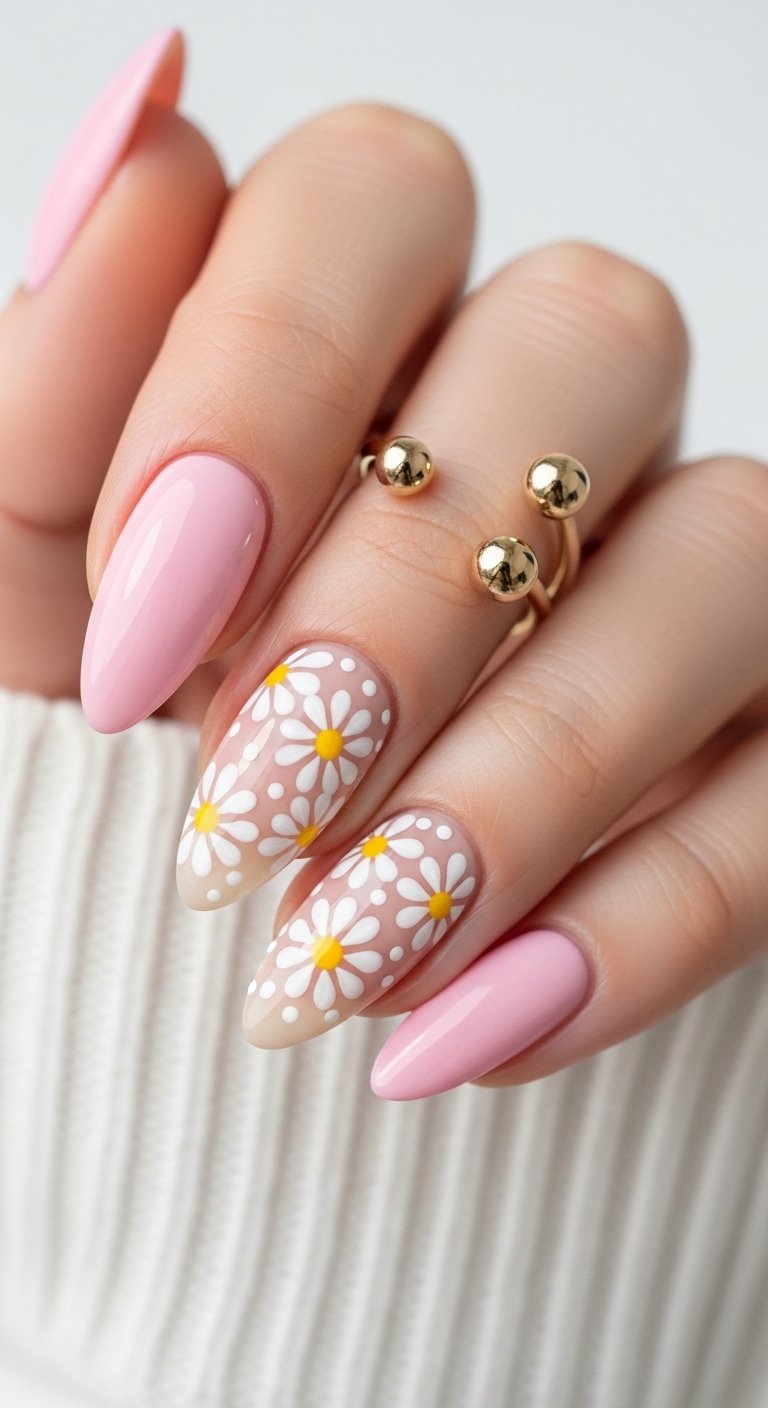
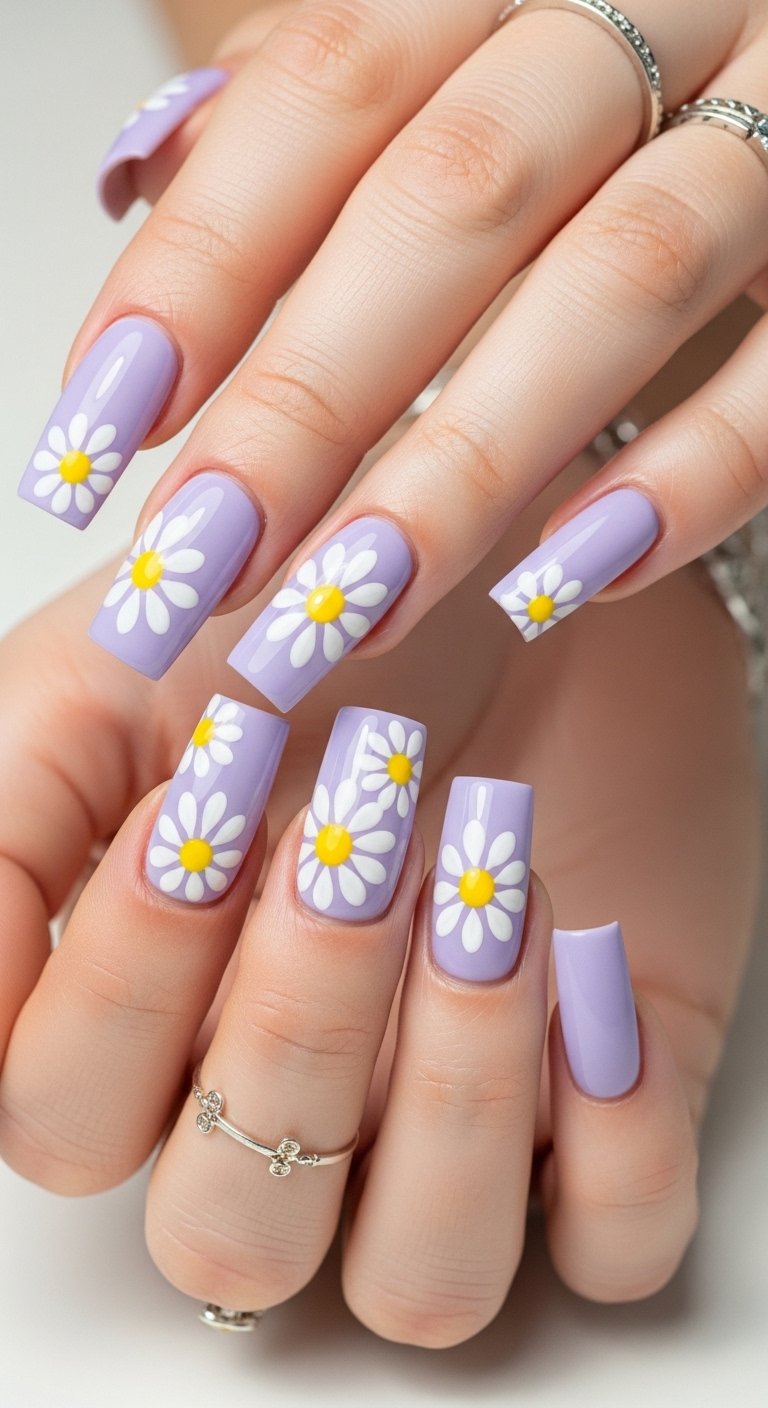
Micro Daisy French Tips
This design updates the classic French manicure. Instead of a stark white line, tiny daisies form the crescent shape at the tip of the nail. The negative space on the rest of the nail keeps the look clean and modern. It balances playfulness with sophistication. The small scale of the flowers ensures the design does not look childish. This style is currently trending heavily on social media due to its retro 90s influence mixed with modern minimalism.
You can recreate this easily at home. A dotting tool is your best friend here. Dip the tool in white polish to make five dots in a circle, then place a yellow dot in the center. Repeat this pattern along the free edge of your nail. You can stick to classic white daisies or use pastel colors for a spring vibe. Keep the base of the nail bare or use a sheer pink polish to let the tips stand out. The precision of the placement is what makes this look professional.
Save this idea to your Pinterest.
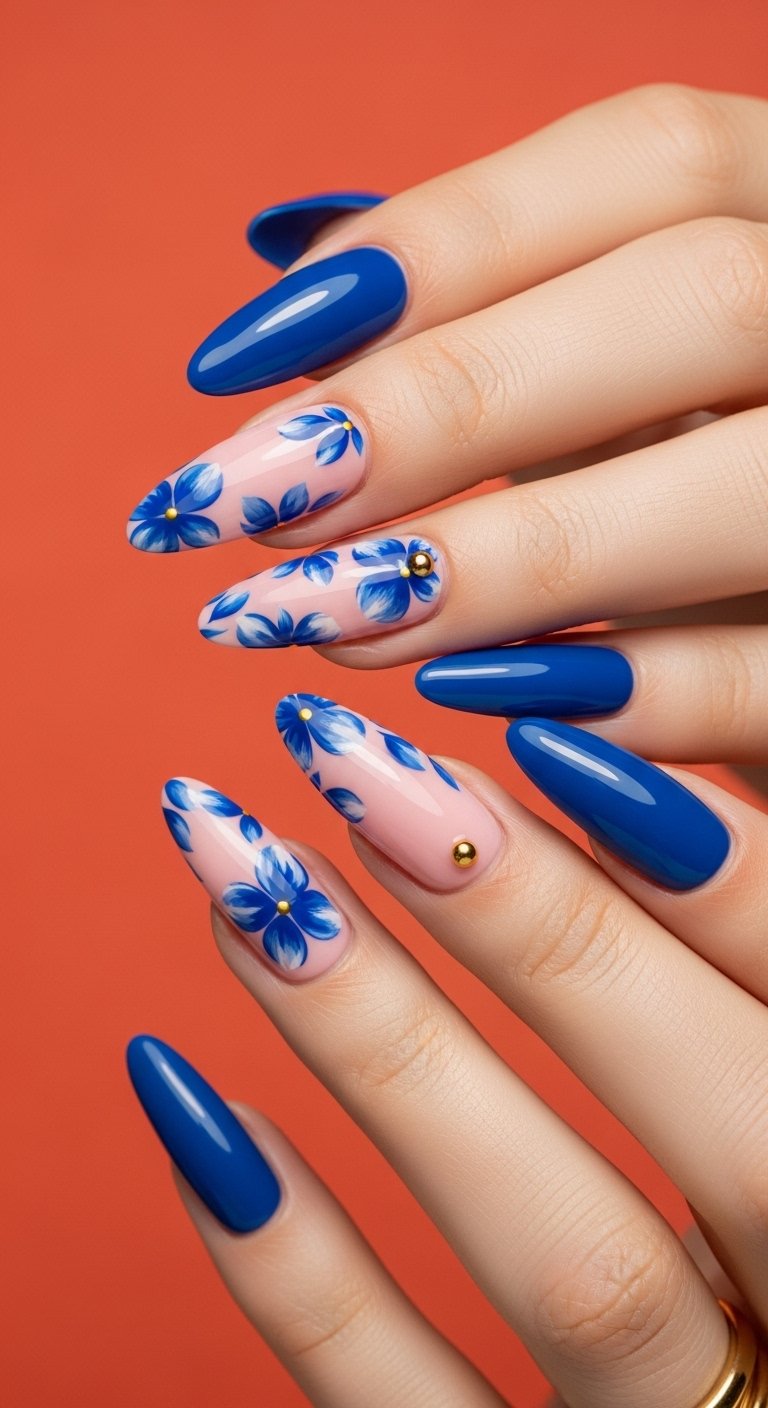
Vintage Porcelain Roses
Think of fine china or antique tea sets. This style features intricate, hand-painted roses usually on a white or pastel blue base. The colors often include soft pinks, dusty greens, and creamy whites. The vibe is strictly “Grandmillennial” or cottagecore. It appeals to those who love romantic, old-world aesthetics. The detail in the shading gives the roses a realistic, slightly raised appearance similar to painted porcelain.
You need fine liner brushes for this level of detail. Start with a solid opaque base color. Paint rough circular blobs in pink. Use a darker pink or red to draw thin “C” shapes inside the blob to create petal definitions. Add small leaves with sage green polish. Do not worry about making them perfect circles; real roses have irregular shapes. A matte top coat often suits this style better than gloss, as it mimics the texture of ceramic ware.
Pro Tip: Flash cure your gel between painting the flower and the leaves so the colors do not bleed into each other.
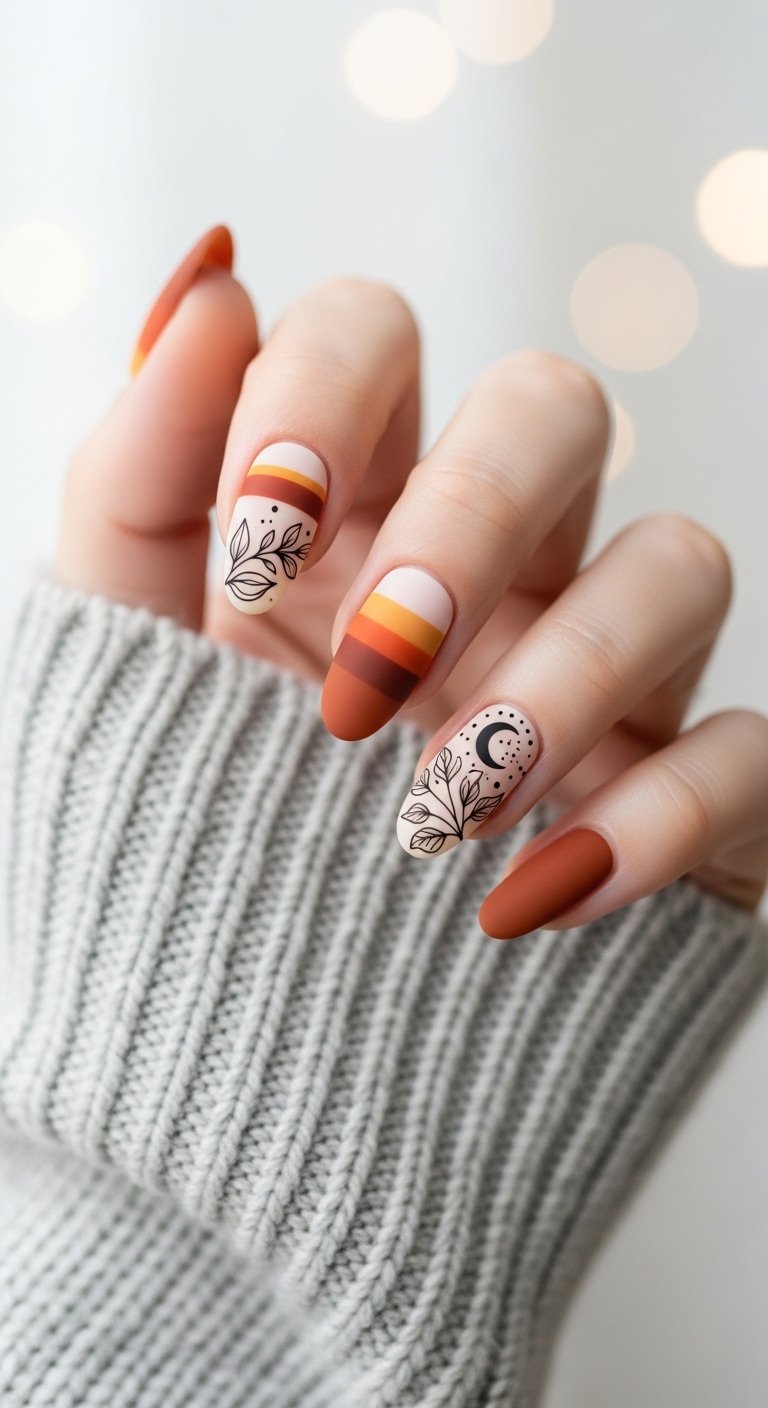
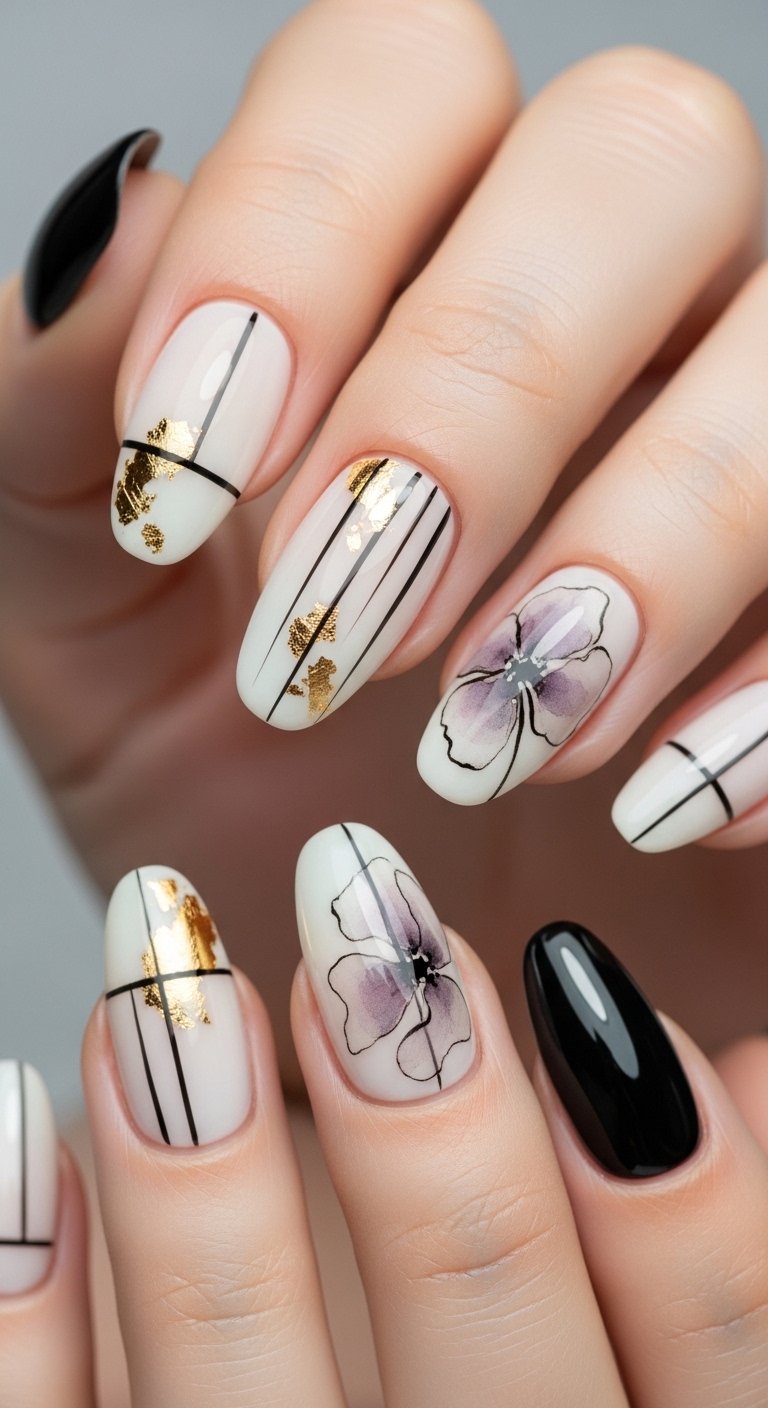
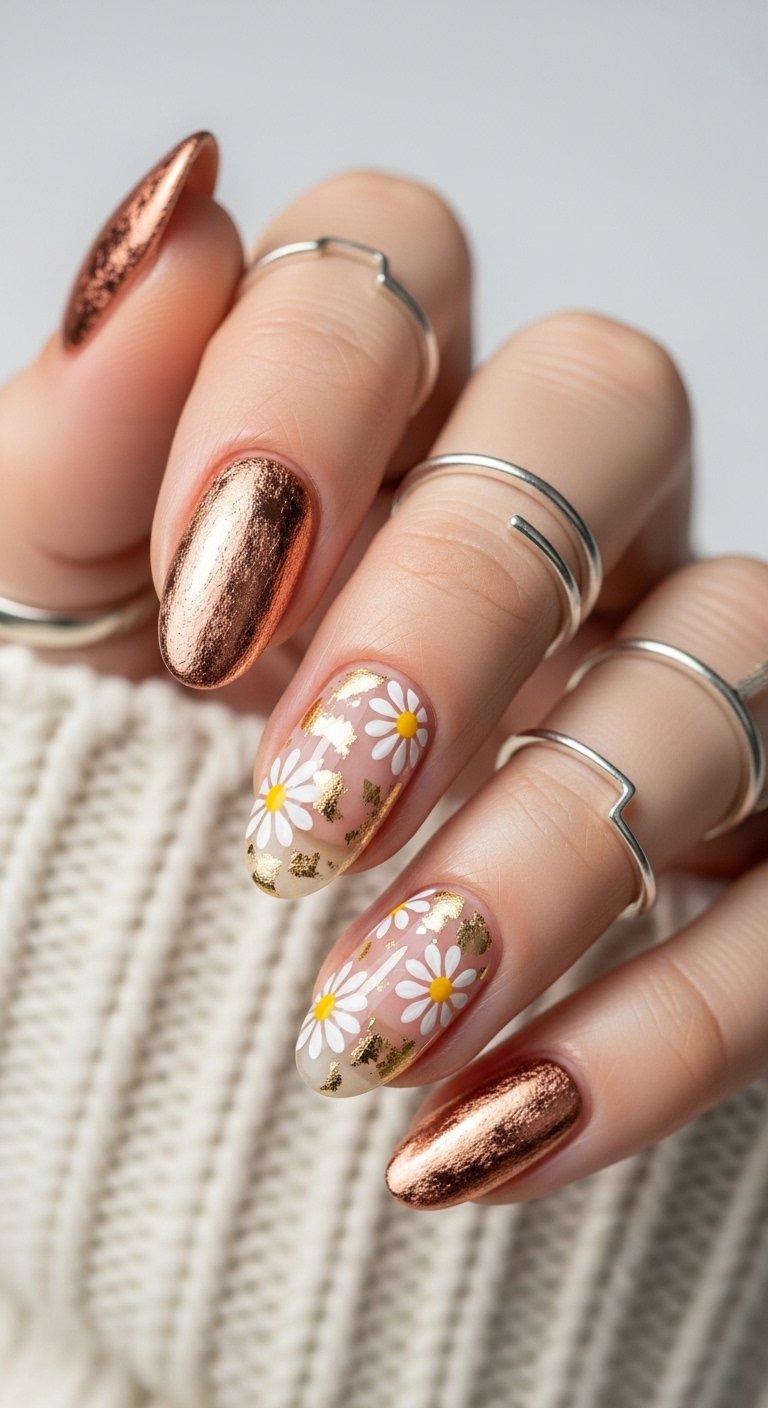
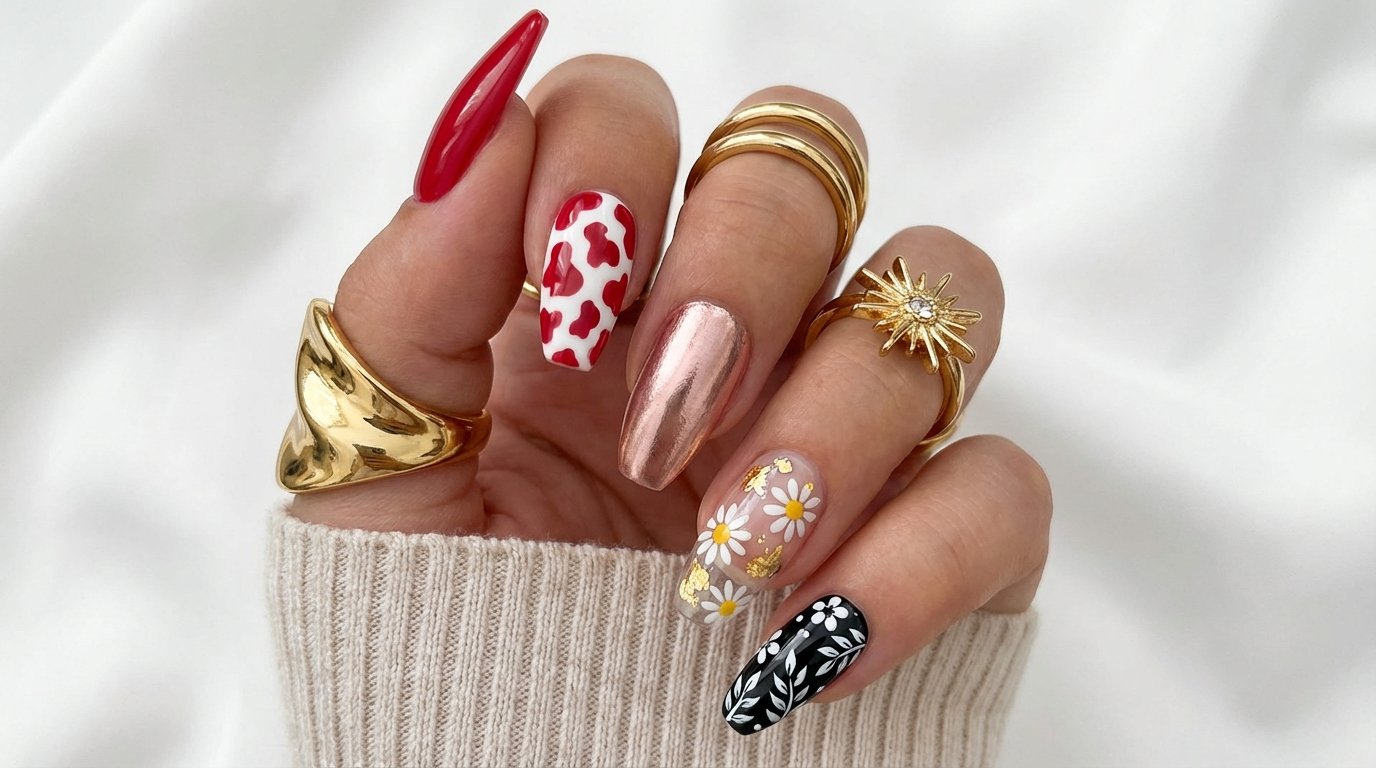
Golden Outline Botanicals
Luxury meets nature in this refined design. The focus here is on the silhouette of the flower rather than the color. Delicate gold chrome or metallic polish traces the outline of leaves and petals against a nude or clear background. The light catches the metallic lines, adding a subtle shimmer that looks like fine jewelry for your hands. This is perfect for formal events where you want nail art that isn’t too loud.
A steady hand is necessary for these fine lines. Use a high-pigment metallic gel paint. If you struggle with painting, look for gold metal stickers that lie flat on the nail. Seal them impeccably well. The contrast between the metallic shine and the natural nail plate creates a stunning visual interest. You can place one large floral outline on the ring finger or do small vines climbing up every nail.
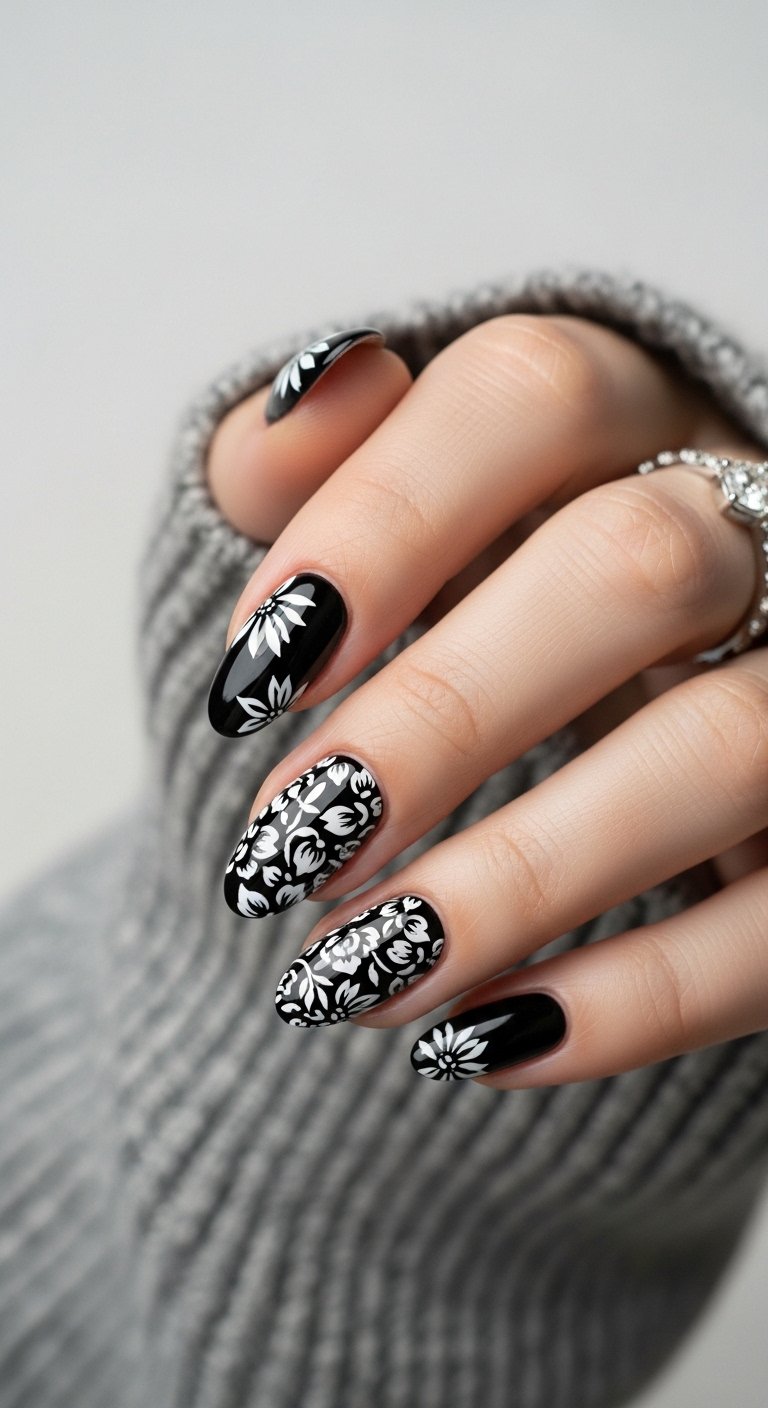
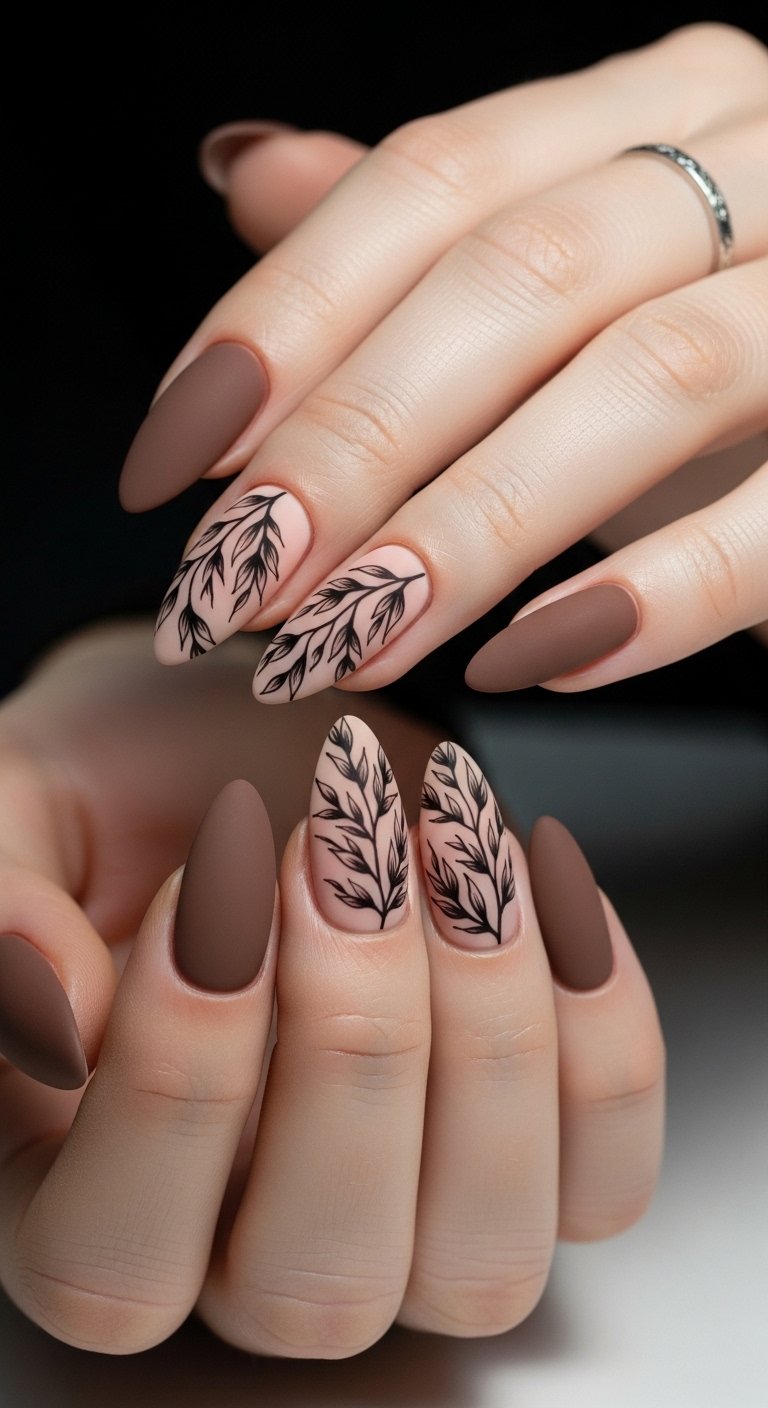
Moody Dark Florals
Floral nails are not just for bright sunny days. Dark florals use black, deep burgundy, navy, or emerald green backgrounds. The flowers on top are often painted in rich jewel tones or stark white for high contrast. This look is dramatic, edgy, and perfect for autumn or winter. It breaks the rule that flowers must be sweet and innocent. The dark base makes the colors pop with an intensity that pastel backgrounds cannot achieve.
Start with two coats of your dark base color. Ensure it is fully opaque. Paint your flowers using lighter shades to ensure they show up. You might need to paint a white silhouette first and then layer the color on top if your polishes are sheer. This layering technique gives the art vibrancy. Adding a few dots of gold foil can elevate the moodiness and add a touch of glamour to the gothic aesthetic.
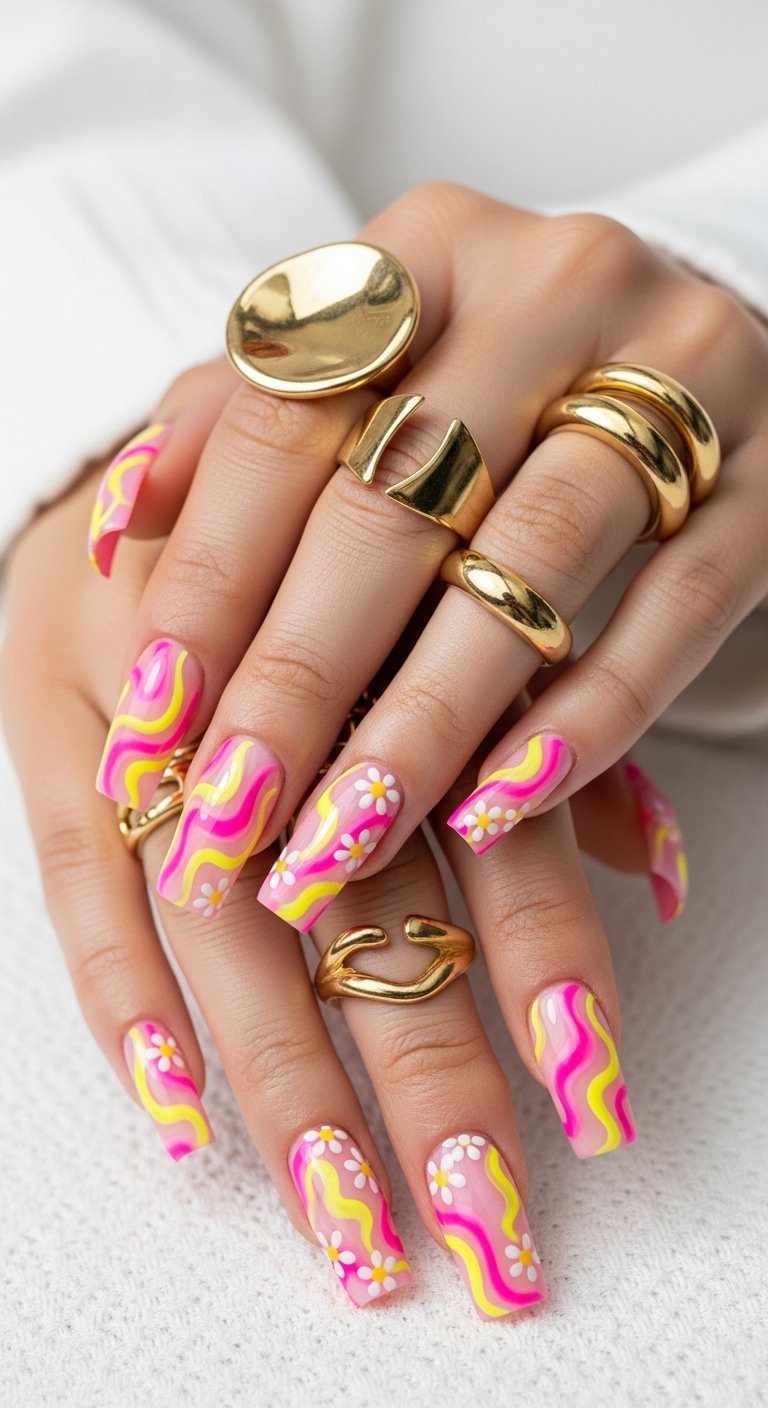
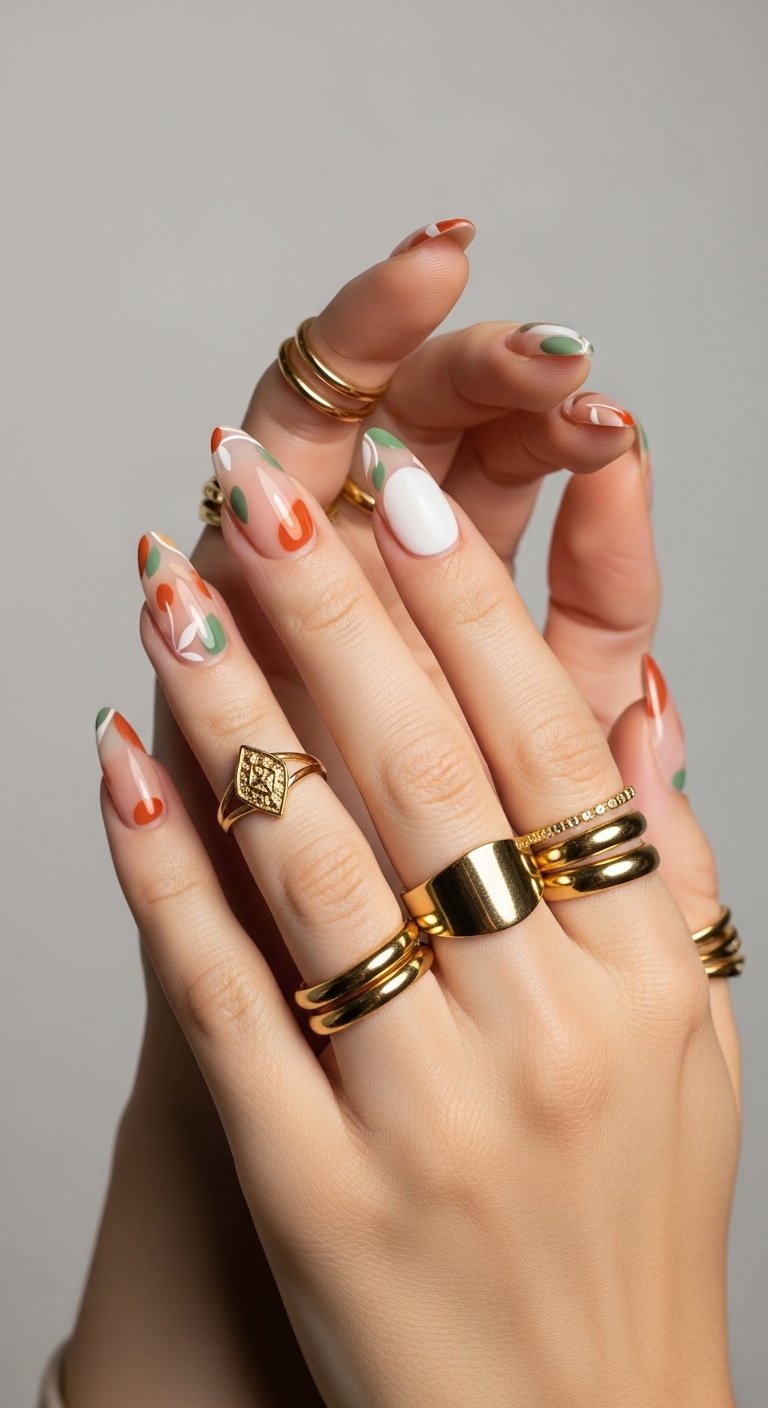
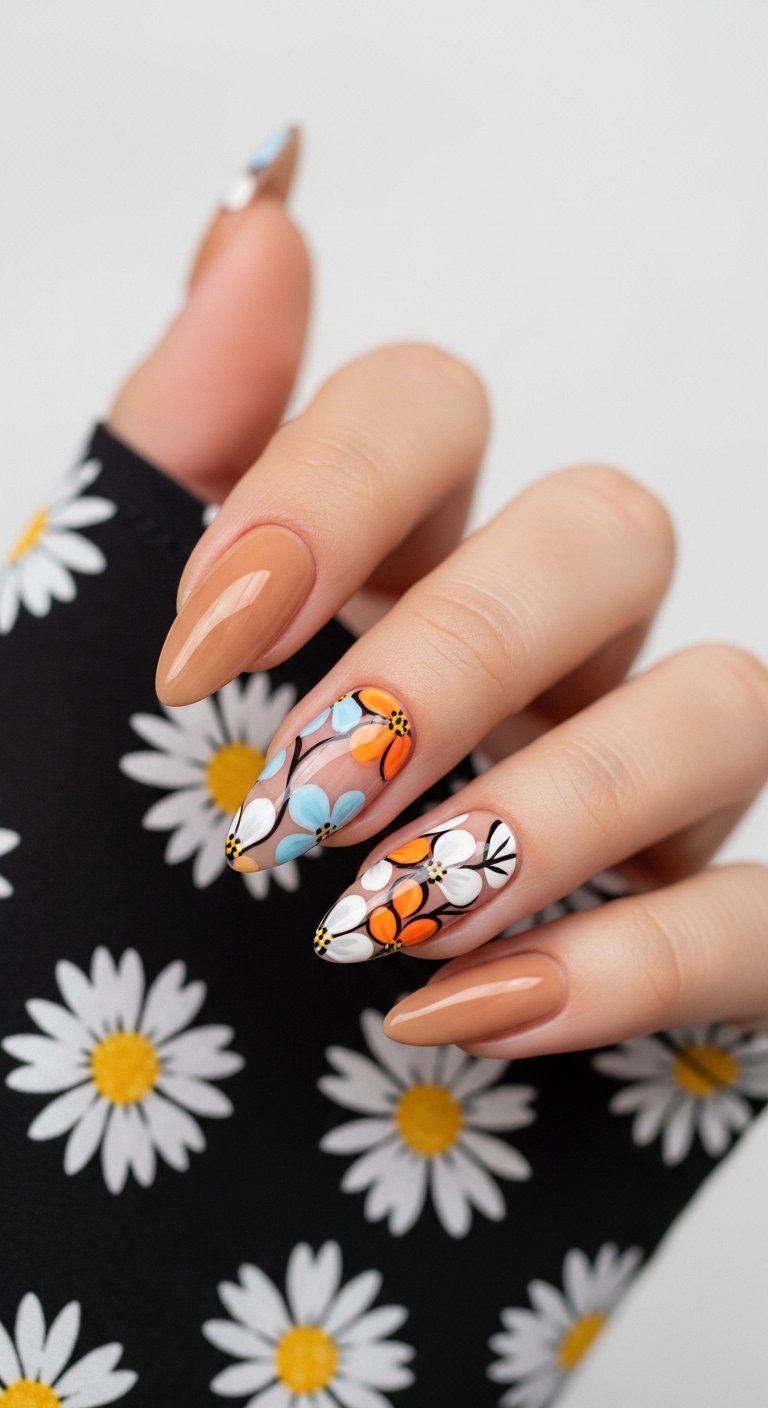
Abstract Petal Swirls
This design moves away from realism. It uses the shapes and colors of flowers to create an abstract composition. Think of Matisse cutouts or modern art prints. The “flowers” might just be blobs of color that suggest a petal, paired with flowing organic lines. It feels artistic and creative. This style allows for mistakes, as there is no “wrong” way to paint an abstract shape. It is about color combination and flow.
Choose a color palette of three to four complementary shades. Use a medium brush to swipe organic shapes onto the nail. Overlap them slightly. Use a darker color to add a few defining lines or dots, but do not try to draw a specific flower. The goal is to capture the essence of a garden. This design looks fantastic with a matte finish, which makes it look like a canvas painting.
Pro Tip: Mix a little white into your colors to vary the opacity, adding depth to your abstract shapes.
Soft Watercolor Blooms
Watercolor nails mimic the bleeding, translucent effect of watercolor paint on paper. The edges of the flowers are soft and undefined. Colors blend into each other seamlessly. This creates a dreamy, romantic, and ethereal look. It is less graphic than other styles and much more forgiving. The lack of harsh lines makes it very wearable for everyday settings.
You can achieve this with blooming gel or by thinning out acrylic paint with water. If using regular polish, dilute a drop of color with acetone on a palette. Dab the thinned color onto the nail. It will naturally spread and dry with that characteristic watercolor fringe. Layer different colors while they are still slightly wet to let them bleed together. A white base coat is best to let the translucent colors show their true pigment.
Save this idea to your Pinterest.
Textured 3D Acrylic Flowers
This style adds physical dimension to your manicure. The flowers literally stand off the nail. Artists use acrylic powder or thick sculpting gel to mold petals that have height and texture. It transforms your nails into a sculptural masterpiece. This is a bold choice, often seen at weddings or special occasions. The tactile element adds a unique sensory experience to your manicure.
This is an advanced technique. You pick up a small bead of acrylic on a brush and press it onto the nail. While it is pliable, you use the brush to flatten and shape it into a petal. You build the flower petal by petal. The center often features a rhinestone or a small bead of gold bullion. Because the design is raised, it can snag on things, so it requires careful wear. Keep the base color simple to let the 3D work take center stage.
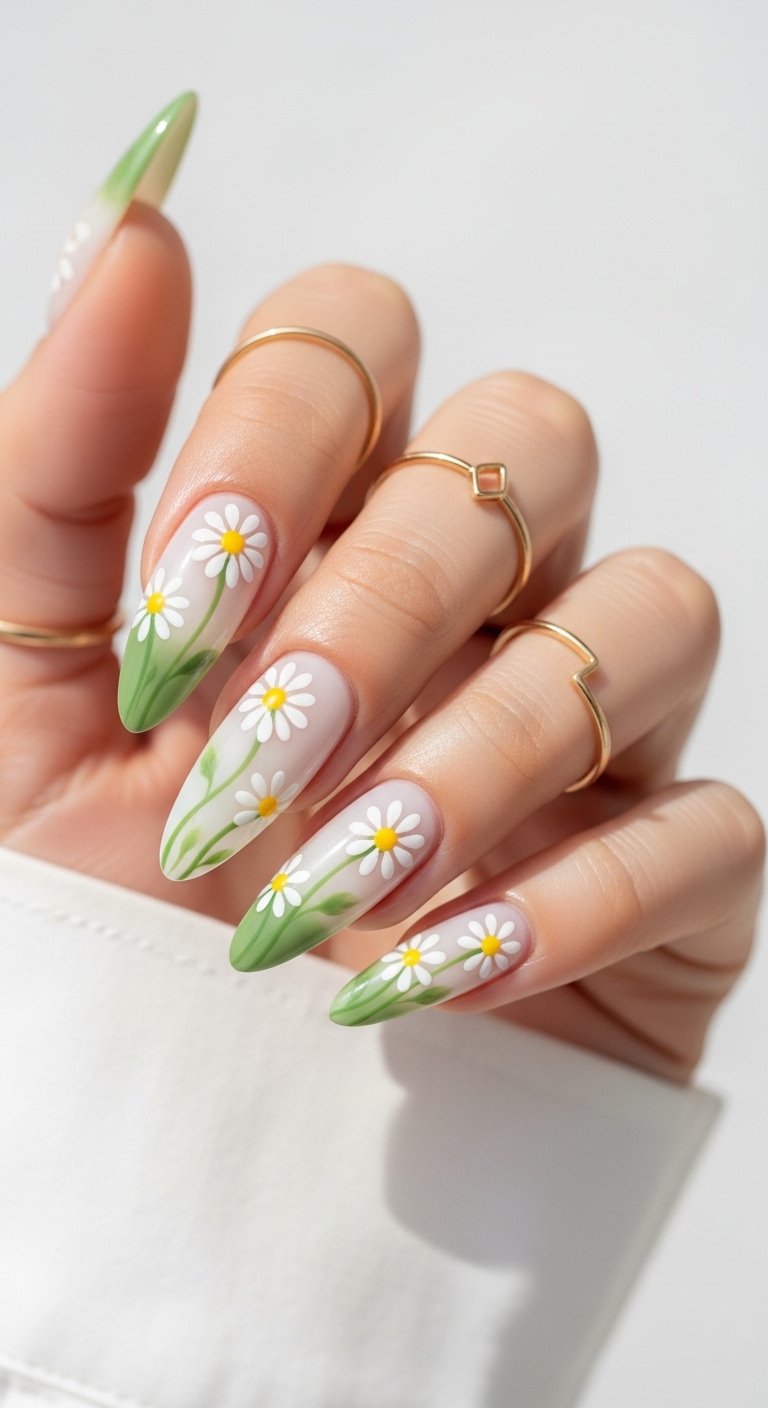
Minimalist Single Stem
Less is often more. The single stem design places one delicate flower on one or two nails, leaving the others solid or bare. The flower usually has a long green stem and a small bud. It draws the eye through the use of negative space. This appeals to the minimalist who wants to participate in the trend without feeling overwhelmed by patterns. It looks clean, curated, and very chic.
A striper brush is essential for the stem. Draw a very thin green line from the cuticle area towards the center. Add a tiny splash of color at the top for the bloom. You do not need to fill the whole nail. The beauty lies in the surrounding empty space. This design looks exceptional on shorter, squoval nails. It elongates the look of the nail bed because of the vertical line of the stem.
Pro Tip: Clean up any mistakes instantly with an angled brush dipped in acetone to keep the background pristine.
Sunflower Statement Nails
Sunflowers bring an instant burst of joy and warmth. Their bright yellow petals and dark centers create a striking contrast. This look screams summer and positivity. Usually, the sunflower is large enough to cover the entire nail plate, or it peeks out from the corner. It pairs beautifully with denim blue or crisp white outfits. The bold colors make it a fun choice for vacations or festivals.
Yellow pigment can sometimes be streaky. Apply thin, even layers to get a solid color opacity for the petals. Use a dark brown or black for the center. To add texture to the center of the sunflower, use a dotting tool to create tiny stipples. This mimics the seeds. You can accent the other nails with a solid yellow that matches the petals to tie the whole look together.
Comparison: Floral Techniques
| Technique | Pros | Cons | Best For |
|---|---|---|---|
| Hand-Painted | Completely custom, artistic flair. | Time-consuming, requires skill. | Unique, specific designs. |
| Dried Flowers | Realistic, organic texture. | Can be bulky if not encapsulated well. | Milk bath styles, boho vibes. |
| Stickers/Decals | Fast, easy, consistent look. | Can peel at edges, looks less “expensive.” | Beginners, quick DIY. |
| Stamping | intricate details, repeatable patterns. | Learning curve with transfer tools. | Full-coverage patterns. |
Get The Look: Essential Tools
To achieve these designs at home, you need more than just polish.
- Dotting Tools: Create perfect daisy centers and petals.
- Striping Brush: Essential for stems and fine outlines.
- Matte Top Coat: Instantly transforms a design into a velvet-like texture.
- Cuticle Oil: Keeps the skin around your art looking healthy and hydrated.
Matte Versus Glossy Contrast
Playing with finish is a subtle way to elevate nail art. This design uses a matte base with glossy flowers, or vice versa. The light hits the surfaces differently, creating a pattern that is visible through texture rather than just color. It is sophisticated and tactile. A matte black nail with glossy black roses, for example, is the height of chic.
Paint your base color and apply a matte top coat. Once dry, use a glossy top coat on a fine brush to paint the floral design over it. Alternatively, paint the flowers in color and only mattify the background. This makes the flowers pop and appear almost 3D. This technique works best with simple floral shapes so the texture difference is obvious.
Tropical Hibiscus Vibes
Transport yourself to an island paradise. Hibiscus flowers are large, showy, and usually come in hot pinks, oranges, and reds. This design often incorporates palm leaves or monsteras. It is the ultimate vacation manicure. The vibrant colors look amazing against sun-kissed skin. The scale of the flowers is usually large, taking up most of the nail.
Gradient backgrounds work well here. Create a sunset ombre with sponges before painting the flower. The hibiscus distinctive feature is its long stamen. Make sure to paint this protruding from the center with yellow dots at the end. Use white to highlight the edges of the petals; this makes the bright colors appear even brighter and adds dimension to the flat paint.
Cherry Blossom Branches
Sakura, or cherry blossoms, represent renewal. This design features jagged black or brown branches stretching across multiple nails, adorned with tiny pink flowers. It creates a panoramic scene across your hand. The vibe is delicate and serene. It is a massive trend every spring. The aesthetic is heavily influenced by Asian art and calligraphy.
The branches should not be straight. Use a shaky hand intentionally to create the gnarly texture of a tree branch. Use a dotting tool to cluster small pink dots along the branches. Mix a lighter pink and a darker pink to give the blossoms depth. This design looks particularly elegant on a sheer nude or pale blue background, representing the sky.
Pro Tip: Let the branch design flow from one nail to the next, so when you hold your fingers together, it forms a complete tree.
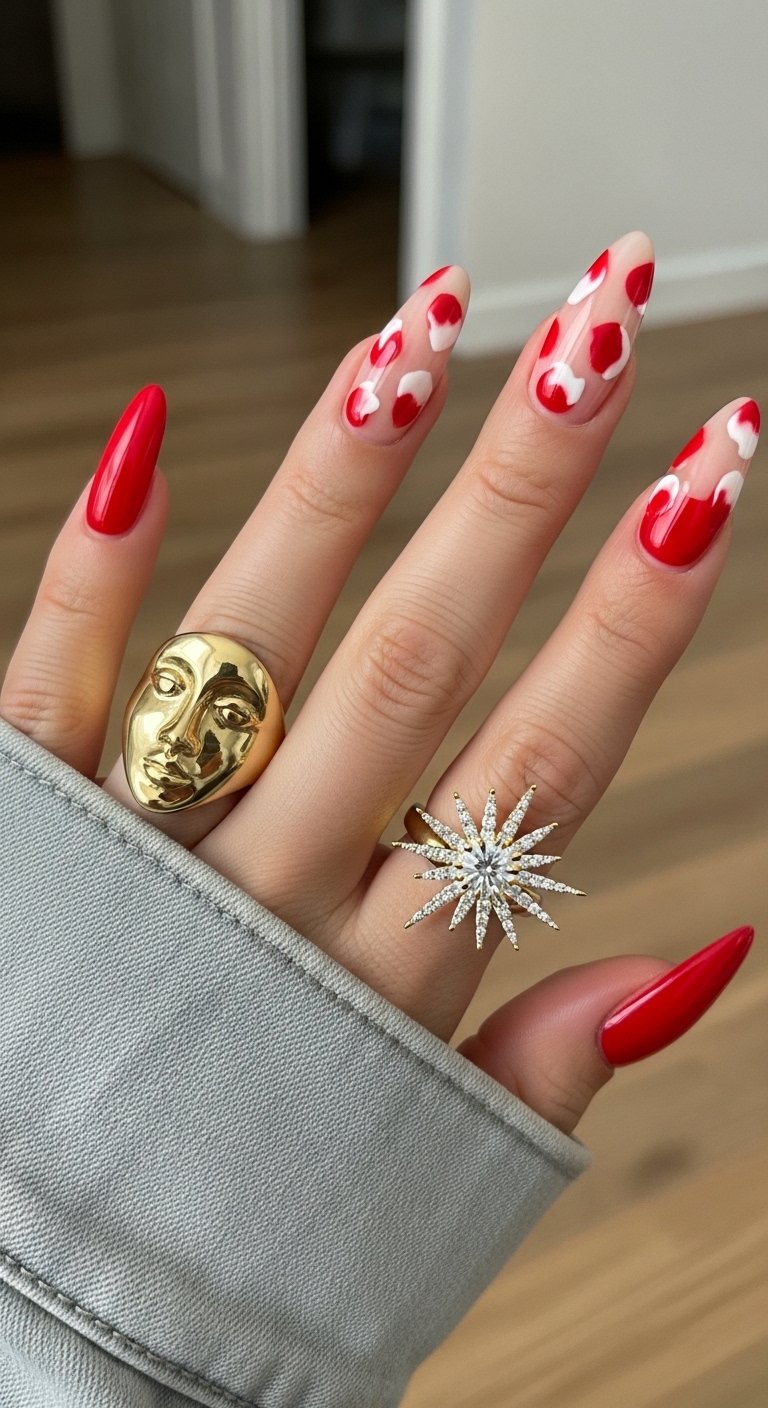
Negative Space Tulips
Tulips have a distinct shape that is easy to recognize. This modern take leaves parts of the nail bare (negative space) and uses blocky colors to form the tulip cup. It feels retro and Scandinavian. The lines are clean and often lack black outlines. It is fresh, youthful, and very tidy.
Focus on the shape of the petals. A tulip usually has three visible points. Paint the green leaves starting from the bottom of the nail, curving outwards. Place the tulip head floating slightly above. The negative space prevents the bold colors from looking too heavy. This is a great design for short nails as it does not require a lot of vertical space to convey the image.
Save this idea to your Pinterest.
Gothic Rose Garden
This is a step further than the moody florals. Gothic roses often incorporate metallic spikes, silver charms, or lace patterns. The roses are deep red or black. It fuses punk rock aesthetics with floral femininity. It creates a powerful statement. This style is for the bold fashionista who wears leather jackets and combat boots.
Texture is key here. Combine a glossy black rose with a matte grey background. Add silver studs to the center of the flowers instead of polish dots. You can also use spider gel to create web-like structures around the roses. The contrast between the soft flower shape and the hard metal hardware creates the visual tension that makes this style work.
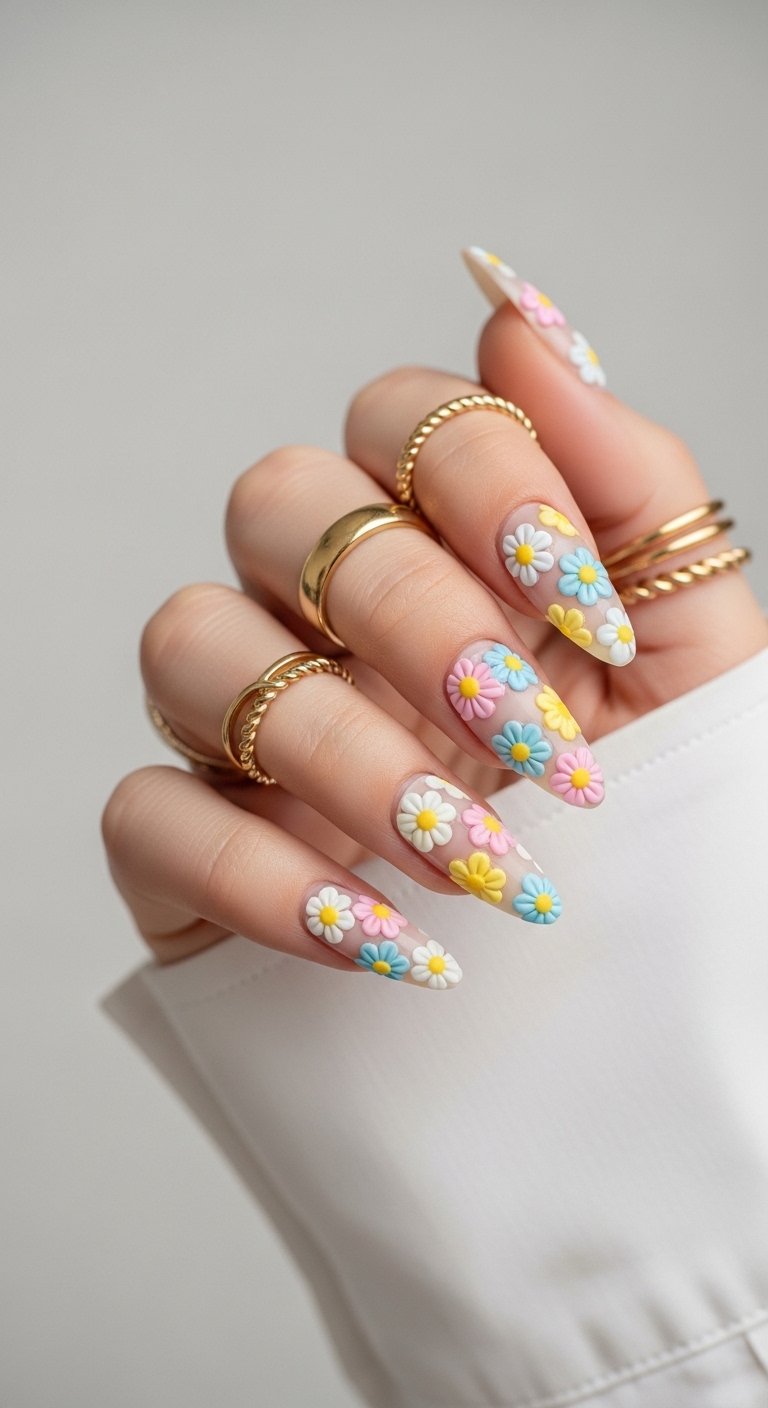
Pastel Mix and Match

Can’t decide on one color? Use them all. This trend involves painting a different pastel floral design on every finger. One nail might have lilac lavender, the next a peach rose, the next a mint leaf pattern. The cohesive element is the pastel saturation level. It feels fun, playful, and eclectic. It encapsulates the joy of a spring garden where everything blooms at once.
Keep the background color consistent, like a creamy white, to tie the mismatched flowers together. Alternatively, do a Skittles manicure (different base color on each nail) and paint white flowers on all of them. The key is balance. If one nail has a large flower, try a pattern of small flowers on the next to avoid visual overcrowding.
Metallic Chrome Petals
Chrome powder has taken the nail world by storm. This design shapes the chrome into flower petals. The result is a mirror-like shine in the shape of a bloom. It looks futuristic and robotic yet retains the softness of nature. Silver and rose gold chrome are the most popular choices. It reflects light blindingly well.
You need a tack-free top coat and chrome powder. Paint the flower shape with the top coat and cure it. Rub the chrome powder only onto the cured design. Dust off the excess. The powder will stick only to the cured flower shapes. Seal it with another layer of top coat. The precision required is high, as chrome shows every imperfection, but the payoff is worth it.
Lavender Fields Forever
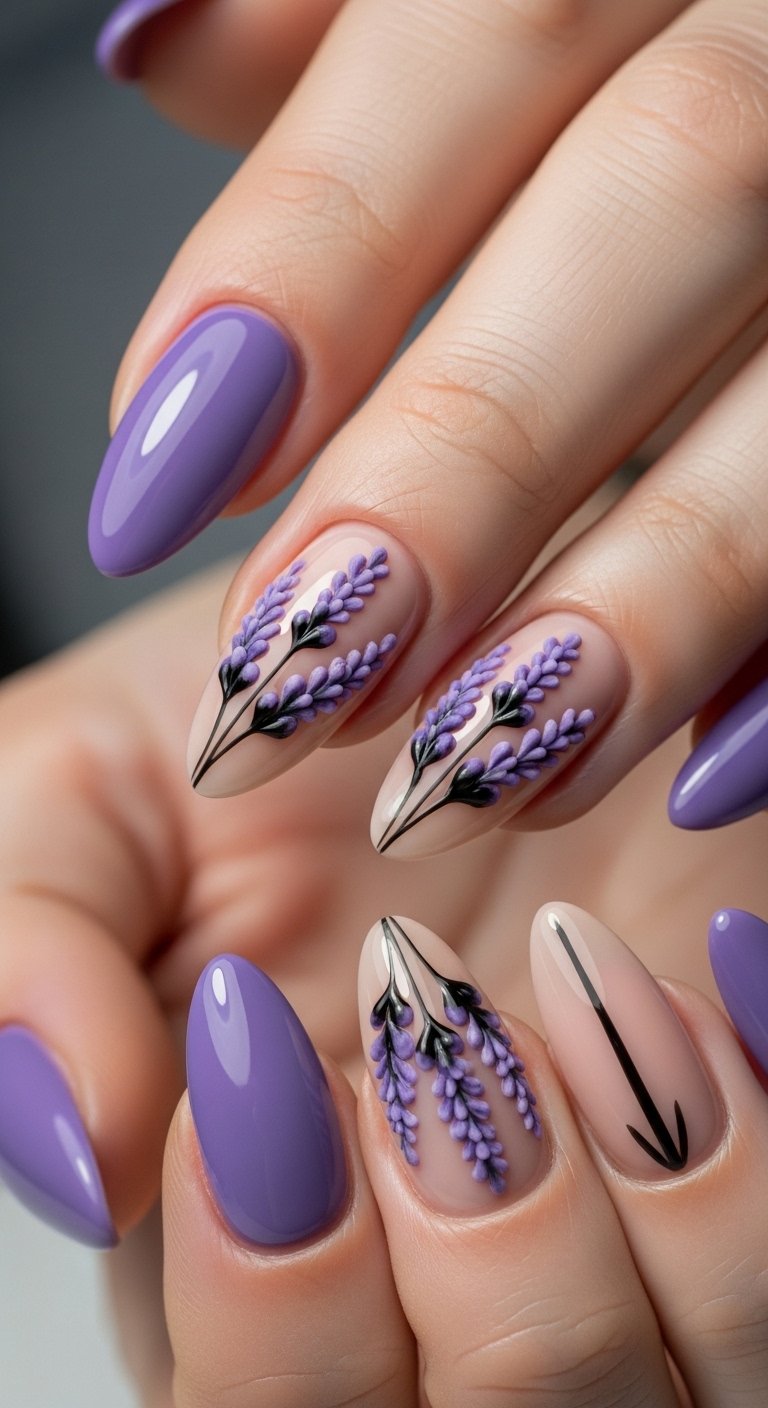
Lavender represents calm and grace. The design consists of tall, thin stalks with tiny purple buds clustered at the top. It is extremely elegant and elongating. The color palette is restricted to greens, purples, and white. It suits a cottage or farmhouse aesthetic. It is subtle enough for conservative workplaces but detailed enough to be interesting.
Use a very fine brush to flick green lines upwards. Use a dotting tool or the very tip of your brush to dab shades of purple along the top third of the stem. Vary the purple shades from dark to light to create volume. This design looks beautiful with a matte finish, mimicking the dry texture of real lavender.
Pro Tip: Add a tiny bee sticker or hand-painted bee near the lavender for a cute, narrative detail.
Popular Asked Questions
How do I keep floral stickers from peeling off?
The key is encapsulation. Apply the sticker to a dry, tack-free surface. Press it down firmly, smoothing out any air bubbles or lifted edges. You must leave a tiny margin between the sticker edge and your cuticle or nail tip. Seal it with two layers of top coat, ensuring you “cap” the free edge of the nail to prevent lifting.
Can I do floral nail art on short nails?
Absolutely. Small patterns like micro-daisies or single stems work best on short nails. Avoid large, complex designs that get cut off at the edges. Focus on negative space designs which prevent the nail from looking cluttered and actually make the nail bed appear longer.
What is the easiest flower to paint for beginners?
The dot-flower (daisy) is the easiest. You do not need brush skills. You simply make five dots in a circle and one in the center. Another easy option is the abstract rose, which is just swirling curved lines that do not require perfect symmetry or precision.
Do I need gel polish for these designs?
While gel polish makes blending and layering easier because it does not dry until cured, you can use regular polish. For regular polish, let each layer dry completely before adding the next to avoid smudging. Acrylic paint is also a great alternative for the actual artwork as it doesn’t get stringy like regular polish.
How do I make my hand-painted flowers look realistic?
Shading is the secret. Flowers in nature are not one flat color. If you paint a petal pink, add a darker pink near the center and a lighter pink or white at the edges. This creates depth and dimension, making the flower look like it has volume rather than looking like a flat sticker.
Conclusion
Floral nail designs offer an endless playground for creativity. They can be soft and romantic or dark and edgy. By mastering a few basic techniques like the dotting method or the milk bath encapsulation, you can achieve salon-quality results at home. Don’t be afraid to experiment with textures like matte top coats or chrome powders to modernize these classic looks.
Which of these floral styles are you excited to try this season?
Follow us on Pinterest for more Floral Nail inspiration.

Leave a Comment