
Look, I get it. Walking through those fancy home improvement stores and seeing rows of sleek bathroom vanities can make anyone’s heart skip a beat. They’re gorgeous, functional, and scream “I have my life together.” But then you see the price tag, and suddenly that skip turns into a full cardiac event. We’re talking hundreds, sometimes thousands of dollars for what is basically a cabinet with a sink on top.
Here’s something I learned after staring at my cramped, outdated bathroom for the better part of a year. You don’t need to drop your entire savings account to get that modern, Instagram-worthy bathroom look. That old dresser sitting in your garage, the one you’ve been meaning to donate for three years? It’s basically a bathroom vanity in disguise. I’m not kidding. With some basic tools and a free weekend, you can transform forgotten furniture into something that looks like it came straight out of a design magazine.
The beauty of creating your own vanity from old furniture isn’t just about saving money, though that’s a pretty sweet bonus. It’s about having something unique, something that tells a story. When friends come over and compliment your bathroom, you get to say “Oh, I made that from my grandmother’s old dresser” instead of “Yeah, I bought it at that big box store down the street.” There’s real pride in that. Plus, you’re keeping furniture out of landfills, which makes you an accidental environmental hero.
I’ve renovated three bathrooms over the past decade, and each time I’ve used repurposed furniture for the vanity. The first one was a learning experience, let’s just say that. I made mistakes. I cursed a lot. I called my dad at least six times. But by the third one, I had the process down to a science. And you know what? Even that first wonky vanity is still standing strong after eight years of daily use. If I can do this, trust me, so can you.
The trick is understanding that you’re not trying to reinvent the wheel here. You’re just adapting an existing piece of furniture to hold a sink and connect to your plumbing. That’s it. You don’t need to be a master carpenter or have a workshop full of expensive tools. You need patience, a willingness to get your hands dirty, and the ability to laugh when things don’t go perfectly the first time.
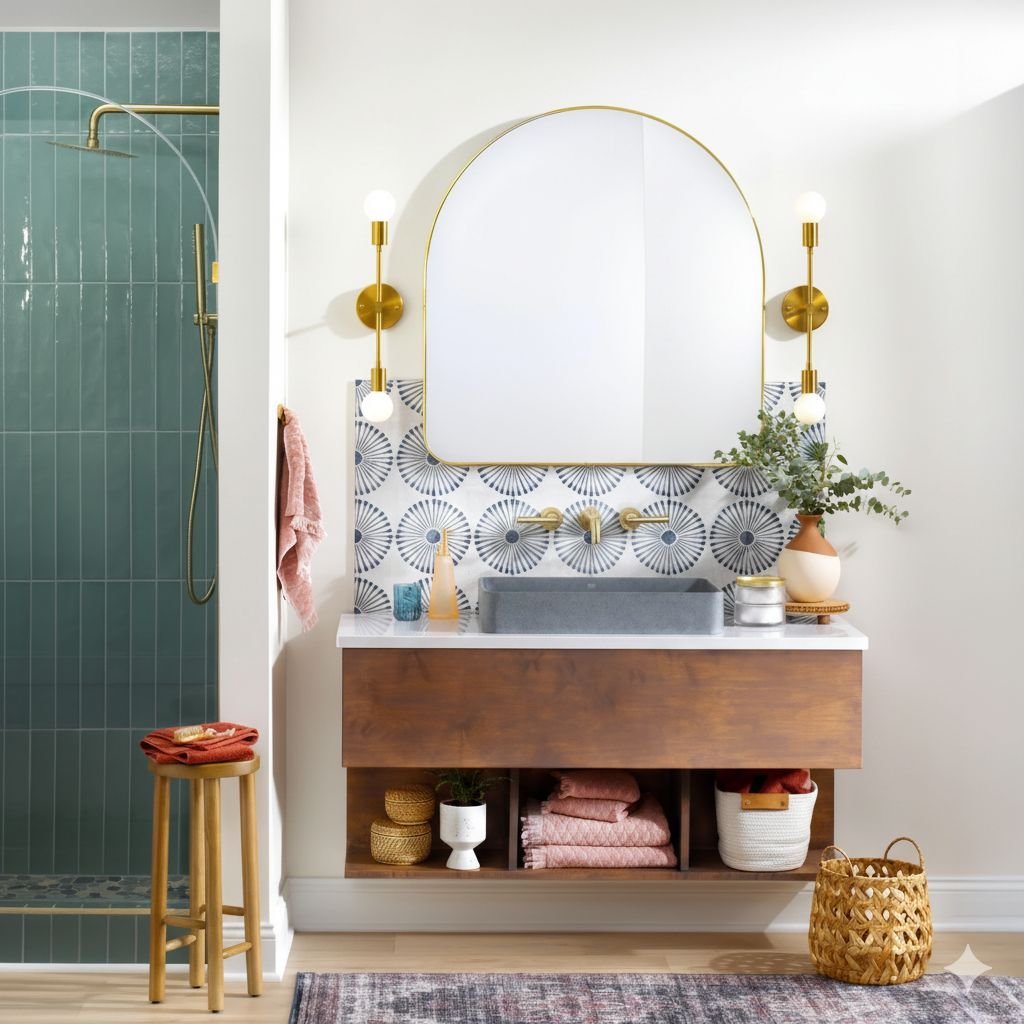
Modern bathrooms are all about clean lines, smart storage, and making the most of your space. A repurposed dresser or cabinet hits all those marks. The drawers become perfect spots for storing towels, toiletries, and all those random things we accumulate in bathrooms. The counter space gives you room to actually put things down. And the best part? You can customize everything to fit your exact space and style. Need a narrow vanity for a tiny powder room? Use a slim dresser. Want double sinks? Find a longer cabinet. The world is your oyster, or in this case, your bathroom is your furniture showroom.
I’m not going to lie and say this project takes zero effort. You’ll need to invest some time, maybe a full weekend if you’re taking it slow and steady. You’ll probably make a mess. You might accidentally cut something slightly wrong and need to improvise. But that’s part of the fun, right? There’s something deeply satisfying about solving problems with your own two hands and creating something functional from scratch.
The economics of this project make so much sense. A decent new bathroom vanity starts around $400 and goes up from there. Way up. Meanwhile, you probably have an old dresser or cabinet taking up space somewhere, or you can snag one from a thrift store for $50. Add another $100 for a sink and supplies, and you’re looking at a fraction of the cost. That’s money you can spend on the fancy faucet you really want, or save for something else entirely.
What makes this whole thing work is that old furniture was built differently. I’m talking about real wood construction, dovetail joints, and craftsmanship that you just don’t see in most modern pieces. When you strip away the outdated finish and give these pieces new life, you’re often working with better quality materials than you’d get in a brand new budget vanity. That old dresser has good bones. We’re just giving it a face lift and a career change.
Getting Your Materials Together and Taking Those First Measurements
Before you start cutting anything or get too excited with power tools, we need to talk about planning. I know, I know, planning isn’t the fun part. The fun part is seeing your finished vanity and feeling like a home improvement genius. But if you skip the planning stage, you’ll end up with a sink that doesn’t fit, plumbing that won’t connect, or a vanity that looks wonky. Trust me, I’ve been there.
First things first, you need to find your canvas. This is the dresser or cabinet that will become your vanity. Walk around your house and take inventory. Check the garage, the attic, that spare bedroom that’s become a storage unit. Look for something solid and sturdy. Give it a good shake. If it wobbles like a newborn giraffe, keep looking. You want something that can handle the weight of a sink filled with water and the daily abuse of bathroom life.
If you’re coming up empty in your own home, hit up thrift stores, estate sales, or those online marketplaces where people practically give away furniture just to clear space. You’d be amazed what people are getting rid of. I once found a solid oak dresser from the 1950s for thirty bucks because the owner thought it was “too old fashioned.” Their loss, my gain. Look for pieces with good structure. The finish doesn’t matter because you’re going to paint it anyway. Water damage on top isn’t a deal breaker since you’ll be cutting into that surface. But the frame needs to be solid.
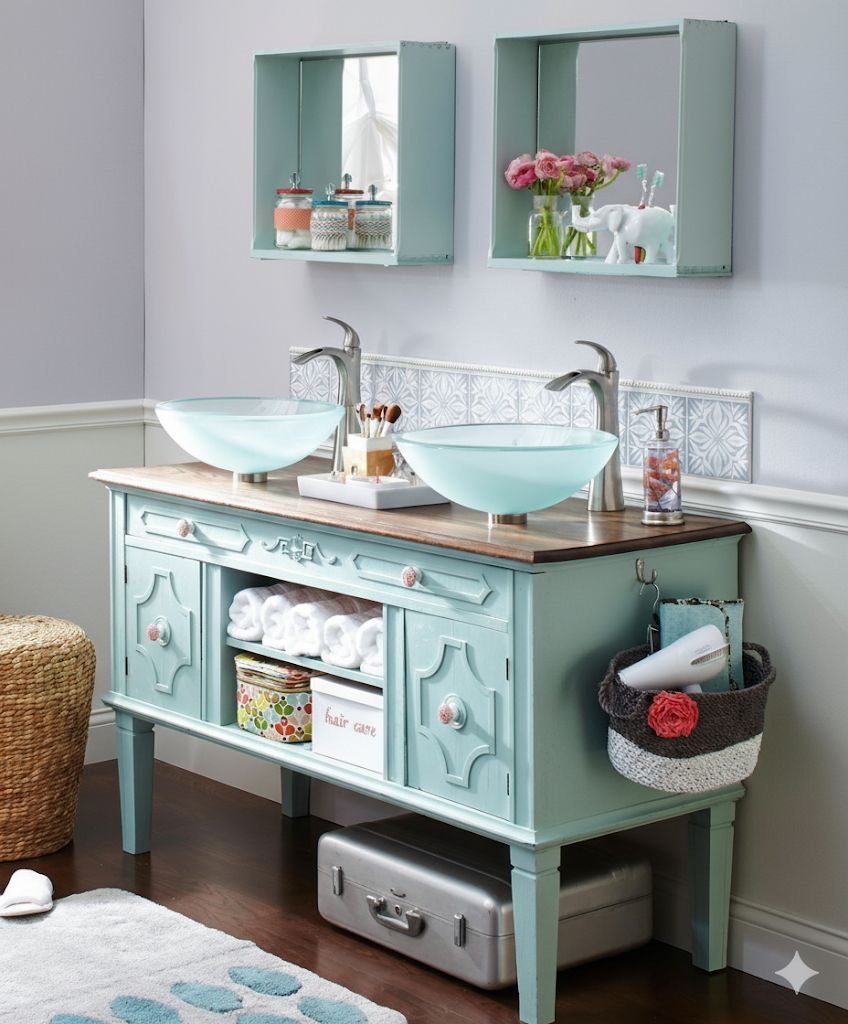
Now let’s talk about what you actually need to buy. Grab a notepad because here comes the shopping list. You’ll need a sink, and this is where you make a real decision about the look you’re going for. You can get a traditional drop in sink that sits flush with the counter, or you can go with a vessel sink that sits on top like a bowl. Both look great, both work fine. The vessel sinks are a bit easier to install since you’re just drilling a hole for the drain instead of cutting out a large opening. But they also sit higher, which might feel weird if you’re used to traditional sinks.
For tools and supplies, you’ll need a drill with various bit sizes, a jigsaw if you’re doing a drop in sink, sandpaper in different grits, paint in whatever color makes your heart happy, a good quality sealant, plumbing fixtures that match your sink, screws, L brackets for mounting, wall anchors, and a pencil for marking. If you don’t own these tools, see if you can borrow them from a friend or neighbor. Most hardware stores also rent tools by the day, which beats buying something you’ll use once.
Here’s where measuring becomes your best friend. Measure your bathroom space first. You need to know exactly how much room you have to work with. Measure width, depth, and the height from floor to where you want your counter to sit. Standard vanity height is around 32 to 36 inches, but you can adjust based on your preference and the height of the people using it. If everyone in your house is over six feet tall, go higher. If you’ve got kids, maybe stick to the lower end.
Now measure your chosen dresser or cabinet. Write everything down. Width, depth, height, the distance between the top and the first drawer, where the existing hardware sits, everything. Take photos too. When you’re at the hardware store trying to pick out a sink, having these measurements and photos on your phone is a lifesaver. You can hold up potential sinks and actually visualize if they’ll work with your piece.
The sink size matters more than you might think. Too big and it’ll hang over the edges looking ridiculous and potentially not having enough support. Too small and it looks lost on the counter, plus you lose valuable sink space. For a standard dresser that’s around 36 inches wide, look for sinks between 16 and 22 inches. If you’re working with something larger and want a double sink setup, you’ll need to space them properly so each person gets enough elbow room.
Let me tell you about the old sink versus new sink debate. Yes, you can reuse your existing bathroom sink if it’s in good shape. This saves money, and if you love that sink, why not? But removing an installed sink means dealing with old caulk, maybe some rust, definitely some grime, and the risk of cracking it during removal. I’ve done it both ways. These days, I usually spring for a new sink because it’s just easier and you’re starting fresh. Plus, sink technology has actually improved. New sinks have better overflow designs, more durable finishes, and some really clever drain mechanisms.
When you’re picking out plumbing fixtures, make sure they match your sink’s specifications. The drain assembly needs to fit your sink’s drain hole. The faucet needs to work with however many holes your sink has. Some sinks come with faucets included, which simplifies things. Others are sold separately, giving you more choice but requiring more coordination. Read the packages carefully. I once bought a beautiful faucet only to realize it needed four inches of clearance behind the sink, and my dresser was pushed against the wall. Had to return it and start over.
Don’t forget about the trap and supply lines under the sink. These are the pipes that connect your sink to the main plumbing. You might be able to reuse your existing ones if they’re in good shape and the right length. But for peace of mind, I usually buy new. They’re not expensive, and new supply lines mean you won’t be dealing with a leak two months down the road because the old rubber finally gave out.
One more thing about measurements that saved me on my second vanity project. Measure where your existing plumbing comes out of the wall. Note the height from the floor and the distance from the side wall. When you position your dresser in the bathroom, you need to make sure these plumbing connections will line up with where you’ll be cutting holes in the back. There’s some wiggle room with flexible supply lines, but you can’t fight physics. If your water lines are on the left side and you put your sink on the right, you’re going to have a bad time.
Preparing Your Cabinet and Making It Plumbing Ready
Okay, you’ve got your dresser, your sink, and all your supplies. Now comes the part where you actually start transforming furniture into a functional bathroom fixture. This is where the magic happens, and also where you need to take your time and not rush things. I learned this the hard way when I got overly confident on my first vanity and cut a hole in the wrong spot. Fixing that mistake took twice as long as doing it right would have.
Start by completely emptying your dresser or cabinet. Take out all the drawers and set them aside. You might be thinking you’ll just leave some drawers in place, but trust me, take them all out. This gives you room to work inside the cabinet and helps you see the structure you’re dealing with. While the drawers are out, look at the interior of the cabinet. See those drawer slides? Those horizontal supports? You need to work around those when planning your plumbing holes.
Here’s something I wish someone had told me earlier. Take photos of how everything goes together before you start modifying anything. Shoot pictures of the drawer assembly, the back panel, how the whole thing is constructed. If you need to put drawers back in later or troubleshoot an issue, having these reference photos is incredibly helpful. Your future self will thank you.
The back of most dressers is just a thin panel of wood, sometimes even just particleboard, held in place with small nails. This is actually perfect for our purposes. You need to cut holes in this back panel for your plumbing to pass through. But before you start cutting, you need to figure out exactly where those holes should go. This is where all that measuring you did earlier pays off.
Position your dresser in the bathroom where it will eventually live. Don’t worry about it being perfect yet, just get it roughly in place. Now look at where your water supply lines and drain pipe come out of the wall. You need to mark corresponding spots on the back of your dresser so when you cut the holes and push the dresser against the wall, everything lines up. I use a pencil to mark these spots, and I mark them generously. It’s better to cut a hole that’s a bit bigger than you need than to cut one that’s too small and have to go back and enlarge it.
Most bathrooms have two water supply lines, one for hot and one for cold, plus the main drain line. The water lines are usually those small pipes with shut off valves. The drain line is larger, probably a couple inches in diameter. You need to cut holes for all three. Use a spade bit or hole saw to make these cuts. Start with a smaller size than you think you need, then test fit. You can always make the hole bigger, but you can’t make it smaller.
When you’re cutting these holes, work slowly and carefully. Let the drill do the work. If you push too hard, you might splinter the wood or your bit might skip and cut somewhere you didn’t intend. Drill from the inside of the cabinet toward the back when possible. This gives you more control and better visibility. If you’re working with a really thin back panel, put a piece of scrap wood behind where you’re drilling to prevent blowout.
After you’ve cut your plumbing holes, test everything by pushing the dresser back against the wall. Do the water lines pass through cleanly? Is there enough room for the drain pipe? Can you access the shut off valves, or did you block them? You want to be able to turn your water on and off without having to move the entire vanity. If something doesn’t line up, now’s the time to fix it. Make your holes bigger if needed, or adjust where the dresser sits.
Now let’s talk about the top of your dresser, where your sink will eventually sit. If you’re using a vessel sink, this part is easier. You just need to drill a hole for the drain, which is typically about an inch and a half in diameter. Mark the center of where your sink will sit, making sure you’re leaving enough space around it and that it’s not going to be right at the edge. The sink needs support underneath, so position it over a solid part of the dresser structure, not hanging over an open drawer space.
For a drop in sink, you’re cutting a much larger hole. This is where that jigsaw comes in handy. Most sinks come with a template, basically a paper outline showing exactly where to cut. If yours didn’t come with one, you can make your own by tracing around the sink’s rim. But here’s the trick, you don’t cut along that line. You need to cut inside it, usually by about a half inch, so the rim of the sink sits on the counter and covers the cut edge. The sink instructions will tell you exactly how much smaller to make the opening.
Before you make any cuts in the top, double check your measurements. Triple check them. Measure where the sink will sit. Make sure it’s centered, or intentionally off center if that’s your design choice. Check that your faucet will reach from where it mounts to the center of the sink. Verify that you have enough depth for the drain assembly underneath. I like to mark the cut line, then step away for ten minutes and come back to look at it with fresh eyes. Mistakes on the top surface are visible and much harder to fix than mistakes on the back panel.
When cutting the sink opening, drill a starter hole first. This gives you a place to insert the jigsaw blade. Drill this starter hole just inside your cut line, in a spot that will be removed anyway. Then carefully cut along your marked line. Keep the jigsaw moving at a steady pace, not too fast or too slow. Support the cutout piece as you finish so it doesn’t fall and splinter. Once you’ve made the cut, smooth the edges with sandpaper. You don’t want any rough spots that might prevent the sink from sitting flat.
Test fit your sink before doing anything else. Place it in the opening and see how it looks. Does it sit flat? Is there good support all around? Can you access the underside to attach the drain and faucet? If something’s off, now’s the time to make adjustments. Sand down high spots, enlarge the opening slightly if needed, or add support blocks underneath if the sink is sitting over an open space.
The sanding process is actually pretty cathartic. You’re smoothing out all your cuts, prepping the wood for paint, and watching this old piece of furniture transform right before your eyes. Start with a rougher grit sandpaper, maybe 80 or 100, to knock down any really rough spots. Then move to 150 grit for smoothing, and finish with 220 grit for a nice smooth surface. Sand the entire outside of the dresser while you’re at it, not just the areas you cut. This helps the paint stick better and gives you a more professional finish.
Bringing Your Vision to Life with Paint and Installation
So you’ve got a dresser with holes cut in all the right places. It probably looks a little rough right now, maybe even a little scary. But this is where the transformation really starts to happen. This is where your vision starts becoming reality, where that old piece of furniture starts looking like it actually belongs in a bathroom.
But before we get to the fun part of painting, we need to do a full dry run. And I mean everything. Install your sink without the sealant. Attach the faucet. Connect the drain assembly. Hook up the water lines. Turn on the water and check for leaks. Make sure everything works exactly as it should. This test run is your safety net. If something doesn’t fit or work properly, you want to discover that now, not after you’ve painted everything and permanently installed the vanity.
When you’re satisfied that everything fits and functions, take it all apart again. Remove the sink, the faucet, all the plumbing connections. Now you’ve got a dresser with holes in it, ready for its makeover. Clean everything thoroughly. Wipe away sawdust, dirt, old finish, anything that might interfere with your paint. I like using a tack cloth for this final wipe down. It picks up even the finest dust particles that regular rags miss.
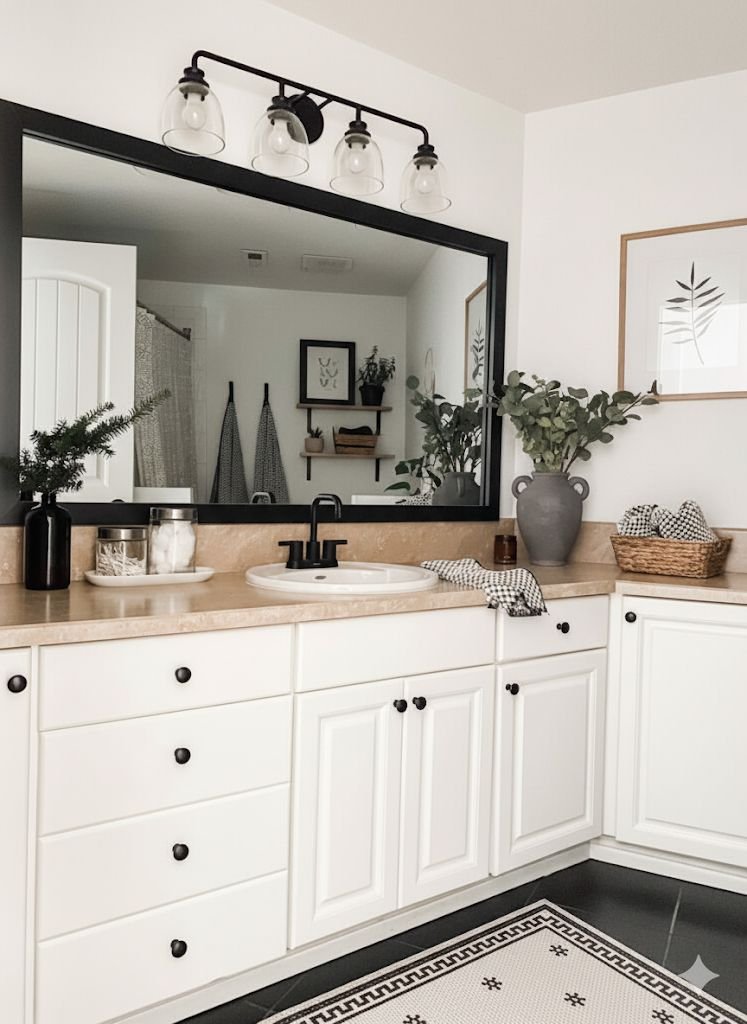
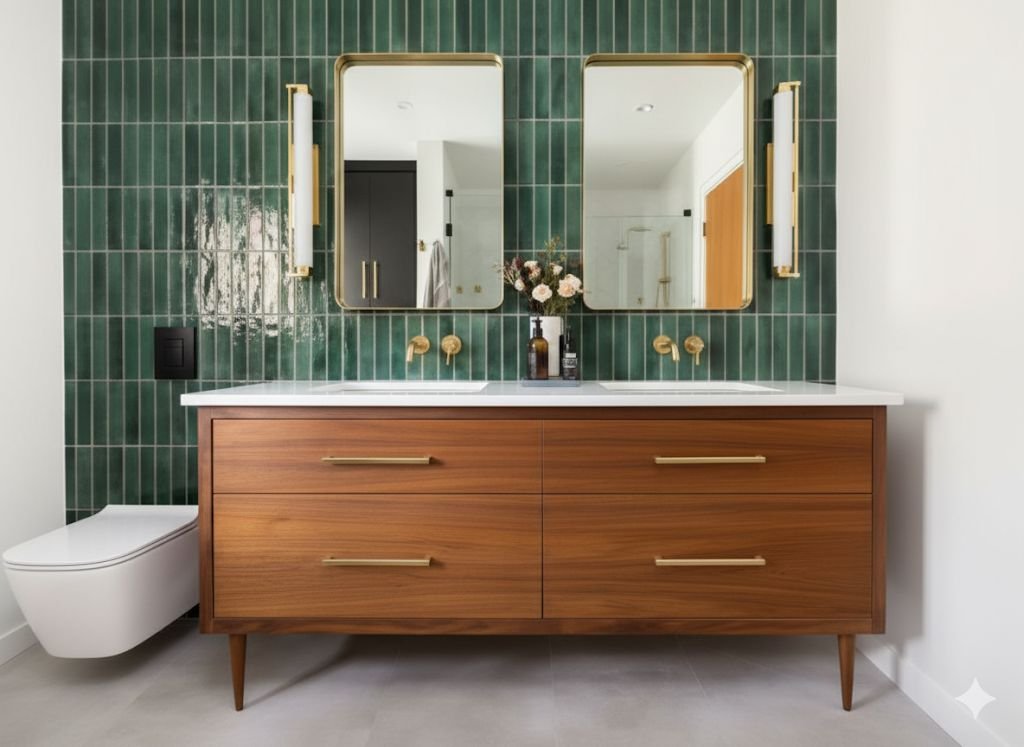
Painting is where you get to inject your personal style into this project. You can go classic white for that clean, spa bathroom look. You can choose a bold navy or emerald green for something more dramatic. You can do a natural wood stain if you love that rustic vibe. There’s no wrong answer here, just what works for your space and your taste. I’ve done vanities in probably ten different colors over the years, and each one totally changes the feel of the bathroom.
The type of paint you choose matters in a bathroom environment. You’re dealing with humidity, water splashes, and constant use. I always use a semi gloss or satin finish paint designed for bathrooms or kitchens. These paints resist moisture better and wipe clean easily. Flat paint might look nice, but it’ll show every water spot and be harder to clean. Buy good quality paint too. Cheap paint means more coats, worse coverage, and a finish that won’t hold up.
Prime your dresser first if you’re making a big color change or working with wood that hasn’t been painted before. Primer gives your topcoat something to grip onto and helps block any stains or discoloration from bleeding through. One coat of primer is usually enough. Let it dry completely before moving on. And I mean completely. Don’t get impatient and start painting while the primer is still tacky. You’ll just make a mess and have to sand and start over.
When applying your paint, use smooth, even strokes. Don’t overload your brush or roller. Multiple thin coats always look better than one thick coat. Thick coats drip, sag, and take forever to dry. Thin coats dry faster and build up to a smoother finish. I usually do three thin coats of paint, waiting for each coat to dry fully before adding the next. Yes, this takes time. Yes, it’s worth it.
Pay attention to your brush strokes or roller marks. Try to keep them all going in the same direction for a more uniform look. If you see drips forming, smooth them out right away before they dry. Once paint dries, fixing mistakes means sanding and repainting. Between coats, inspect your work in good lighting. Look for thin spots, drips, or areas you might have missed. It’s easy to miss the underside of drawer fronts or the inside edges of the frame.
While your paint is drying, and we’re talking at least 24 hours after your final coat before you move onto installation, think about hardware. Do you want to keep the existing drawer pulls, replace them with something new, or remove them entirely? New hardware can really elevate the look. You can find great options for not much money. Just make sure whatever you choose can actually be installed on your dresser. Check that the screw holes line up or that you’re willing to drill new ones.
Now we’re ready for installation, the part where your vanity goes from a painted dresser sitting in your garage to an actual, permanent bathroom fixture. This is where having a friend help is really useful. Vanities are heavy, awkward to maneuver, and you need to get them positioned just right. If you don’t have a friend available, take your time and use proper lifting techniques. Your back will thank you.
Position your vanity in the bathroom exactly where it will live. Use a level to make sure it’s sitting straight. If your floor isn’t level, and most floors aren’t perfectly level, you might need to shim the vanity. Little wooden shims under the low corners will keep everything plumb. This matters because if your vanity tilts, water will pool on one side of the counter, your drawers might not open smoothly, and it’ll just look wrong.
Once you’ve got it level and positioned, you need to secure it to the wall. This is where those L brackets and anchors come in. Most dressers have a back frame you can screw the brackets into. Attach one end of the bracket to the dresser frame, then drill through the other end into the wall. But here’s something really big to remember. You need to find the wall studs and attach into those, or use proper wall anchors rated for the weight. A vanity with a sink full of water is heavy. You can’t just screw into drywall and hope for the best.
I use a stud finder to locate studs behind where the vanity sits. Mark the stud locations with pencil. Then I attach my L brackets so they line up with these studs. If a stud doesn’t line up perfectly with where I want a bracket, I use heavy duty wall anchors instead. These anchors expand behind the drywall and can hold significant weight. Whatever you do, make sure that vanity is firmly attached. You don’t want it pulling away from the wall over time.
Final Assembly and Making Everything Work
We’re in the home stretch now. Your vanity is painted, dry, and secured to the wall. Now we bring back the sink and make this thing actually functional. This part feels really satisfying because you can finally see your project coming together. All those hours of measuring, cutting, sanding, and painting are about to pay off.
Start with the faucet installation. It’s much easier to attach the faucet to the sink before you install the sink into the vanity. Trust me on this. Trying to tighten those mounting nuts while contorted inside a cabinet is nobody’s idea of a good time. Lay your sink upside down on a soft surface like a towel or blanket so you don’t scratch it. Attach the faucet according to its instructions. Every faucet is a little different, but most follow the same basic principle. The faucet body sits on top, you thread the mounting hardware through from underneath, and tighten the nuts to hold everything in place.
Don’t crank those nuts down so hard you crack the sink. Hand tight plus a quarter turn with a wrench is usually plenty. If you overtighten, you risk cracking the sink around the mounting holes, which would be a very expensive mistake. Some faucets come with rubber gaskets that go between the faucet and sink. Make sure those are in place. They prevent water from seeping under the faucet base.
Now flip your sink back over and apply your sealant. This is the waterproof barrier that prevents water from sneaking between the sink and counter. Use a good quality silicone sealant rated for kitchen and bath use. Run a bead of sealant around the underside edge of the sink rim. You want a continuous line with no gaps. Don’t skimp here, but don’t go crazy either. Too much sealant will squeeze out everywhere when you set the sink. Too little and you won’t get a good seal.
Carefully lower the sink into its opening. Get it positioned just right before you press down because once that sealant makes contact, it’s sticky and hard to adjust. Once you’re happy with the position, press down firmly around the entire perimeter. The sealant should squish out a little bit all the way around. That’s how you know you’ve got good contact. Use a damp cloth or your finger to smooth the excess sealant and wipe away anything that squeezed out too far. Work quickly because sealant starts to skin over fast.
Let the sealant cure for the time specified on the tube before you do anything else with the sink. This usually means waiting several hours or overnight. I know you’re excited to finish, but rushing this step can lead to leaks later. Use this time to clean up your work area, put away tools, or admire your handiwork from a distance.
Once the sealant is cured, you can finish the drain assembly. From underneath the sink, attach the drain body. This screws or clamps into the drain hole in the bottom of your sink. Again, don’t overtighten. These pieces are often plastic and can crack. Hand tight is usually sufficient. Apply plumber’s putty or the included gasket according to the drain’s instructions. This creates a watertight seal between the drain and the sink.
Connect the P trap to your drain. This is that curved pipe under every sink. It holds a small amount of water that prevents sewer gases from coming up through the drain. The P trap connects to the drain tailpiece coming from your sink, then to the drain pipe going into the wall. Modern P traps often use slip joints with rubber gaskets that just hand tighten. These are great because you can adjust them easily and they don’t require any tools or putty.
Now for the water supply lines. These flexible lines connect from your faucet to the shut off valves on the wall. One for hot, one for cold. They usually have a threaded connection on each end. Screw one end to the faucet supply tube, and the other end to the shut off valve. Again, hand tight plus a little extra with a wrench is plenty. If you feel like you’re forcing something, stop. Cross threaded connections will leak. Make sure the rubber washers are in place at each connection. These washers are what actually create the seal.
Before you fully tighten everything, check that your supply lines aren’t kinked or twisted. They should make a gentle curve from the faucet to the wall connection. Kinks will restrict water flow and can eventually cause the line to fail. Once everything is connected, double check all your connections. Give each one a little tug to make sure it’s secure.
Now comes the moment of truth. Turn on your shut off valves slowly. Watch your connections carefully. See any drips? If you do, tighten that connection a bit more. Turn on your faucet and let the water run. Check under the sink again. Look at the drain connections, the supply lines, everything. A tiny drip now will become a puddle later. Better to catch it and fix it immediately.
If everything is dry, congratulations. You’ve got a functioning bathroom vanity. Run the water for a few minutes. Fill the sink and let it drain. Make sure everything works smoothly. Check underneath one more time. Sometimes leaks take a few minutes to show up. If you’re still dry after running water for five or ten minutes, you’re golden.
The last step is dealing with those drawers you removed way back at the beginning. You might be able to reinstall some of them depending on where your plumbing sits. The top drawers are usually blocked by the sink drain, so those often become false fronts. They look like drawers but don’t actually open. You can attach the drawer front to the cabinet frame so it looks normal but doesn’t pull out. Lower drawers might work fine if your plumbing doesn’t extend down that far. Just make sure drawers can open and close without hitting pipes.
Living With Your Creation
So here you are. You’ve turned an old dresser into a bathroom vanity that looks like you spent serious money on it. The sink works, the paint looks great, and you did it yourself. That feeling of accomplishment is worth more than any money you saved, though saving money is pretty great too.
The first few days with your new vanity, you’ll probably walk into your bathroom just to look at it. I still do this with projects I’ve finished. There’s something special about seeing something you made with your own hands being useful every day. Your guests will notice too. Get ready for compliments and questions about where you bought it. The look on their faces when you say you made it yourself never gets old.
Maintaining your DIY vanity is pretty straightforward. Treat it like any other bathroom furniture. Wipe up water spills so they don’t sit on the painted surface. Use coasters or trays for bottles and containers that might leak. The paint you used should be durable enough to handle normal bathroom conditions, but it’s still wood underneath. Standing water is wood’s enemy. A quick wipe down after someone splashes water everywhere takes two seconds and prevents problems down the road.
Check your plumbing connections occasionally. Maybe once every few months, peek under the sink and make sure everything is still dry. Look at your supply lines. They should stay flexible, not get brittle or show cracks. If you spot any issues, fix them right away. A small drip ignored becomes water damage. Water damage in a bathroom can lead to mold, rotted subfloors, and repairs that cost way more than preventing the problem would have.
The painted finish might need touch ups eventually. Bathrooms are tough environments with humidity, temperature changes, and daily wear. Keep some of your paint for touch ups. A tiny dab of paint on a small chip takes a minute and keeps your vanity looking fresh. If you notice the finish getting dull or damaged after a few years, you can always sand it lightly and add a fresh coat of paint. That’s the beauty of doing it yourself. You know exactly how it was built, so maintaining and updating it is no mystery.
Here’s something I learned after living with my first DIY vanity for a while. You’ll probably think of improvements or changes you want to make. Maybe you wish you’d positioned the sink differently. Maybe you want to add a shelf inside for better organization. That’s completely normal and actually part of the fun. You can modify and improve your vanity over time because you built it. Try doing that with a store bought vanity still under warranty.
The confidence you gain from completing a project like this spills over into other areas. Suddenly other home improvement projects seem less scary. That leaky faucet you’ve been ignoring? You can probably fix that. Want to build shelves in your closet? You’ve got the skills. Every project you complete builds on the last one. This vanity might be the start of a whole new hobby for you.
Let’s talk money for a second. You probably spent somewhere between $150 and $300 on this entire project, depending on what you already had and what you needed to buy. A comparable new vanity would run $500 to $1,500 easily. You saved hundreds of dollars. But beyond that, you created something unique that fits your space perfectly. You can’t put a price on that. Well, you can. It’s the difference between what you spent and what you would have spent, plus the satisfaction of doing it yourself. That’s a pretty good deal.
If you caught the DIY bug from this project, start looking around your house for other furniture that could have a second life. That bookshelf could become a linen closet. The old entertainment center might work as a storage unit in the garage. Once you realize furniture is just materials you can reshape and repurpose, a whole world of possibilities opens up. And you don’t have to feel guilty about getting rid of old furniture because you’re not getting rid of it. You’re transforming it.
Share your project with friends, family, or online if you’re into that sort of thing. Take before and after photos. You’ll inspire someone else to tackle their own project. The DIY community is full of people helping each other, sharing ideas, and encouraging newcomers. Your first vanity might look amateur compared to what you’ll build in five years, but it’s still something to be proud of. We all start somewhere.
One last thought. That line at the end of the original instructions about just buying a ready made vanity instead of dealing with the DIY hassle? Forget that. Where’s the fun in that? Where’s the story? Where’s the personal touch? Sure, buying a vanity is easier. But easier isn’t always better. You built something. You solved problems. You learned new skills. You saved money. You have a bathroom vanity that nobody else in the world has. That beats easy any day of the week.
Your bathroom is probably the smallest room in your house, but it’s one you use multiple times every day. Having it look good and function well matters. And now you’ve made it yours in a way that goes beyond just decorating. You’ve literally built part of it. Every time you wash your hands or brush your teeth, you’re using something you created. That’s pretty cool when you stop and think about it.
So go ahead. Use that vanity. Enjoy it. Be proud of it. And maybe start thinking about what your next project might be. Because now you know you can do this stuff. You’re not just a person who uses bathrooms. You’re a person who builds them. That’s a pretty good feeling to carry with you.

Leave a Comment