
Planning and Designing Your Dream Outdoor Garden
When I first started planning my garden, I made every rookie mistake in the book. I rushed headfirst into buying plants without measuring my space, ignored my clay soil situation completely, and planted sun-loving flowers in the shadiest corner of my yard. Three months later, I was staring at a collection of very expensive compost. Don’t be me.
The secret to a successful garden lies in the planning stage, and I can’t stress this enough. You need to slow down and really study your outdoor space before you spend a single dollar at the nursery. I learned this the hard way when my first attempt at a vegetable garden turned into what my neighbor kindly called “an abstract art installation.”
Start by grabbing a notepad and spending time in your yard during different parts of the day. I like to take my morning coffee outside and just observe. Where does the sun hit first? Which areas stay damp longer after rain? You’ll be surprised what you notice when you’re not rushing around.
Understanding Your Space and Conditions
Your yard is unique, just like a fingerprint. What works in your friend’s garden might be a complete disaster in yours. I discovered this when I tried to recreate my aunt’s gorgeous rose garden, only to realize she had sandy soil and full sun while I was working with clay that could double as pottery material.
Take measurements of everything. And I mean everything. Don’t just pace it off like I did initially. Use an actual measuring tape and write down the numbers. Measure straight lines, diagonal distances, and those weird irregular shapes that every yard seems to have. Trust me, when you’re trying to figure out if that curved flower bed will fit, you’ll thank yourself for having accurate measurements.
Soil testing might sound boring, but it’s like getting a medical checkup for your garden. Clay soil feels sticky when wet and cracks like a desert when dry. Sandy soil runs through your fingers like, well, sand. Peaty soil feels spongy and smells earthy. Each type needs different plants and different care approaches.
I spent my first summer fighting clay soil before someone told me I could actually work with it instead of against it. Clay holds nutrients beautifully once you know how to manage it. Sandy soil drains fast but needs more frequent feeding. Know what you’re working with, and you’ll save yourself countless headaches.
Drawing Your Master Plan
Here’s where things get fun. Grab some graph paper and start sketching your ideas. I know it sounds tedious, but there’s something satisfying about seeing your vision come together on paper. Plus, it’s much cheaper to make mistakes with a pencil than with actual plants and hardscaping materials.
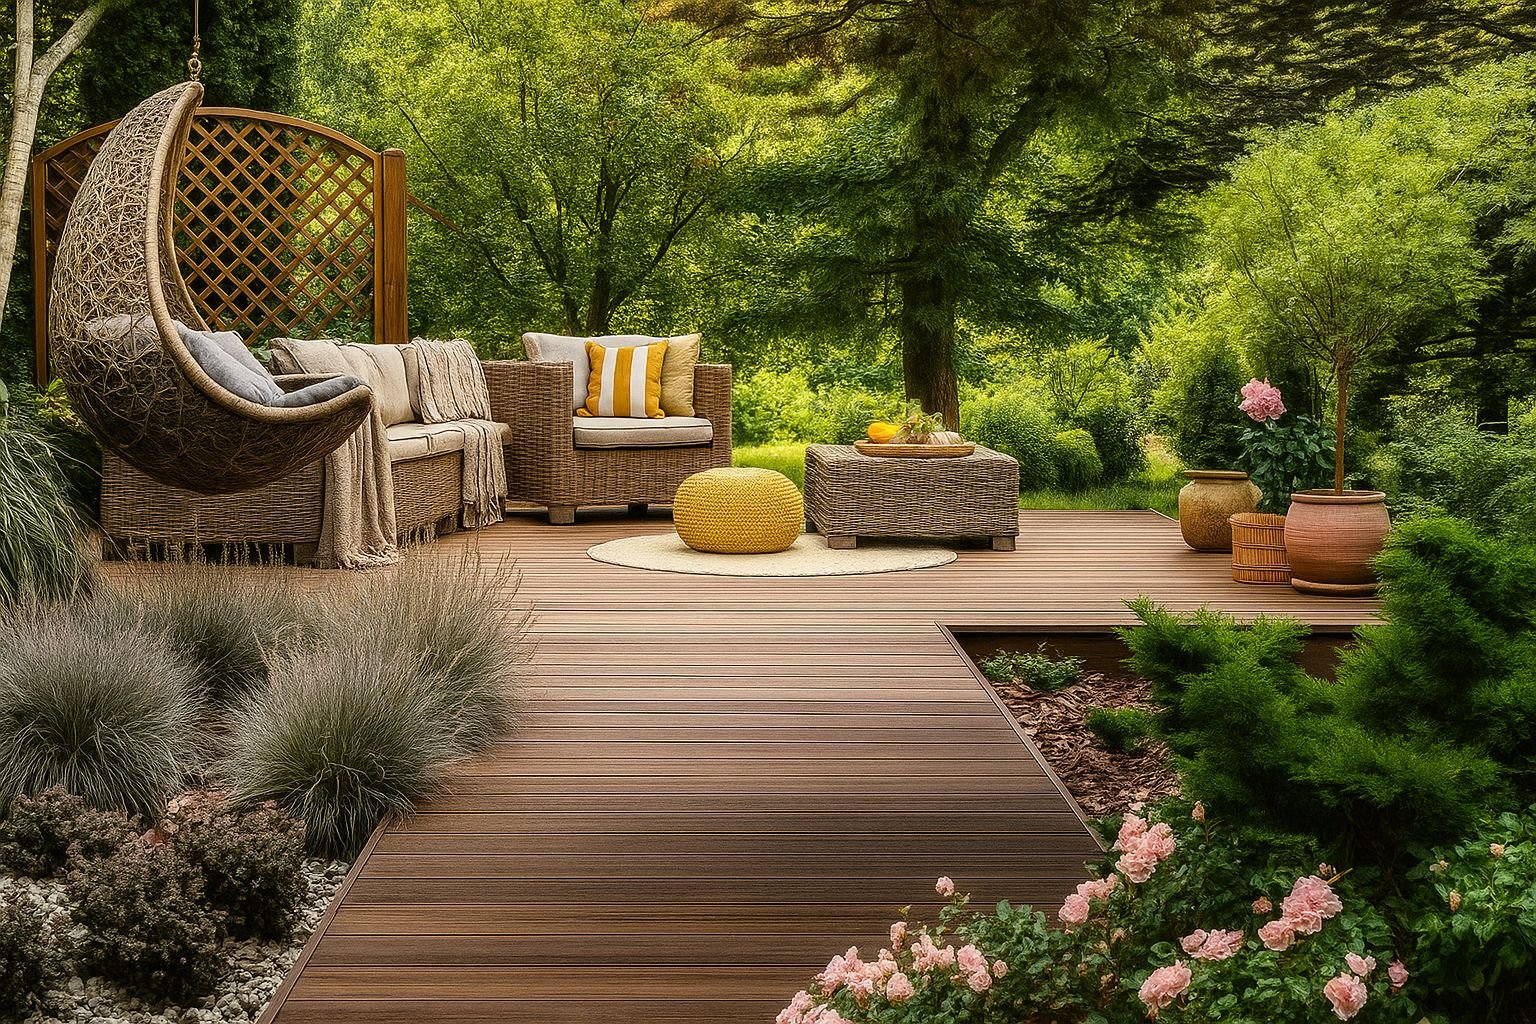
Start with the permanent features first. If you’re planning a pond, patio, or pergola, mark those down before anything else. These big elements will dictate where everything else can go. I learned this lesson when I fell in love with a spot for my herb garden, only to realize it was exactly where the air conditioning unit needed to go.
Think about traffic flow through your space. Can two people walk side by side on your planned pathways? Can you get a wheelbarrow through to haul mulch to the back beds? I once designed beautiful narrow paths that looked great on paper but made garden maintenance a nightmare in reality.
Consider your future self when you’re planning. That cute little tree might look perfect now, but will it block your kitchen window in ten years? Will you still want to climb a ladder to prune that overhead vine when you’re older? I try to design gardens that will get better and easier to maintain as they mature, not harder.
Putting Your Plan into Action
Once you’ve got your design on paper, it’s time to test it in real life. Use stakes and string to mark out your planned beds and pathways. Walk through the space. Sit in different areas. Try to visualize how it will look and feel once everything grows in.
This is your chance to catch problems before they become expensive mistakes. I once staked out a seating area that looked perfect on paper, only to discover it was directly in the path of my neighbor’s sprinkler system. Better to find out with string than with a newly installed stone bench.
Pay attention to practical details that might not show up on your drawing. Can you reach that pond spot with your garden hose? Is there electrical access for lighting or water features? Will your planned vegetable garden get morning sun but afternoon shade? These details matter more than you might think.
Remember that gardens evolve over time. Your initial plan doesn’t have to be perfect or permanent. I’ve been tweaking and adjusting my garden design for years, and it just keeps getting better. Start with the bones of your design and let the details develop as you live with the space.
Starting Seeds Indoors Like a Pro
There’s something magical about starting seeds indoors. Maybe it’s the hope of spring when snow is still on the ground, or the satisfaction of growing something from almost nothing. Whatever it is, I’m completely hooked on seed starting, and I think you will be too.
My seed-starting addiction began innocently enough. I wanted to grow some heirloom tomatoes that I couldn’t find as plants at the local garden center. One packet of seeds led to another, and now every winter my dining room table disappears under a forest of seed trays. My family has learned to eat dinner on TV trays during seed season.
The beauty of starting your own seeds is the incredible variety available. Seed catalogs offer thousands of varieties that you’ll never see as transplants in stores. Want purple carrots? They’ve got seeds. How about striped tomatoes or blue potatoes? All available in seed form. It’s like having access to a secret garden center that only seed starters know about.
Setting Up Your Indoor Growing Space
You don’t need a fancy greenhouse to start seeds successfully. I’ve grown thousands of seedlings on kitchen counters, basement tables, and yes, that dining room table I mentioned. The key is understanding what your seeds need and finding creative ways to provide it.
Light is the big challenge for most indoor seed starters. Seeds themselves often don’t need light to germinate, but once those little green shoots appear, they’re hungry for photons. A south-facing window works if you have one, but I’ve had better luck with simple fluorescent shop lights. Nothing fancy, just the basic fixtures you can get at any hardware store.
Temperature consistency matters more than you might think. Seeds are picky about their comfort zone. Too cold and they’ll sit there sulking. Too hot and they might germinate and then fizzle out. I use a simple thermometer to monitor my growing area, and I’ve learned that the top of my refrigerator is actually the perfect temperature for germinating warm-season crops.
Containers can be anything clean with drainage holes. I’ve successfully started seeds in yogurt containers, egg cartons, recycled plant pots, and those fancy seed-starting trays. The container isn’t nearly as important as keeping it clean and providing good drainage. Wet seeds are dead seeds, as I learned the hard way during my first year.
The Art of Seed Sowing and Care
Starting seeds is part science, part art, and part luck. The science part is following the directions on the seed packet. The art part is learning to read your plants and adjust your care. The luck part is that sometimes seeds just do their own thing no matter what you do.
Most seeds want to be planted about four times as deep as they are wide. This sounds simple until you’re holding a lettuce seed that’s smaller than a grain of sand. For tiny seeds, I just sprinkle them on the surface and barely cover them with soil. For bigger seeds like beans or squash, I poke actual holes with my finger.
Watering new seedlings is where most people mess up. Too much water and your seeds rot. Too little and they dry out and die. I use a spray bottle for newly planted seeds and tiny seedlings. Once they get a few leaves, I water from the bottom by setting the containers in a tray of water. This encourages the roots to grow downward instead of staying shallow.
The waiting game is the hardest part. Some seeds pop up in a few days, while others take weeks to show their faces. Parsley can take up to three weeks to germinate, and I’ve learned to be patient. Mark your planting dates on a calendar so you don’t give up too early.
Once your seedlings have their first true leaves (not the initial seed leaves, but the ones that actually look like the plant), it’s time to start feeding them. I use a weak liquid fertilizer about once a week. Think of it as baby food for plants. Too strong and you’ll burn them, too weak and they’ll be pale and spindly.
Growing Strong, Healthy Seedlings
The difference between wimpy seedlings and strong ones often comes down to air circulation and light management. Seedlings that grow in still air tend to be weak and prone to fungal problems. I run a small fan near my seedling area, not blowing directly on them, but just keeping the air moving gently.
If you’re growing on a windowsill, turn your containers every day so the seedlings don’t lean toward the light. Leggy, stretched-out seedlings are usually reaching for more light. If this happens, you can transplant them deeper to bury some of that stretched stem, or provide supplemental lighting.
Thinning seedlings is hard but necessary. When you plant multiple seeds in each cell and they all come up, you need to remove the weaker ones to give the strong ones room to grow. I use small scissors to cut the unwanted seedlings at soil level rather than pulling them up and disturbing the roots of the keepers.
Watch for signs of trouble like yellowing leaves, white fuzzy mold, or seedlings that suddenly fall over. These problems are usually related to watering, air circulation, or cleanliness. Catching problems early can often save your seedlings before they become serious issues.
Hardening Off and Transplanting Your Indoor Babies
Moving seedlings from the comfort of your indoor setup to the harsh realities of outdoor life is like sending your kids off to college. You’ve done everything you can to prepare them, but now they need to prove they can handle the real world. This transition process is called hardening off, and it’s absolutely critical for seedling success.
I learned about hardening off the hard way during my second year of gardening. I had beautiful, healthy seedlings growing under lights in my basement. When the weather warmed up, I planted them directly in the garden on a sunny Saturday morning. By Sunday evening, most of them looked like wilted lettuce. I’d shocked them so badly that many never recovered.
Outdoor conditions are brutal compared to your cozy indoor growing setup. There’s wind that can snap tender stems, temperature swings that stress plants, and intense sunlight that can literally burn leaves that have only known the gentle glow of fluorescent lights. Your seedlings need time to develop what I call “outdoor muscles” before they face these challenges full-time.
The Gradual Introduction Process
Hardening off is like gradually introducing your seedlings to outdoor boot camp. You start easy and increase the intensity over about a week to ten days. I begin by moving my seedlings to a shaded, protected outdoor area for just a few hours on the first day. A covered porch or the north side of the house works perfectly.
The first few days are all about getting them used to air movement and temperature changes. I bring them back inside if temperatures drop too much at night or if the weather turns nasty. Think of it as outdoor day camp while they still sleep in their comfortable indoor beds.
Gradually, I increase their outdoor time and start introducing them to some direct sunlight. Maybe an hour of morning sun on day three, two hours on day four. I watch them carefully for signs of stress like wilting or leaf burn. If they start looking unhappy, I back off and slow down the process.
By the end of the week, my seedlings are spending full days outside and only coming in at night if frost threatens. They’re noticeably sturdier by this point, with thicker stems and leaves that feel more substantial. They’ve literally grown tougher in response to the outdoor conditions.
Wind is often the biggest shock for indoor-grown seedlings. They’ve never experienced anything stronger than the gentle breeze from my circulating fan. I start them in very protected spots and gradually expose them to more air movement. A little stress from wind actually makes them stronger, but too much too fast can break them.
Timing Your Transplant for Success
Patience is your friend when it comes to transplanting timing. I used to be so eager to get my seedlings in the ground that I’d push the season and plant too early. Cold soil and surprise late frosts taught me to wait for truly settled weather.
Different crops have different temperature tolerances. Cool-season crops like lettuce and peas can handle some cold weather, while warm-season plants like tomatoes and peppers need consistently warm soil and air temperatures. I keep a soil thermometer handy and check both soil temperature and the long-range weather forecast before transplanting.
The ideal transplanting day is cloudy and calm. Strong sun can stress newly transplanted seedlings even if they’ve been properly hardened off. If you must transplant on a sunny day, try to do it in the evening so the plants have all night to recover before facing the next day’s heat.
I always water both the garden bed and the seedlings thoroughly before transplanting. Well-hydrated plants handle the stress of transplanting much better than thirsty ones. I also try to time my transplanting so that rain is expected within a day or two. Nature’s gentle watering system is better than anything I can provide with a hose.
The Actual Transplanting Process
When I’m ready to plant, I dig holes about twice as wide as the root ball and just deep enough so the seedling will be at the same level it was growing in the container. For tomatoes, I make an exception and plant them deeper, burying some of the stem to encourage a stronger root system.
I handle the seedlings gently, trying not to disturb the roots more than necessary. If the roots are circling around in the container, I gently tease them apart so they’ll grow outward into the soil. Root-bound seedlings sometimes continue growing in circles even after transplanting if you don’t break up that pattern.
After planting, I water each transplant individually and thoroughly. I create a small depression around each plant to help catch and hold water. This first watering helps settle the soil around the roots and eliminates air pockets that could dry out the roots.
For the first week after transplanting, I check my new plants daily and water as needed. They’re still establishing their root systems in the new soil, so they can’t reach as much water as they’ll be able to once they’re established. I’ve learned that deep, less frequent watering encourages deeper root growth than shallow, frequent watering.
Sometimes despite my best efforts, a few seedlings still struggle with the transition. I keep a few extra seedlings as backups for these situations. There’s no shame in replanting a spot where a transplant didn’t make it. Gardening is full of these small failures and recoveries.
Choosing the Right Plants for Your Indoor Garden
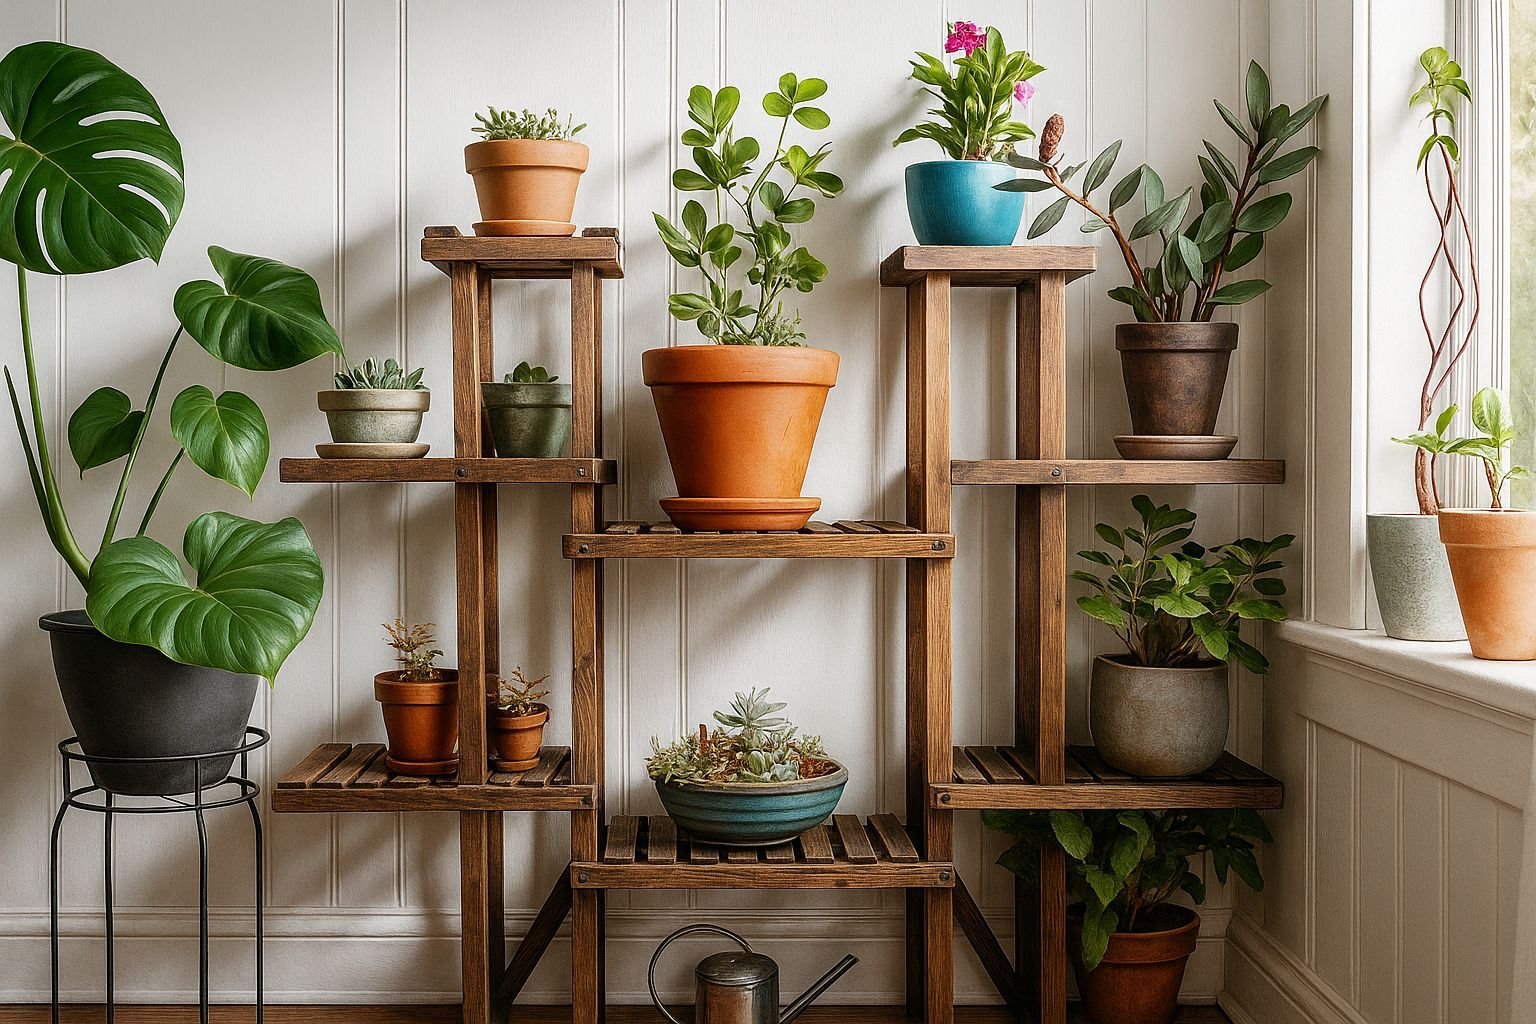
Plant selection for indoor gardening is where dreams meet reality, and let me tell you, reality can be humbling. I once killed a supposedly “bulletproof” houseplant so thoroughly that my kids asked if we should hold a funeral. The truth is, choosing the right plants for your specific indoor conditions is the difference between a thriving indoor garden and a collection of very expensive compost.
Your house is not a greenhouse, and that’s perfectly fine. You just need to work with what you have instead of fighting against it. Some plants are drama queens that demand perfect conditions, while others are like that easygoing friend who adapts to any situation. Guess which ones I recommend for beginners?
I’ve learned that successful indoor gardening is more about matching plants to your lifestyle and conditions than trying to create perfect conditions for demanding plants. Do you travel frequently? Skip the plants that need daily attention. Is your house on the dark side? Embrace shade-loving plants instead of struggling with sun worshippers.
Assessing Your Indoor Growing Conditions
Every indoor space has its own personality when it comes to light, humidity, and temperature. I spent my first year trying to grow plants that needed bright light in a north-facing window. The results were predictably disappointing. Now I use a simple light meter app on my phone to actually measure the light in different spots.
Low light doesn’t mean no light, but it does mean you need to be realistic about what will thrive. That Instagram-worthy fiddle leaf fig needs bright, indirect light for several hours a day. If you don’t have that, save yourself the heartache and choose something more suitable for your conditions.
Humidity is often overlooked but can make or break your indoor garden success. Most homes have much lower humidity than tropical plants prefer, especially during winter heating season. I group my humidity-loving plants together and sometimes run a small humidifier nearby. It’s easier to create a microclimate than to humidify your entire house.
Temperature consistency matters more than you might think. Plants don’t like temperature swings any more than you do. That spot near the heating vent or drafty window might seem convenient, but it’s probably stressing your plants. I look for spots with steady temperatures and good air circulation.
Consider how much time you realistically want to spend on plant care. Some plants need daily attention, while others are perfectly happy being mostly ignored. Be honest about your schedule and commitment level. There’s no shame in choosing low-maintenance plants if that’s what fits your life.
Budget-Friendly Plant Selection Strategies
Starting an indoor garden doesn’t have to break the bank, though I’ll admit I’ve spent embarrassing amounts of money on plants over the years. Seeds are the most economical option, and many houseplants can be grown from seed if you’re patient. Herbs are especially rewarding to grow from seed since you’ll harvest them regularly.
Propagating plants from cuttings is like getting free plants from friends. Many houseplants root easily in water or moist soil. I’ve built a substantial collection by trading cuttings with other plant lovers. It’s also a great way to get backup plants of your favorites.
Plant swaps and local gardening groups are goldmines for affordable plants. I’ve attended plant swaps where I came home with armloads of new plants in exchange for extras from my collection. Community gardens sometimes have plant sales with reasonable prices too.
Don’t overlook grocery store plants. The selection might not be as extensive as a specialty nursery, but the prices are usually much better. I’ve had great success with herbs, pothos, and succulents from the grocery store. Just inspect them carefully for pests before bringing them home.
Beginner-Friendly Plant Recommendations
After years of successes and failures, I’ve developed a list of plants that I confidently recommend to beginners. These are plants that forgive mistakes, adapt to less-than-perfect conditions, and still look good while they’re doing it.
Pothos plants are nearly indestructible and will grow in almost any light condition. They trail beautifully from hanging baskets or climb up moss poles if you want a vertical element. Plus, they’re excellent at cleaning indoor air, so they’re working while they’re decorating.
Snake plants are perfect for people who travel or tend to forget about watering. They actually prefer to dry out between waterings and can handle low light conditions. They also come in several varieties, so you can have some visual interest without increasing the difficulty level.
Spider plants are classic houseplants for good reason. They produce baby plants on long stems, giving you free plants to expand your collection or share with friends. They’re tolerant of various light conditions and will tell you what they need by their appearance.
ZZ plants have thick, waxy leaves that store water, making them very drought tolerant. They grow slowly but steadily and can handle neglect better than almost any other plant. The glossy leaves always look good, even when you haven’t been the most attentive plant parent.
For those interested in edible indoor plants, herbs like basil, mint, and oregano are rewarding and relatively easy. They prefer bright light but will produce usable harvests even in less ideal conditions. There’s nothing quite like fresh herbs from your windowsill in the middle of winter.
Succulents deserve a special mention because they’re trendy and often recommended for beginners, but they can be trickier than people expect. They need well-draining soil and are easy to overwater. If you want to try succulents, start with jade plants or echeveria varieties, which are more forgiving than some of the more exotic types.
Remember that plant care is a skill that develops over time. Don’t be discouraged if you lose a few plants while you’re learning. Even experienced gardeners kill plants occasionally. The key is to learn from each experience and gradually expand your plant care skills and your collection.

Leave a Comment