
Have you ever stood by a lonely grill in the corner of your patio, juggling plates, tongs, and a drink, wishing you had just a bit more counter space? You aren’t alone. The days of the solitary barbecue are fading; today’s trend is about creating a cohesive garden BBQ area that acts as a functional extension of your home. Whether you have a sprawling lawn or a compact urban courtyard, dedicating a zone specifically for outdoor cooking changes the entire dynamic of summer entertaining. It shifts the focus from stressful logistics to the joy of open-air dining.
In this guide, we break down high-impact garden BBQ area ideas that blend style with serious utility. From full-scale outdoor kitchens to clever small garden BBQ area ideas, we provide the blueprint you need to stop just “grilling” and start “hosting.”
Key Takeaways
- Zoning is Critical: A successful BBQ area isn’t just about the grill; it’s about the “Triangle of Workflow” (Prep, Cook, Serve).
- Material Durability: Choose materials like stainless steel, treated timber, and porcelain tile that withstand local weather fluctuations without constant maintenance.
- Shelter Adds Value: Incorporating a pergola or cover extends your grilling season by months, protecting both the chef and the equipment.
- Lighting Sets the Mood: Functional task lighting over the grill combined with ambient string lights creates a transition from day cooking to evening lounging.
Table of Contents
- The Integrated Built-In Grill Station
- The Flexible Portable BBQ Setup
- The Complete Outdoor Kitchen
- The Entertainer’s Bar & Grill
- The Covered Pergola Kitchen
- The Minimalist Timber Zone
- The Compact DIY Pod
- The Space-Saving Wall Unit
- Popular Asked Questions
- Conclusion
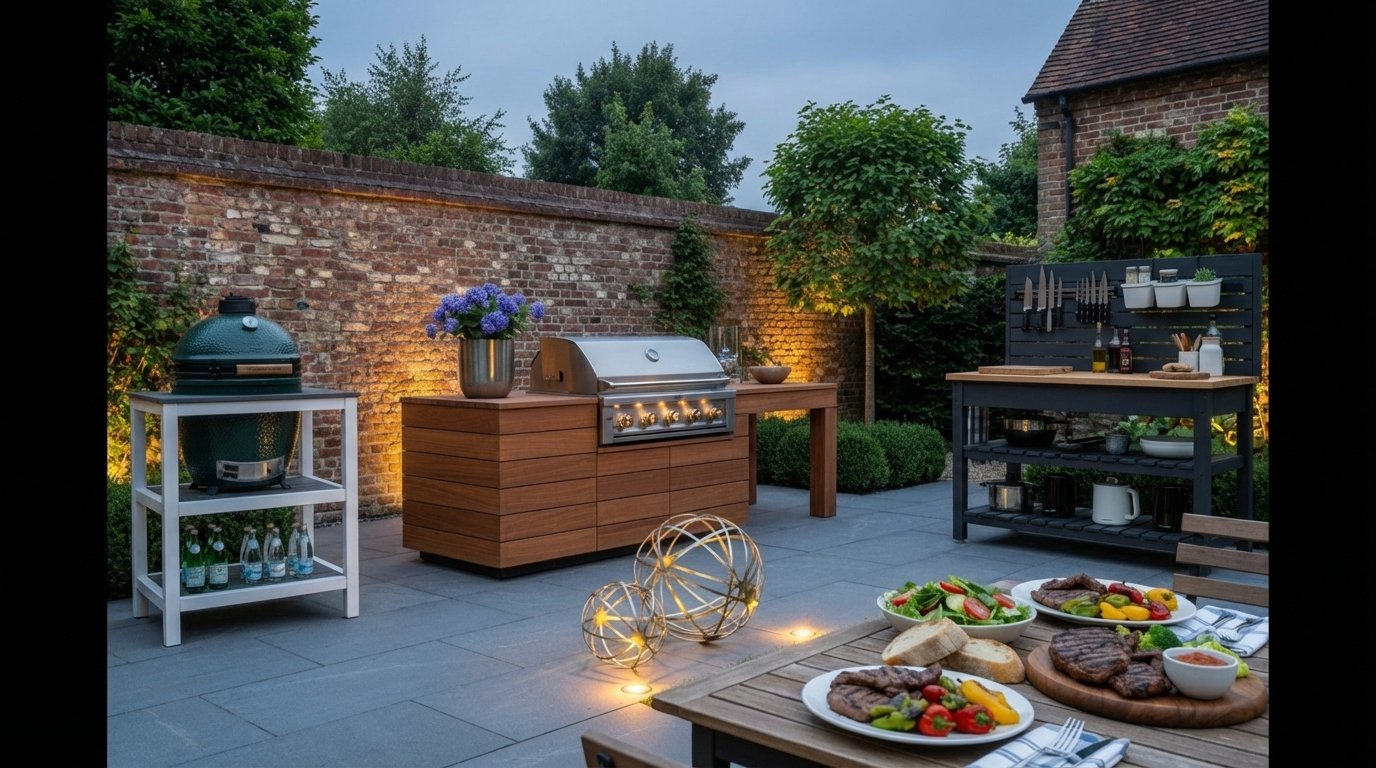
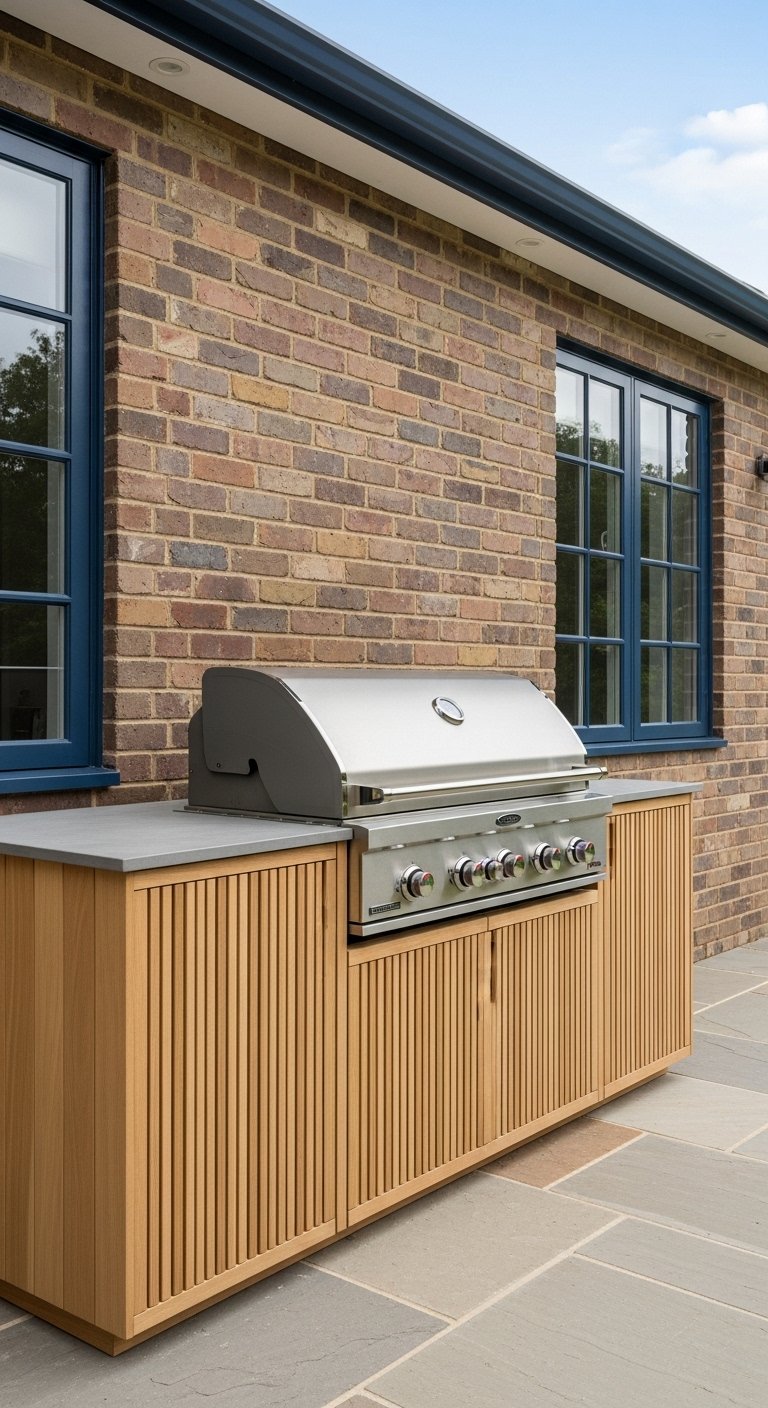
The Integrated Built-In Grill Station
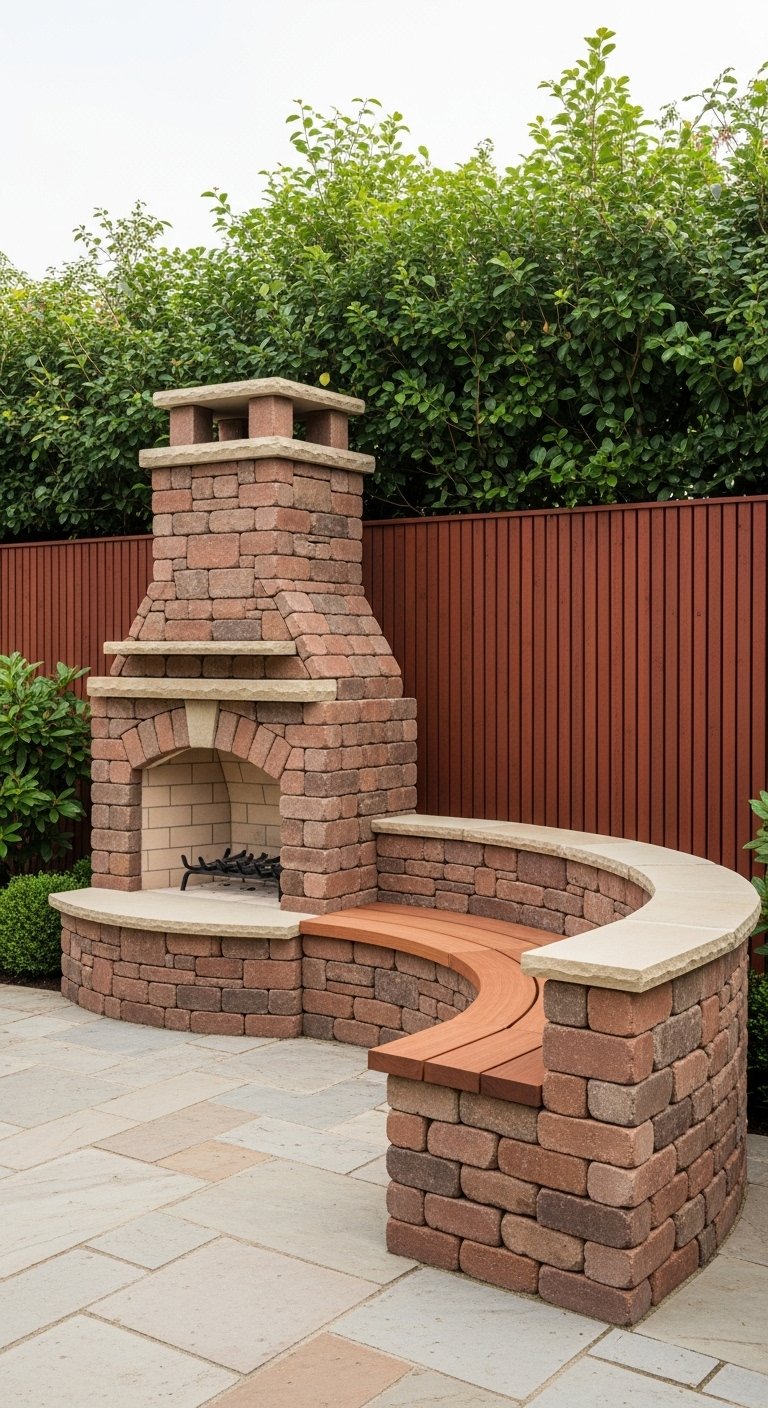
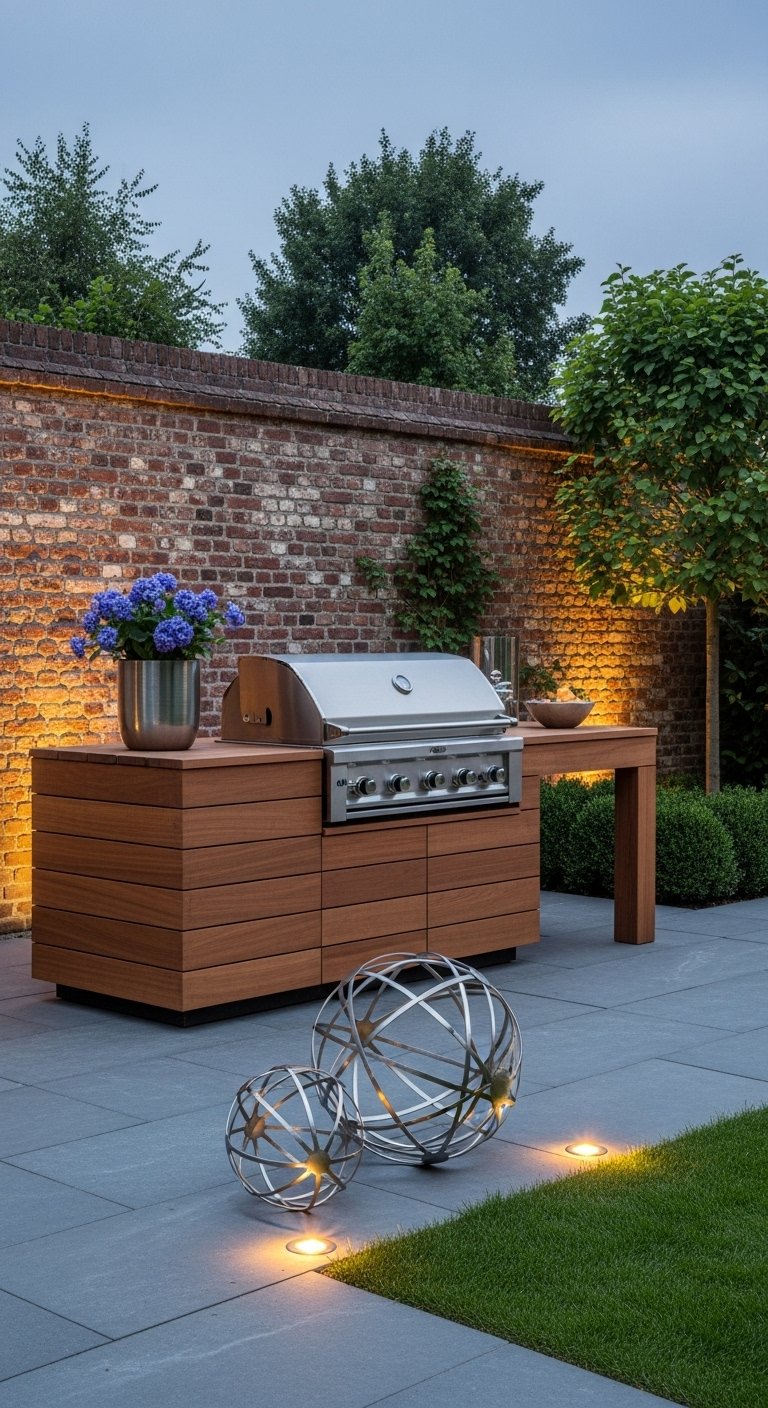
When you want your garden BBQ area to feel permanent and substantial, a built-in station is the gold standard. This approach abandons the wobbly wheels of a standard cart in favor of a structure that anchors the patio. The grill head—whether gas or charcoal—is dropped into a custom-constructed unit, typically made of brick, stone, or concrete blocks clad in veneer. This design signals that your outdoor space is a dedicated room, not an afterthought.
Visually, built-ins offer a clean, seamless look that integrates with your garden’s hardscaping. If your patio uses grey slate, a built-in station clad in matching slate tile creates a stunning visual continuity. The weight of the stone contrasts beautifully with the stainless steel of the grill, balancing industrial function with organic texture. From a practical standpoint, this setup allows you to customize the height of the grill surface to your exact ergonomic needs, preventing the back pain often associated with standard height carts.
To implement this, you do not necessarily need a contractor. Many companies now offer “modular” built-in kits where the frame is pre-made, and you simply apply the finish. If you are building from scratch using concrete blocks, ensure you have a “fire box” or insulated jacket for the grill insert to prevent the heat from cracking your masonry.
Pro Tip: Incorporate a small stainless steel access door under the grill. This isn’t just for storage; it gives you essential access to the gas line or drainage plumbing for maintenance.
The Flexible Portable BBQ Setup
Not every home needs a permanent stone monument to grilling. For renters or those with smaller, multi-use gardens, a flexible portable BBQ setup is the smarter choice. The key here is not just buying a grill on wheels, but designing a “station” that the grill rolls into. This defines the zone without cementing it. You might use a heavy-duty rolling kitchen island or a potting bench as your prep station, parked next to your high-quality portable charcoal or gas grill.
This design relies on the principle of adaptability. Visually, you can create a cohesive look by color-matching your portable grill to your outdoor furniture. A bright red kettle grill next to a red metal bistro set creates a deliberate “vibe” rather than a cluttered look. The beauty of this setup is the ability to chase the sun or hide from the wind. In the morning, the gear can be tucked against the wall; in the evening, it rolls out to the center of the patio.
For implementation, look for a portable grill with robust wheels—plastic casters often break on uneven patio pavers. Pair it with a “grilling cart” that has hooks for tongs and a lower shelf for charcoal bags or gas canisters. This keeps the mess off the floor and organizes your workspace. When choosing between charcoal vs. gas BBQs for this setup, gas offers speed, but a portable charcoal kettle offers that authentic flavor profile that many purists demand for weekend feasts.
Pro Tip: Use a heavy-duty outdoor rug to visually “zone” this area. It catches grease spills and visually anchors your rolling equipment so it looks like a deliberate arrangement.
Save this idea to your Pinterest.
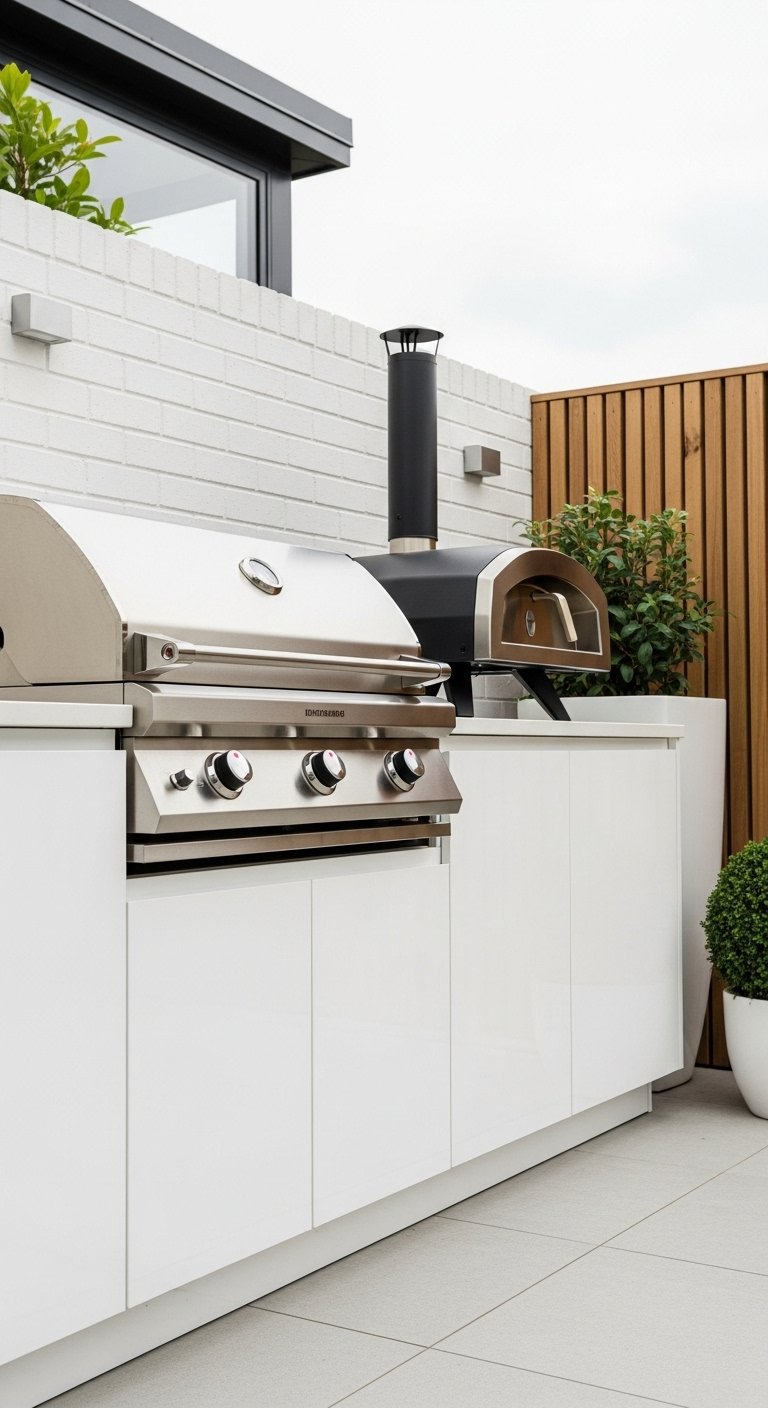
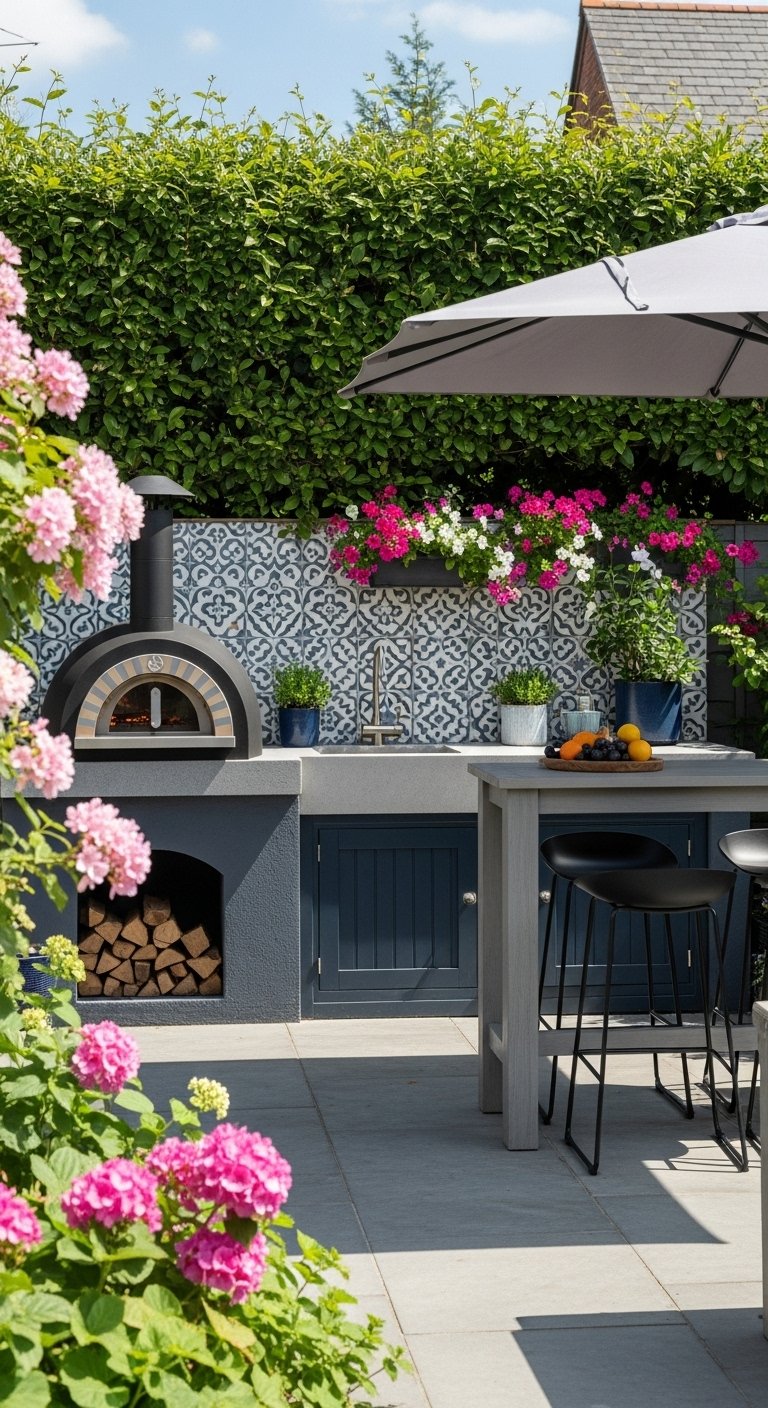
The Complete Outdoor Kitchen
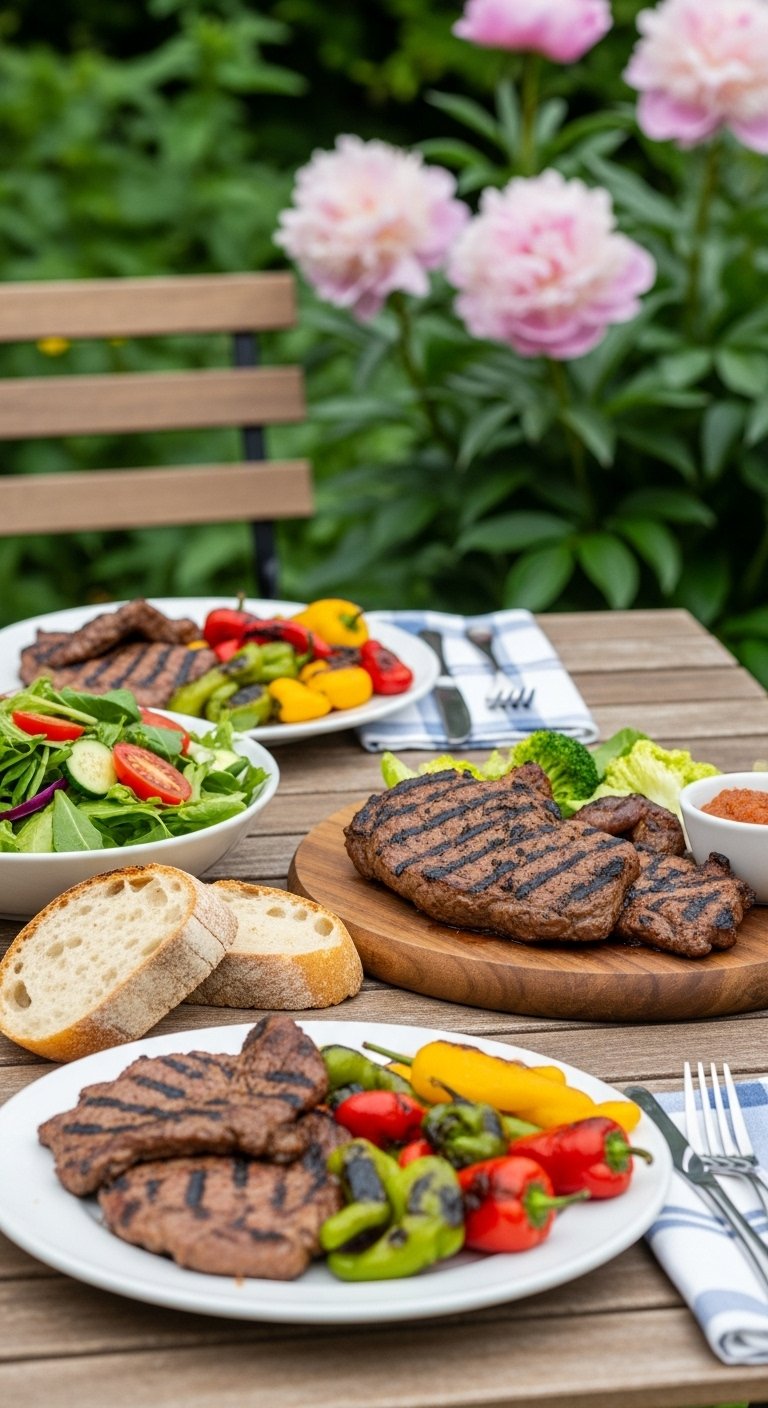
Moving beyond a simple grill, the complete outdoor kitchen is for the serious chef who wants to prep, cook, and clean without entering the house. This layout mimics your indoor kitchen, featuring countertops, a sink with running water, and integrated appliances like a fridge or a pizza oven. The goal is complete autonomy. You aren’t just flipping burgers; you are chopping vegetables, washing hands, and grabbing cold drinks right in the garden.
The design aesthetic here usually leans towards “Modern Luxury” or “Rustic Farmhouse.” Modern versions utilize polished concrete countertops and sleek stainless steel cabinetry, while rustic versions rely on rough-hewn timber and natural stone. The critical design principle is the “landing zone.” You need at least 24 inches of clear counter space on both sides of the grill. One side is for raw food waiting to be cooked; the other is for cooked food ready to serve. This flow prevents cross-contamination.
Building a full outdoor kitchen requires planning for utilities. You will need to trench lines for water, electricity, and possibly natural gas. If running a water line is too expensive, consider a “dry sink” which drains into a bucket or a French drain system, used strictly for washing hands or rinsing veggies with a pitcher. When you equip your kitchen, prioritize a high-quality outdoor-rated fridge. Standard dorm fridges will die in the heat and humidity; an outdoor unit is insulated to keep beverages cold even when it’s 90°F (32°C) outside.
Pro Tip: Install a backsplash behind your counter if it sits against a wall or fence. Cooking grease stains timber and stucco permanently. A tile or stainless steel backsplash is easy to wipe down.
The Entertainer’s Bar & Grill
A barbecue with bar area transforms the chef from a lonely servant into the life of the party. This design elevates the countertop behind or to the side of the grill to bar height (42 inches), allowing guests to sit on stools and chat with the cook. It creates a social theater around the cooking process. Instead of hiding the mess, you are showcasing the sizzle.
Visual interaction is the main driver here. You want the bar top to contrast with the base. If the base is clad in dark wood, use a light granite or quartz top. This contrast highlights the serving area. Lighting is also vital; install LED strip lighting under the lip of the bar counter. It looks sophisticated at night and helps guests see their drinks without flooding the area with harsh floodlights.
To build this, the overhang of the counter is crucial. You need at least 12 to 15 inches of overhang for comfortable knee room. Without it, guests have to lean forward awkwardly. Ensure your stools are made of weather-resistant materials like powder-coated aluminum or synthetic wicker. Cloth cushions should be stored indoors when not in use to prevent mildew.
Pro Tip: If you have a small space, use a “pass-through” window design. Build the bar counter on the outside of your kitchen window. You pass food out from the indoor kitchen, and the grill station sits adjacent on the patio.
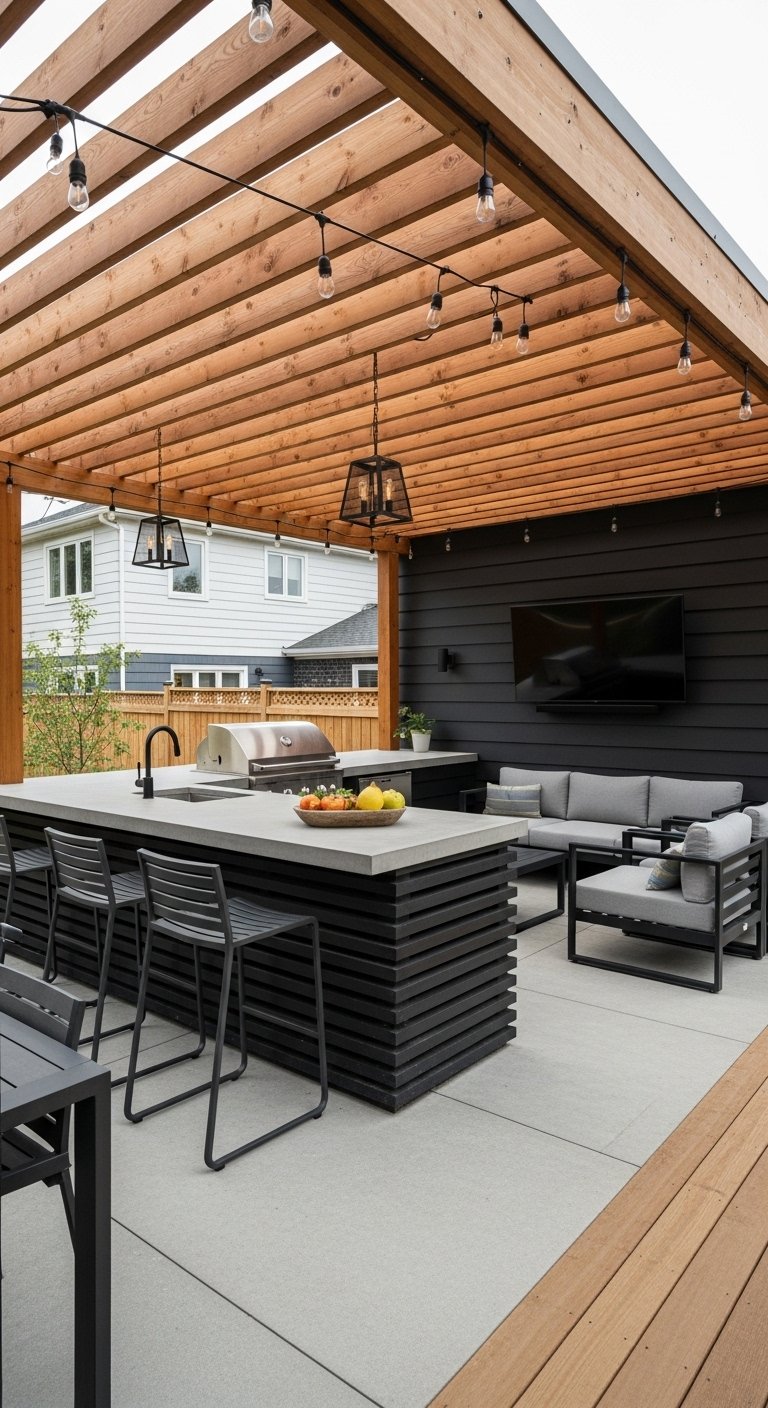
The Covered Pergola Kitchen
A pergola BBQ kitchen addresses the biggest enemy of outdoor cooking: the weather. By building a structure overhead, you define the vertical space and offer protection from direct sun and light rain. This doesn’t just protect the cook; it protects the expensive equipment from UV damage and rust. A pergola creates lovely dappled light during the day and offers a structure to hang heating lamps for chilly autumn evenings.
The design vibe here is “architectural.” The pillars of the pergola frame the view of the garden. You can grow climbing plants like wisteria or grapes up the posts to soften the hard lines of the timber or metal. For the roof, consider a louvered system that opens and closes. This gives you control; open it to vent smoke when searing steaks, and close it when a summer shower passes through.
When planning a covered area, smoke ventilation is the number one safety concern. You cannot put a grill directly under a low, flammable solid roof without a hood. If you have an open slat pergola, natural airflow usually suffices. If the roof is solid, you must install an outdoor-rated vent hood to capture smoke and grease, preventing it from staining the ceiling or creating a fire hazard.
Pro Tip: Hang hooks on the pergola posts for your grilling tools and an apron. It keeps the workspace tidy and adds a “lived-in” culinary charm to the structure.
Comparison: Gas vs. Charcoal for Your Garden Setup
| Feature | Gas BBQ | Charcoal BBQ |
|---|---|---|
| Heat Up Time | Instant (5-10 mins) | Slow (20-40 mins) |
| Flavor Profile | Neutral (tastes like the food) | Smoky, authentic BBQ taste |
| Temperature Control | Precise knobs | Requires skill with vents |
| Cleanup | Easy (brush grates) | Messy (ash disposal) |
| Best For | Weeknight dinners, quick meals | Weekend feasts, slow roasts |
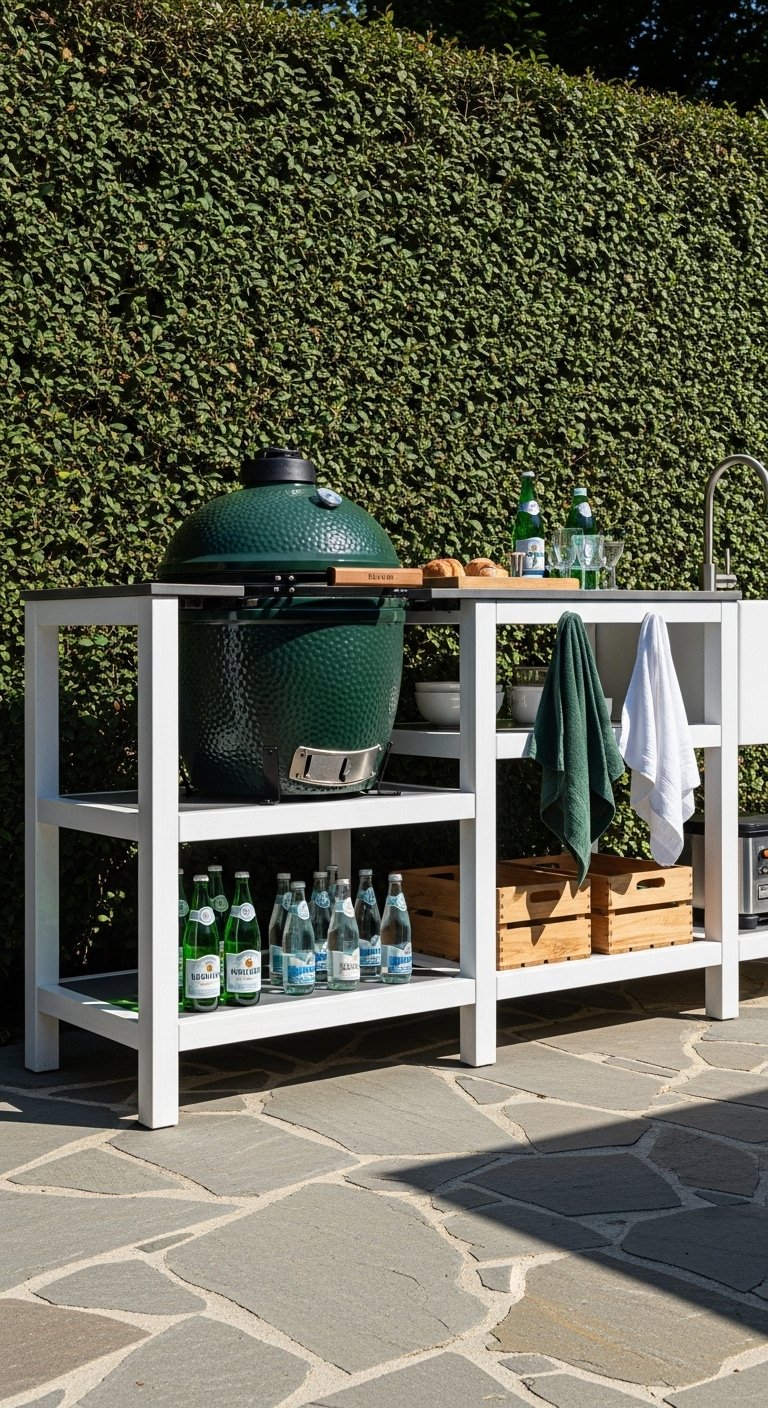
The Minimalist Timber Zone
The minimalist wooden outdoor BBQ kitchen relies on clean lines and the warmth of natural grain. This style is perfect for modern homes or Scandinavian-inspired gardens. Instead of heavy masonry, the cabinetry is built from slats of hardwood like Cedar, Teak, or Iroko. These woods are naturally resistant to rot and insects. The look is airy and light, often floating off the ground on legs rather than sitting on a heavy plinth.
The aesthetic balance comes from mixing the warm wood with cool concrete or black metal hardware. A slatted timber screen behind the BBQ can hide an ugly fence or the neighbor’s view, providing privacy while letting air circulate. This design feels less “built-in” and more like high-end furniture placed in the garden.
Maintenance is the key implementation factor here. While the wood is durable, it will turn grey (silver patina) over time if left untreated. If you want to maintain the rich brown color, you must oil the wood annually with a UV-protective penetrating oil. Avoid varnish, which will peel and require sanding.
Pro Tip: Use “hidden fasteners” when building timber cladding. Visible screws can interrupt the clean, minimalist lines.
Save this idea to your Pinterest.
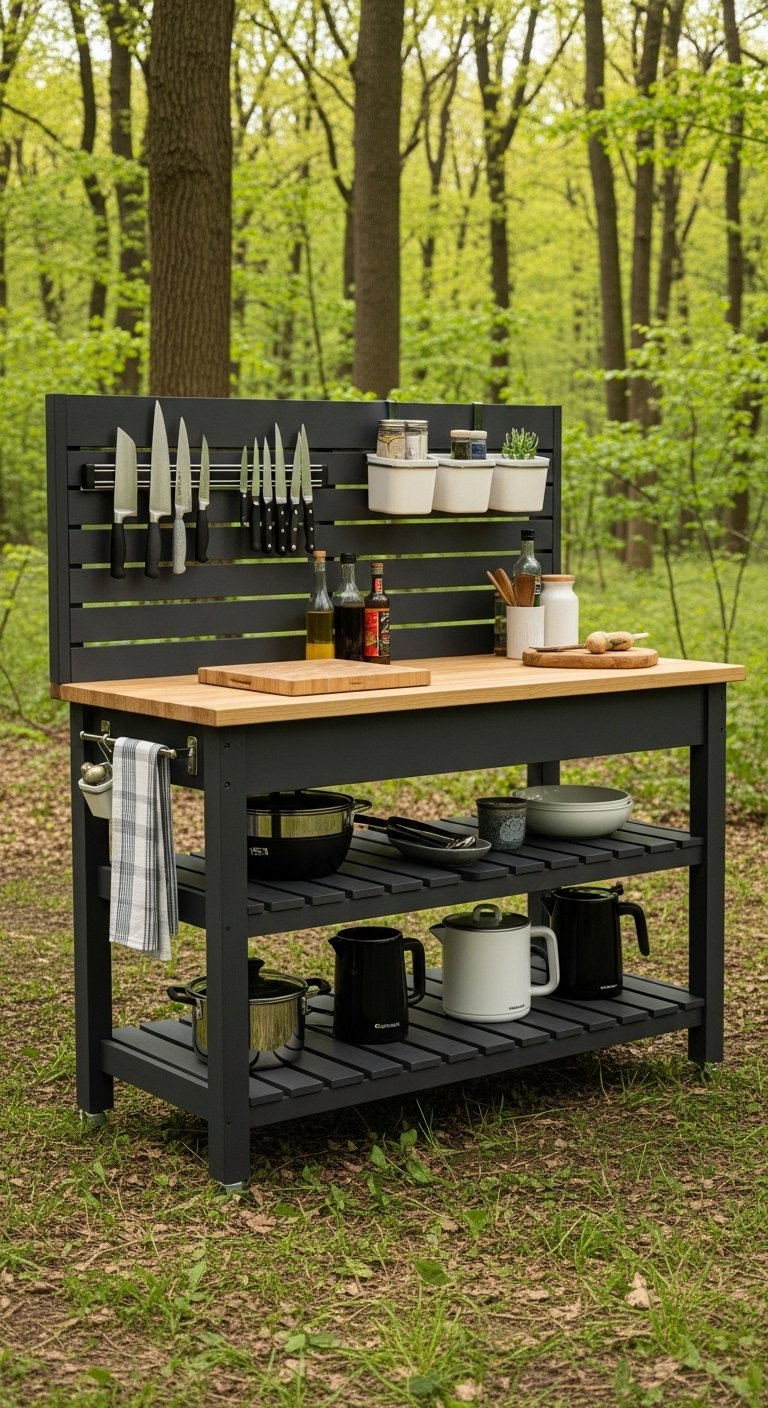
The Compact DIY Pod
For those with limited skills or budget, the compact DIY kitchen or “BBQ Pod” is a brilliant solution. This concept uses a pre-existing potting bench or a modified heavy-duty shelving unit as the skeleton. You simply insert a portable grill and add hooks for storage. It is a self-contained island that takes up less than 4 square feet of ground space.
Visually, you can embrace the “Industrial DIY” look. Use scaffolding boards for shelves and galvanized pipes for the frame. This looks rugged and trendy. Alternatively, upcycle an old wooden dresser by painting it with exterior paint and replacing the top with a granite remnant or a large concrete paver to take the heat of a tabletop grill.
To make this functional, focus on vertical storage. Use a pegboard on the side of the unit to hang spatulas, wire brushes, and mitts. Since counter space is tiny, install a fold-down shelf on the side (like a drop-leaf table) that can be popped up when you need to plate the burgers.
Pro Tip: If using a wooden DIY stand, place a metal sheet or a large tile under your tabletop grill to deflect heat away from the wood surface.
The Space-Saving Wall Unit
The ultimate space-saving BBQ area utilizes the garden walls or fences themselves. Instead of an island that blocks flow in a small garden, you mount the grill and prep surfaces to the wall. Some modern designs feature wall-mounted grills that fold up flat against the wall when not in use, similar to a Murphy bed.
This design relies on “negative space.” By keeping the floor clear, the garden feels bigger. Floating shelves above the grill can hold herbs in pots and spice rubs. The wall behind the grill becomes a focal point; clad it in a funky geometric tile or a sheet of corten steel to protect the boundary wall from heat and smoke stains.
Implementation requires a sturdy wall. Do not attempt to hang heavy equipment on a flimsy wooden fence panel. It must be a brick wall or a reinforced timber structure. Ensure the location isn’t directly under an eave or a window where smoke will enter the house.
Pro Tip: Plant a vertical herb garden on the wall right next to the grill. Grabbing fresh rosemary or thyme while you cook adds a chef-quality touch to the experience.
Get The Look: Essential BBQ Accessories
To elevate any of these designs, you need the right tools.
- Heavy Duty Tongs: Long handles keep your hands safe from the fire.
- Digital Meat Thermometer: Never guess if the chicken is done again.
- Grill Cover: The single most important item to extend the life of your BBQ.
- Chimney Starter: If using charcoal, this is mandatory for lighting coals without lighter fluid taste.
Popular Asked Questions
Do I need planning permission for an outdoor BBQ area?
Generally, you do not need planning permission for a standard BBQ area or outdoor kitchen if it is considered a “permitted development.” However, if you are building a permanent structure (like a pergola) that is very high (usually over 2.5 meters near a boundary) or covers more than 50% of your garden, you might need permission. Always check your local council regulations, especially if your home is a listed building or in a conservation area.
What is the best floor for a BBQ area?
The flooring must be non-combustible and stain-resistant. Porcelain pavers are excellent because they don’t absorb grease and are easy to jet wash. Concrete is durable and modern but can stain if not sealed. Avoid wooden decking directly under a charcoal grill due to fire risk; if you must use wood, place a large fireproof mat or a stone slab under the grill.
How far should a BBQ be from the house?
Safety experts recommend placing your grill at least 10 feet (3 meters) away from your house, shed, or wooden fences. This distance prevents accidental fires from flare-ups and keeps smoke from drifting into open windows or staining your siding.
How do you build a budget BBQ station?
To build a budget friendly BBQ station, focus on upcycling. Use concrete blocks (cinder blocks) stacked and bonding with construction adhesive—no complex mortar skills needed. Top it with a large concrete paver as a countertop. Alternatively, convert a sturdy second-hand wooden potting bench into a prep station by painting it with outdoor paint and adding hooks for tools.
Conclusion
Creating a stylish garden BBQ area is about more than just buying a grill; it’s about curating an experience. Whether you opt for a sleek integrated built-in grill station or a clever hideaway BBQ pod for a small balcony, the goal is to make outdoor cooking seamless and enjoyable. By paying attention to the layout, materials, and lighting, you turn a simple patch of patio into a culinary destination.
Start small if you need to—perhaps just a designated prep table and some good lighting—and upgrade as you go. The most important part is that you are outside, enjoying the fresh air and the food.
Which of these BBQ setups would fit your garden best? Tell us in the comments below!
Follow us on Pinterest for more Garden BBQ Area inspiration.

Leave a Comment